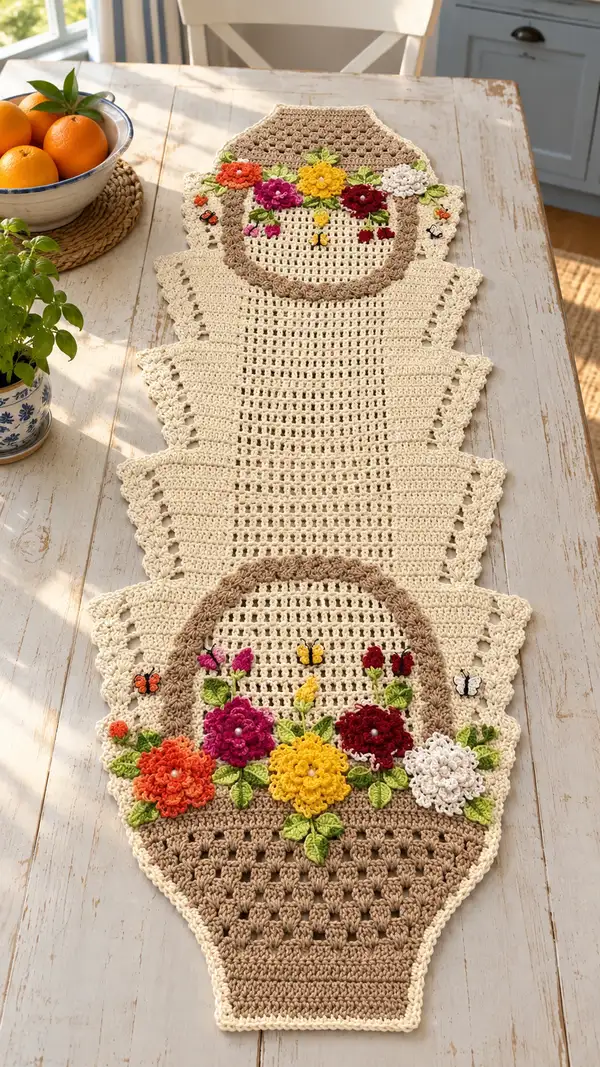
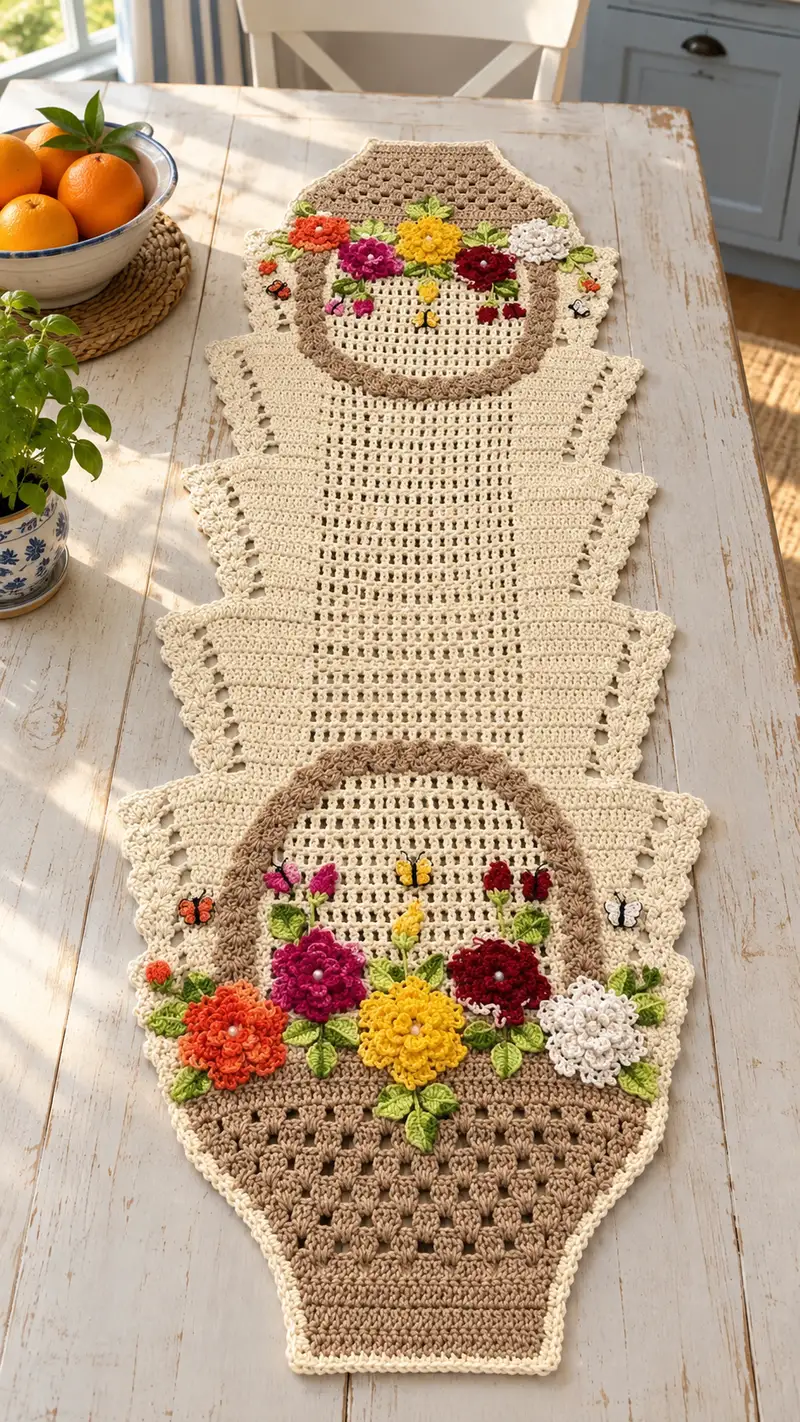
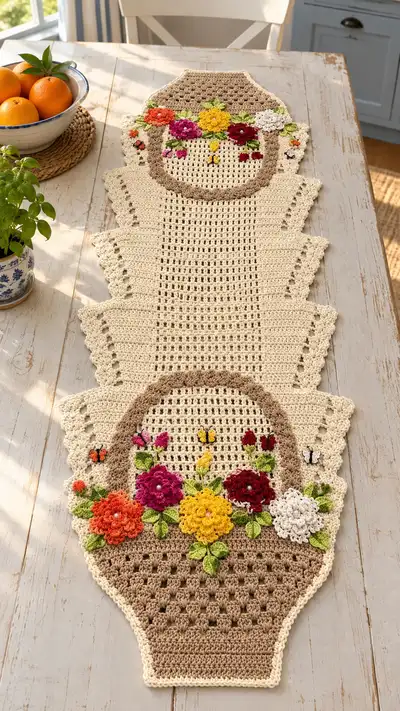
A vintage-inspired crochet table runner featuring two basket-shaped ends, open mesh center, scalloped side panels and colorful 3D floral appliques. Neutral cream and warm tan grounds offset bright orange, yellow, magenta and burgundy blooms with green leaves and tiny embroidered butterflies. The runner is worked in sections and joined, making it easy to customize length or color.
Progress Tracker
0% Complete
— Basket End (Make 2) :
Info :
These basket-shaped end panels form the decorative caps of the runner. Work two identical pieces in the tan yarn. They are worked in rounds flat to create an elongated oval that will be edged and joined into the mesh center. Keep rounds continuous; use a stitch marker to mark the beginning of each round.
Round 1 :
6 sc in magic ring (6)
Round 3 :
(1 sc, inc) x 6 (18)
Round 4 :
(2 sc, inc) x 6 (24)
Round 5 :
(3 sc, inc) x 6 (30)
Round 6 :
(4 sc, inc) x 6 (36)
Round 7 :
(5 sc, inc) x 6 (42)
Round 8 :
(6 sc, inc) x 6 (48)
Round 9 :
(7 sc, inc) x 6 (54)
Round 10 :
(8 sc, inc) x 6 (60)
Info :
At this stage the oval has reached its widest point. From rounds 11–14 we will create a textured cluster panel for the lower basket body using simple V-puff clusters to mimic woven effect.
Round 11 :
*Skip next st, (dc, ch1, dc) in next st (V-puff), sc in next st* rep around to end; join with sl st (60 effective posts, texture maintained)
Round 12 :
1 sc in each st around through both loops (60)
Round 13 :
*V-puff in same place as previous cluster rows: work (dc, ch1, dc) into the chain space created by prior v-puff; sc in next st* rep around; join with sl st (60)
Round 14 :
1 sc in each st around (60)
Info :
We will now start to narrow the panel into the basket neck by decreasing evenly. Keep the basket symmetrical by ensuring your decreases are placed evenly across the round.
Round 15 :
(8 sc, dec) x 6 (54)
Round 16 :
1 sc in each st (54)
Round 17 :
(7 sc, dec) x 6 (48)
Round 18 :
1 sc in each st (48)
Round 19 :
(6 sc, dec) x 6 (42)
Round 20 :
1 sc in each st (42)
Info :
Switch to alternate stitch texture to form the curved rim: work a round in BLO to create a distinct rim line that the flower arch will sit on.
Round 21 :
1 sc in each st BLO (42)
Round 22 :
1 sc in each st (42)
Round 23 :
(5 sc, dec) x 6 (36)
Round 24 :
1 sc in each st (36)
Round 25 :
(4 sc, dec) x 6 (30)
Round 26 :
1 sc in each st (30)
Info :
Prepare to transition from the narrower neck to an arched flower cradle. We will form a semi-circle arch at the top with a thicker ridge - use puff stitches for the ridge to make a raised border that the appliques will sit against.
Round 27 :
(3 sc, dec) x 6 (24)
Round 28 :
1 sc in each st (24)
Round 29 :
(2 sc, dec) x 6 (18)
Round 30 :
1 sc in each st (18)
Round 31 :
(1 sc, dec) x 6 (12)
Info :
Fasten off the round and leave a long tail for joining to the central mesh. Repeat entire sequence for the second basket end. The outside of the basket has a thick ridge; if you prefer a flatter edge, instead of puff stitches in rounds 11 and 13 use simple dc clusters (dc3tog) and keep counts identical.
— Center Mesh Panel :
Info :
The center panel is worked flat in rows to create the open mesh seen between the two baskets. Use cream yarn as the main body color. Make a foundation chain that matches the width between the two basket rims when they are pinned 32 stitches apart across the join. The example runner uses a foundation chain of 90 chains to produce approximately 28–30 cm width including side scallops.
Row 1 :
Ch 90, dc in 4th ch from hook and in each ch across, turn (88 dc)
Row 2 :
Ch 3 (counts as first dc), *ch1, sk next dc, dc in next dc* rep across to last st, dc in top of turning ch, turn (approx 44 dc posts and 44 ch-1 spaces)
Row 3 :
Ch 3, dc in first ch-1 sp, *ch1, dc in next ch-1 sp* rep across, end dc in top of turning ch, turn
Row 4-10 :
Repeat Row 3 (open mesh builds evenly); keep tension loose enough to let mesh drape yet firm enough it does not sag (repeat 7 times)
Info :
Count and mark the center row — this will help when aligning the baskets. The mesh is a simple filet-like ladder mesh made with dc and ch-1 spaces; it is visually dense enough but airy to show the wooden tabletop beneath.
Row 11 :
Ch 3, dc in first ch-1 sp, *ch1, dc in next ch-1 sp* rep across, turn
Row 12-20 :
Repeat Row 11 (9 rows) — this section gives length to the runner; add or subtract rows in multiples of 1 to get desired runner length
Info :
If you want a longer runner, work additional mesh repeats now. For modular construction, stop at an even number of mesh repeats so both baskets join symmetrically.
Row 21-30 :
Repeat Row 11 (10 rows)
Row 31-40 :
Repeat Row 11 (10 rows). Fasten off leaving long tails at both short ends for joining to basket rims.
— Side Scalloped Wings (Make 6 panels: 3 each side) :
Info :
The triangular scalloped wings that step down the runner sides are worked flat and joined along the center mesh with shell edging. Make six identical panels, three per side, using cream yarn. Each wing starts with a small chain base and builds out with alternating shells to create the stepped triangular look seen in the photo.
Row 1 :
Ch 24, dc in 4th ch from hook and in each ch across, turn (22 dc)
Row 2 :
Ch 3 (counts as dc), dc in next 6 dc, shell (5 dc) in next st, dc in next 6 dc, dc in last st, turn (center shell forms)
Row 3 :
Ch 3, dc in next 6 dc, shell in center of previous shell (5 dc in center st), dc in next 6 dc, dc in last st, turn
Row 4 :
Ch 3, dc across to center shell, shell in center st, dc across, turn
Row 5 :
Ch 3, dc across (shorten the row by one st at the outer edge to create the stepped triangle), turn
Row 6 :
Repeat Row 4 but stop one st earlier for the outer edge shaping; this will create the scalloped step. Turn
Row 7 :
Ch 3, dc across to next shell, shell in center, dc across, turn
Row 8 :
Ch 3, dc across but decrease 2 sts at outer edge to shape the scallop; turn
Row 9 :
Ch 3, dc across completing the triangular wing height (approx 9 rows total), finish off and weave ends
Info :
Make three of these panels for each side. When placed together they produce the alternating stacked scallops seen along the runner. Block each panel flat to definition before joining.
— Large Layered Flower (Make 5 assorted colors) :
Info :
These large 3D flower appliques are worked in rounds using a small hook (3.5mm optional) to make petal layers that sit off the basket rim. Make five large flowers—choose bright colors: orange, magenta, yellow, burgundy, and white. Add a small pearl bead in the center if desired.
Round 1 :
Ch 4, join to form ring, work 8 sc in ring, join (8)
Round 2 :
Ch 1, (sc, ch 2) x 8 around in each st to create 8 small loops; sl st to first sc, turn (8 loops)
Round 3 :
Into each ch-2 loop: (sc, hdc, 3 dc, hdc, sc) — full petal — repeat in each loop (8 petals)
Round 4 :
Ch 1, sl st behind between petals then chain 3 to reach center of previous petal base; in spaces between petals work 5 dc clusters to build next layer offset from previous petals. This creates an overlapping layered look (8 clusters)
Round 5 :
Fasten off color or continue with same color to add a ruffle round: 1 sc between each outer petal, then in next round work (ch1, 5 dc) in those spaces to create ruffle. Fasten off and weave ends. Sew a small bead in center if desired.
Info :
For deeper, fuller flowers add an extra layer: make a second round of ch-2 loops and repeat petal round into each loop, offsetting petals so they interlock. To vary size, omit the outer ruffle or use a larger hook for the outermost layer.
— Medium Rosette Flower (Make 2) :
Round 1 :
Ch 5, sl st to form ring, ch 1, 12 sc in ring, join (12)
Round 2 :
(sc, ch 2) around to make 12 loops, join
Round 3 :
Into each loop work (sc, 3 dc, sc) to form 12 small petals; join and finish
Info :
These mid-sized rosettes sit between large flowers to give variety. Use bright magenta and deep burgundy for contrast.
— Small Flower Buds (Make 6) :
Round 1 :
Ch 4, sl st to form ring, 6 hdc in ring, join (6)
Round 2 :
Ch 1, (sc, ch 1) around in each st creating 6 tiny loops; in each loop work 3 dc to make tiny opening petals; fasten off (6 small buds)
Info :
Buds are used as accents near the basket rim and in between leaves. Use bright oranges or small colors to create lively contrast.
— Leaves (Make 12-16) :
Info :
Leaves are worked flat in green yarn and attached around flowers and stems. Make at least 12–16 leaves of varying sizes to match the photo—some single leaves and some 2–3 leaf clusters.
Leaf 1 Round 1 :
Ch 8, sc in 2nd ch from hook, hdc in next, dc in next 2, hdc in next, sc in last, now work along opposite side of chain: sc, hdc, dc, dc, hdc, sc; sl st to starting st. Fasten off (12 sts approx)
Leaf 1 Round 2 :
With contrast stitch, work 1 sc in each st around; when you reach the tip, work 3 sc in same st to create a pointed tip, sl st to join, finish
Info :
Vary chain length from 6 to 10 to create small and medium leaves. Use a tapestry needle to embroider a center vein with a running stitch in a slightly darker green for extra realism.
— Tiny Butterflies and Embroidered Details :
Info :
Small embroidered butterflies are worked using surface embroidery and tiny crochet wings. Use black, white, and orange yarns for simple two-color wings. These are sewn onto the cream background around the baskets.
Butterfly Wing Crochet :
Ch 6, 3 sc in 2nd ch from hook, 2 sc, sl st in next, ch 3, 3 sc into loop and sl st to create the second wing; fasten off and sew two wings together with a small black body stitch in the center
Embroidered Body :
Using black yarn and a yarn needle, embroider a small body of 3-4 straight stitches and tiny antennae. Sew wings to the background.
Info :
Place butterflies and embroidered details symmetrically around the basket rim—3 on each end (or as desired) to match the photograph's balanced look.
— Assembly and Joining :
Info :
Block all pieces lightly to shape—basket ends, mesh center, and scalloped wings. Lay them out flat to arrange placement of the baskets and side panels. Use pins to hold pieces in place on a blocking mat before sewing.
Step 1 :
Align one basket rim to one short edge of the mesh center; the basket's outer arc should match the mesh row counts. Using tan yarn and a mattress stitch (or whip stitch) sew the basket rim to the mesh by inserting the needle under corresponding dc posts and sc posts, distributing the 42 rim stitches across 44 mesh spaces—adjust by skimming a few spaces slightly to match tension.
Info :
If the mesh and rim stitch counts are not identical, ease the difference by slightly overlapping fringe stitches or by creating small sl st loops to absorb the extra space. Keep joins neat—use small gathering stitches rather than large visible loops.
Step 2 :
Repeat joining on the opposite end with the second basket. Ensure the baskets are oriented the same direction so flower motifs match each other visually.
Step 3 :
Position the three scalloped wing panels along each long side of the mesh: the largest near the center, smaller towards the baskets. Align the straight edge of each wing to a mesh row and sew with running stitches spaced every 1/2 inch for a firm seam.
Info :
When sewing wings, make sure the scallop edges face outward and that adjacent panels are overlapped slightly to create the stepped stack seen in the photo. Use matching cream yarn so visible joins blend in.
— Attaching Appliques :
Info :
Arrange flowers and leaves along the top arc of each basket before sewing. Place largest flowers centered on the rim and cluster medium rosettes and buds around them. Pin in place and photograph the layout if necessary to replicate the arrangement on the opposite end.
Step 1 :
Sew flower centers first: tack each large flower in 6-8 evenly spaced stitches around its base so the petals flare out; make sure the raised petals are secured but not flattened.
Step 2 :
Position leaves partially under flowers and stitch their bases into the mesh and rim seam so they appear to grow from within the basket. Use small invisible stitches along the midrib to anchor.
Step 3 :
Sew small buds and embroidered butterflies into the remaining open spaces along the rim and the cream wings. Use surface slip stitch embroidery to add tiny floral stems if desired.
Info :
For durability, go through several passes for each applique anchor point—flowers borne on table runners often take handling, and multiple secure stitches will prevent shifting.
— Final Edging and Border :
Info :
A final scalloped border around the entire runner unifies panels visually and disguises minor unevenness in joins. Use cream yarn and work in rounds around the outer edge—this border is worked as a continuous row of shells with small picot points for vintage character.
Round 1 :
With cream yarn, join at a discreet point and work 1 sc evenly around the entire perimeter into each outer loop or edge stitch (approx 220–260 sc depending on joins); adjust to keep corners flat
Round 2 :
*Skip 2 sc, 5 dc in next sc (shell), skip 2 sc, sl st into next sc* rep around. At sharp corners, work 3 shells close together to maintain curve. Join with sl st to first sc.
Round 3 :
*Sl st to center of shell, ch 3, sl st back to shell center (small picot), sl st into next shell center* rep around to create delicate picot points between shells; finish and fasten off.
Info :
Weave in all ends. Gently block the finished runner to open shells and petals. Pin shells into shape and spray lightly with water, allow to dry completely on a flat surface to set the shape.
— Alternate Options & Sizing Notes :
Info :
To change runner length, increase or decrease the number of mesh center repeats (Row 11). Each repeat is approx 0.75-1 cm in the finished runner length. You can also omit one set of side scallops for a slimmer look or add extra floral clusters for a very ornate result.
Info :
If substituting yarn weight, always work a gauge swatch of the mesh and basket panels to ensure proportions match. Thicker yarn will produce a denser, shorter runner; finer yarn will produce a finer, longer runner. Adjust hook size accordingly.
This Floral Basket Table Runner brings cottage garden charm to your dining or console table with its textured basket ends and bright 3D blooms. Each section comes together as a satisfying project—blocking and careful applique placement make a beautiful heirloom piece. Enjoy the process of layering texture and color, and then delight in seeing it brighten a room. 🧶🌼🥰