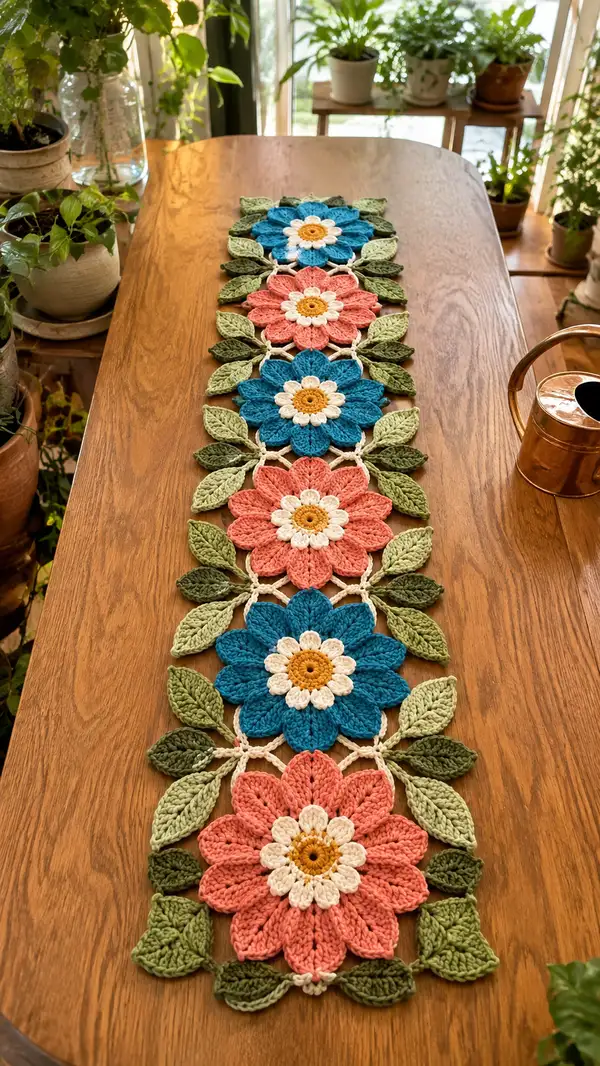
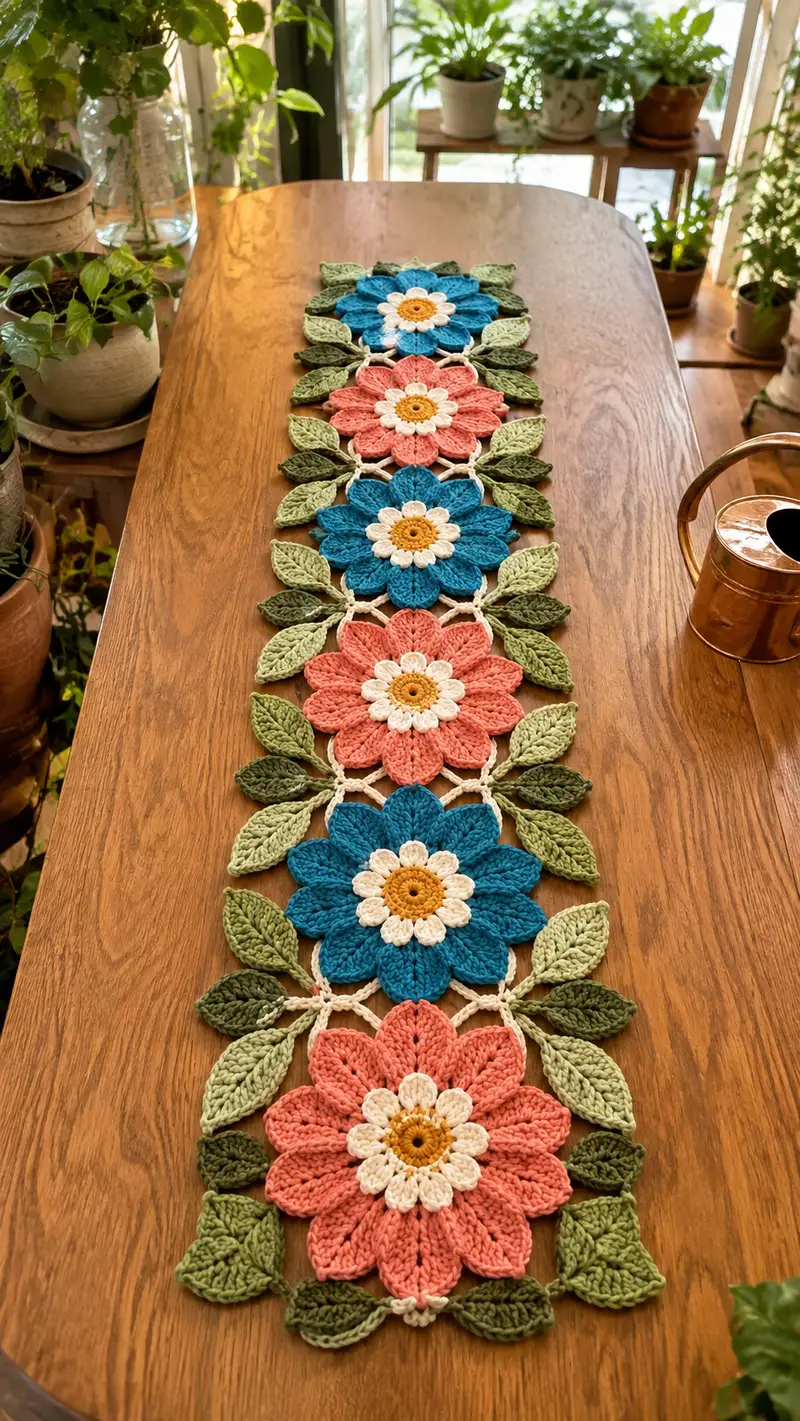
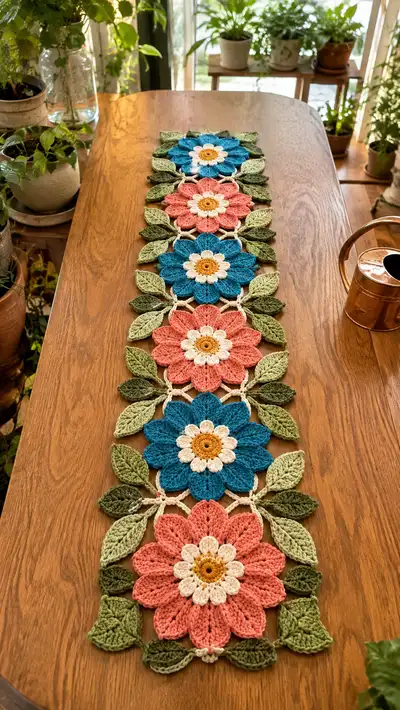
Create a bright, botanical table runner made from linked floral medallions and layered leaves. Each medallion features a mustard center, cream daisy ring, and bold coral or teal petals surrounded by textured olive and sage leaves. The motifs are joined with a delicate cream lattice to make a long runner perfect for a dining table or console. This pattern includes detailed step-by-step rounds, join-as-you-go instructions, and finishing tips to recreate the exact look.
Progress Tracker
0% Complete
— Flower Center (Make one per medallion) :
Round 1 :
With mustard yarn, start with mr, ch1, 8 sc into mr — pull tight and join with sl st to first sc (8)
Round 2 :
Ch1, 8 inc around (16)
Round 3 :
Ch1, (1 sc, inc) x8 (24)
Round 4 :
Ch1, (2 sc, inc) x8 (32)
Info :
Keep a light tension; this small textured disk becomes the anchor for the daisy ring. Do not over-tighten stitches or the daisy petals will sit too high.
Round 5 :
Ch1, 1 sc in each st (32)
Round 6 :
Ch1, (4 sc, inc) x6 then (3 sc, inc) x? — adjust for round math to retain circularity; instead continue evenly: 1 sc in each st (32)
Round 7 :
Fasten off mustard leaving tail to weave through bottom of medallion or to attach to backing later
Info :
At this stage you can add a second round of mustard if you prefer a slightly raised center. Otherwise change to cream yarn for the daisy ring.
— Daisy Petal Ring (Make one ring per medallion) :
Round 1 :
Join cream yarn to any stitch of center, ch1, sc in same st, ch3, *skip next st, sc in next st, ch3; rep from * around to create 16 ch3 loops (16 ch3 loops)
Round 2 :
Slip into first ch3 loop, ch2 (counts as hdc), (7 dc, ch2, sl st) into same ch3 loop to form petal base — this forms first small petal shell; rep in each ch3 loop to create 16 small daisy petals; join with sl st to top of starting ch2
Round 3 :
Ch1, sc around working into back loops of petal bases and sc between petals on center disk where possible to anchor; aim for (32) anchoring sc evenly spaced
Info :
These small petals are the cream daisy ring visible in the photo; keep them slightly flattened by blocking if they curl. Secure tails neatly at the back and weave them inside the center to avoid bulk.
Round 4 :
Optional: for a raised daisy look, work a picot at the tip of each small petal: sl st to tip, ch3, sl st in 3rd ch from hook; repeat for each petal
Round 5 :
Fasten off cream and secure ends. Place the motif on a flat surface to align for large petal placement.
— Large Sculpture Petals (Make 8 large petals per medallion) :
Info :
Change to your chosen petal color (coral or teal) now. Each large petal is worked in rounds into a designated base space around the daisy ring. We make 8 petals per medallion, evenly spaced; mark 8 anchoring points around the daisy ring before starting.
Petal Round 1 :
Attach color yarn at marked point, ch2, 6 hdc into same st, sl st to base to form small half-circle (6)
Petal Round 2 :
Ch2, (hdc, inc hdc) x3 across the base (9) — work into front loops of previous round to create depth
Petal Round 3 :
Ch2, (1 hdc, 1 dc, 1 tr, 1 dtr, 1 tr, 1 dc, 1 hdc) across the top of petal shaping a pointed petal tip; anchor with sl st to base (7 tall stitches)
Info :
Use a combination of tall stitches to sculpt the petal curve. The central dtr gives a tall peak; surrounding stitches grade down to create a soft rounded edge.
Petal Round 4 :
Return working along the sides: ch1, sc evenly along one side down to base (approx 6 sc), sl st across base to opposite side, sc up opposite side symmetrically (approx 6 sc), sl st to join (approx 12 sc along sides plus base attached)
Petal Round 5 :
1 sc in each st around petal edge working slightly in FLO on outer curve to encourage petal to sit forward (total counts will vary per petal; aim for symmetry across all 8 petals)
Petal Round 6 :
Repeat shaping: ch1, (sc around evenly) and work a decorative ridge by working 1 sc in BLO on the outer edge for 1 round to add texture
Info :
Block each petal lightly by pinning to shape and wet blocking or steam blocking to open up the sculpted shape before joining motifs — this gives the petals a flat, crisp silhouette like in the photo.
Petal Round 7 :
Fasten off petal color leaving a tail for weaving; repeat to create the remaining 7 petals, spacing them evenly around the daisy ring and ensuring petals overlap slightly at the bases for fullness.
— Rear Petal Reinforcement & Texture Rounds :
Round 1 :
With same petal color, rejoin at the base of any petal underside, ch1 and work 1 sc around underside of petal to secure it to center and neighboring petals (work approx 6 sc underside each)
Round 2 :
Ch1, sc between petal bases on center disk to close gaps; work 1 sc into space between petals (approx 8-12 sc) to secure the ring together
Round 3 :
With cream yarn, work decorative small slip-stitch ladder around the outer base where petals meet so the join color shows as a thin halo like photo: join cream, ch1, *sl st at base of petal, ch3; rep between each petal (8 ch3 decorative joins)
Info :
These subtle cream connection loops read as the delicate lattice and help later join medallions. Secure ends and weave tails to the back.
— Leaf Motif (Make multiple leaves; pattern uses 6 leaves around each medallion) :
Info :
There are two leaf sizes: small leaf (3 rounds) and large leaf (6 rounds). Use two shades of green (olive and sage) and alternate placement to recreate the layered look. Leaves are worked flat then folded and slip-stitched to form a ridge.
Small Leaf Round 1 :
With sage green, ch9, sc in 2nd ch from hook, hdc in next, dc in next 3 ch, hdc in next, sc in last, then continue on other side of chain: sc, hdc, dc x3, hdc, sc; do not join — you have created a leaf oval base (approx 18 sts)
Small Leaf Round 2 :
Work 1 sc around the entire oval, placing 2 sc in tip stitches to keep shape (approx 22 sc)
Small Leaf Round 3 :
Fold leaf lengthwise and sl st through both layers down center (approx 11 sl st) creating a central ridge; fasten off leaving tail for attaching
Info :
These small leaves form the close-in layer next to the petals. Block gently to flatten and make ridges crisp before joining.
Large Leaf Round 1 :
With olive green, ch13, sc in 2nd ch from hook, hdc, dc x5 across center, hdc, sc, then around other side of chain sc, hdc, dc x5, hdc, sc (approx 30 sts)
Large Leaf Round 2 :
Ch1, 1 sc in each st around, placing 3 sc at tip and at base to give rounded edges (approx 34 sc)
Large Leaf Round 3 :
Ch1, work (sc, hdc, dc, tr) down one side of leaf and mirror up the other side to create a pronounced vein; fasten off leaving tail
Large Leaf Round 4 :
Fold lengthwise and mattress stitch or sl st through both layers along center (approx 15 sl st) to create raised central vein
Info :
Alternate leaf colors and sizes around each medallion. Make 6 leaves per medallion (three large and three small) arranged as in photo: two large flanking petal sides and small tucked between petals.
Large Leaf Round 5 :
Optional: using a tapestry needle, run a strand of contrasting green along the center vein to emphasize texture and mimic the stitched ribbing in the photo
Large Leaf Round 6 :
Block leaves flat and allow to dry for crisp silhouette before joining to motifs
— Connector Lattice & Join-As-You-Go Points :
Info :
Motifs are joined with a cream lattice formed by small chain rings and slip stitches connecting neighboring medallions. Plan placement: each medallion has 8 connection points around its perimeter (one between each petal) where short three- or four-chain loops link to adjacent motifs.
Round 1 :
With cream yarn attached at a base point between two petals, ch5, sl st to petal base forming a small ring, repeat around base every petal junction to create 8 ch5 loops — these become join points
Round 2 :
On motifs you want to link right away, when you create a loop on the second motif, instead of sl st to its base, sl st into the loop on the already-made motif (join-as-you-go). Work small ch loops in each subsequent motif to link continuous chain (no sewing required for main join)
Info :
To achieve the airy X-shaped join as pictured, use ch5 loops and join motifs in a staggered pattern: when joining two motifs, attach at alternating pairs so that each loop forms a small X with a loop from the opposite motif.
Round 3 :
Once the runner length is planned, continue making motifs and join at 2-3 points per side using the join-as-you-go loops; for interior joins link four motifs at a single cross point by slip stitching all loops together.
Info :
Use pins to hold motifs in place during joining so the lattice remains symmetrical and tension is even across joins.
— Outer Leaf Band & Framing (Adds decorative greenery around entire runner) :
Round 1 :
With cream yarn, create a small decorative chain between medallions at outer petal tips to form the airy lattice framing; ch6 between outermost petal tips and sl st to the tip on neighboring motif to create scallop link (repeat along both sides)
Round 2 :
At each scallop point, attach a small cluster of leaves: sew a small leaf (small leaf pattern) to the center of each ch6 scallop using mattress stitch to hide tail
Round 3 :
Alternate olive and sage leaves outward from the runner creating layered effect — place larger leaves slightly overlapping the edges for the organic trailing vine look
Info :
Reinforce leaf joins by stitching through both leaf layers and the lattice ring for durable connection. Keep stitches small and hidden behind leaf ribs.
Round 4 :
Where leaves meet at the runner ends, sew small pairs of leaves across tip-to-tip to create a neat rounded end rather than abrupt clipping of a petal
Round 5 :
Trim any excess tails and weave ends into the back of the lattice so the front remains clean and seamless
— Edge Finishing & Neatening Rounds :
Round 1 :
With cream yarn, join at any outermost sl st and work 1 sc evenly around entire outer edge of runner including around leaves and petal tips to provide a neat border; take care to place multiple sc in tight corners (approx 200-260 sc depending on size)
Round 2 :
Ch1, *sc in next 3 sts, ch2, sk 1; rep around to create tiny scallops between larger leaves and petals; adjust to make even spacing and end with sl st to first sc
Info :
Use this round to correct any slight asymmetry in motif spacing; small increases or decreases in this border are fine to even the runner visually.
Round 3 :
Optional: Work 1 round of crab stitch (reverse sc) in cream along the very edge to create a braided rope look and visually tie the runner together
Round 4 :
Fasten off and weave all ends securely. Use small hidden stitches to pull any slightly flared petals down into line with runner surface if necessary.
Info :
Spritz and block the entire runner to final dimensions: pin flat on blocking mat, gently steam or wet-block and allow to dry. Blocking opens petals and flattens leaf shapes giving the piece its finished silhouette.
— Alternate Decorative Embellishments (Optional) :
Round 1 :
Add small embroidered veins on petals using thin stranded yarn in a slightly lighter shade than petals: stitch 3-4 straight lines from base to tip on each petal for visual interest
Round 2 :
Sew tiny wooden beads into mustard centers if you want a beaded center accent; use matching thread and secure with multiple stitches so beads don't wobble
Info :
Embellishments are optional but can add sophistication. Keep additions light so runner still lays flat and can be laundered if you used cotton yarn.
— Full Medallion Build Summary (Checklist for each medallion) :
Step 1 :
Make one mustard center (Rounds described above)
Step 2 :
Make cream daisy ring and anchor to center (Daisy Petal rounds)
Step 3 :
Create 8 large sculpted colored petals and secure underside (Large Petals rounds)
Step 4 :
Make 3 small and 3 large leaves (Leaf Motif rounds) and block
Step 5 :
Attach small cream join loops at petal junctions and join to neighboring medallions as you go (Connector Lattice rounds)
Info :
Following this checklist for each medallion will keep your process organized. Make a prototype medallion first to ensure gauge and shaping match the photo before making a full runner.
— Notes on Gauge, Size and Motif Count :
Info :
Using worsted cotton and 4.0 mm hook each medallion measures approximately 9.5 - 11 inches (24-28 cm) across including outer leaves. The sample runner pictured contains five medallions with overlapping leaves for an overall length just over 60 inches (150 cm). Adjust medallion count to lengthen or shorten the runner.
Info :
If you prefer a denser runner, use a slightly smaller hook (3.75 mm) and the same yarn — this reduces motif diameter by approximately 10-15%.
Finishing this floral medallion runner is such a reward — every layered petal and leaf creates depth and personality. The join-as-you-go construction speeds assembly so you can enjoy the full length sooner. Place it on your dining table, console, or a window seat to bring botanical charm and handmade warmth to your home. 🧶🌿 I hope you enjoy making and gifting this bright, textured runner! 🎁