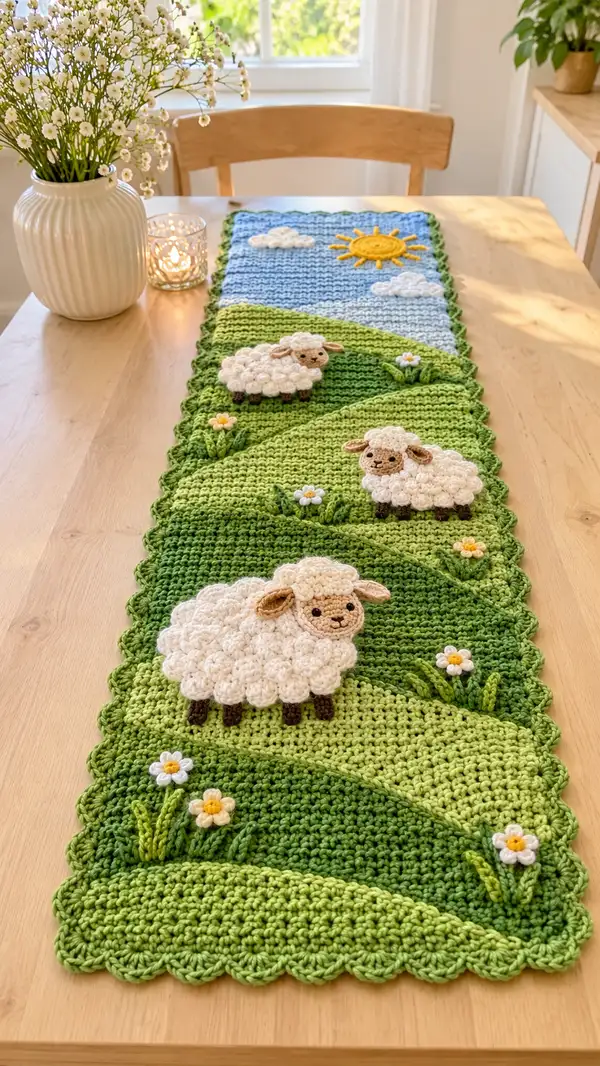
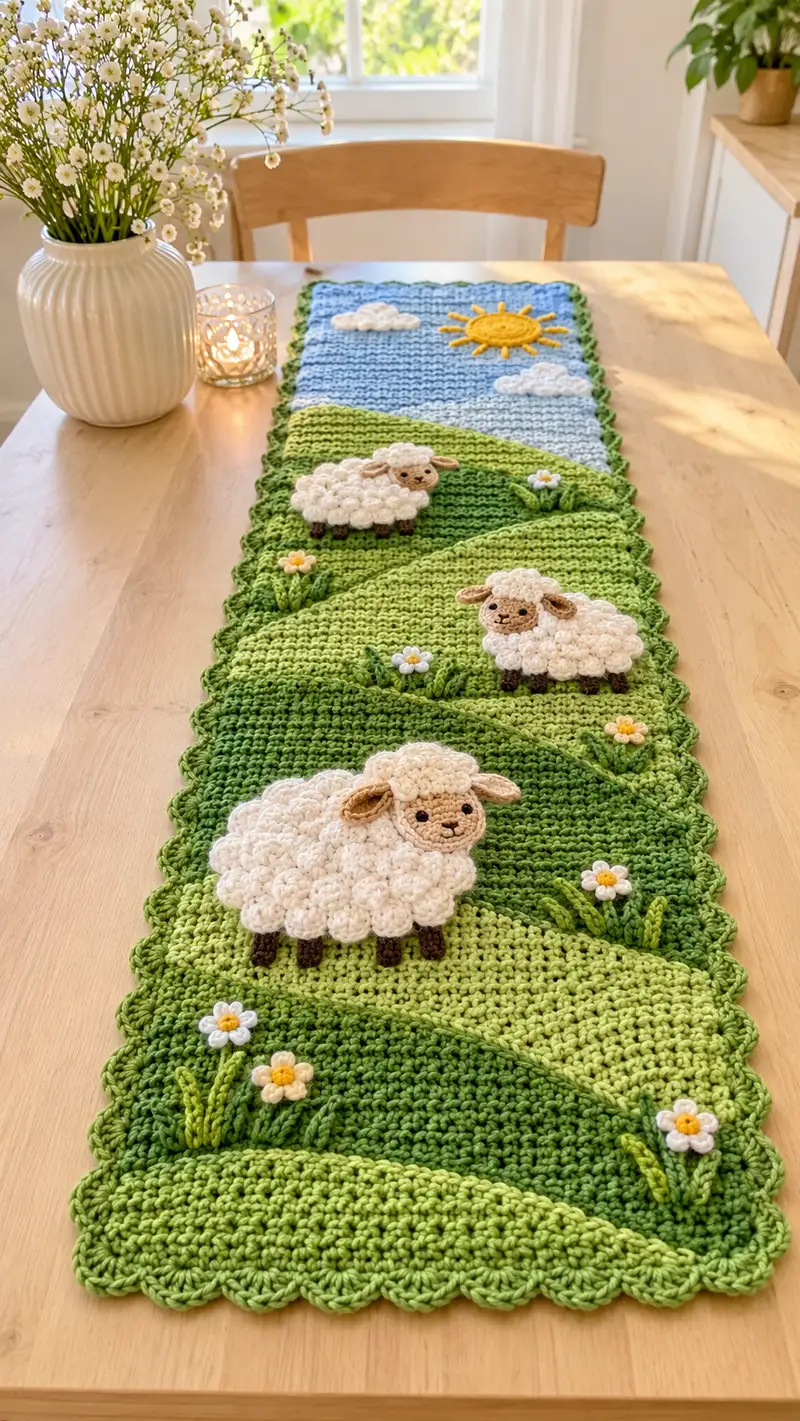
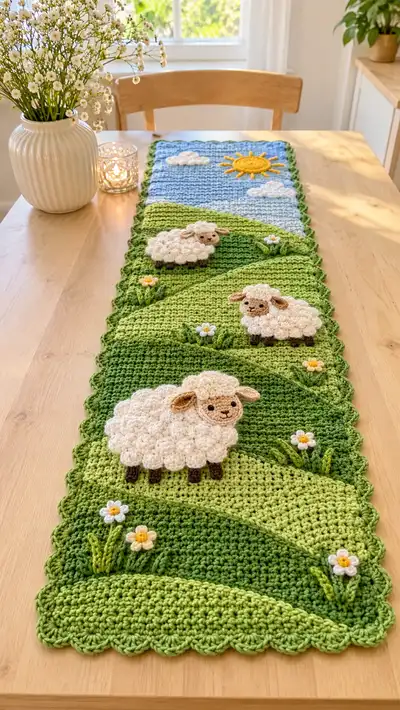
A charming, long table runner featuring rolling green hills, fluffy 3D sheep appliques, bright sun, puffy clouds and tiny daisies. Crafted in layered color panels with a scalloped border for a delightful handmade centerpiece. Perfect for spring and farmhouse decor — soft texture, playful details, and lots of embroidery-style finishing. This full pattern includes detailed step-by-step assembly and applique instructions to recreate the scene exactly as shown.
Progress Tracker
0% Complete
— Materials & Gauge :
Info :
Gauge: 12 hdc x 8 rows = 10cm/4in in fabric tension used here. Using 5.0mm hook and worsted weight yarn gives the pictured density. Runner finished size shown is approximately 110cm x 28cm (43in x 11in). Adjust foundation chain and number of hill panels to change length.
— Foundation & Runner Base (Main Panel) :
Round 1 :
Using sky blue yarn and 5.0mm hook, ch 121 (121)
Round 2 :
Row 1: Hdc in 3rd ch from hook (counts as first hdc + ch?) No, hdc in 3rd ch from hook and in each ch across, turn. (119 hdc)
Round 3-10 :
Row 2-9: Ch 2 (counts as first hdc), hdc in each st across. Turn. Keep stitch count at 119 hdc each row. (119)
Info :
Keep your tension even. These rows form the sky panel at the top of the runner. Work in back loops only (BLO) for row 4 if you prefer a defined ridge between sky and next section.
Round 11 :
Change to lighter sky blue/transition color at end of row. Ch 2, hdc across in BLO to create a subtle ridge. (119)
Round 12-16 :
Rows 11-15: Continue hdc across each row in current sky blue (119). These rows are the upper sky area for sun/cloud placement.
Info :
Use stitch markers at the first stitch of each row to mark row starts so that your edges remain straight. Count rows from the top to position the sun and clouds later—mark the centre stitch at row 14 for sun placement.
Round 17 :
Change to green 1 (light lime green) at end of the row to start the topmost hill panel. Ch 2, hdc across 119. (119)
Round 18-26 :
Work Rows 17-25: Ch 2, hdc in each st across. Keep count 119. (119)
Info :
These rows form the first narrow hill band. We will later overlay a diagonal hill seam with short-row shaping; right now create a full-width base to allow seaming and shaping in the Hills section.
Round 27-42 :
Continue alternating greens for additional hill bands using medium spring green for Rows 26-34 and deep meadow green for Rows 35-42. Each row: Ch 2, hdc in each st across. (119)
Info :
At the end of Row 42 you will have created a continuous base fabric divided into sky + three hill bands. We will shape diagonal overlays for each hill using short rows and separate hill panels to give the runner a layered rolling look.
— Hill Panel Shaping (Short Rows & Diagonals) :
Info :
Short rows create the diagonal edges of the hills. You will make three hill overlays (front, middle, back) in contrasting green shades and sew them onto the base. Each hill overlay is made by working a foundation chain equal to the width you need (we use 119 stitches) and then working short rows that gradually shorten to form a slope. Below is the detailed short-row shaping for one medium-sized hill; repeat or adapt for other hills using scale adjustments.
Round 1 :
Using medium spring green and 5.0mm hook, ch 119. Turn. (119)
Round 2 :
Row 1: Ch 2, hdc in each st across 119. Turn. (119)
Round 3 :
Row 2: Ch 2, hdc in first 95 sts only, turn. (95)
Info :
By turning early you create a short row. The number of stitches you work determines the slope angle. Mark the turning stitch with a scrap of yarn to keep count.
Round 4 :
Row 3: Ch 2, hdc in first 95 sts, ch 1, turn. (95)
Round 5 :
Row 4: Ch 2, hdc in first 80 sts only, turn. (80)
Round 6 :
Row 5: Ch 2, hdc in first 80 sts, turn. (80)
Round 7 :
Row 6: Ch 2, hdc in first 60 sts only, turn. (60)
Info :
Continue creating decreases of worked stitch counts to bring the hill to a pleasing rounded slope. You can vary the counts to make a gentler or steeper slope, but keep track to maintain symmetry when you sew mirrors or repeat panels across the runner.
Round 8 :
Row 7: Ch 2, hdc in first 60 sts, turn. (60)
Round 9 :
Row 8: Ch 2, hdc in first 40 sts only, turn. (40)
Round 10 :
Row 9: Ch 2, hdc in first 40 sts, turn. (40)
Round 11 :
Row 10: Ch 2, hdc in first 20 sts only, turn. (20)
Round 12 :
Row 11: Ch 2, hdc in first 20 sts, finish off leaving long tail for sewing. (20)
Info :
Block the hill overlay lightly if needed to smooth short-row ends before sewing. Position it on the runner base so the diagonal line overlays the seam between hill bands; sew with ladder stitch for a smooth join.
Round 13-20 :
Make second and third hill overlays: scale counts slightly (e.g., for the front hill use maximum counts 119 down to 25; for the back hill use 119 down to 50) following the same short-row method. Finish and leave tails for sewing.
Info :
Stitch overlays to the runner base by pinning and using a yarn needle to sew through both layers. Use a slip-stitch seam or ladder stitch to hide joins. Trim any long tails then weave them into the back side.
— Scalloped Shell Border :
Round 1 :
Join medium green yarn to any corner. Ch 1, sc evenly around the whole runner edge, placing (3 sc) in each corner to keep it flat. Work approx 1 sc in each 2 rows along long edges; adjust to keep the border even. (approx stitch count varies by length)
Round 2 :
Work shell edging: *skip 2 sc, 5 dc in next st, skip 2 sc, sc in next st* rep along edge; place 5 dc shell in corner sts to keep corners rounded. Fasten off and weave ends. This creates the scalloped finished edge seen in the photo.
Info :
If the border waves, block the runner lightly, or adjust shell spacing slightly (skip 1 or 3 sc instead of 2) to flatten the edge. Shells written in dc may be replaced with hdc shells for a smaller look.
— Sheep Applique — Body (make 3) :
Info :
Each sheep fleece is constructed as a cluster of round bobbles/puff stitches attached into a roughly oval base. The body begins with a small oval foundation, then puff stitches are worked in rounds to create the fluffy, raised wool texture. Use cream/ivory and a 4.0mm hook for tighter, textured puffs.
Round 1 :
Using cream yarn and 4.0mm hook, make a mr, ch 1, 6 sc in magic ring. (6)
Round 2 :
Inc in each st around. (12)
Round 3 :
(1 sc, inc) x 6 (18)
Round 4 :
(2 sc, inc) x 6 (24)
Round 5 :
(3 sc, inc) x 6 (30)
Info :
We will now begin layering puff stitches in rounds to create the curly fleece. Puffs are worked over a base of sc rounds - each puff counts for one st in the round. Keep puffs tight by wrapping yarn around the hook 3 times and pulling up evenly about 2/3 of hook length before finishing the puff with a ch or sl st as explained below.
Round 6 :
Working into the spiral foundation: *puff stitch in next st, sc in next st* repeat around (i.e., alternate puff and sc) to create texture. (30 total elements)
Round 7 :
Round of puffs: puff in each puff and in each sc across (30 puffs). Keep puffs snug; finish each puff by pulling yarn through all loops and sl st into same st to secure. (30)
Round 8 :
*(sc, puff) repeat* across in between the existing puffs to fill gaps. (30)
Round 9 :
Round of puffs worked in each available space to expand the oval: puff x 36 around (increase puff spaces by working additional puffs into chain spaces if needed). (36)
Info :
Stuffing: For these appliques I recommend light stuffing only if you want more dimension. Insert a small amount of fiberfill underneath the puff surface as you build the last rounds to give a subtle lift. Do not overstuff—these are appliques sewn flat onto the runner.
Round 10 :
Work sc around the edge to stabilize puffs: sc in each st around, close round with sl st. (36)
Round 11-15 :
Repeat additional puff rounds to reach desired fullness: alternate rounds of puffs and sc stabilization for 4-5 rounds. Aim for a final oval approximately 10cm x 7cm for the large foreground sheep, smaller for middle and back sheep (reduce final rounds by 1-2 to make them proportionally smaller).
Round 16 :
After final puff round, finish off leaving long tail for sewing. Weave tail through last round to close slightly and secure. Fasten off. (final count varies ~42 puffs)
Info :
Make three bodies in cream. For scale: make the front-most sheep slightly larger by adding one extra puff round; make the distant sheep smaller by stopping one puff round earlier. Keep bodies roughly proportional as in the picture: large, medium, small.
— Sheep Applique — Head (make 3) :
Info :
Heads are worked in rounds as small amigurumi pieces in light brown/tan. They are slightly flattened to sit against the puff body and have tiny embroidered eyes and mouth. We will make the head round-by-round with a tight tension using a 4.0mm hook.
Round 1 :
Mr, ch 1, 6 sc in magic ring. (6)
Round 2 :
Inc in each st around. (12)
Round 3 :
(1 sc, inc) x 6 (18)
Round 4 :
(2 sc, inc) x 6 (24)
Round 5 :
1 sc in each st around (24)
Round 6 :
(3 sc, dec) x 6 (18)
Info :
Place safety eyes between rounds 4 and 5 about 4-5 sts apart depending on desired expression; if embroidering eyes, mark placement now with a removable marker. Begin a very light stuffing at this stage so the head retains shape but remains slightly flat to sit against the body.
Round 7 :
(1 sc, dec) x 6 (12)
Round 8 :
6 dec (6). Fasten off leaving long tail for sewing. Stuff lightly and close opening with yarn tail. (6)
Round 9-25 :
Make small ear flaps and facial shaping: For a more defined muzzle, use a separate small oval (mr, 6 sc; inc round to 12; finish) and sit it centered on the lower face of the head, sewing neatly. Embroider mouth and nostrils with dark brown embroidery thread using backstitch and French knots for nostrils. Add small blush with pastel if desired.
Info :
Heads should be proportionate to bodies: the largest sheep's head should be about 3.5cm diameter, the medium 3cm and the small 2.5cm. Secure eyes and mouth carefully. If using safety eyes, ensure washers are tightly fixed before sewing to body.
— Sheep Applique — Legs (make 12 total — 4 per sheep) :
Round 1 :
Using dark brown yarn and 4.0mm hook, ch 4, join to work in rounds or work 4 sc in second ch from hook to form a small column. (4)
Round 2-6 :
Round 2-5: Sc around in spiral for 4 rounds to make squat legs. (4)
Round 7 :
Finish off leaving tail for sewing. Make 4 legs per sheep. For the large sheep use slightly longer legs by adding one extra sc round for a taller profile.
Info :
Sew legs to underside of sheep body spaced evenly so the sheep sits level on the runner—place legs slightly inset from outer edge. Use yarn tail to stitch through both body and runner base if you want legs to be fixed in place and stable.
— Sheep Applique — Ears (make 6) :
Round 1 :
Using light brown/tan and 4.0mm hook, mr, ch 1, 6 sc in magic ring (6)
Round 2 :
(1 sc, inc) x 2, sc in next 2 (8)
Round 3 :
Sc around to finish, flatten slightly and fasten off leaving long tail for sewing. Attach ears to top sides of head using mattress stitch or ladder stitch so they fold slightly forward like the photo.
Info :
Stitch the ear base into the head seam and add a few securing stitches through two layers of head and a couple through the outer puffs of the body so the ear stays slightly folded and natural-looking.
— Sun Applique :
Round 1 :
Using yellow yarn and 4.0mm hook, mr, ch 1, 8 sc in magic ring (8)
Round 2 :
Inc in each st around (16)
Round 3 :
(1 sc, inc) x 8 (24)
Round 4 :
Sc around to stabilize (24)
Round 5 :
Fasten off leaving long tail. Add sun rays: using a contrasting yellow-orange, embroider 12 rays radiating from the edge, each comprised of a short chain of 6 ch, anchored back into the round with a sl st to create pointed rays.
Info :
Flatten and pin to runner sky area before stitching. Use small whip stitches to attach through the runner base only so rays remain slightly lifted for dimension.
— Cloud Applique (make 2) :
Round 1 :
Using white and 4.0mm hook, mr, ch 1, 6 sc in ring (6)
Round 3 :
(1 sc, inc) x 6 (18)
Round 4 :
Puff round: work small puffs across the top surface to create a fluffy silhouette—*puff in next st, sl st in next* repeat around. Fasten off leaving long tail for sewing. (18)
Info :
Place clouds in the sky panel using reference marks created earlier. Sew with small invisible stitches so clouds look like they rest on the sky surface.
— Daisy Flower Applique (make 6-8) :
Round 1 :
Using white and 3.5-4.0mm hook, ch 6, join to form ring with sl st. *Ch 2, 3 dc in ring, ch 2, sl st* repeat 5 times to create 6 petal clusters. Fasten off. (6 petals)
Round 2 :
Sew a small yellow French knot or a tiny round bead in the center for the flower core. Alternatively, make a tiny mr with yellow and 6 sc in mr, pull tight and sew into center.
Info :
Sew daisies onto hill panels in clusters and tuck petals under or on top of puff stitches to create dimensional flowers as in the picture. Use matching green embroidery for small stems or leaf accents.
— Grass Blades & Embroidered Details :
Round 1 :
Embroider grass blades with medium green using long satin stitches: insert needle through base, pull up to 1-2cm above fabric, insert back to create a long blade. Repeat in clusters of 3-4 blades at hill seams and around daisies.
Round 2 :
For dimensional grass, make small crocheted loops: ch 6, sl st back into the first ch to form small loop, secure and tack down at base on runner to form tufted grass. Make multiples along slopes.
Info :
Use slightly darker green for shadowed grass and lighter green for sunlit highlights. This embroidery step adds realism—place blades near sheep legs and flower stems where they naturally appear.
— Placement & Assembly Prep :
Info :
Before sewing any appliques in place, lay your runner flat and place each piece according to the photo references: a larger sheep near the foreground, medium one mid-runner, smaller one closer to the top. Place daisies and grass clusters in the interstitial spaces. Pin everything securely and photograph both sides to check symmetry before stitching.
Round 1 :
Using long tails left on each applique, baste the pieces in place with a few loose stitches to check placement. Adjust pins and spacing as needed until composition is visually balanced across the runner.
Info :
When ready, sew appliques with a matching yarn and a yarn needle using ladder stitch or small whip stitches. Travel under the puffs carefully—only catch the body backing and the runner surface to maintain fluffy texture on top.
— Final Finishing Touches :
Round 1 :
Weave in all ends by threading tails through a yarn needle and running the tail into the back of the runner for at least 5-6cm. Trim flush. Use a little fabric glue on very small petals or centers if needed to keep them secure.
Round 2 :
Light blocking: lay runner flat on a blocking board, spray lightly with water and pin into shape. Allow to dry to flatten and even out shell border. Remove pins.
Info :
For longevity, consider lining the underside with cotton fabric or interfacing if the runner will see heavy use. This stabilizes the appliques and prevents snagging from tableware.
This Fluffy Sheep on Green Hills table runner is a joyful project that brings a playful pastoral scene to your table. With careful short-row shaping, fluffy puff sheep, and charming embroidered details, every section is a little celebration of texture and color. Enjoy the slow, meditative process of building hills and adding tiny daisies — the end result is a centerpiece that invites smiles and warmth. 🐑🌼🧶