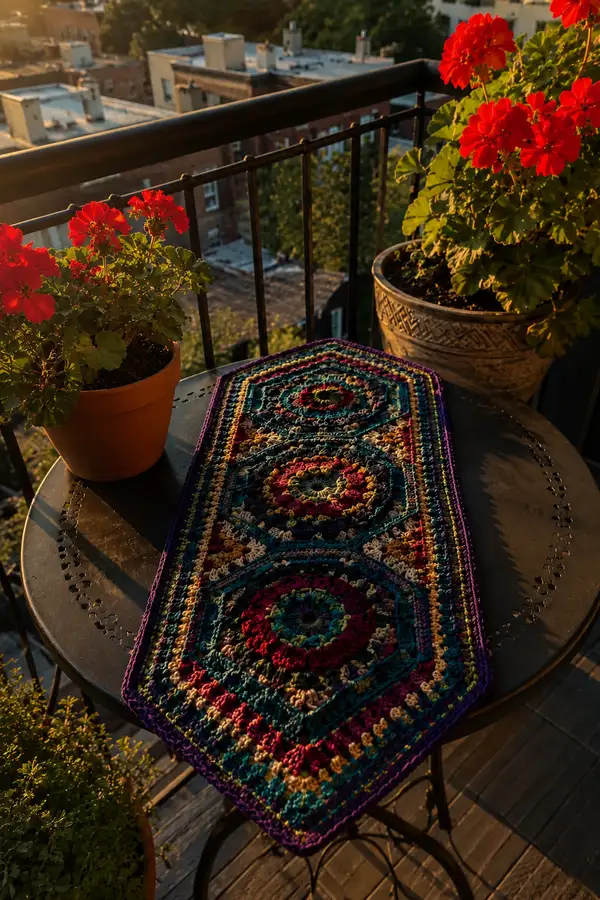
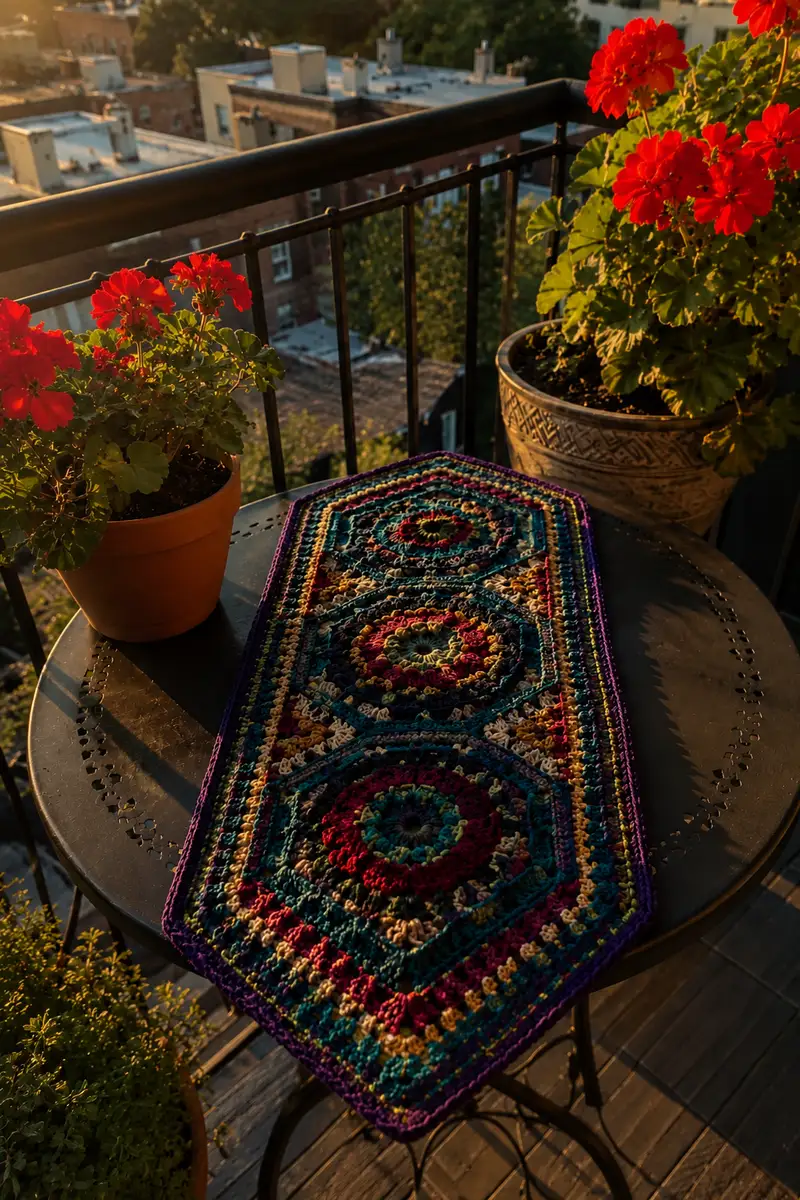
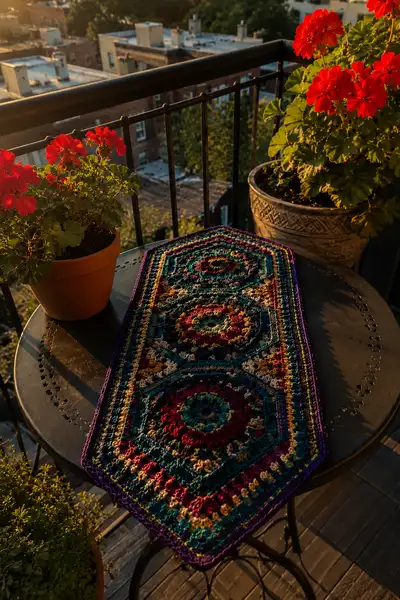
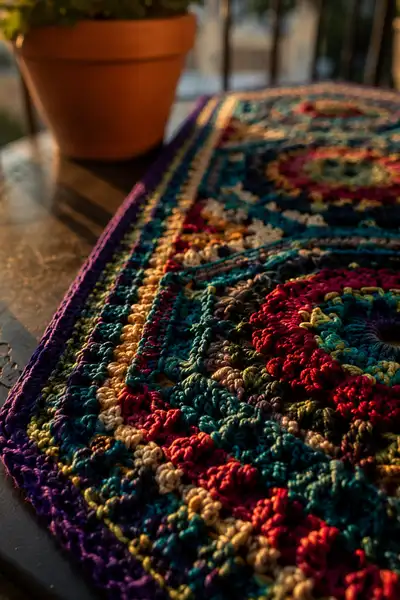
A richly textured geometric mandala table runner worked in jewel-toned yarns and bold contrast borders. This long table runner features three connected hexagonal mandalas with layered stitches, puff clusters and decorative ridges for depth. Perfect for brightening a small bistro table, dresser or entry console, the runner showcases deep teal, burgundy, gold, and purple for a luxurious boho look. The pattern uses join-as-you-go and a multi-row border to finish cleanly.
Progress Tracker
0% Complete
— Notes & Special Stitches :
Info :
This pattern is worked flat, motif-by-motif with three large hexagonal mandalas joined by a decorative connecting panel. Each hexagon is worked in rounds using sets of 6 increases to preserve the hexagon geometry. Puff stitches are counted as one stitch where indicated; make puff stitches consistent in height to keep counts correct.
Info :
Puff stitch (standard): yarn over, insert hook, yarn over pull up a loop (do this 4 times to have 9 loops on hook), yarn over and pull through all loops, ch1 to close puff. Counts as 1 stitch unless otherwise noted. Adjust loops to your preferred puff height but keep consistent across rounds.
— Hexagon Mandala Motif (Make 3 identical motifs):
Round 1 :
With Color A (deep teal), make a magic ring. Ch3 (counts as first dc), work 11 dc into MR. Join with sl st to top of ch3. (12)
Round 2 :
Ch3, dc in same st, 1 dc in next st around. Repeat across so that you have (2 dc in first st, 1 dc in next) pattern for 12 pairs. Join. (18)
Round 3 :
Ch2 (counts as hdc), hdc in same st, (hdc in next 2 sts, 2 hdc in next) x6. Join. (24)
Info :
Counting now is in groups of 6; this motif expands by adding 6 sts per increase round to maintain hexagon geometry. Place a removable marker at start of rounds to track alignment of corners (every 1/6th).
Round 4 :
Ch1, sc in same st, (sc in next 3 sts, 2 sc in next) x6. Join. (30)
Round 5 :
Info :
Change to Color B (mustard/gold) now for a highlight round. Carry unused yarn inside or cut and weave later as preferred.
Round 5 :
With Color B, ch3, (dc, ch1, dc) in same st to create a small ring, *sk 2 sts, (dc, ch1, dc) in next st*, rep around. Join. This creates 6 small corner arches corresponding to hexagon corners. (30 clusters/spaces)
Round 6 :
Info :
Switch back to Color A for a textured round. Work in FLO to create a subtle ridge if you prefer a defined side edge.
Round 6 :
With Color A, ch1, sc in each st and ch1-sp across, treating each (dc,ch1,dc) arch as 3 sts across (dc, ch1, dc). Maintain 30 sc total. Join. (30)
Round 7 :
Ch3, dc in same st, *sk 1 st, puff in next st, ch1, sk1, dc in next* around aligning puff stitches so each of the 6 corners has a puff centered on it. Join. (30 puff/dc mix counted as 30)
Info :
Make puffs by drawing up loops 4 times; each puff counts as single stitch. Space puffs evenly but make sure 6 corner puffs are centered to visually mark hexagon points.
Round 8 :
Ch2, hdc in each st and in ch1 spaces around (30). Join. (30)
Round 9 :
Ch1, sc in same st, (sc in next 4 sts, 2 sc in next) x6. Join. (36)
Round 10 :
Change to Color C (burgundy) for a bold round. Ch3, dc in each st around (36). Join. (36)
Info :
Color changes at the start of a round give crisp bands. Use a standing stitch for neater joins when changing color mid-row if preferred.
Round 11 :
Ch1, sc in each st around (36). Join. (36)
Round 12 :
Ch3, *dc in next 2 sts, puff in next st, ch1* repeat around aligning puffs so you get an alternating texture. Join. (36)
Round 13 :
Info :
Switch to Color D (olive) now. Work next two rounds in BLO to create horizontal ridges that emphasize the mandala rings.
Round 13 :
With Color D, ch1, sc in each st BLO around (36). Join. (36)
Round 14 :
Ch2, hdc in each st (36). Join. (36)
Round 15 :
Ch1, sc in same st, (sc in next 5 sts, 2 sc in next) x6. Join. (42)
Round 16 :
Change to Color E (navy or deep accent). Ch3, dc in each st around (42). Join. (42)
Info :
At this stage the hexagon is growing visibly. Place markers at the 6 corner increase points (every 1/6th of the round) to help preserve straight sides when you reach wider rounds.
Round 17 :
Ch1, sc in each st around (42). Join. (42)
Round 18 :
Ch3, *dc in next 3 sts, puff in next st, ch1* around to add texture and create a regular pattern of puffs around the ring. Join. (42)
Round 19 :
Ch1, sc in each st and ch1-sp around (42). Join. (42)
Round 20 :
Ch2, hdc in next 6 sts, (2 hdc in next st) x6 to create 6 increases spaced equally. Join. (48)
Info :
Check that you now have 48 stitches. This will be the base count for the wide rounds that begin to form the hexagon edge. Reposition markers if needed so corners fall at every 8th stitch (48 / 6 = 8).
Round 21 :
With Color B, ch3, dc in each st around for 48 dc. Join. (48)
Round 22 :
Ch1, sc in each st around (48). Join. (48)
Round 23 :
Ch3, *dc in next 5 sts, puff in next st, ch1* around aligning 6 corner puffs. Join. (48)
Round 24 :
Ch1, sc in each st (48). Join. (48)
Info :
Begin forming distinct straight sides for hexagon by working a careful sequence of increases at the 6 corner points over the next rounds to maintain geometry. Keep markers at corner increase points.
Round 25 :
Ch1, sc in next 7 sts, 2 sc in next (corner inc), repeat around. (6 corners x (7+1) = 48) Join. (54)
Round 26 :
Ch3, dc in each st around (54). Join. (54)
Round 27 :
Ch1, sc in each st around (54). Join. (54)
Round 28 :
With Color E, Ch3, *dc in next 8 sts, puff in next st* repeat around aligning puffs for texture. Join. (54)
Info :
Fasten off Color E and weave ends neatly. Your first hexagon mandala is complete. Make two more identical motifs following the same color progression or substitute your own color choices to create three mandalas of matching size.
— Motif 2 :
Info :
Repeat Rounds 1-28 exactly as Motif 1. Use the same color sequence to maintain a cohesive look or swap Color B and Color C between motifs to create subtle variation. Block each motif lightly to square and flatten before joining.
— Motif 3 :
Info :
Repeat Rounds 1-28 exactly as Motif 1. After blocking all three motifs, arrange them in a straight vertical line, with a small gap between each to be bridged by the connecting panel. Orientation should keep hexagon point-to-point alignment consistent (points inline lengthwise).
— Connecting Panel & Join-As-You-Go (Bridging the motifs) :
Info :
With motifs placed in position, we will join them using a decorative connecting panel worked in rows between motifs. You will join Motif 1 to Motif 2 first, then Motif 2 to Motif 3. Use Color A or a contrasting stripe for the connecting rows. Join-as-you-go technique: when you reach the edge stitch that aligns with the neighboring motif, sl st into the corresponding edge stitch of the neighbor instead of chain, creating a flat, seamless join.
Round 1 (Panel Row 1) :
Attach Color A to a corner on Motif 1 at the side edge below the top-most corner. Ch1, sc evenly along the side edge working into each side stitch (not into corner picots) until you reach the opposite corner. Do not fasten off. (Work a number of scs equal to the side length; if hexagon side had 9 sts use 9 sc.)
Round 2 (Panel Row 2) :
Ch2, hdc across in back loops only of previous row to create a ridge. Turn. Repeat until panel height measures the distance to the next motif, usually 6-8 rows depending on gauge. Join to motif edge using sl st into the corresponding edge stitch on Motif 2: when you reach the row where the motifs meet, for each st along that edge, insert hook into edge st of Motif 2 and sl st to join, then continue panel on reverse side. (Panel width and height variable.)
Info :
Keep tension relaxed while joining to avoid pulling motifs together too tightly; you want a crisp bridge that sits flat. Pin motifs together if needed before joining to ensure alignment. Repeat join for Motif 2 to Motif 3.
Round 3 (Panel Decorative Picks) :
With Color C, ch1, *sc in next st, ch3, sk next st* across the panel row to create decorative picot-like arches. This is decorative and helps visually connect motifs. Work matching rows on both sides of the panel for symmetry. Fasten off and weave ends.
— Expanded Rectangular Body & Transitional Rounds :
Round 1 :
Join Color D at one of the long side midpoints between motifs. Ch1, sc evenly around the entire assembled motif trio, working sc in each exposed stitch around the outer edge. When you come to joins, sc into the panel join spaces to create a continuous edge. Count total sts; you should have a number divisible by 6 to preserve hexagonal corner alignment (record your total as N).
Round 2 :
Ch2, hdc in each st around (N). Join. (N)
Info :
If your stitch count is not divisible by 6, adjust by adding or removing up to 6 sc evenly on a round to create a divisible count. This keeps future increases symmetrical and the border straight.
Round 3 :
Ch1, sc in each st around (N). Join. (N)
Round 4 :
Ch3, dc in next 2 sts, *ch1, sk 1 st* around to add texture and broken cloth effect. Join. (N but with ch1 spaces included)
Round 5 :
Change to Color E. Ch1, sc in each st and ch1-sp around, treating ch1 spaces as single st (maintain N). Join. (N)
Info :
These transitional rounds soften the geometry between motifs and the outer border. Work evenly and block again if necessary before wide border rounds to ensure flatness.
Round 6 :
Ch2, hdc in first 5 sts, (2 hdc in next) repeat around aligning increases at hexagon corners if visible (N + 6 increases). Join. (N+6)
Round 7 :
Ch1, sc in each st around (N+6). Join. (N+6)
Round 8 :
Ch3, dc in each st around (N+6). Join. (N+6)
Round 9 :
Info :
At this stage your runner has a continuous outer edge ready for a wide layered border. Choose Color F (royal purple) as the outermost border for strong framing. We'll now add alternating texture rounds of puff and simple stitches to enhance structure and color bands.
— Outer Border (work 16 rounds for a deep frame) :
Border Round 1 :
With Color F, ch1, sc around evenly, placing 3 sc in each outer corner to maintain shape where hexagon corners project into the rectangular assembly. Join. (Count will vary; maintain corners with 3 sc clusters.)
Border Round 2 :
Ch2, hdc in each st around. Join.
Border Round 3 :
Ch1, sc in each st around. Join.
Info :
Work BLO or FLO on alternating rounds to create ridges that complement mandala texture. For a strong ridge: work next round in BLO with sc to make a crisp line.
Border Round 4 :
Ch1, sc in each st BLO around. Join.
Border Round 5 :
Change to Color A. Ch3, *dc in next 3 sts, puff in next st* around. Join.
Border Round 6 :
Ch1, sc in each st and in puff-ch spaces (treat puff as single st) around. Join.
Border Round 7 :
Color change to Color C. Ch2, hdc in each st around. Join.
Border Round 8 :
Ch1, sc in each st around. Join. (Use this round to tidy up any uneven edges by adding extra sc in shallow curves and reducing at any bulges.)
Border Round 9 :
With Color D, ch1, *sc in next 5 sts, 2 sc in next* around to increase slightly and square corners if necessary. Join.
Border Round 10 :
Ch3, dc in each st around. Join.
Info :
At this point re-check the runner perimeter for symmetry. If one side looks longer, adjust by adding a small number of sc evenly across that side in the next round and then compensate opposite side similarly to retain rectangular balance.
Border Round 11 :
Change to Color E. Ch1, sc in each st around. Join.
Border Round 12 :
Ch1, *sc in next 2 sts, picot (ch3, sl st to first ch)* repeat around for a subtle decorative edge inside the outer frame. Join.
Border Round 13 :
With Color F, ch2, hdc in each st around. Join.
Border Round 14 :
Ch3, dc in each st for a final solid band. Join.
Border Round 15 :
Ch1, sc in each st around. Join. (This round cleans up stitch heights and evens the final profile.)
Border Round 16 :
Fasten off leaving a 10" tail. Using tapestry needle, weave tail through final round stitches and pull to slightly cinch if desired or weave flat for a smooth finish. Weave in all other ends neatly on the reverse side.
Info :
Blocking: Wet-block the runner or steam-block to flatten motifs and set the geometry. Pin to a rectangular shape maintaining hexagon corner lines, allowing the motifs to sit flat. Air-dry thoroughly before removing pins. Optionally press with a cool iron and a damp cloth for final crispness.
— Finishing Touches & Optional Embellishments :
Info :
Add embroidered accent lines with tapestry needle and long running stitches using contrast yarn in the center of any mandala to emphasize the radial design. Add small tassels or pom-poms to the two short ends if you like—make 4 small tassels in purple and attach evenly spaced.
Final Info :
Weave in all ends at least 2-3 inches into the fabric. Trim excess close to surface but avoid cutting into stitches. Give the runner a final light blocking and allow to dry fully before use.
Completing this geometric mandala table runner is so satisfying — the jewel tones and sculpted stitches create a dramatic handmade centerpiece that feels both boho and refined. Each mandala layer reveals new texture as you work, and the join-as-you-go method makes assembly smooth and rewarding. I hope this project delights you as much as it did me — enjoy blocking, arranging and gifting this beautiful piece! 🧶✨