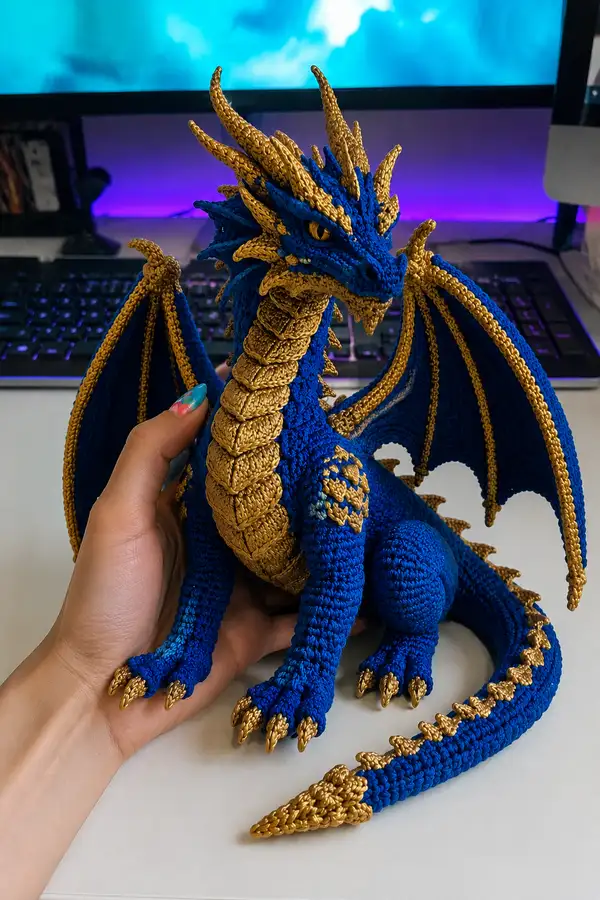
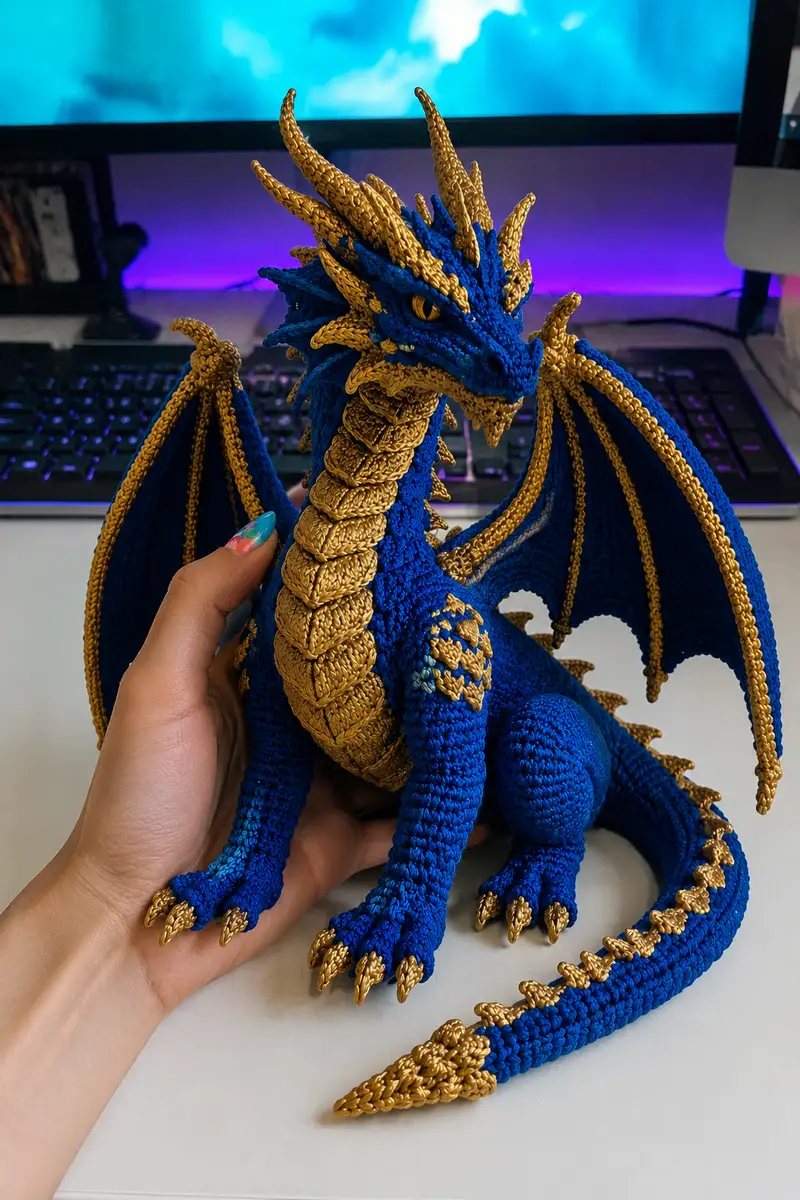
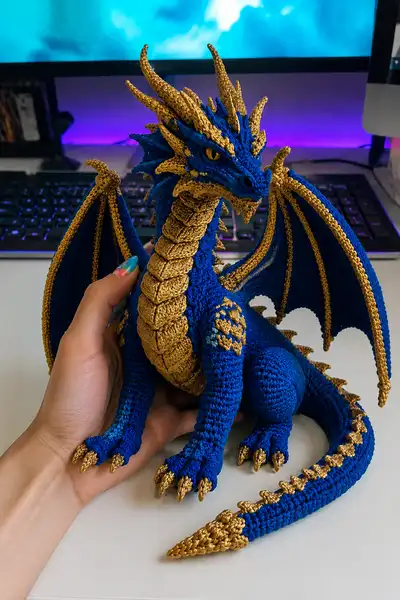
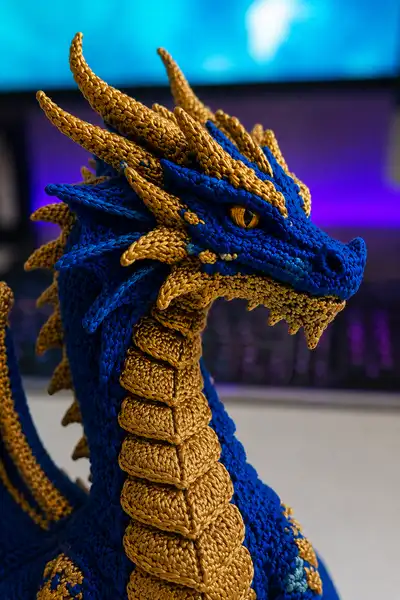
Create a majestic royal blue and metallic gold dragon amigurumi with layered scales, articulated wings, tall horns, and a sculpted expressive head. This pattern recreates the refined silhouette of a seated king dragon with a scaled belly, ridged tail and detailed claws. The finished piece stands as an impressive display plush or heirloom gift, combining tight amigurumi fabric with decorative textured plates and frills.
Progress Tracker
0% Complete
— Head :
Round 1 :
6 sc in magic ring (6)
Round 3 :
(1 sc, 1 inc) x 6 (18)
Round 4 :
(2 sc, 1 inc) x 6 (24)
Round 5 :
(3 sc, 1 inc) x 6 (30)
Round 6 :
(4 sc, 1 inc) x 6 (36)
Round 7 :
(5 sc, 1 inc) x 6 (42)
Round 8 :
(6 sc, 1 inc) x 6 (48)
Round 9 :
(7 sc, 1 inc) x 6 (54)
Round 10 :
(8 sc, 1 inc) x 6 (60)
Round 11-16 :
1 sc in each st (60) — work even to build head height
Info :
Place safety eyes between rounds 14-15, approximately 12-14 stitches apart (adjust spacing for desired expression). If embroidering eyes, mark placement now. Use small stitch markers to mark corners of the snout for later shaping.
Round 17 :
(8 sc, 1 dec) x 6 (54)
Round 18 :
(7 sc, 1 dec) x 6 (48)
Info :
Begin to stuff the front of the head firmly but leave the back hollow for neck shaping. Stuff small amounts at a time to avoid lumps. Check eye alignment again while stuffing.
Round 19 :
(6 sc, 1 dec) x 6 (42)
Round 20 :
(5 sc, 1 dec) x 6 (36)
Round 21 :
(4 sc, 1 dec) x 6 (30)
Round 22 :
(3 sc, 1 dec) x 6 (24)
Info :
Sculpt the snout by adding a few short surface stitches: use slip stitches or sc along the top of the snout to create a slight ridge. Add two small embroidered nostrils at rounds 19-20 center front using dark yarn.
Round 23 :
(2 sc, 1 dec) x 6 (18)
Round 24 :
(1 sc, 1 dec) x 6 (12)
Info :
Do not fasten off here if you plan to crochet the neck continuous — instead change stitch technique for neck formation. But for this design we will fasten off leaving a 20-30 cm tail for sewing and join neck later for precise positioning.
Round 26 :
Fasten off leaving long tail for sewing (head complete). Finish stuffing and shape with fingers to refine cheeks and snout.
— Neck (sculpted, worked as a separate tube with belly plate foundation) :
Round 1 :
6 sc in magic ring (6)
Round 3 :
(1 sc, 1 inc) x 6 (18)
Round 4 :
(2 sc, 1 inc) x 6 (24)
Round 5 :
1 sc in each st (24)
Round 6 :
1 sc in each st BLO (24) — optional ridge row to help belly plates sit
Round 7-10 :
1 sc in each st (24) — build neck length
Info :
We will attach segmented belly plates down the front of the neck. Crocheting the neck tube separately gives more control to sew plates on evenly. Stuff neck lightly now so it remains flexible for posing later.
Round 11 :
(2 sc, 1 inc) x 6 (30) — slight flare where neck meets chest
Round 12-18 :
1 sc in each st (30) — continue length; adjust rounds to match head-to-body proportion
Info :
Mark the seam where the neck will attach to the head: leave a tail on the neck to sew into the head opening and fit before final closing. Aim for a neck tube length of 9-12 cm unstuffed depending on yarn gauge.
Round 19 :
(3 sc, 1 dec) x 6 (24)
Round 20 :
(2 sc, 1 dec) x 6 (18)
Round 21 :
(1 sc, 1 dec) x 6 (12)
Round 22 :
1 sc in each st (12) — finish neck tube, fasten off leaving long tail for sewing
Info :
Create a set of belly plate pieces in gold now (see 'Belly Plates' section). When sewing, overlap each plate slightly and couch the plate edges into the neck seam to hide the joint. Use pins to evenly space plates along the front of the neck.
— Belly Plates (Make 9-11, size varies by plate) :
Info :
Each plate is worked flat in metallic gold yarn and shaped like a small scalloped armor plate. Make plates in graduated sizes: smallest for throat (3-4 cm long) to largest for top chest (approx 4-5 cm).
Plate Round 1 :
Ch 7, sc in 2nd ch from hook and in each across (6)
Plate Round 2 :
Ch1, turn, (1 sc, inc) across to end to create slight curve (9)
Plate Round 3 :
Ch1, turn, sc across (9)
Plate Round 4 :
Ch1, turn, (2 sc, inc) x 3 (12)
Plate Round 5 :
Ch1, turn, sc across (12)
Plate Round 6 :
Ch1, turn, (3 sc, inc) x 3 (15) — create larger plate for bottom rows
Info :
Fasten off leaving a long tail to seam. For each plate, use surface slip stitches along the outer edge to create a raised rim if desired. Stiffen plates lightly with diluted fabric glue or pva if you want crisp plates.
Plate Round 7 (optional rim) :
Using gold yarn, work 1 sc around edge through both layers, placing 3 sc in corners to keep shape. Fasten off and weave ends.
Info :
Sew plates onto neck and body front overlapping slightly (approx 2-3 mm) and stitch through the center back to secure. Arrange plates so they follow the neck curve and the largest sits at the top of the chest.
— Body :
Round 1 :
6 sc in magic ring (6)
Round 3 :
(1 sc, 1 inc) x 6 (18)
Round 4 :
(2 sc, 1 inc) x 6 (24)
Round 5 :
(3 sc, 1 inc) x 6 (30)
Round 6 :
(4 sc, 1 inc) x 6 (36)
Round 7 :
(5 sc, 1 inc) x 6 (42)
Round 8 :
(6 sc, 1 inc) x 6 (48)
Round 9-14 :
1 sc in each st (48) — even to build torso height
Info :
Mark front center and position for leg attachments. The seated dragon has a wider chest, so consider two extra rounds of increases if you prefer a broader torso. Add two safety pins on either side to mark leg placement approximately 10-12 sts from front center on each side.
Round 15 :
(7 sc, 1 inc) x 6 (54)
Round 16-20 :
1 sc in each st (54)
Round 21 :
(7 sc, 1 dec) x 6 (48)
Round 22 :
(6 sc, 1 dec) x 6 (42)
Info :
Begin stuffing the main body moderately — the torso should feel firm but slightly yielding to allow seam attachment of the neck and hips. Add a small pouch of poly pellets at the bottom to stabilize the seated pose if desired.
Round 23 :
(5 sc, 1 dec) x 6 (36)
Round 24 :
(4 sc, 1 dec) x 6 (30)
Round 25 :
1 sc in each st (30) — work even for belly join and rear leg spacing
Round 26 :
1 sc in each st (30)
Round 27 :
(2 sc, 1 inc) x 10 (40) — flare slightly for hip area
Round 28-30 :
1 sc in each st (40) — finish body and leave opening for joining with tail. Fasten off leaving long tail for sewing to tail base.
Info :
If you plan to insert wires into hind legs or tail for poseability, insert them now through the body cavity before final stuffing. Ensure ends are folded and taped or capped safely.
— Front Legs (Make 2) :
Round 1 :
6 sc in magic ring (6)
Round 3 :
(1 sc, 1 inc) x 6 (18)
Round 4 :
(2 sc, 1 inc) x 6 (24) — shape wrist/foot base
Round 5-7 :
1 sc in each st (24) — bulk for paw/foot
Info :
Front legs are sculpted with a slight front-facing paw; add extra tight stuffing to the paw area so the dragon can sit and support chest weight. Pin to body to check length — usually front legs end around body rounds 10-14.
Round 8 :
(3 sc, 1 inc) x 6 (30) — begin lower arm
Round 9-14 :
1 sc in each st (30) — build lower and mid arm
Round 15 :
(3 sc, 1 dec) x 6 (24)
Round 16-18 :
1 sc in each st (24) — upper arm shaping
Round 19 :
(2 sc, 1 dec) x 6 (18)
Round 20 :
1 sc in each st (18); finish and fasten off leaving long tail for sewing
Info :
Make claws (see 'Claws' section) and sew 3-4 claws to each front paw. Sew legs to body at rounds 12-15 for a natural seated front placement. Reinforce join using mattress stitch into body rounds that line up with leg top.
— Hind Legs (Make 2) :
Round 1 :
6 sc in magic ring (6)
Round 3 :
(1 sc, 1 inc) x 6 (18)
Round 4 :
(2 sc, 1 inc) x 6 (24)
Round 5-9 :
1 sc in each st (24) — work even for paw bulk
Info :
Hind legs are larger and more muscular; stuff feet firmly and add slight flattening at the sole for seated stability. Consider inserting a small flat disc of stiff felt at the sole to help the dragon sit upright.
Round 10 :
(3 sc, 1 inc) x 6 (30)
Round 11-16 :
1 sc in each st (30) — build thigh
Round 17 :
(4 sc, 1 dec) x 5 (25) — slight taper
Round 18 :
(3 sc, 1 dec) x 5 (20)
Round 19 :
(2 sc, 1 dec) x 5 (15)
Round 20-22 :
1 sc in each st (15) — finish top of hip and fasten off leaving long tail for sewing
Info :
Sew hind legs to body at hip level (body rounds 25-28). Aim to angle thighs slightly outward so the dragon looks stable and regal while seated.
— Claws (Make 10-12 small gold claws) :
Claw Round 1 :
4 sc in magic ring (4)
Claw Round 2 :
(1 sc, 1 inc) x 2 (6)
Claw Round 3 :
1 sc in each st (6)
Claw Round 4 :
(1 sc, 1 dec) x 2 (4) — taper
Claw Round 5 :
4 sc in each st, sl st to close slightly, fasten off leaving tail for sewing (4)
Info :
Stuff claws very lightly. Sew a cluster of 3 claws to each front paw and 3 to each hind paw, spacing equally. The claws are slightly curved; position points outward to give a gripping look.
— Wings (Make 2 large wings with inner bone and outer membrane) :
Wing Bone - Finger 1 (inner) Round 1 :
Ch 20, sc in 2nd ch from hook and across (19)
Wing Bone Round 2 :
Ch1, turn, 1 sc in each st (19)
Wing Bone Round 3 :
Ch1, turn, (2 sc, 1 inc) x 6 +1 sc end to shape tip (25)
Wing Bone Round 4 :
Ch1, turn, 1 sc in each st (25)
Info :
Make three wing bones per wing (finger 1 inner, finger 2 middle, finger 3 outer). Vary chain length and bone width to create swept wing shape (finger 1 longest, finger 3 shortest). Crochet bones in gold for contrast and robust structure. Insert thin floral wire down the center of each bone if you want poseable wings.
Wing Membrane (worked around bones) Round 1 :
Join sapphire yarn at base of inner bone. Ch 1, sc evenly along one side of bone to outer tip, continue to next bone and sc down toward base, forming a triangular membrane. Aim for roughly 150-220 sc around bones depending on wing size.
Wing Membrane Round 2-6 :
1 sc in each st (work even) — build membrane depth. Add two rows of BLO along the leading edge in gold for raised trim: join gold yarn and work 1 sc BLO across the wing leading edge to create a ridge.
Info :
Leave base of wing open with a long tail to sew to body. Block wings flat using pins to set curve and position fingers before final sewing. For a sculpted look, add a row of single crochet over the outer edge and then picots or small spike appliques in gold along the trailing edge.
Wing Assembly :
Sew bones to membrane on both sides with tight whip stitch to keep membrane taut. Insert wire if poseable and fold ends inward to prevent poking. Sew wings to back at body rounds 6-10 depending on desired height.
— Horns (Make 2 long tapered gold horns) :
Horn Round 1 :
6 sc in magic ring (6)
Horn Round 2 :
(1 sc, 1 inc) x 3 (9)
Horn Round 3 :
1 sc in each st (9)
Horn Round 4 :
(2 sc, 1 inc) x 3 (12)
Horn Round 5-8 :
1 sc in each st (12)
Horn Round 9 :
(2 sc, 1 dec) x 3 (9)
Horn Round 10 :
(1 sc, 1 dec) x 3 (6)
Horn Round 11-14 :
1 sc in each st (6) — continue tapering by working a few rounds then dec to maintain gentle spiral. Stuff horn lightly to keep hollow but firm.
Horn Round 15 :
Fasten off leaving long tail for sewing. Use tail to sew horn base to top back of head, angling horns backwards. Add small embroidered ridges in gold to emphasize twisting horn texture.
Info :
Create several smaller spike pieces in gold to layer around the horn bases and along the head crest. These are simple cone shapes made like mini horns with 4-6 rounds each.
— Head Spikes / Frill (Make 12-18 small frill spikes) :
Frill Round 1 :
4 sc in magic ring (4)
Frill Round 2 :
(1 sc, 1 inc) x 2 (6)
Frill Round 3 :
1 sc in each st (6)
Frill Round 4 :
(1 sc, 1 dec) x 2 (4)
Frill Round 5 :
Fasten off, leave tail. Make 12-18 in a mix of blue and gold. Sew in overlapping rows behind the jaw, along the neck seam and the brow ridge to create layered frill effect.
Info :
Shape frill spikes by pulling their tip slightly with a yarn tail and anchoring with a small stitch through the base. This helps them stand outward rather than flop flat.
— Tail (Long tapering tail with dorsal spikes) :
Round 1 :
6 sc in magic ring (6)
Round 3 :
(1 sc, 1 inc) x 6 (18)
Round 4-8 :
1 sc in each st (18) — begin tail shaft
Round 9 :
(2 sc, 1 inc) x 6 (24)
Round 10-18 :
1 sc in each st (24) — lengthen tail; add wire if you want bending ability
Round 19 :
(2 sc, 1 dec) x 6 (18)
Round 20 :
(1 sc, 1 dec) x 6 (12)
Round 21-24 :
1 sc in each st (12) — taper toward tip
Round 25 :
(1 sc, 1 dec) x 4 (8)
Round 26 :
1 sc in each st (8)
Round 27 :
Fasten off leaving long tail to sew to body base. Before final sewing, add dorsal spikes along tail back (see 'Dorsal Spikes' section) and a gold terminal spike at tip.
— Dorsal Spikes (Make 14-18 small spikes) :
Spike Round 1 :
4 sc in magic ring (4)
Spike Round 2 :
(1 sc, 1 inc) x 2 (6)
Spike Round 3 :
1 sc in each st (6)
Spike Round 4 :
(1 sc, 1 dec) x 2 (4)
Spike Round 5 :
Fasten off leaving tail for sewing. Space spikes evenly from base of neck down to tail tip and sew securely through the tail and body stitches to anchor.
Info :
Alternate larger gold spikes and smaller blue spikes to match image. Sew plates slightly overlapping to achieve armored ridge down the back.
— Scales / Shoulder Appliques (Make 6-10) :
Scale Round 1 :
Ch 6, sc in 2nd ch from hook and in next 4 ch (5)
Scale Round 2 :
Ch1, turn, (1 sc, inc) across to create small scallop (7)
Scale Round 3 :
Ch1, turn, sc across (7)
Info :
Sew a cluster of appliques to each shoulder and flank as decorative scale patches. Use turquoise accents for a few scales to recreate small light-blue highlights visible on the shoulders.
— Eyes (Embellished safety eyes or embroidered) :
Info :
If using safety eyes: position between head rounds 14-15, about 12-14 sts apart. Insert washers firmly before stuffing more of the head. For embroidered eyes: use long satin stitches or layered stitches to create a golden iris with vertical black slit pupil. Embroidery allows more expressive eyelids.
Eye Embroidery Tip :
For eyelids, use a row of satin stitch above and below the eye placement to create a hooded look. Use dark blue or black to define lids.
— Finishing Details and Textured Ridges :
Info :
Work a ridged single crochet row along the center of each wing leading edge in gold: join gold yarn to the wing base, 1 sc BLO around the leading edge to create a raised ridge. Add small picots or tiny cone spikes in gold at intervals along the ridge for decorative flourish.
Detail Row :
Along body spine, use a surface slip stitch in gold to create a thin highlight line that brings out the scale arrangement. This is worked after all pieces are sewn on.
Info :
Weave all tails inside pieces where possible. For safety, secure large decorative pieces (horns, wings) with multiple anchor stitches into the body and then add a few invisible stitches through the inner fabric for reinforcement.
— Assembly (overview before sewing) :
Info :
Block wings and horns lightly before attaching to ensure even curves. Lay out all parts around the body and pin approximate positions. Attach heavier pieces first (hind legs, body to tail, neck to body), then add lighter decorative spikes and plates. Always check symmetry from several angles.
Final Touch :
Brush metallic yarn gently with a soft brush to open sheen if it is slightly compacted. Add small accents of light blue embroidery on shoulders and near eye corners to mimic subtle color flecks visible in the photo.
This regal Sapphire and Gold King Dragon brings together sculptural shaping and decorative stitching for a truly show-stopping handmade companion. Every layered plate, spike and horn becomes part of the dragon's noble identity, and assembling the pieces feels like armor-building for your own miniature monarch. Enjoy the slow process — the detailed finish is worth every stitch! 🐉✨🧶