🧢 Beautiful ✨ Detailed πŸ’ Adorable

Giant Sloth Amigurumi Pattern

Giant Sloth Amigurumi Pattern
4.0β˜… Rating
5-7 Hours Time Needed
2.5K Made This
βœ‚οΈ

Intermediate Level

Ideal for those with basic crochet experience, featuring slightly more advanced stitches and techniques to expand your skills.

⏱️

Weekend Treat

Takes 5-7 hours, making it an enjoyable project to finish over a couple of days.

🧸

Cute Companion

An adorable friend to cherish, handcrafted with love to bring comfort and joy for years to come.

About This Giant Sloth Amigurumi Pattern

This pattern teaches you how to crochet a Giant Sloth amigurumi using jumbo size 7 chenille yarn for a plush, soft finish. Youll work in a spiral to create an oval head/body and add felt facial features for a sweet expression. The design includes templates for the eye patches and step-by-step assembly notes. It is designed as a larger pillow-like toy that makes a wonderful handmade gift.

Giant Sloth Amigurumi Pattern crochet pattern - detailed view of completed project

Includes full materials list, stitch abbreviations, and printable templates for facial pieces. Clear photos and tips help you align rounds and finish with neat seams and claws.

Why You'll Love This Giant Sloth Amigurumi Pattern

I absolutely love this pattern because it turns jumbo chenille yarn into a delightfully huggable sloth that feels like a soft pillow. I enjoy the simple shaping that creates a large, satisfying form without complex parts, which makes assembly relaxing and rewarding. Sewing on felt facial features adds a handmade character and lets you personalise each sloth’s expression. The techniques taught here helped me learn how to comfortably work with fuzzy chenille yarn and avoid common snags. I hope youll enjoy making these sibling sloths as much as I enjoyed designing them.

Giant Sloth Amigurumi Pattern step 1 - construction progress Giant Sloth Amigurumi Pattern step 2 - assembly progress Giant Sloth Amigurumi Pattern step 3 - details and accessories Giant Sloth Amigurumi Pattern step 4 - final assembly and finishing

Switch Things Up

I love experimenting with color palettes so I often change the body shade to soft pastels or warm neutrals for a different mood.

You can make a mini version by using thinner yarn and a smaller hook, or go bigger with a bulkier chenille and larger hook for an oversized cuddle buddy.

I sometimes embroider tiny details around the eyes or mouth to change the expression and add personality to each sloth.

Try using different felt colors for the eye patches to create a playful or realistic look depending on your preference.

For posable limbs, I add a thin armature wire inside the arms before stuffing so I can pose the sloth holding little props.

I also create matching accessories like a tiny crocheted scarf or a leaf for the sloth to hold as a finishing touch.

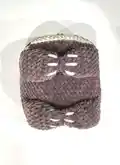
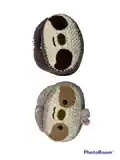
Make a set of sibling sloths in varying colors to display as a family or stack them like in the photos for a charming vignette.

Adjust stuffing firmness to change how your sloth sits: firmer stuffing keeps shape, lighter stuffing makes it squishier and more pillow-like.

To make a keychain or bag charm, reduce the pattern size and attach a sturdy ring to the top of the head.

I recommend testing eye placement with pins before updating permanently; moving eyes slightly changes the entire personality of the sloth.

Common Mistakes & How to Fix Them

βœ— Skipping stitch markers at the beginning of rounds can cause you to lose the start point; always place a stitch marker and move it every round to keep your spiral aligned. βœ— Not stuffing evenly will create lumps and an uneven silhouette; stuff gradually, pulling filling apart and adding small amounts until the shape is smooth. βœ— Failing to align the start of the decrease rounds will make the oval twist and look lopsided; align rnd 24 with where rnd 6 began or add/undo a few sc to correct it. βœ— Using a thinner yarn weight with jumbo pattern instructions will produce incorrect dimensions; use the recommended jumbo size 7 chenille yarn or rework the stitch counts for a different gauge. βœ— Cutting chenille yarn roughly can produce loose fibers and fraying; cut carefully and expect some loose fibers, trimming gently and finishing edges with hot glue sparingly if needed.

Giant Sloth Amigurumi Pattern

Make your own cuddly Giant Sloth with this friendly amigurumi pattern designed for jumbo chenille yarn. Youll create a pillow-like sloth head/body with sweet felt facial features and three-toed claws. The pattern includes stitch templates, clear round-by-round instructions, and assembly guidance so you can finish a charming companion. Perfect for gifting or cozy home decor.

Intermediate 5-7 Hours

Materials Needed for Giant Sloth Amigurumi Pattern

β€” Main Fabric

  • 01
    Jumbo size 7 chenille yarn - Cream for face (approximately 23 g)
  • 02
    Jumbo size 7 chenille yarn - Taupe or Marshmallow for body (approximately 386 g; a little over 1 skein may be needed for main body color with some brands)
  • 03
    Fiber fill stuffing - 680 g (for plush, pillow-like finish)
  • 04
    Brown/tan/black felt for facial patches and nose (small pieces)
  • 05
    Dark brown medium worsted yarn - long strand for nostril details/other facial features
  • 06
    Long strand of white blanket yarn for the three claws

β€” Tools Required

  • 01
    10 mm crochet hook
  • 02
    Jumbo yarn needle for sewing
  • 03
    Scissors
  • 04
    Stitch markers
  • 05
    Hot glue (optional, use sparingly)
  • 06
    Sewing pins for positioning parts
  • 07
    Polyester fiber fill stuffing (680 g)
  • 08
    20 mm safety eyes (2)
  • 09
    Printer to print eye patch templates (pg 5)

Progress Tracker

0% Complete

β€” Head/Body :

Round 1 :

Ch 13. Sc into the second st from the hook. Sc into the next 10 sts. Make 3 sc into the next st. Continue onto the underside of the chain. Sc into the next 10 sts. Inc into the next st and slst into the first st of the rnd. [26]

Info :

*The new rnd starts after the slst.

Round 2 :

(10 sc, inc into the next 3 sts) x2. [32]

Round 3 :

(10 sc, [sc into the next st, inc] x3) x2 [38]

Round 4 :

(10 sc, [2 sc, inc] x3) x2 [44]

Round 5 :

(10 sc, [3 sc, inc] x3) x2 [50]

Info :

Change to your main color yarn.

Round 6 :

blo - (10 sc, [4 sc, inc] x3) x2 [56]

Round 7-23 :

(17 rnds total): sc all around [56]

Info :

Insert a stitch marker and remove your hook. We will now create the facial features before closing up the body.

β€” Facial Features :

Eyes :

Cut out two pieces of brown or tan felt for the dark part of the eyes using the template on pg 5. Then, cut a small slit in both to insert the safety eyes into. Glue (sewing is optional) the felt part onto the face and secure the eyes in place.

Nose :

Cut an oval out of brown felt ~2 in. x 1 in. and create the nostrils out of a darker felt. Glue (or sew) the nose in the middle of the starting ch, keeping it aligned with the eyes for a cuter look.

Mouth :

Use your yarn needle and create a mouth right below the nose. Secure the yarn tails in a knot on the wrong side of the body. [img 2]

Hair tuft (for Sylvia) :

(ch 6, slst into the first st) x3. Fasten off and sew onto the head where the body color starts. Secure the yarn tails in a knot on the inside of the body. [img 2]

β€” Head/Body (cont.) :

Info :

Here, we will begin decreasing. Lay the body flat against a table to see where the start of the rnd should align with where rnd 6 started. Undo or add a few sts to achieve this.

Round 24 :

(10 sc, [4 sc, dec] x3) x2 [50]

Round 25 :

(10 sc, [3 sc, dec] x3) x2 [44]

Round 26 :

(10 sc, [2 sc, dec] x3) x2 [38]

Round 27 :

(10 sc, [sc into the next st, dec] x3) x2 [32]

Round 28 :

(10 sc, dec into the next 3 sts) x2. [26]

Info :

Fasten off and leave a long tail for sewing. Stuff well.

Info :

Pinching the two longer edges together, whip stitch the hole closed. Bury the excess yarn tail.

β€” Arms/Legs :

Info :

(make four in body color)

Round 1 :

Ch 5. Sc into the second ch from the hook. Sc into the next 2 sts. Make 3 sc into the next st. Continue onto the underside of the chain. Sc into the next 2 sts. Inc into the next st and slst into the first st of the rnd. [10]

Round 2 :

sc all around [10]

Round 3 :

(2 sc, inc into the next 3 sts) x2 [16]

Round 4-5 :

sc all around [16]

Round 6 :

(6 sc, dec) x2 [14]

Round 7-9 :

(3 rnds total): sc all around [14]

Info :

Fasten off and leave a long tail for sewing.

β€” Assembly :

Limbs :

Cut a long strand of white blanket yarn. Using your yarn needle, weave through each limb to create three long claws. Secure the yarn tails in a knot. Lightly stuff.

Info :

Flatten each arm and then use pins to mark where to sew so that the tips meet in the middle.

Info :

Sew the arms 2 rnds below the cream part of the face. Sew the legs 4 rnds below the arms.

Info :

Weave one of the arm's remaining tail through to the hand and sew the two hands together. [img 3]

Assembly Instructions

  • Weave three long claws into each limb using a long strand of white blanket yarn, secure the tails in a knot, and lightly stuff the limb before finishing.
  • Flatten each arm and use pins to mark where the arm tips meet, then whipstitch or sew the tips together for a neat closure.
  • Sew the arms in place 2 rounds below the cream face area so they sit evenly on either side of the body.
  • Position and sew the legs 4 rounds below the arms to create a stable base for the sloth to rest on.
  • Pin facial felt patches in place before gluing or sewing, then insert 20 mm safety eyes through the felt slits and secure them from the inside.

Important Notes

  • πŸ’‘Use stitch markers to keep track of round starts because chenille yarn can hide stitches easily.
  • πŸ’‘Stuff gradually and fluff filling as you go to avoid lumps and to achieve an even, pillow-like shape.
  • πŸ’‘Pin all parts in place before sewing to ensure symmetry and correct placement of arms and legs.
  • πŸ’‘When using hot glue, apply in a zigzag motion and avoid globbing; less is more to keep a clean finish.

This Giant Sloth pattern is made to become a beloved, cuddly companion in your home. Whether you make Sylvia, Sylvester, or both, each one is a cozy, huggable cushion full of character. The jumbo chenille texture makes them extra soft and perfect for snuggling. 🧢✨

You ask,

we answer.

FAQs

What size will the finished piece be?

The finished sloth measures approximately 14 in. x 13 in. when using the recommended jumbo chenille yarn and 10 mm hook.

Can I use different yarn weights for this pattern?

You can try different yarn weights, but the designer notes jumbo patterns do not transfer well to thinner yarns and the dimensions will be off.

Do I need prior crochet experience for this pattern?

This pattern is rated intermediate due to working in an oval spiral and managing decreases to keep the shape aligned; basic amigurumi experience is recommended.

How long does this project typically take to complete?

Most makers complete the sloth in about 5-7 hours, though time may vary depending on experience and assembly speed.