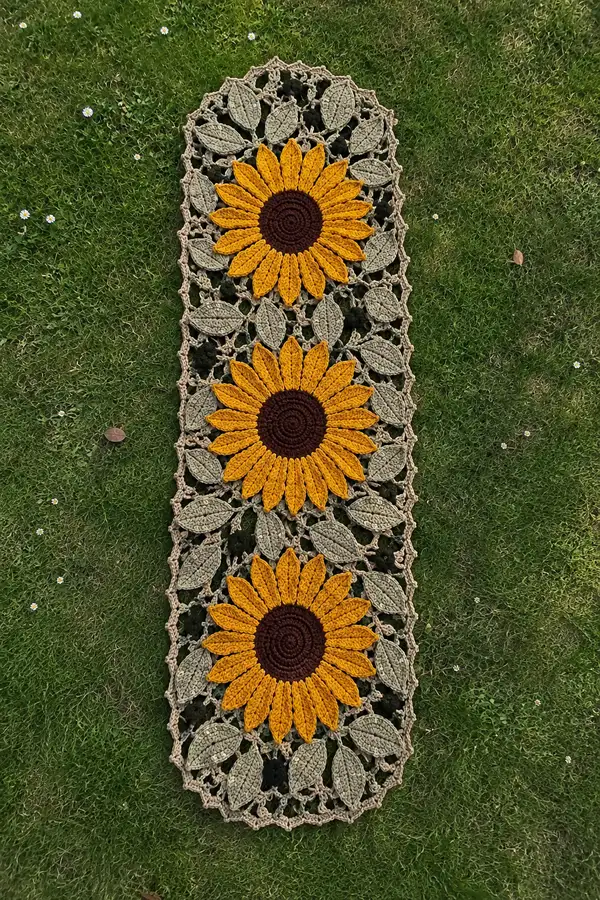
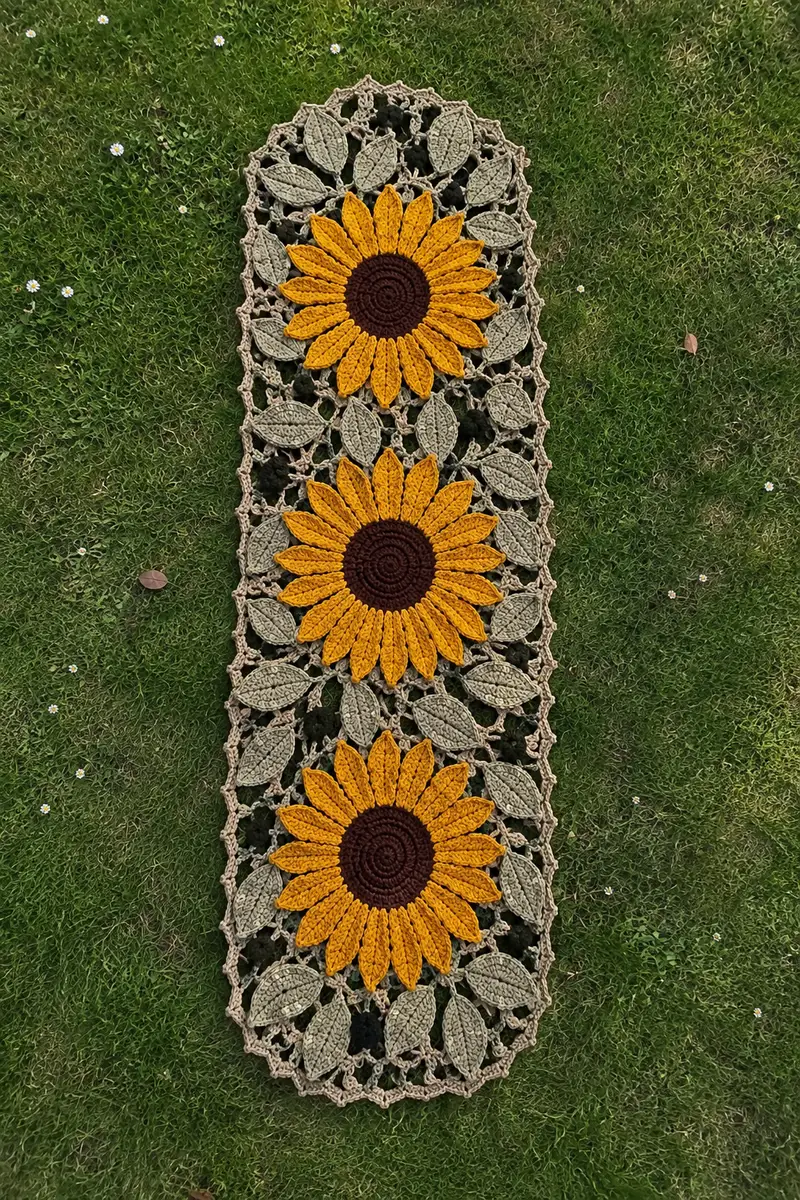
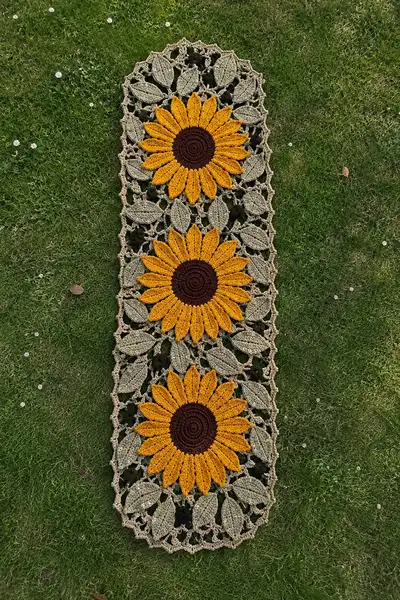
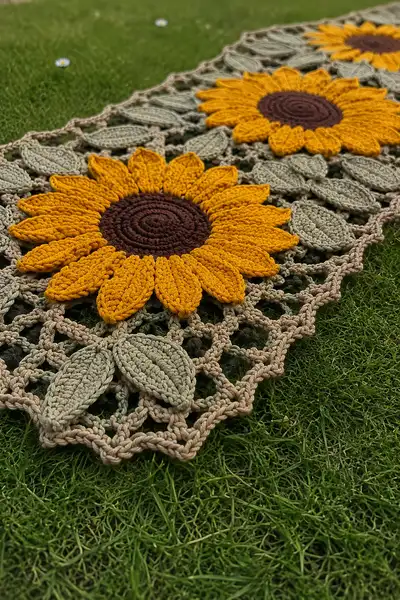
Create a stunning harvest-inspired table runner featuring three oversized sunflowers surrounded by sculpted olive-green leaves and an open lacy mesh. This runner uses textured petals, raised leaf motifs, and a decorative scalloped border for a handcrafted seasonal centerpiece. Worked in modular motifs and joined with a chain-mesh, the finished piece is eye-catching on a dining table, sideboard, or bench.
Progress Tracker
0% Complete
— Overview & Construction Notes :
Info :
This runner is made modularly: 3 sunflower motifs, multiple leaf motifs, small filler bobbles, chain-lace connector panels, and a scalloped border. Make all motifs first, block them flat, then join into columns and attach edge. Stitches are given for a single sunflower motif and leaf; repeat counts are provided to create the full runner. Use a consistent gauge to make motifs match in size; a sample center should be 12-14 cm across for best proportion.
— Sunflower Center (Make 3 identical centers) :
Round 1 :
mr, 6 sc into ring (6)
Round 3 :
(1 sc, inc) x 6 (18)
Round 4 :
(2 sc, inc) x 6 (24)
Round 5 :
(3 sc, inc) x 6 (30)
Round 6 :
(4 sc, inc) x 6 (36)
Round 7 :
(5 sc, inc) x 6 (42)
Round 8 :
1 sc in each st around (42)
Info :
Use dark brown yarn. The center is worked in continuous rounds to produce a neat spiral; place a stitch marker at the start of each round and move it each round to track progress. If you prefer visible seams, join rounds with sl st.
Round 9 :
1 sc in each st around (42)
Round 10 :
1 sc in each st around (42)
Info :
If you want a slightly smaller center, stop at Round 8; for more robust centers continue to Round 12 by adding two more even rounds. Fasten off, weave in ends. Press or steam gently to set.
— Petal Units (Make 16 petals per sunflower; 48 petals total) :
Info :
Petals are worked directly onto a second round of stitches around the center using golden-yellow yarn. You will create 16 evenly spaced petal anchoring points on the center's Round 8 or Round 10 (whichever you used). For accuracy, stitch markers placed every 2-3 stitches around the center will mark petal anchors.
Petal Base (Round A) :
Join yellow yarn with sl st to top of an anchor stitch on the chosen round, ch1 (does not count), *sc in same st, ch3, sc in next anchor (creates a small loop to start petal).* Repeat until you have 16 loops (use anchor every 2-3 sts) and end with sl st to first sc to create a ring of loops.
Petal Row 1 :
Work into each loop: (sc, hdc, 3 dc, hdc, sc) all into the loop to form the base of each petal. This creates a fan-shaped petal. Repeat for 16 petals. (Petal count: 16)
Info :
Work the same fan for each petal. Keep your tension consistent so all petals match in size. Use stitch markers to mark petals 1 and 9 so you can check symmetry when joining later.
Petal Row 2 :
Turn petal so it curves away from the center slightly: in each petal work along the outside edge (starting at base point): sc in next st, (hdc, 2 dc, hdc) in center of petal, sc in next st. This adds height and curvature to the petals. Repeat for all 16 petals.
Petal Row 3 :
For extra definition work BLO on this round: join at base of any petal, ch1, *5 sc in BLO across the edge of petal, sl st into next base to move to next petal.* Repeat for all petals. This ridge on the back protects petal shape and shows as a neat outline on the underside.
Info :
After completing petals, block each sunflower flat, pinning the petals gently outwards to a smooth round flower. If any petals seem tall, steam lightly and press flat. Fasten off and weave ends securely through the base of the center.
— Petal Texture Variation (Optional) :
Info :
For the raised chevron lines visible in the photo, work front post half double crochet (FPHdc) rows across the petal body before the final edging. Insert hook under the post of the stitch where you want a raised ridge, yarn over and complete hdc. Repeat to create veins. Add these on Petal Row 2 before the BLO ridge for best look.
— Leaf Motif (Make 24-28 leaves to match layout) :
Round 1 :
mr, ch2 (counts as hdc), 8 hdc into ring, join with sl st to top of ch2 (8)
Round 2 :
ch1, 2 hdc in each st around (16)
Round 3 :
(1 hdc, 2 hdc in next st) x 8 (24)
Info :
Leaves are worked flat in rows after Round 3. From the top center of this round you will create an elongated leaf shape by working along one side and returning along the other.
Round 4 (Leaf Shaping Start) :
Working in FLO of round 3 only, ch1, sc 6 along the top half of the circle to form the leaf tip and then continue around the outside edge: (hdc in next 5 sts, dc in next 4 sts, tr in next 3 sts) to lengthen the tip, then dec back: (tr dec over next 3 sts, dc in next 4 sts, hdc in next 5 sts) ending with sc to join to the base. Fasten off. (Leaf approximate length after shaping: 9-11 cm depending on yarn)
Round 5 :
Using olive green, join at the base and work a center ridge: ch1, sc in base, *ch3, sl st into center column of leaf to create a vein, sc in next base st* repeat across to create 5-7 vein sl st placements. Fasten off.
Info :
Alternate leaf direction (mirror image) every other leaf so when motifs are joined the leaves alternate orientation. Block leaves with pins to create a slightly cupped shape that lifts off the mesh for realistic texture.
Leaf Edge Finish :
Optional: Use tan/beige to work a single round of sc around the leaf edge to match the runner mesh color. Work evenly: 1 sc per stitch, place 3 sc in the tip to round and 2 sc in curves to prevent puckering. Weave ends and block.
— Small Filler Clusters (Make 12-16) :
Round 1 :
mr, 6 sc into ring, join (6)
Round 2 :
*ch2, 3 dc in same st, ch2, sl st in next st* repeat around to form little pompom clusters. Fasten off. These will be stitched into open mesh holes as dark moss accents like in the photo.
Info :
Filler clusters add depth and a darker contrast that sits behind petals and leaves. Make as many as needed to fill visually dark pockets in your layout.
— Mesh Connector Panels (Make 2 long panels to connect the 3 sunflowers) :
Panel Foundation Row 1 :
With tan/beige, ch 56 (or length determined by your center spacing), turn. This will create the length between adjacent sunflower centers; adjust chain to space centers at same distance as photo (approx 18-20 cm center-to-center).
Panel Row 2 :
sc in 2nd ch from hook and across (55 sc). Turn. This creates a firm foundation for attaching leaves.
Panel Row 3 :
ch4 (counts as tr+ch1), *skip 1, tr in next, ch1* across to create open mesh of tall arches. End with tr in last st, ch1, turn.
Panel Row 4 :
sl st into first arch ch1 space, ch3, 3 dc in same arch, sk next arch, sc in next arch, *ch5, sc in next arch* repeat across to create lacy bridges and spaces for leaf attachment. Fasten off and block flat.
Info :
These panels are worked to create holes wide enough to slip leaf bases under or to whip-stitch leaves onto. If working a narrower runner, shorten foundation chain by multiples of 8 to keep arch pattern consistent.
— Joining Motifs into Runner Layout :
Info :
Layout sequence for runner from top to bottom: scalloped end base, mesh panel, sunflower motif, mesh panel, sunflower motif, mesh panel, sunflower motif, mesh panel, scalloped end base. Pin all motifs in position before joining.
Join Method A (Slip-Stitch Join into Mesh) :
Place a sunflower on the mesh panel so that petals straddle arches. From wrong side, insert hook through mesh arch and through the base stitch of petal, sl st joining petal base to mesh. Work around the 16 petal bases making sure each petal is uniformly placed. After joining the sunflower, position 3-4 leaves around its perimeter and sew leaves through their base into the mesh using invisible whip stitch for a raised look. Add filler clusters to inner gaps.
Info :
For a cleaner look use a yarn color matching the mesh to stitch joins invisibly. Sew slowly and securely to avoid petals flaring away from mesh during use.
— Repeat Sunflower Construction for 3 Motifs :
Info :
Make 3 complete sunflower motifs and block them. Make the mesh panels and number them left to right. Assemble starting with a mesh panel at the top, then the first sunflower, then joining panel, second sunflower, panel, third sunflower, panel, and scalloped end. This modular approach allows you to customize spacing and runner length.
— Decorative Scalloped End (Make 2 ends) :
Round 1 :
Join tan yarn at mesh panel end, ch1, evenly sc along the final row edge to create a firm base edge. Count to keep stitch multiples of 8 for scallops.
Round 2 :
*ch3, skip 2 sts, sc in next, repeat across to form small arches; end with sl st to first sc.*
Round 3 :
Into each arch work: (sc, hdc, 3 dc, hdc, sc) to form a scallop. Repeat across. Fasten off. Mirror for the opposite end.
Info :
For a pointed end like the pictured rounded-oval finish, shape the foundation length into a half-circle before scallop rounds and increase scallops at the center point to keep the curve smooth. Block to hold shape.
— Border & Final Edge Rounds :
Round 1 :
With tan yarn join at any mesh join point, ch1, sc evenly around entire runner edge including scallop edges and petal tips (work 1 sc per obvious ridge or 2 sc in deeper gaps to keep flat). Keep counts even along sides for symmetry.
Round 2 :
Work a picot trim to give final edge lift: *sc in next 3 sts, ch3, sl st into last ch to create picot, sc in next 3 sts.* Repeat to end around. Fasten off and weave in ends thoroughly.
Info :
Use blocking wires or pins to curve the final edge into a smooth oval. Mist with steam and allow to dry fully to ensure lasting shape. If the runner will be laundered occasionally, stitch lines more securely and avoid delicate picots in high-traffic areas.
— Assembly, Finishing & Tweaks :
Info :
After joining sunflowers and leaves, check for any loose loops. Reinforce attachment points at the base of petals with two passes of yarn if the runner will be used on a heavily handled table. Consider sewing a lightweight linen backing if you want to protect delicate stitches from rough tabletops.
Edge Reinforcement :
For durability, after finishing the picot edge, take a final round of sc using a slightly smaller hook (3.5mm) to tighten the border and prevent stretching when washed. Weave ends at least 8 cm into the fabric before trimming.
Info :
Label parts as you go (Center A, Petals Set 1, Leaves Set A) so when assembling you can quickly position matching sets and avoid mistakes. Photograph the layout before sewing to use as a visual guide.
— Gauge & Sizing Notes :
Info :
Gauge: A completed sunflower motif (center + petals) should be approximately 28-30 cm across when worked with recommended yarn and hook. If your motif measures smaller or larger, adjust hook size by 0.5 mm and re-check. The sample runner as pictured measures roughly 120-140 cm in length and 28-32 cm wide depending on blocking and spacing.
Care Instructions :
Hand wash gently or machine wash on delicate inside a laundry bag. Reshape while damp and air dry flat. Avoid tumble drying to preserve shape and texture.
This sunflower table runner is a joyful combination of sculpted petals, textured leaves, and airy crochet lace — perfect for bringing autumn warmth to your home! Each modular motif comes together into an elegant, tactile centerpiece full of seasonal charm. Working this project is rewarding and meditative; every petal and leaf adds character until you have a showstopping runner. 🧶🌻 Give it as a gift or keep it as a proud handmade statement for your table. Happy stitching and enjoy the harvest vibes! 🍂