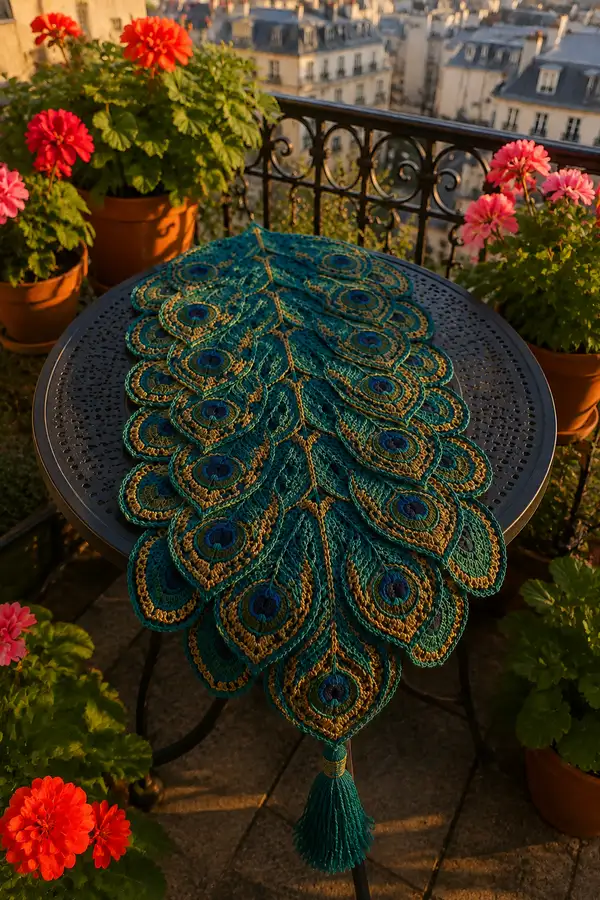
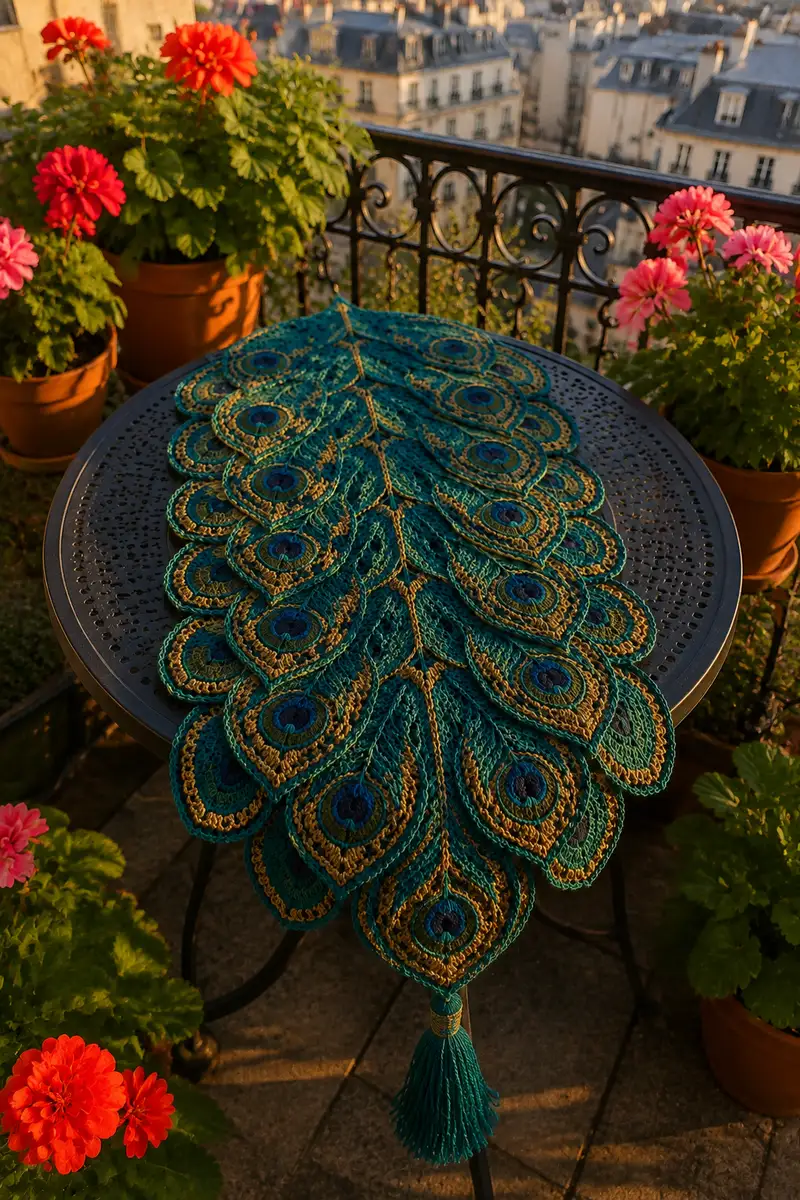
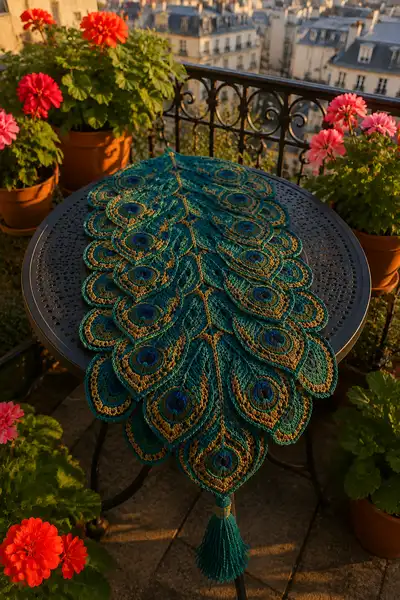
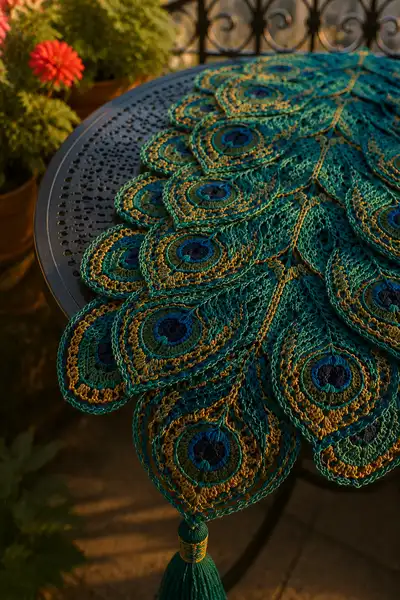
A dramatic layered table runner inspired by peacock plumage, worked in teal, deep blue, emerald and metallic gold for a luxurious, vintage look. Features stacked teardrop ‘feather’ motifs with lacy mesh connectors and a decorative tassel at each tip. This pattern teaches motif construction, color layering, delicate lace joins and edging to create an elegant centerpiece that drapes beautifully down a dining table or console.
Progress Tracker
0% Complete
— Notes & Gauge :
Info :
Gauge is flexible for this decorative runner; a single feather motif should measure approximately 10.5-12cm across at the widest point when using 3.5mm hook and fingering/light DK yarn. Work a sample motif and block to match photo proportions before committing to full runner. To make the runner longer or shorter, add or remove rows of feather motifs. Use metallic thread held together with main yarn when an accented gold line is specified for best gilded effect.
— Feather Motif (Make 20–24 motifs depending on desired length) :
Info :
Each individual feather is crocheted from the center 'eye' outward in concentric rounds, switching colors for contrast. The motif below is given as a 32-round motif to create the layered look seen in the photo. Make as many motifs as required; photos show 20 motifs arranged in overlapping rows. Block each motif flat before joining.
Round 1 :
mr, ch 1, 6 sc in mr, sl st to first sc to join (6)
Round 2 :
Change to NAVY. 2 sc in each st around (12)
Round 3 :
(1 sc, inc) x 6 (18)
Round 4 :
1 sc in each st (18)
Info :
Place a removable marker at the first stitch of this round to keep track as you will start working cluster rounds next. The small navy circle is the central 'eye'.
Round 5 :
Change to DEEP BLUE. ch1, (sc in next 2 sts, 2 dc in next st) x 6 (24)
Round 6 :
1 sc in each st around (24)
Round 7 :
Change to EMERALD. (1 sc, inc) x 12 (36)
Round 8 :
1 sc in each st (36)
Round 9 :
Replace yarn with TEAL (main color) held together with metallic gold thread (hold both strands together for this round). ch1, (sc in next 4 sts, inc) x 6 (42)
Info :
Holding metallic gold with teal gives a subtle gilded line in this expansion round. If you prefer less metallic shine, work Teal alone or use metallic only on later outlining rounds.
Round 10 :
1 sc in each st (42)
Round 11 :
Switch to TEAL only. (2 sc, inc) x 14 (56)
Round 12 :
1 sc in each st (56)
Round 13 :
ch3 (counts as dc), dc in next 3 sts, skip 2 sts, dc5 in next st (shell), sk 2, dc in next 4, ch2, dc in next 4, sk 2, dc5 in next st (shell), repeat across to create 8 shell placements total and finish to marker. This shapes the beginning of the teardrop lobes (56)
Info :
Work Round 13 in FLO (front loops only) if you prefer a subtle ridge for later outlining. This round begins the lacy shaping that will pull the round into a teardrop rather than a perfect circle.
Round 14 :
1 sc in each st and in each dc around, placing 1 sc in the top of each shell center and 2 sc in each chain-2 space to maintain shape (adjust count) (approx 80)
Round 15 :
Switch to METALLIC GOLD only. ch1, sc in each st around working in BLO for a delicate ridge (80)
Round 16 :
Change back to TEAL. ch1, (sc in next 6 sts, inc) x 10 (90)
Round 17 :
1 sc in each st (90)
Info :
The stitch counts around 14-17 are approximate depending on placement of shells and whether you worked in BLO. The aim is to increase smoothly to shape the teardrop; if you have extra or fewer stitches, even them out in the next round with evenly spaced sc before the shaping rows begin.
Round 18 :
Shape teardrop point — work around back half only to create a point. From marker, sc in next 36 sts (across base), then ch10 (length of point), sl st to next base stitch, continue sc across remaining 54 sts (this forms a laced bridge and elongated point)
Round 19 :
Work along ch10 point: From base, sc evenly along chain length to tip (approx 10 sc), then sc back along opposite side of chain to base, join with sc in first sc after base to close loop. Continue 1 sc in each round stitch around motif to stabilize (approx 100)
Round 20 :
Decorative heightening: ch4 (counts as tr + ch1), (tr in next st, ch1) repeat around entire motif placing a ch1 space between tall stitches to create lacy mesh. Where the point meets the body, work (tr, ch2, tr) to emphasize the tip (approx 100)
Info :
Use this lacy round to define the feather shape; adjust tension to keep the mesh open but not floppy. Blocking will open this lace further.
Round 21 :
Switch to METALLIC GOLD held with TEAL for highlight. ch1, sc in each st placing 2 sc in each ch1 space created last round and 3 sc in (tr, ch2, tr) space to create a pronounced golden rim around the tip (count will vary but expect ~120)
Round 22 :
Edge shaping: ch2, hdc in next 2 sts, sc in next 3, picot (ch3, sl st in 3rd ch from hook) in every 12th stitch to create subtle points along the outer rim (continue around) (approx 120)
Round 23 :
Repeat sc round in TEAL single crochet around to tidy the edge; if necessary add sl st joins to shape rows evenly (approx 120)
Info :
Add a narrower metallic outline now with a small hook if you want highly defined gold lines between scallops. This is done by slip-stitching a fine metallic thread into select spaces only—work it along shell tops and the center ridge only for a gilded look.
Round 24 :
Decorative ridge: Work BLO sc around the entire motif to create a textured border that will sit nicely when motifs overlap (120)
Round 25 :
Form inner eye ridge: With EMERALD, work a chain loop series where you place ch6 loops into select inner stitches (8 loops evenly spaced) and secure with sc between; this forms the layered eye detail (approx 120)
Round 26 :
Stitch reinforcement: sc in each st around to secure loops and smooth transitions (120)
Round 27 :
Highlight piping: With metallic gold held with teal, work (sl st, ch1, sl st) around selected ridges to make gold piping lines that read when the motif is layered (120)
Round 28 :
Final outer finish: 1 sc in each st, finishing with 6 evenly spaced picots for a delicate scalloped outer edge. Fasten off leaving 20-25cm tail for weaving when joining (120)
Info :
Fasten off and weave tail through foundation of the motif toward the point so joins are sewn invisibly. Block each motif flat, pinning the tip to create a sharp teardrop point and steam or spray damp to set shape. Allow to dry fully before assembly.
— Lace Connector 'Leaf' (Make connector units to join feather motifs) :
Info :
Connectors are small diamond-shaped mesh pieces that run between feathers to create the continuous lace runner. Each connector is worked flat and then joined with slip-stitch seams into the motif edges. Make enough to link motifs in the same layout as the photos; the connector is 1 motif wide and length depends on layout.
Round 1 :
ch 12, sl st to form ring, ch1
Round 2 :
sc in ring 12 (12)
Round 3 :
(ch4, sk 1, sc) repeat across to create elongated diamond loops (12 loops)
Round 4 :
1 sc in each loop base, making 2 sc in the center ch-4 spaces to widen the middle (approx 18)
Round 5 :
ch3, dc in next st, ch2, dc in next, ch3 around to shape diamond points; finish with sc around to tidy (approx 18)
Info :
Use TEAL for the connector and hold metallic gold in the final single crochet round to echo the feather outlines. These connectors should be small and jiggle-free; use a slightly smaller hook (3.0mm) if your lace seems too loose.
— Central Spine (Make 1 long lace spine to anchor motifs) :
Round 1 :
ch to length required for your runner (measure table length minus one feather length at each end), join with sl st to form chain ring if making a loop spine or leave as foundation for rows if working single long chain. For the example runner, ch 150 to create a 120cm spine then turn.
Round 2 :
Work a mesh row: ch3 (counts as dc), *sk2, dc in next, ch2, dc in next* repeat across to end to make airy lace spine
Round 3 :
1 sc in each dc and 2 sc in each ch2 space to stabilize (approx 50-60 depending on starting chain)
Round 4 :
Decorative ridge: With metallic gold, sl st along the center ridge (use a small hook to keep metallic neat)
Info :
The spine will be used as the central anchor: motifs will be sewn or slip-stitched along the edges of the spine so that the runner fans out. Position motifs first dry on the spine and pin them to confirm placement before sewing.
— Assembly & Joining Motifs :
Info :
Arrange motifs over the central spine in overlapping rows following the photo: a top central column of motifs with two staggered columns at either side creating the layered feather look. Overlap outer motifs so the metallic outlines sit above the lace edges beneath. Pin in place and join with mattress stitch or slip-stitch join using the 20–25cm tails left earlier.
Round 1 Join :
With TEAL and yarn needle sew motif tip to spine every 10–12cm depending on motif size using a ladder stitch: insert needle through tail end foundation then through spine stitch, pull gently and repeat to secure the tip (no stitch count)
Round 2 Join :
Join sides: where two motif sides overlap, use slip-stitch join along BLO ridge: insert hook through both motif BLO ridges and work sl st with matching teal yarn for an invisible seam (work evenly across overlap)
Info :
When joining, keep tension loose enough to allow slight drape. Avoid pulling motifs flat; they should nest slightly so the runner retains its sculptural layered look. Pin and check symmetry frequently.
— Edging & Final Border :
Round 1 :
With TEAL, sc evenly around entire runner perimeter where motifs protrude, placing 3 sc in inner concave spaces to reduce ruffling and 1 sc per outer edge stitch (approx count varies; work evenly)
Round 2 :
With METALLIC GOLD held with TEAL, work (ch3, sc in next 2 sts) repeat around to create small scallop ridges. Where you want peaks, work (sc, ch2, sc) to form decorative points.
Round 3 :
Final clean-up round: sc in each st BLO to create a subtle raised border; finish with picot every 8th stitch to echo feather edging. Fasten off and weave in all ends securely.
Info :
Edge rounds will unify the motifs visually; experiment with metallic placement—if too shiny, reduce metallic rounds to only the center spine and outermost scallops.
— Tassel (Make 2) :
Round 1 :
Create tassel body: wind teal worsted yarn around a 6–7cm card approximately 80–100 times depending on desired fullness. Tie head with gold-wrapped thread and trim at bottom.
Round 2 :
Cover tassel head: With teal yarn, work around top wrapping tightly then stitch a small decorative gold band made by wrapping metallic thread and securing with tiny stitches. Attach tassel to runner tip by sewing through wrapped head to the motif point (no stitch count).
Info :
Securely sew tassel head through multiple stitches in the motif point and tie an internal knot. Add a small dab of fabric glue if tassel will be handled heavily. Trim tassel ends evenly and steam lightly if fibers look uneven.
— Blocking & Finishing :
Info :
Block each motif and the assembled runner to shape: pin motifs with points sharp and lacy mesh open. Use steam or wet-block method appropriate for yarn fiber. Allow to dry fully, then unpin and press lightly if needed. Reweave any visible ends and trim.
Round 1 :
Final check: Inspect joins for gaps, reinforce with extra whip stitches through motif foundations and the spine where stress may occur (no stitch count)
Info :
If the runner needs extra stability for heavy table decor, add a lightweight interfacing or narrow linen strip sewn along the underside of the spine to support weight while keeping appearance delicate on top.
Finishing this gilded peacock feather runner is a joy — each layered motif locks into a dramatic, luxurious cascade of color and texture. The metallic highlights catch the light just right while the lacy mesh keeps the overall look delicate and refined. Whether draped down a dining table or styled on a console, it makes a stunning handmade statement piece. 🧶💛 Enjoy the meditative rhythm of motif-making and the satisfying reveal at the end — your table will thank you! ✨