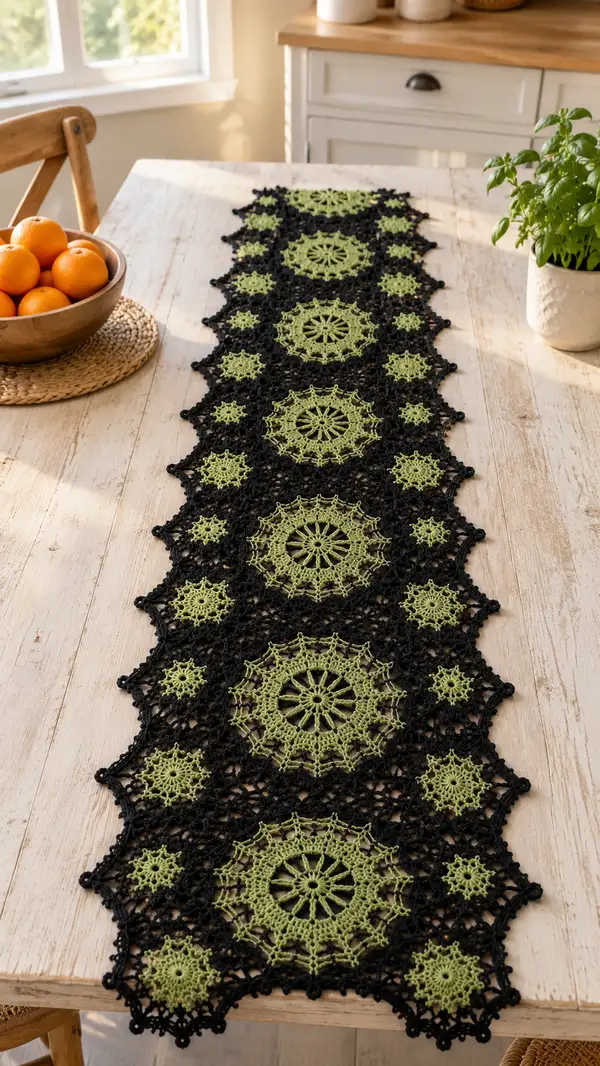
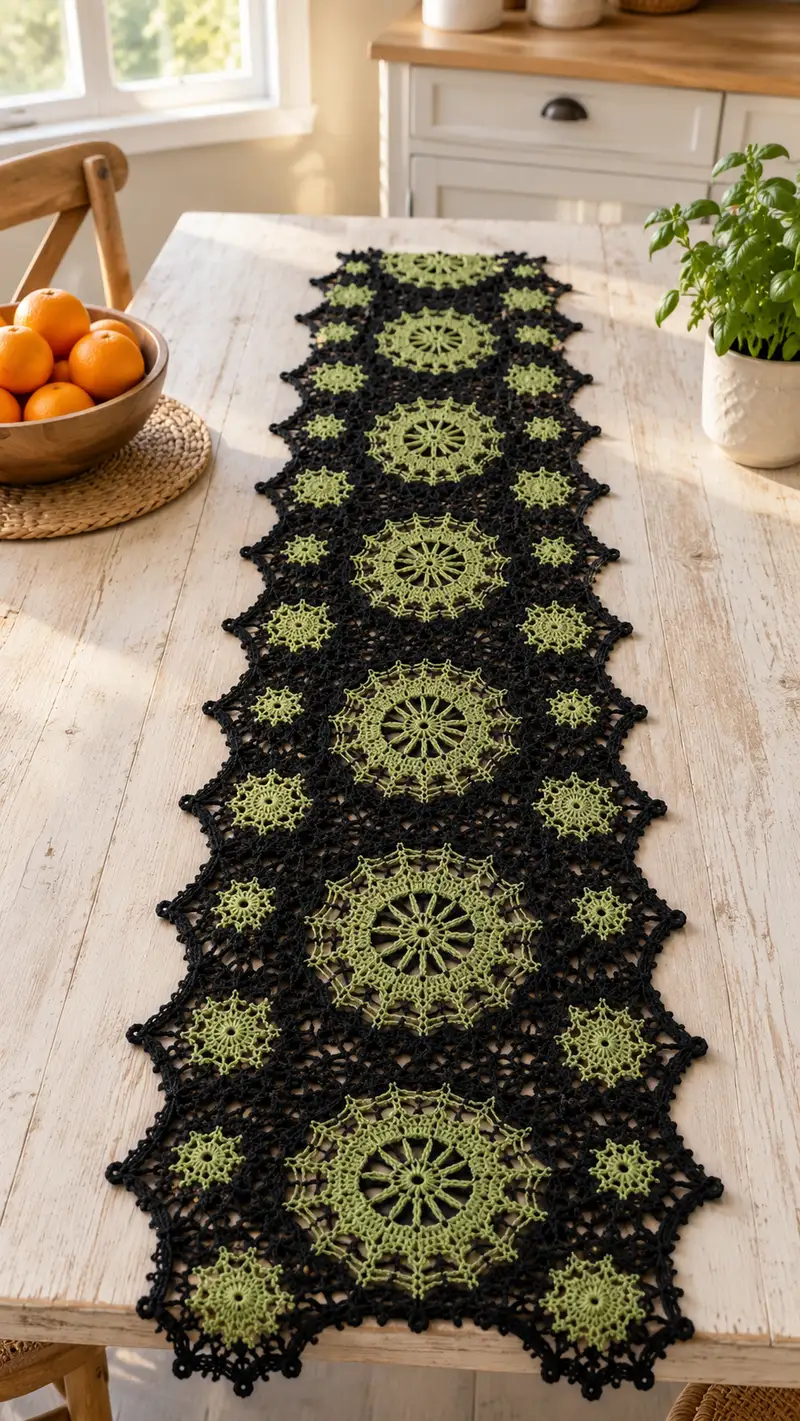
A striking lace table runner that pairs soft olive-green medallions with a dramatic black lace mesh for contrast. The design features repeating large circular medallions, smaller starburst accents, and a scalloped pointed edge. Worked in lightweight cotton, the runner creates an elegant, airy centerpiece for dining tables or sideboards. Suitable for those comfortable with lace techniques and joining motifs, this pattern includes thorough round-by-round instructions and plenty of tips for blocking and finishing.
Progress Tracker
0% Complete
— Materials & Gauge :
Info :
This runner is designed for size 10 crochet cotton or a fine fingering-weight yarn. Gauge is not strictly critical for the lace look, but a consistent gauge keeps motif sizes uniform. With size 10 thread and a 2.0mm hook, each large medallion finished at approximately 14 cm (5.5 inches) across; adjust hook up or down to match your thread and desired openness of lace.
— Construction Overview :
Info :
The runner is constructed from three repeating element types: Large Medallions (LM), Small Star Motifs (SM), and a connecting Black Lace Mesh (CLM). You will make 5 large medallions and 10 small motifs in the photographed layout, join them with rounds of black mesh as you go, then finish with an outer scallop edging. The pattern gives complete rounds for each element and a separate Joining & Mesh section to convert finished motifs into the runner.
— Large Medallion (Make 5) :
Info :
Each large medallion is worked in Accent Green (AC). Work in joined rounds; do not turn. The medallion is built on a 12-point radial repeat to match the photographed spokes.
Round 1 :
Make a magic ring; ch 3 (counts as dc), work 11 dc into ring, sl st to top of ch3 to join (12)
Round 2 :
Ch 5, sl st into next dc — rep 12 times to form 12 chain-5 loops around (12 ch-5 loops)
Round 3 :
Into each ch-5 loop work: (sc, hdc, 3 dc, hdc, sc) — rep 12 times (84 total stitches around these loops; treat as 12 clusters)
Round 4 :
Ch 7, sl st into center top of next cluster — rep 12 times to create 12 chain-7 loops (12 ch-7 loops)
Round 5 :
Into each ch-7 loop work: (sc, 5 dc, sc) — rep 12 times (84 sts)
Round 6 :
Ch 3 (counts as dc), *sk next 3 dc, dc in sc, ch 3, dc in same sc, sk next 3 dc, dc in next sc; rep from * around, sl st to top of ch3 — Forms 12 open 'spoke' arches (12 arches)
Round 7 :
In each arch: (sc, ch3, 3 tr, ch3, sc) — rep 12 times (creates tall lacy petals; count = 1+1+3+1+1=7 units per arch; treat as 84 stitches)
Info :
Check that the medallion lies flat before continuing. If it ruffles, use a hook slightly larger next round to relax tension; if it cups, use smaller hook to tighten.
Round 8 :
Working in back loops of previous round petals only: 1 sc in each st BLO around to create a slight ridge (84)
Round 9 :
Ch 5, sl st into the center of next petal (the top of 3 tr) — rep 12 times (12 ch-5 loops)
Round 10 :
Into each ch-5 loop: (sc, hdc, 5 dc, hdc, sc) — rep 12 times (108 sts)
Round 11 :
Ch 4, *picot (ch3, sl st in top of last st), ch 1, sl st in next 9th dc center of the large cluster; rep from * around, finishing with sl st to join. This creates little joining points that will later be used for attaching the black mesh
Round 12 :
Working behind the picot row, ch 6, sl st into picot base; rep 12 times to form 12 ch-6 loops placed between the outer spokes
Round 13 :
Into each ch-6 loop: (sc, 7 dc, sc) — rep 12 times (108 sts)
Round 14 :
Ch 2, *1 hdc in each of next 9 dc, ch 3, skip the sc, 1 hdc in next sc; rep from * around creating a chain-3 connection space between each section (108 hdc + 12 ch-3 spaces)
Info :
At this point the medallion measures roughly 14 cm across. Make a small sample medallion to check size before making all five. If needed, adjust by working one additional round of larger dc clusters for more diameter.
Round 15 :
Ch 4, *(dc, ch2, dc) in the ch-3 space from previous round (forming small shells), sc in the body between shells; rep around (12 shells; total stitch count will vary but work evenly)
Round 16 :
Work 1 sc around every stitch and through each shell apex to create a stable round for joining later (approx 144 sc — this is approximate because shells create more points; keep even tension)
Round 17 :
Ch 5, sl st into every 3rd sc to create elongated open mesh loops around the medallion; rep 12 times to form 12 elongated loops
Round 18 :
Into each elongated loop: (sc, hdc, 3 dc, hdc, sc) — rep 12 times (84 units; similar to earlier cluster count)
Round 19 :
Ch 7, sl st to join forming the final outer chain loops that will be joined into the black lace mesh during assembly (12 ch-7 loops)
Info :
Fasten off AC leaving a 20–25 cm tail if you plan to use it to assist in joining the medallions later. We will attach the black mesh around the last rounds of medallions to create a consistent ground.
— Small Star Motif (Make 10) :
Info :
Small star motifs (SM) are worked in AC as compact 12-point starbursts to fill the negative space between the large medallions. These are much smaller and are joined into the black mesh similarly to the large medallions.
Round 1 :
Make a magic ring; ch 2 (counts as hdc), 11 hdc into ring, sl st to top of ch2 to join (12)
Round 2 :
Ch 3, *(1 dc, ch 3) in next st, sl st in the same st to form a tiny petal; rep from * around to make 12 tiny petals (12 petals)
Round 3 :
Into each ch-3 loop: (sc, 3 dc, sc) — rep 12 times (60 sts)
Round 4 :
Ch 5, sl st into top of next petal; rep 12 times to create 12 ch-5 loops around the star (12 ch-5 loops)
Round 5 :
Into each ch-5 loop work: (sc, 5 dc, sc) — rep 12 times (84 sts)
Round 6 :
Ch 1, 1 sc in each st around to create a neat finishing round (84 sc). Fasten off leaving a 20 cm tail for joining
Info :
Make 10 small star motifs to match the photo layout. Small motifs are visually delicate; keep tension consistent and block lightly before joining to open up the loops.
— Black Lace Mesh & Joining (Work as you go; assume MC = Black) :
Info :
The black lace is worked in rounds that connect medallions and star motifs into a single flat runner. You will join motifs to the mesh at the loop points created on the medallions (the ch-7 outer loops and picot points). Work the mesh in successive rounds, joining motifs as you come to their connection points. Use stitch markers on each medallion to mark the exact loop used for joining.
Round 1 (Mesh Start - per motif cluster) :
Attach MC to a picot or ch loop on a large medallion with a sl st. Ch 3 (counts as dc), 2 dc in same join, *ch 5, sk to next join point and 3 dc into the next join; rep around the medallion's outer join points until meeting a point where a small motif will be placed. Do not finish the round here — this creates anchor chains for the larger mesh.
Round 2 :
Now work between adjacent medallions: ch 7, sl st to the corresponding ch-7 loop on an adjacent medallion to join; ch 7 again, make 3 dc in the next mesh join on this medallion; rep to form connecting bars. Each connection uses sl st joins and ch-7 bars to keep the fabric open but stable. Keep counts even by ensuring every radial point on a medallion is connected to the neighboring medallions with an equal number of bars (aim for 12 connections per medallion distributed evenly)
Round 3 :
In the long ch-7 bridging loops created: (sc, ch3, sc) across the center of the bridge to create a lattice foundation. Where a small star motif is to be placed, join the star into the ch-3 space by sewing or sl st through the star's outer sc round (see assembly notes). This round creates a secondary net of ch-3 spaces for added stability.
Info :
When joining a small star motif, align its outer round evenly into a prepared ch space and use small sl sts or a tapestry needle to sew-through the outer sc of the star into the mesh; avoid pulling too tightly — the goal is a flat join with a tiny invisible seam.
Round 4 :
Work 1 sc around each mesh bar and sl st into each join to make the mesh uniform and easier to block later. Where two medallions meet in a narrow corridor, add a (ch 3, sl st) picot at the center of that corridor as decorative reinforcement.
Round 5 :
Continue to extend the mesh outward between each pair of medallions and star motifs: ch 9, *sk 3, 3 dc cluster in the next large medallion join, ch 9; rep to form long arching motifs between medallion centers. Keep consistent shape by counting the number of chains between clusters and matching on each repeat.
Round 6 :
Into each arch created last round work: (sc, hdc, 5 dc, hdc, sc) to mirror the green medallion outer clusters, but all in black. This forms a secondary set of petals that visually echo the medallions and tie the runner into a cohesive whole. Maintain 12 arches per medallion perimeter for symmetry.
Info :
During these joining rounds you will constantly alternate between sl st joins (permanent) and surface chains that will later be stabilized with sc rounds. Use temporary pins to position motifs before permanently joining, especially at the runner ends where points align with the scalloped edge.
Round 7 :
Work 1 sc evenly around all newly formed clusters and bridging stitches to tighten the ground, making it easier to add the next mesh layer (approx stitch counts vary depending on joins; work evenly until each medallion perimeter has an identical number of scs measured visually).
Round 8 :
Ch 6, sl st into select sc points to create star connector loops in the mesh. In these connectors, insert the small star motif by joining with sl st at four evenly spaced points around the star perimeter, then continue the mesh so the stars sit embedded in the black network.
Round 9-12 :
Repeat and expand the mesh network symmetrically across the runner, alternating rounds of long chain bars for openness and rounds of sc to stabilize and create a grid. After Round 12 the basic ground will be fully formed and motifs will be joined into their final positions.
Info :
Counting and symmetry are important here: always confirm that each medallion has the same number of connecting bars and sc anchors. If one side looks denser than the other, remove a join and redistribute to match the opposite side for an even finished look.
— Outer Scallop Edge (Edging Rounds) :
Round 1 :
With MC attached at any mesh sc, ch 3 (counts as dc), *ch 5, sk to next outermost sc point and work 3 dc in that sc, ch 5, 1 dc in the same sc; rep across the runner edges to form preliminary scallops. This establishes all the large scallops that will become the pointed edge.
Round 2 :
Into each ch-5 scallop: (sc, ch 3, 7 dc, ch 3, sc) — rep across each scallop to create large pointed shells. Count the shells to ensure they are centered at medallion outer points. Each shell will correspond visually to one of the 12 radial points along the medallions' circumference when the motif is placed.
Round 3 :
Working behind each shell, 1 sc behind every dc and 3 sc over each ch-3 space to create a stable base. At each shell peak, work a picot (ch3, sl st into top of shell apex) to make a delicate decorative point. This produces the pointed scalloped edge seen in the photo.
Round 4 :
For final reinforcement, work 1 round of sc around the very outer edge, pulling the scallops slightly outward as you stitch so the points lay flat when blocked. Add a final decorative picot every third sc along the base edge for rhythm.
Info :
Edge tension controls final shape: take care not to tighten when working the final sc round — keep them loose enough to allow the scallops to be shaped in blocking. If scallops cup, steam lightly and reshape.
— Blocking & Finishing :
Info :
Wet-block the completed runner: soak in lukewarm water with mild detergent, gently squeeze out excess water (do not wring). Pin the runner out on a blocking board to the desired final dimensions, stretching each scallop point evenly. Use rust-proof pins and leave to dry completely (24-48 hours). Blocking will open the lace and make the pattern pop.
Info :
After blocking, weave in all tails neatly on the back using a tapestry needle. If any joins look loose, secure them with a few extra invisible whip stitches to maintain structural integrity. Trim any remaining excess threads carefully.
Info :
Optional: If your runner will get heavy daily use, consider adding a thin fabric stabilizer under the mesh (stitched at a few points) to protect the lace and prevent snagging.
This medallion table runner transforms any table into a curated focal point with dramatic contrast and delicate lacework. Each carefully crafted medallion and connector rounds come together to create an airy, elegant silhouette that feels handmade and refined. Blocking brings the pattern to life, opening the lace and defining scallops for a beautiful finish. Enjoy the slow, satisfying process — and the stunning result! 🧶✨