About This Grumpy Mini Octopus Amigurumi Pattern
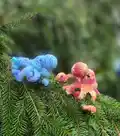
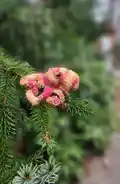
This pattern makes a Grumpy Mini Octopus — a tiny amigurumi with a round head, small nose, and eight curly arms. It uses variegated Red Heart Super Saver or any similar worsted yarn to give a colorful, pooled look. The design features simple shaping, eyelids that create a grumpy expression, and curled arms worked from chains to give lively movement.

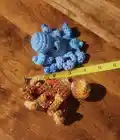
Perfect for ornaments or small toys, this octopus finishes small and sweet to fit in the palm of your hand. Full instructions include materials, abbreviations, rounds for nose, body, arms, and step-by-step assembling tips.
Why You'll Love This Grumpy Mini Octopus Amigurumi Pattern
I absolutely love this pattern because it turns a few basic stitches into a character full of personality. I enjoy how the simple eyelids and small nose change the whole expression and give a grumpy charm. The curled arms are fun to make and addictive — you can see progress quickly as each arm becomes a little spiral. I also love that the pattern works beautifully with variegated yarn, letting color pooling create unique results every time.
Switch Things Up
I love changing up this pattern by swapping yarn colors; variegated yarn gives a playful, pooled effect while solid colors allow the shape to really stand out.
I sometimes make a micro version by using fingering weight yarn and a 2.5mm hook to create tiny keychain-sized octopuses.
I also enjoy making a chunkier cuddly version using bulky yarn and a 5mm or 6mm hook for a softer, more huggable toy.
I recommend trying different eye sizes: tiny safety eyes make a subtle look while larger eyes give more character and presence.
For a calmer expression, skip the eyelid 'V' shaping; for a angrier or sleepier look, alter the eyelid placement slightly higher or lower.
I often embroider a small mouth or a little freckle to further personalize the face and storytelling of each octopus.
To change the arm style, experiment with different chain lengths or stitch increases to make longer, shorter, or thicker tentacles.
I sometimes add felt or tiny crocheted accessories like hats, bows, or scarves to match seasons or create gift-ready characters.
Try adding a loop of yarn at the top of the head before finishing to create an ornament hook for hanging on a tree or garland.
I occasionally insert a small piece of wire into an arm for posability, wrapping it first in yarn to avoid poke-throughs.
If you like collectible sets, make octopuses in a coordinated palette and vary eye or eyelid styles to give each one a distinct personality.
I find blocking the body gently (if using acrylic-friendly blocking methods) can help the octopus sit flat and present its arms nicely.
Common Mistakes & How to Fix Them
✗ Skipping placement of safety eyes can make the face look uneven; add the eyes between rounds 2 and 3 and count stitches carefully to keep them 4 to 5 stitches apart.
✗ Overstuffing the body makes the octopus too round and loses the flat base effect; stuff lightly and shape gradually until it is somewhat flat as instructed.
✗ Failing to leave a long tail for sewing the nose will complicate assembly; do not close the nose, leave a long tail and stuff before setting aside for sewing.
✗ Working chain-based arms without noting direction can affect curl direction; decide clockwise or counterclockwise before starting each arm to control whether they curl up or down.