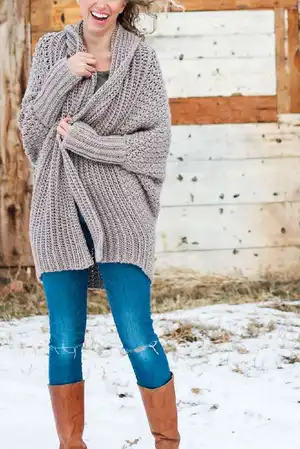
Make a drapey, tush-covering oversized cardigan from a simple rectangle. This pattern uses basic stitches and clear construction so you can create a cozy, stylish sweater that layers beautifully. Perfect for gifting or keeping, the Habitat Cardigan delivers a relaxed, flattering fit with minimal shaping. Grab your yarn and hooks and enjoy a satisfying wearable project.
Progress Tracker
0% Complete
— Rectangle Body of Sweater :
Infos :
Notes: To adjust the width of the sweater, chain a multiple of 2 + 1, plus 2 for the foundation chain (i.e. any odd number). Use larger hook.
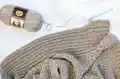
Foundation Row :
Ch 99 (105, 109, 113, 117).
Row 1 :
Sk first 2 ch (counts as 1 sc), dc in next ch, *sk next ch, sc and dc in next ch; rep from * until 2 ch remain, sk next ch, sc in last ch; turn. (97, 103, 107, 111, 115)
Row 2 :
Ch 1 (counts as 1 sc), dc in first st, *sk next dc, sc and dc in next sc; rep from * until 2 sts remain, sk next dc, sc in tch; turn.
Row 3-? :
Repeat Row 2 56 (62, 64, 64, 64) times. This should end with a WS row.
Info :
Rectangle should measure approximately: S/M: 38.5 x 22"; M/L: 41 x 25"; L/XL: 43 x 26"; XL/2XL: 44.5 x 26"; 2XL/3XL: 46 x 26".
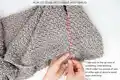
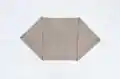
— Seaming Rectangle :
Infos :
Lay rectangle flat so that WS is facing up. (Tail from foundation chain should be in bottom corner on same side as your dominant hand.) Fold rectangle in half so that foundation row and final row of the rectangle are touching. RS should now be facing out and the stripes of the rows of crocheting should be running horizontally. Pin in place along side seams using stitch markers or safety pins. Place a stitch marker 4.75 (5.5, 5.5, 6.25, 6.25)" in from the folded crease on each side. This distance will remain unsewn and form the armhole opening. Using a tapestry needle and a single strand of MC yarn, begin seaming the rectangle, working from the corners to the folded crease. Take care to keep rows of crocheting lined up on either side of seam. Stop at the stitch marker. Repeat for second seam. Lay your new shrug-lette flat as pictured. The last row of the rectangle should be at the bottom and the foundation chain at the top. Place a stitch marker in the single crochet stitch that falls at the intersection of the bottom of the shrug and the perpendicular collar edge. Repeat on second side.
— Tush Extension :
Infos :
This section begins by working into the bottom of the sweater between the stitch markers, which is the last row of the rectangle you worked before seaming. The tush extension is worked the same for all sizes, but if you'd prefer an extra long cardigan, you may work additional rows. End with a RS row. Use larger hook. With RS of fabric facing you, attach yarn into the sc marked stitch on same side of the rectangle as your dominant hand (right marker for right-handed crocheters, left marker for left-handed crocheters).
Row 1 :
Ch 1 (counts as 1 sc), dc in same sc yarn attached in, *sk next dc, sc and dc in next sc; rep from * until 2 sts remain until marker, sk next dc, sc in marked sc; turn.
Row 2 :
Ch 1 (counts as 1 sc), dc in first st, *sk next dc, sc and dc in next sc; rep from * until 2 sts remain, sk next dc, sc in tch; turn.
Repeat :
Repeat Row 2 11 more times to create a total of 13 rows of the extension. This should end with a RS row. Do not fasten off.
— Adding Ribbed Collar :
Infos :
Collar is worked along the edge of the shrug/tush extension back and forth in rows starting at the bottom front corner of the sweater, working around the back of the neck and returning to the bottom front corner on the other side. When working Row 1, be more concerned with evenly spacing the hdc stitches so that the resulting collar looks smooth rather than the total stitch count. Ch 2 at the beginning of each row does not count as a hdc. Use larger hook. With RS of fabric facing you, continue using yarn strand from tush extension.
Row 1 :
Ch 2, work hdc stitches evenly from bottom collar corner to opposite corner. To do this: hdc in each row of the tush extension, then hdc in each st along collar edge and again hdc in each row of the tush extension of the opposite side (be certain to work into final sc of last tush extension row as it can be hard to see); turn.
Row 2 :
Ch 2, hdcflo in each hdc to end of row; turn. (See photo G.)
Repeat :
Rep Row 2 22 (24, 24, 26, 26) more times to create a total of 12 (13, 13, 14, 14) visible ribbing "bumps" or rows of "V"s running along collar. Fasten off.
— Sleeves :
Infos :
Sleeves are worked flat and then seamed into tubes. As in collar, ch 2 at beginning of row does not count as a stitch. Use smaller hook. Make 2.
Foundation Row :
Ch 28 (32, 32, 32, 32).
Row 1 :
Sk 2 ch, hdc in each ch; turn. 26 (30, 30, 30, 30)
Row 2 :
Ch 2, hdcflo in each hdc; turn.
Repeat :
Rep Row 2 16 (18, 18, 20, 20) more times to create a total of 9 (10, 10, 11, 11) visible ribbing "bumps" or rows of "V"s running in sleeve rectangle. Fasten off leaving 24" tail for seaming.
— Seaming Sleeves :
Info :
Lay sleeve rectangle with WS facing you (this will become RS of sleeves when sweater is finished) and the foundation ch oriented to the top of the rectangle. Fold sleeve so foundation ch and final row of sleeve are touching. Use single strand tail from fastening off and a tapestry needle. Seam sleeve by sewing through the two vertical posts of each sc in Row 1 and the two back loops of each hdc st of the last row. The purpose of seaming this way is to best hide the seam within the sleeve ribbing. Do not fasten off yarn. Repeat with second sleeve. Do not turn sleeves inside out.
— Attaching Sleeves :
Infos :
Turn main sweater inside out. If you’re confused by what is the RS and WS at any point, look at the place where the hdc collar edge meets the sweater. It should look like a smooth transition on the RS of the sweater and a little rougher on the WS. Lay sweater and sleeve as pictured. Pin with stitch markers if desired. With tail left over from seaming sleeve, use the mattress stitch to join sleeve to sweater. Fasten off. Repeat with second sleeve. Turn sweater right side out.
Info :
Wrap up in your new Habitat Cardigan and feel the pride that comes creating your own coziness.
This Habitat Cardigan was designed to wrap you in softness and comfy style every day. 🧶
Made from a simple rectangle, it transforms into a cozy, oversized cardigan with a plush ribbed collar and flattering drape. 🧵
Enjoy the satisfaction of making a wearable garment that feels custom and timeless.