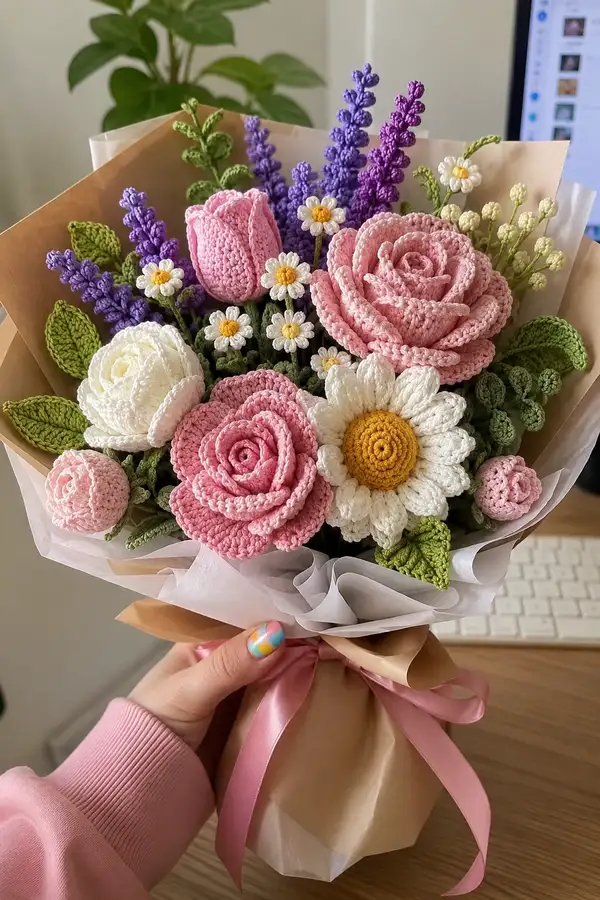
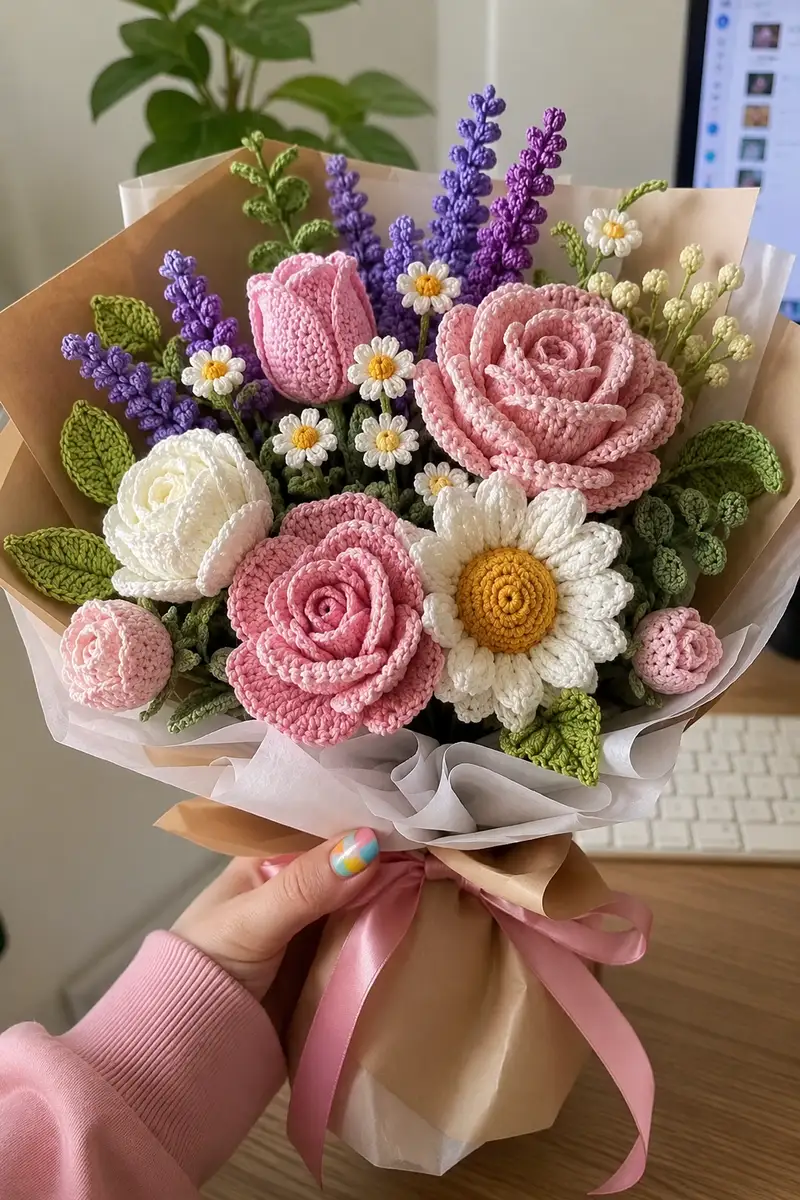
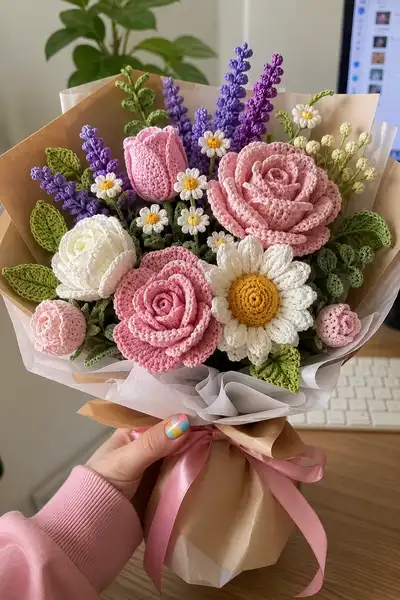
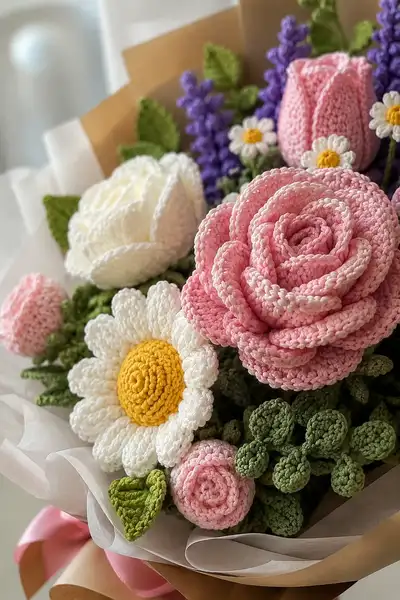
Create a timeless, washable bouquet of crochet flowers that looks fresh forever. This pattern recreates the layered pink roses, white daisies with yellow centers, tall lavender spikes, delicate tulip buds and lush green leaves shown in the photos. Designed for an experienced crocheter, the bouquet uses cotton or cotton-blend yarn to give crisp petal definition and holds shape beautifully. The instructions include step-by-step rounds, assembly tips, and finishing notes so you can make a stunning floral arrangement.
Progress Tracker
0% Complete
— Materials & Notes :
Info :
Use mercerized cotton or cotton-blend DK yarn for crisp, well-defined petals. Recommended hook 3.0mm to 3.25mm depending on your tension. Work clockwise for all petals to ensure consistent rolling. Wire stems are essential to hold bouquets in place; wrap wire with yarn and cover with floral tape. All counts are written for right side facing unless otherwise noted.
— Large Layered Rose (Make 2 large roses) :
Round 1 :
6 sc in magic ring (6)
Round 3 :
(1 sc, 1 inc) x 6 (18)
Round 4 :
(2 sc, 1 inc) x 6 (24)
Round 5 :
(3 sc, 1 inc) x 6 (30)
Info :
These first rounds make the tight central bud of the rose. Keep tension slightly tighter than usual so the centre is compact and stands upright when rolled.
Round 6 :
1 sc in each st (30)
Round 7 :
(4 sc, 1 inc) x 6 (36)
Round 8 :
1 sc in each st (36)
Info :
From Round 9 we will start building a long petal strip in rows (treated as rounds here) that will be rolled into a layered rose. Count carefully: each 'round' from 9 onward is actually a row building outward to form petals.
Round 9 :
(5 sc, 1 inc) x 6 (42)
Round 10 :
1 sc in each st (42)
Round 11 :
(6 sc, 1 inc) x 6 (48)
Round 12 :
1 sc in each st (48)
Info :
We will begin forming the petal edge: work alternating shell rows and single crochet rows to make a strip with natural petal ridges.
Round 13 :
*ch 1, sc in next 2 sts, ch 3, skip 1 st, sc in next 3 sts* rep around to end, adjust final repeats to total 48 base points (creates 12 petal points)
Round 14 :
Turn work. In each ch-3 space: (sc, hdc, 3 dc, hdc, sc) to form a raised petal. In sc areas between petals, work 1 sc. (Creates 12 large petals; stitch count varies due to shells ≈ 120 stitches across the row)
Round 15 :
Turn. 1 sc across each stitch and into top of petals to create a neat ridge (approx 120 sc)
Info :
If you prefer a softer outer petal, change to 3.5mm hook for Round 14 only and return to 3.0mm for sewing and rolling. Block petals flat by pinning lightly damp pieces to shape.
Round 16 :
Repeat Round 14 into every other ch-3 space along the outer edge to add a second row of petals (you will be working petals offset to sit between first row petals). Approx additional 12 petals.
Round 17 :
1 sc around entire strip edge to tidy (approx 240 sc counting both rows and spaces; exact count depends on shell stitches). Fasten off leaving long tail for sewing.
Info :
Roll method: With RS facing out, begin rolling the tight center (Rounds 1-8) into a spiral and secure with running stitch through the base. Continue rolling the petal strip and tack the base every 5-8 mm to maintain shape. Add small amount of fiberfill into the bottom of the rolled base to create a stable foundation if needed.
— Medium Spiral Rose (Make 2-3) :
Round 1 :
6 sc in magic ring (6)
Round 3 :
(1 sc, 1 inc) x 6 (18)
Round 4 :
(2 sc, 1 inc) x 6 (24)
Info :
This rose is created as a long spiral strip rather than separate petals. We will increase moderately to create a wide base and then build rows of scalloped petals.
Round 5 :
1 sc in each st (24)
Round 6 :
(3 sc, 1 inc) x 6 (30)
Round 7 :
1 sc in each st (30)
Round 8 :
*ch 2, skip 1 st, sc in next 2, (sc, ch 3, sc) in next st, sc in next 2* rep around forming scallops (creates 15 scallop points)
Round 9 :
In each ch-3: (sc, hdc, 3 dc, hdc, sc). Between scallops sc in base stitches to keep shape. Approx stitch width ≈ 90-100 depending on counts.
Info :
Do not fasten off. After completing 6-8 scallop petal rows, you will create a long strip by continuing alternating petal rows and single crochet grounding rows until the strip measures approximately 25-30 cm. Then roll and sew to create a spiral rose.
Round 10-20 :
Alternate: Row A: 1 sc across (approx 90 sc), Row B: petal row as Round 9. Repeat for 10 rows total, forming long petal strip (length and stitch count depend on desired size)
Round 21 :
1 sc around final edge and fasten off leaving long tail for sewing. Roll from one end, secure with whip stitches through the base every 5 mm to form a medium spiral rose.
— Small Rose Bud (Make 3-4) :
Round 1 :
6 sc in magic ring (6)
Round 3 :
(1 sc, 1 inc) x 6 (18)
Round 4 :
1 sc in each st (18)
Round 5 :
(2 sc, 1 inc) x 6 (24)
Round 6 :
Work 4 rows 1 sc in each st (24) - Rounds 6-9
Info :
Stop increasing early to create a tapered, bud-like shape. Add a little fiberfill to the base only; the tip of the bud remains firm from stitches. Fasten off leaving long tail for sewing to stem.
Round 10 :
(2 sc, 1 dec) x 6 (18)
Round 11 :
(1 sc, 1 dec) x 6 (12)
Round 12 :
6 dec (6). Fasten off and close, leaving tail for sewing to stem. Optional: make 2-part bud by crocheting a small outer cup (see Leaves - calyx section) and sewing it around base.
— Tulip Bud (Make 2-3) :
Round 1 :
6 sc in magic ring (6)
Round 3 :
(1 sc, 1 inc) x 6 (18)
Round 4 :
1 sc in each st (18)
Round 5 :
(2 sc, 1 inc) x 6 (24)
Round 6 :
1 sc in each st (24)
Round 7 :
Shape petals: *ch 6, 1 sl st into next stitch on base, repeat around to create 12 loops* Use 6 loops to create 3 tall petals - see next rounds (total loops and petals depend on spacing)
Round 8 :
For each petal loop: work into chain: sl st, sc, hdc, 2 dc, 1 tr, 2 dc, hdc, sc, sl st to create a tall pointed petal. Repeat for 3 petals. Fasten off leaving tail for sew.
Info :
Post-shaping: lightly steam or wet-block petals to curve inward for tulip shape. Sew base to a wrapped wired stem and add a small green calyx using leaf pattern folded tightly around base.
— Daisy with Raised Center (Make 2) :
Center Round 1 :
6 sc in magic ring with yellow yarn (6)
Center Round 2 :
6 inc (12)
Center Round 3 :
(1 sc, 1 inc) x 6 (18)
Center Round 4 :
1 sc in each st (18)
Center Round 5 :
*sc in next st, inc in next st* around (27). Fasten off yellow center leaving a long tail to sew to petals. This creates a raised mound for the daisy center.
Info :
Daisy petals are worked separately and sewn around the yellow center. Petals are slightly cupped to create a daisy profile.
Petal Round 1 :
With white yarn, ch 4, sl st to first petal base point to form 1st loop. Repeat to create 12 loops around the center (12 ch-4 loops).
Petal Round 2 :
In each ch-4 loop work: sc, hdc, 3 dc, hdc, sc. Fasten off and leave tails. Sew each petal's base to the yellow center so petals are evenly spaced (12 petals total).
Info :
Arrange petals so they slightly overlap; tack petals down with small stitches through the yellow center to keep them flared out. For a fuller daisy, make 2 rounds of petals staggered.
— Lavender Spike (Make 6 spikes) :
Round 1 :
Chain 30 with lavender yarn (or desired length for spike) - this forms the central stem base (30 ch)
Round 2 :
Working back along chain: sc in 2nd ch from hook and across (29 sc). Fasten off and leave long tail for wrapping stem.
Round 3 :
Make small puff clusters along the chain: working into side of the strip across one side: *make puff stitch (yarn over, insert, pull up, repeat 3 times, yarn over and pull through all loops), sl st into next space* repeat along length every 3-4 stitches to simulate lavender buds. Make approx 8-12 puff clusters per spike.
Info :
Alternate method: make tiny bobble clusters by working 5 dc tog to create small knobs. Secure each cluster with a sl st at base. After finishing clusters, sew the strip to a wrapped wire stem and arrange clusters upward to look like lavender.
— Small Filler Bud Cluster (Make several) :
Round 1 :
6 sc in magic ring with light cream yarn (6)
Round 3 :
1 sc around (12)
Round 4 :
Fasten off leaving long tail; make 3-5 buds and sew them onto a single wire form to create clustered filler.
Info :
These tiny buds are perfect for filling gaps around larger blooms. Make several in varying sizes and group them tightly when assembling the bouquet.
— Leaves (Multiple Types) :
Leaf Type A (Elongated Leaf) :
Ch 11. Row 1: sc in 2nd ch from hook and each ch across (10). Row 2: ch1, turn, inc in first st, sc across until last st, inc in last st (12). Row 3: ch1, turn, (sc, inc) at start and end to create tapered tip (14). Row 4-6: 1 sc in each st (14). Row 7: dece at start and end (12). Row 8: 1 sc across. Row 9: (sc2tog) at start and end, then sl st and finish. Fasten off. Make distinct central vein with surface slip stitches in contrasting green.
Info :
Make leaves in two sizes by varying starting chain: ch 9 for smaller, ch 13 for large. After blocking, add a heavy surface slip stitch rib down the center to mimic the midrib.
Leaf Type B (Rounded Heart Leaf) :
Ch 9. Round 1: 3 sc in 2nd ch from hook, sc across to last 2 ch, 3 sc in last ch, turn and work on opposite chain to create symmetrical shape (approx 18 sc total). Round 2: working around: inc in first 3 sts, sc around, dec at tip to shape. Fasten off leaving long tail for sewing.
Info :
Sew leaves to wired stems at varying heights. Gently bend wire and fold leaf slightly to give a natural curl. Starch lightly for crisp leaves or leave soft for flexible bouquets.
— Calyx / Flower Cup (Attach to buds & tulips) :
Round 1 :
Magic ring, 6 sc in ring (6)
Round 3 :
(1 sc, 1 inc) x 6 (18)
Round 4 :
1 sc around (18)
Round 5 :
*ch 6, sl st into next st* repeat around to make 6 loops. In each loop make small pointed leaf: sc, hdc, 2 dc, hdc, sc. Fasten off leaving tail for sewing under bloom base.
Info :
Attach calyx to the base of buds and tulips to conceal stitches and create a realistic floral cup. Sew through the base of the bloom and around the wire for strength.
— Stems & Wiring :
Round 1 :
Cut floral wire to desired stem length (20-28 cm typical for bouquet). Optionally wrap wire with green yarn using single crochet: start by making a loop around wire and sc tightly over wire forming a covering spiral approx 3-4 mm wide per round until full length is covered (this is worked as a spiral and counts are not given in traditional rounds). Secure ends and cover joined areas with floral tape.
Info :
When attaching flowers: pass wire into the base of the bloom, wrap a couple of stitches around wire inside the base, reinforce with hot glue if needed, then wrap with floral tape to hide raw yarn and secure the joint.
— Small Round Rose (Puff Spiral) :
Round 1 :
6 sc in magic ring (6)
Round 3 :
(1 sc, 1 inc) x 6 (18)
Round 4 :
Work 3 rows of 1 sc each (18) - Rounds 4-6
Round 7 :
*ch 10, sl st in base every 3rd st to create loops for rolling* rep to make 6 loops
Round 8 :
In each loop work: sc, hdc, 2 dc, hdc, sc; fasten off and roll like spiral rose for a tight little puff rose. Sew to stem and add calyx.
Info :
Small rolled roses make excellent accents. Vary loop length and number to achieve different puff sizes.
— Leafy Vine / Eucalyptus Clusters (Make several) :
Round 1 :
Chain 20 for vine base. Row 1: sc in 2nd ch from hook and across (19 sc)
Round 2 :
Along one side of chain add leaf motifs: *ch 6, sl st into side of base at next interval, make small oval leaf as: 4 sc into ch loop, fasten off* repeat every 3 stitches to create a string of small oval leaves (approx 6-7 leaves per vine)
Info :
Attach vine to wire with a few wraps of yarn and floral tape. These clusters fill space and add texture as seen in the bouquet's lower right corner.
— Finishing Petal Edging (Optional contrast edge) :
Round 1 :
Using a contrasting lighter shade for rose edges, sc around outermost petal row, working 1 sc per stitch and smoothing corners. This single round adds a delicate lighter rim to petals and is worked in BLO on some pieces if desired to emphasize ridge.
Info :
Work edge in BLO if you want a subtly raised edge (e.g., for pink roses with a lighter rim). Change color by joining with sl st at any starting point, continue around and fasten off.
— Assembly & Bouquet Composition :
Info :
Prepare all flowers on wired stems. Wrap each joint with floral tape. Plan layout: taller lavender spikes in back, large roses front-center, daisies as focal accents, small buds and eucalyptus clusters fill gaps. Use foam block inside wrapping for stability or arrange stems in a small vase covered by wrapping paper as shown in photograph.
Final Step :
Group stems into a pleasing dome shape, secure stems by wrapping with floral tape about 5 cm down from flower heads, then wrap base in kraft and tissue paper and tie with satin ribbon.
Info :
Adjust positioning by bending wire stems, trimming wire lengths for balance, and rotating bouquet while pinning paper to ensure an even presentation. Weave in all yarn tails into stems or hide under floral tape for a clean finish.
This handmade crochet flower bouquet brings the beauty of a garden indoors without ever wilting. The layered roses, cheerful daisies, tall lavender sprigs and delicate buds combine into a heartfelt arrangement that makes a lovely gift or centerpiece. Each bloom is sewn and wired with care, then wrapped in soft tissue and kraft paper for a polished finish. Enjoy creating and gifting a bouquet that will last forever! 🌷🎀