About This Ice Cream Turtle Amigurumi Pattern
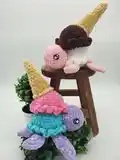
This pattern creates an adorable Ice Cream Turtle amigurumi with stacked ice cream scoops, a ruffled shell edge, and a removable-looking cone. It uses fluffy/velvet-style bulky yarn for a plush, soft finish and clear round-by-round instructions for every piece. You will learn to work in front and back loops, create ruffled edges, and assemble all parts neatly for a polished toy.
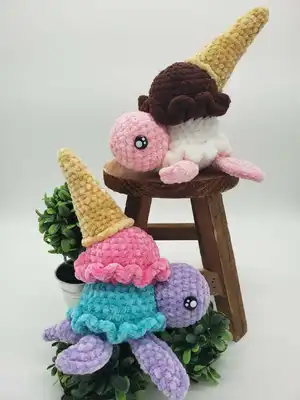
Perfect for intermediate crocheters who enjoy making toys with character and texture. The finished piece measures approximately 6 x 6 x 7 inches using the recommended yarn and hook.
Why You'll Love This Ice Cream Turtle Amigurumi Pattern
I absolutely love this pattern because it combines the playful charm of a turtle with the whimsical fun of stacked ice cream scoops. The use of fluffy velvet yarn gives the finished toy a cozy, huggable feel that kids and adults both adore. I enjoy the clever shaping on the legs and shell, which creates a lot of character with just a few simple rounds. Sewing the cone and positioning the scoops is a fun finishing step that really brings the piece to life.
Switch Things Up
I love how easy it is to customize the colors of this Ice Cream Turtle; try pastel shades for a softer look or bright rainbow scoops for a playful set.
You can change the size by swapping yarn weight and hook size — thicker yarn and a larger hook create a chunkier, cuddlier toy while thinner yarn gives you a tiny keychain version.
I often add embroidered sprinkles or tiny felt hearts to the scoops for extra detail and personality.
Try swapping safety eyes for embroidered eyes for a fully child-safe version if you are making this for a baby or toddler.
Make multiple scoops with different textures by alternating velvet, cotton, and acrylic yarn for contrast and tactile interest.
For a posable turtle, consider adding a short wire piece inside the legs before stuffing to allow slight movement.
If you prefer a more realistic turtle, use greens and browns for the scoops and body and add a textured stitch for the shell instead of the ruffle.
Turn the cone into a removable hat by sewing it to the top scoop loosely or adding a small interior loop to secure it in place.
Try adding tiny accessories like a crocheted cherry, a small bow, or a mini scarf to give your turtle character and a theme.
I sometimes make a matching mini set by making a smaller turtle using DK yarn and a smaller hook to create a parent-and-baby duo.
Consider using safety noses or little felt mouths to change facial expressions and bring different personalities to each finished toy.
Don�t be afraid to mix yarn brands; just keep consistent hook size and tension to maintain similar finished proportions.
Common Mistakes & How to Fix Them
✗ Skipping stitch markers when working with fluffy or chenille yarn makes rounds hard to track; use a marker at the start of every round to stay accurate.
✗ Understuffing pieces can cause floppy, undefined shapes; add stuffing gradually and firmly to maintain structure without overfilling.
✗ Forgetting to work into the correct loops for the shell ruffle will change your texture; ensure you work in FLO or BLO as instructed for the intended effect.
✗ Cutting yarn too short when finishing means you cannot sew pieces securely later; leave a long tail (about 8-9 inches) for sewing and finishing.