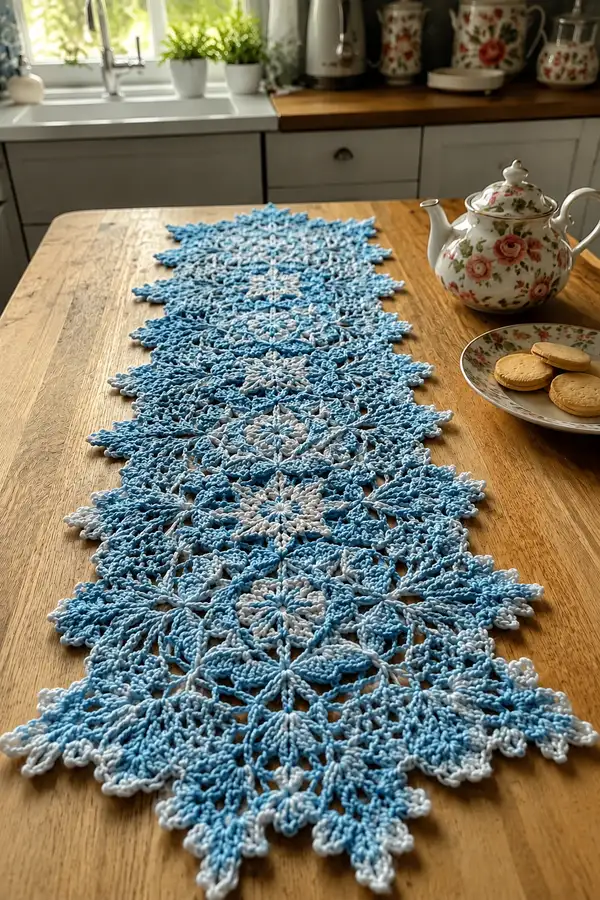
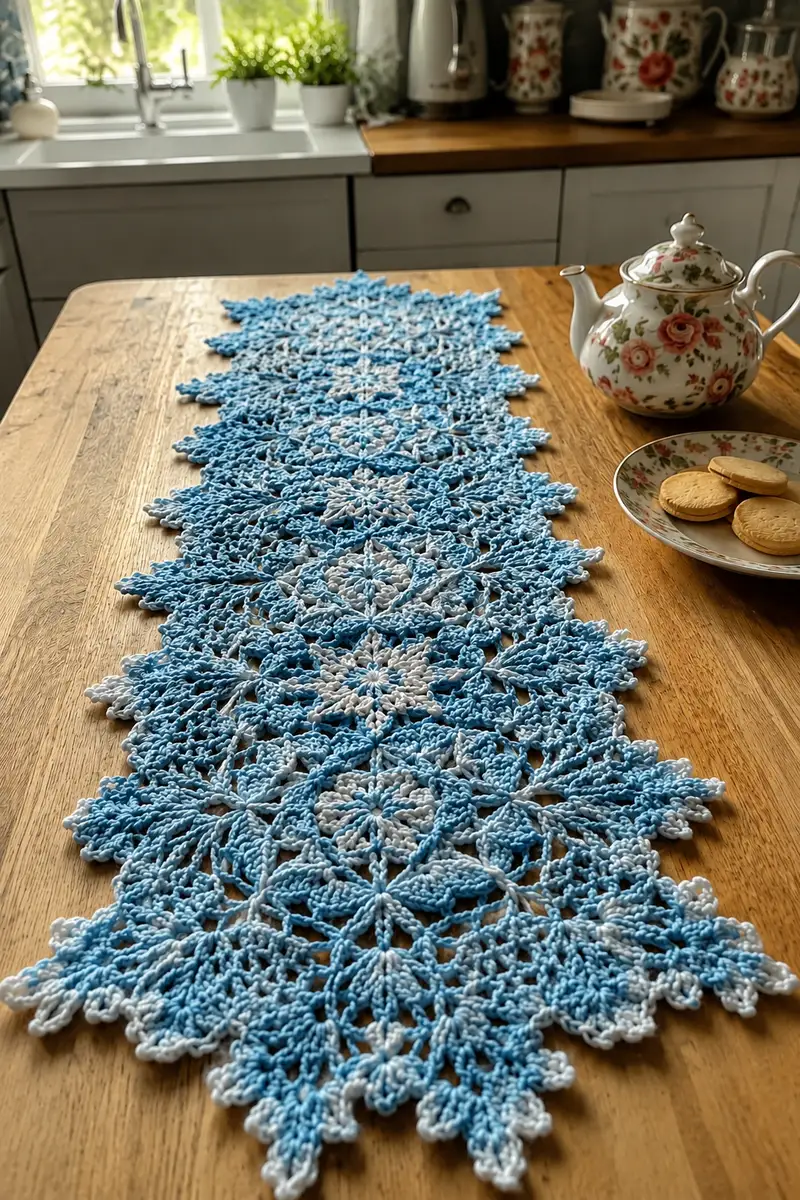
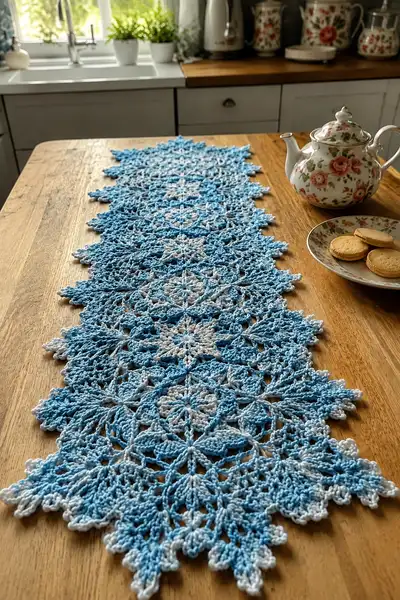
This delicate Icy Blue Snowflake table runner is made from interlocking snowflake motifs in a soft gradient from pure white to cool sky blue. The lacey motifs create a long, elegant runner perfect for winter tabletops or a festive tea setting. Worked in lightweight cotton with a join-as-you-go technique, it lies flat and blocks beautifully to reveal crisp snowflake points. The finished runner is lightweight, washable, and adds a handmade frosty accent to your decor.
Progress Tracker
0% Complete
— Overview :
Info :
This pattern builds a column of identical snowflake motifs joined by a join-as-you-go (JAYG) technique and finished with a scalloped lacy border. The snowflake motif itself is worked in 30 rounds (detailed below) to create a pronounced star with 12 radiating points. Join-as-you-go instructions follow the motif rounds and there is a separate edging section to give the runner a neat finish and strengthen the joins. Work with consistent tension and block each motif lightly before joining for best results.
— Motif (Make 9–11 motifs to reach pictured length; adjust to taste) :
Supplies :
1 motif uses ~35-45g of DK cotton depending on final size. Use 3.5mm hook for balanced stitch definition. Begin with a magic ring.
Round 1 :
mr, ch1, 12 sc into ring; pull tight and join with sl st to first sc (12)
Round 2 :
ch4 (counts as 1 tr), *ch2, tr in next st; rep from * around to form 12 tall stitches separated by ch2; join with sl st to top of starting ch4 (12 tr + 12 ch2 sps)
Info :
Round 2 creates 12 spokes; keep the ch2 spaces even. If your tr stitches are very tall, use ch3 starting instead of ch4 to match height.
Round 3 :
sl st into first ch2 sp, (ch3, 2 dc, ch2, 3 dc) in same ch2 sp (this forms a petal shell), *sk next tr, (3 dc, ch2, 3 dc) in next ch2 sp; rep from * around; join with sl st to first dc of round (12 shells)
Round 4 :
ch1, sc in same st, *ch5, sc in center dc of next shell; rep from * around to create 12 chain-5 loops for later cluster work; join with sl st to first sc (12 loops)
Round 5 :
Into each ch5 loop: (sc, ch3, 5 dc, ch3, sc) — repeat into each loop around; join to first sc (12 large puff petals created)
Info :
When working the 5 dc cluster inside the ch5 loop, keep the stitches snug so the petal stands up slightly. If your petals flair too much, use 4 dc instead of 5 to tighten the motif proportion.
Round 6 :
ch1, sc in same st, *ch7, sc in top of next petal (between petals); rep around to create 12 ch7 arches; join with sl st (12 arches)
Round 7 :
Into each ch7 arch: (sc, ch3, 7 dc, ch3, sc) — large lace points forming an outer petal; join with sl st to first sc (12 points)
Round 8 :
ch1, sc in same st, *ch6, sc in 4th dc of next large point to create inner connection; rep around (12 ch6 loops)
Round 9 :
Work (sc, ch2, tr3tog cluster made over 3 tr spaces, ch2, sc) into each ch6 loop; cluster aims to create a distinct ridge between points; join with sl st (12 clusters)
Info :
At this stage the motif has an inner ring and 12 outer points. Keep counts careful: there should always be 12 repeats so the motif remains symmetrical.
Round 10 :
ch1, sc into same st, *ch4, sc into center of next cluster; rep around (12 ch4 loops); join with sl st (12)
Round 11 :
Into each ch4 loop: (sc, ch2, 3 dc, ch2, sc) to create smaller scallops between large points; join with sl st (12 scallops)
Round 12 :
sl st to the top of nearest large point petal, ch3 (counts as dc), work 2 dc in same place, *sk scallop, dc3 in next petal top; rep around to create small clusters on each major point; join (36 dc clusters total placed on 12 points)
Round 13 :
ch1, sc in same st, *ch5, sc in space between dc-clusters; rep around to form 12 ch5 forming the outer scaffolding; join with sl st (12 ch5)
Round 14 :
Into each ch5: (sc, ch4, picot, ch4, sc) — a decorative picot bead between layers; join with sl st (12 picot spaces)
Info :
Picots are optional but add a frosty beaded look. To make a picot: ch3, sl st in 3rd ch; adjust to ch2 picots for subtler texture.
Round 15 :
Move to the top of each large point, ch1, sc, *ch8, sc in next large point top; rep around to create 12 ch8 spikes; join with sl st (12 ch8)
Round 16 :
Into each ch8 spike: (sc, ch3, 9 dc, ch3, sc) — a tall elongated fan to extend the snowflake points; join with sl st (12 elongated fans)
Round 17 :
ch1, sc in same st, *ch3, hdc in center of fan, ch3, sc into fan base; rep around to add support arches (12 sets)
Round 18 :
Work (2 dc, ch2, 2 dc) into each fan center to create an ornamental double cluster; join with sl st (12 double clusters)
Info :
These double clusters add a snowy weight to the points. Keep tension consistent so points remain flat after blocking.
Round 19 :
ch1, sc across back of each fan cluster, placing sc in the ch3 arches previously made to tie the fans together. Approximate count: 48 sc placed around; join with sl st (48)
Round 20 :
ch1, (sc in next 3 sts, ch5, sk 3 sts) x12 around to create inter-point lacy loops; join with sl st (12 ch5 loops)
Round 21 :
Into each ch5 loop: (sc, ch3, 7 dc cluster, ch3, sc) — fill the interspaces with decorative shells; join (12 shells)
Round 22 :
sl st to outermost dc of each shell, ch1, sc into shell top, *ch2, sc into next shell top; rep around to add small connecting stitches; join (24 sc)
Round 23 :
Working behind shells, ch6, sl st in gap between adjacent big points, *ch6, sl st in next gap; rep to form 12 ch6 connectors around outer rim; join
Round 24 :
Into each ch6 connector: (sc, ch2, 5 dc, ch2, sc) — a final decorative petal layer; join with sl st (12 petals)
Info :
By Round 24 the motif has achieved its full complexity. Keep track of repeats: there are still 12 primary repeats; counting at the end of each round prevents drift.
Round 25 :
ch1, sc in same st, *ch4, sc around the tip of each new petal to form small arched loops; rep around (12 ch4)
Round 26 :
Into each ch4 loop: (sc, ch3, 3 dc, ch3, sc) to create mini-points working up the outermost edge; join with sl st (12 mini-points)
Round 27 :
Work 3 sc in each mini-point and 1 sc in each valley between mini-points to create a firm edge; approximate stitch count: 72 sc around; join with sl st (72)
Round 28 :
ch1, sc in each st BLO around to create a subtle ridge for definition (72 sc)
Round 29 :
Edge round: *ch3, picot, ch3, sl st in next sc to create tiny scalloped scallops around each mini-point; rep around; join
Round 30 :
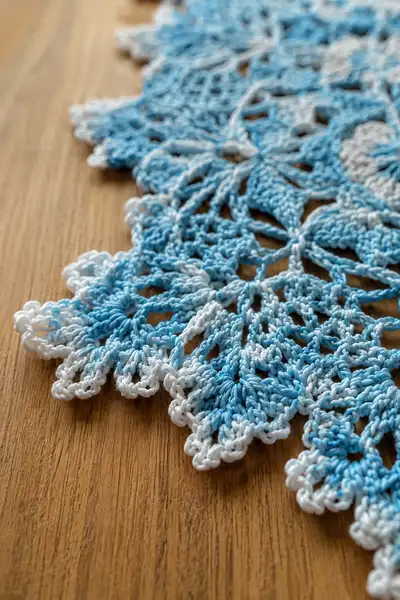
Final finishing round: sc in each st to tidy edge and close any gaps; if using white contrast for tips, change to white before this round (72 sc)
Info :
Fasten off leaving at least a 40 cm tail for join-as-you-go if this motif will be used to join directly to neighbors. Lightly steam-block or spray-block the motif to open all lace points before joining.
— Color & Yarn Notes :
Info :
To achieve the pictured gradient effect, use a long-gradient variegated cotton or intentionally change color every 2–4 motifs. For crisp white tips, change to white in Round 30 as noted above; weave in color change tails invisibly across the back of the last few rounds. Carrying a second color across a short distance is fine; trim and weave ends if carrying through several motifs causes bulk.
— Blocking and Pre-Joining :
Info :
Blocking each motif opens the lace and gives precise points. Pin each of the 12 points out to identical lengths on a blocking board using rust-proof pins; mist with water and allow to dry fully. Blocking also makes join-as-you-go easier and the final runner flatter.
— Join-as-You-Go Column Instruction (JAYG) :
Overview :
Motifs are joined in a single long column using join-as-you-go, connecting motifs along two or three points per adjacent motif so seams lie flat. The following rounds (Round J1–J30) detail a stepwise join executed during the final rounds of each motif. Perform these steps while working Round 30 of the new motif, or in an extra joining round immediately after Round 30 if preferred.
Round J1 :
Work Round 30 of new motif until you reach the first point that will meet the previous motif's tip. Change to join color (or use main color) if preferred and start join process.
Round J2 :
At the designated join point, instead of finishing the ch/picot, insert hook into corresponding picot or gap on adjacent completed motif and sl st through both pieces to connect. Continue to complete the rest of the round on your motif. Repeat this join at 2–3 points across the rim for each adjacent motif (typically at every third or fourth major point) to create a secure but lacy seam. Approx joins per neighbor: 3
Round J3 :
Complete a round of sc or slip stitches across the seam-bearing edge, catching the adjacent motif at regular intervals (e.g., sc3, sl st join, sc3). This distributes the join tension and prevents pulling. Approx stitch count after join: 72 sc total but a few sl sts will be replacements across connected gaps.
Info :
When joining, keep your tension slightly looser for the join slip-stitches so the seam doesn't pucker. Use the same yarn color for an invisible seam or a contrasting color to highlight the join.
Round J4 :
After you have connected one side of the new motif to the previous motif, rotate the new motif and locate the second edge you will join to the neighbor on the other side (if applicable). Repeat sl st joins at matching points to maintain alignment. Count carefully to ensure that joins occur at equivalent repeats around each motif (e.g., join at repeat positions 1, 5, 9 around motif circumference).
Round J5 :
Work one tidy sc round over the outer edge, making a small loop or slip-stitch every 6th stitch to provide points for a later scalloped edging. This also helps anchor joins and evens tension across the runner's length. Approx stitch count remains near 72 with 12 small loops formed.
Round J6 :
Continue motif joins for subsequent motifs: place motif on table aligning blocked points, pin if helpful, and join at the prescribed 3 points using sl st through both motifs. After joining 3 points along one side, move to the opposite side and repeat to produce an interlocking chain. Repeat for all motifs in the column.
Info :
For perfect alignment, mark the first motif with a removable stitch marker at a specific point (repeat position 1). Always join subsequent motifs using that marking as your orientation reference so snowflake motifs don't twist relative to each other.
Round J7 :
Once all motifs are joined into a column, work a reinforcing round along each join seam on both sides: sc evenly along the seam catching both motifs with each stitch to create a neat ridge. This will add strength and reduce stretch. Approx seam ridge length per motif side: 18–24 sts depending on point complexity.
Round J8 :
Optional decorative join: switch to contrasting white and work (ch3, picot, ch3, sl st) over seam ridges in a repeating cadence to emphasize the connected snowflakes. This creates a frost-like beaded chain between motifs.
Info :
Check alignment frequently by laying the joined motifs flat. Seams should be flat and the column should lie straight. If motifs pull in one area, undo a few joins and redistribute tension by working fewer sl sts over that area and more around the adjacent open sections.
— Edge & Final Scalloped Border :
Round E1 :
With whole column joined, prepare for a continuous border. Work 1 sc in each st around the entire outer perimeter of the runner to even the edge; this may include working across connected seams. Approx total stitch count around full runner varies; for a 9-motif column expect ~700–900 sc depending on gaps and joins.
Round E2 :
Ch4, sk 2 sc, sl st in next sc; rep around to create small decorative loops spaced along the perimeter; join where necessary. These loops will be the base for the scallops.
Round E3 :
Into each ch4 loop: (sc, ch3, 5 dc, ch3, sc) to form moderate scallops; join with sl st between loops. Approx count: number of loops equals number of scallops.
Round E4 :
sc in each st across scallop bases to firm the border, placing 3 sc across each 5-dc section to smooth any bumps. This creates an even, resilient edge ready for final picot beadwork.
Info :
If using white for tips, change to white at Round E3 to create crisp white scallops reminiscent of frosted edges as in the photos.
Round E5 :
Picot finish: *ch3, sl st in 3rd ch to form picot, sk 1 st, sc in next st; rep around entire border to create a gentle picot teeth finish. This gives the runner a delicate snowflake-like rim.
Round E6 :
Final tidy round: sc in each st to even spacing and hide join tails; use smaller 3.0mm hook if desired to firm up the border. Fasten off and weave ends thoroughly into back of work.
Info :
For a lacy, wider border add two extra fan rounds (repeat E3 and E4 once more) before the picot finish. For a slimmer look skip E3 and use ch2 loops in E2 instead.
— Alternative Joining & Layout Options :
Info :
You can make a wide table runner by joining motifs in multiple columns (e.g., 3 columns x 4 rows) using the same JAYG principles. For multi-column layout, join vertically first, then join columns horizontally using additional sl st joins along the motif sides. Plan and block large sections in manageable sets (e.g., join 4 motifs, block the combined unit, then join units together).
— Finishing & Blocking :
Info :
Block the entire runner flat. Pin each snowflake point and scallop to the desired crispness and allow to dry fully. Use a steam iron held above the fabric (do not press directly on mercerized cotton) or mist lightly with water and let air-dry. After blocking, re-check joins and reinforce any loose spots with a few secure sl sts from the back to avoid visible knots.
— Care Instructions :
Info :
Wash gently by hand in cool water with mild detergent or machine wash on delicate in a mesh bag. Reshape and block while damp. Avoid high heat drying; air-dry flat to maintain lace shape and crisp points.
— Troubleshooting and Tips :
Info :
If points are uneven, unpin and re-block with slightly more tension on shorter points. If joining pulls motifs out of shape, remove some sl st joins and replace with fewer, broader sl st connections to distribute tension. Secure stray tails by weaving across the last 3 rounds of the motif back and forth several times.
Creating this Icy Blue Snowflake table runner is a satisfying mix of lacework and meditative repetition — each snowflake builds a little crystal of texture and light. Blocking reveals the full geometry of the points and the join-as-you-go technique makes the final assembly seamless. Put it on a breakfast table or use it as a festive centerpiece — it adds handmade winter charm to any room. 🧶❄️✨