🧶 Beautiful ✨ Detailed 💝 Adorable

Jack Skellington Amigurumi Pattern

Jack Skellington Amigurumi Pattern
4.5★ Rating
5-7 Hours Time Needed
2.7K Made This
✂️

Intermediate Level

Ideal for those with basic crochet experience, featuring slightly more advanced stitches and techniques to expand your skills.

⏱️

Weekend Treat

Takes 5-7 hours, making it an enjoyable project to finish over a couple of days.

🧸

Cute Companion

An adorable friend to cherish, handcrafted with love to bring comfort and joy for years to come.

About This Jack Skellington Amigurumi Pattern

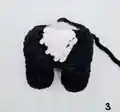
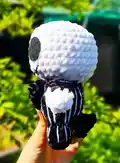
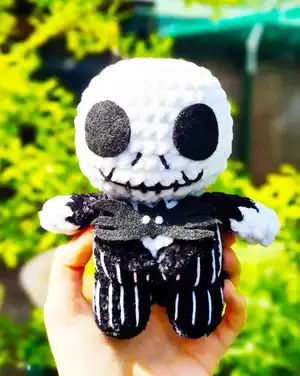
This pattern creates a charming Jack Skellington amigurumi complete with a textured chenille head, striped suit, and felt details. You will work in the round with color changes to build the body and add costume accents. The design includes clear rounds and photo references to help with placement and finishing.

Jack Skellington Amigurumi Pattern crochet pattern - detailed view of completed project

Perfect for crocheters who enjoy character dolls, it uses chenille and cotton/acrylic yarns for contrast and texture. The result is a cuddly, display-ready figure with sewn-on felt eyes and a papillon accessory.

Why You'll Love This Jack Skellington Amigurumi Pattern

I absolutely love this pattern because it captures Jack Skellington's iconic look with simple, approachable techniques. I enjoy how the chenille yarn gives the head a plush, cloud-like texture that feels delightful to touch. The step-by-step rounds make shaping straightforward, and I appreciate the clear color-change instructions for the suit stripes. Sewing the felt details and papillon is one of my favorite finishing touches that brings personality to the toy.

Jack Skellington Amigurumi Pattern step 1 - construction progress Jack Skellington Amigurumi Pattern step 2 - assembly progress Jack Skellington Amigurumi Pattern step 3 - details and accessories Jack Skellington Amigurumi Pattern step 4 - final assembly and finishing

Switch Things Up

I love experimenting with yarn choices for this pattern; switching chenille to a smooth worsted yarn gives a different texture and cleaner stitch definition.

I often change the size by using a thicker yarn and larger hook to make a chunky, huggable version, or use finer yarn and smaller hook for a tiny keychain friend.

I add embroidered mouth variations to give Jack different expressions—try a small smile or a wider grin to change his personality.

I sometimes replace felt eyes with safety eyes for durability, or embroider them for a flatter look that is child-safe.

For a unique twist, dye the felt slightly off-white or add subtle gray shading to the head to give an aged, spooky appearance.

I recommend trying metallic thread for the suit stripes for a subtle shiny effect that catches the light beautifully.

To make the toy poseable, I add thin wire inside the arms before stuffing so they can be bent into gestures.

I like creating tiny accessories like a mini top hat or a sewn scarf to make each doll feel personalized and gift-ready.

Try making a whole set of characters with the same technique—Sally, Oogie, or other friends—using color and detail changes to differentiate them.

Finally, consider making a matching display base or small coffin-shaped backdrop using felt and cardboard to present Jack as a decorative piece for Halloween or year-round display.

Common Mistakes & How to Fix Them

✗ Skipping stitch markers during rounds can make counting difficult and cause uneven shaping; use a marker at the start of each round to keep track and recount often. ✗ Not stuffing gradually leads to lumps or uneven shape in the head and body; add fiberfill little by little and shape as you go for a smooth round result. ✗ Pulling the chenille yarn too tightly during color changes can distort stitches; maintain relaxed, consistent tension especially when changing from white to black. ✗ Forgetting to flatten and shape the feet before finishing can make the toy unstable; stuff the feet firmly and flatten them while stitching the joins so the amigurumi stands properly.

Jack Skellington Amigurumi Pattern

Make a spooky-cute Jack Skellington amigurumi using chenille yarn and simple stitches. This pattern guides you step-by-step through the head, body, arms, and costume details so you can recreate the iconic black-and-white suit. Perfect as a Halloween decoration or a unique handmade gift—follow the clear rounds and assembly notes to bring Jack to life.

Intermediate 5-7 Hours

Materials Needed for Jack Skellington Amigurumi Pattern

— Main Fabric

  • 01
    Black chenille size 4 medium (main for suit and jacket)
  • 02
    White chenille size 4 medium (head and hands)
  • 03
    Black cotton/acrylic yarn (details and stripes)
  • 04
    White cotton/acrylic yarn (suit stripes and details)
  • 05
    Black felt (eyes and papillon details)
  • 06
    White felt (papillon accents)
  • 07
    Polyester stuffing (fiber fill) for head, body, and limbs

— Tools Required

  • 01
    Crochet hook 5mm
  • 02
    Tapestry needle for sewing and weaving ends
  • 03
    Stitch markers
  • 04
    Scissors
  • 05
    Hot/super glue for felt pieces
  • 06
    Pins for positioning pieces while sewing

Progress Tracker

0% Complete

— Head :

Info :

Use white yarn

Round 1 :

8sc in a mr (8)

Round 2 :

8inc (16)

Round 3 :

(sc, inc)x8 (24)

Round 4 :

(3sc, inc)x6 (30)

Round 5 :

(2sc, inc, 2sc)x6 (36)

Round 6-10 :

36sc (36) – 5 rounds

Round 11 :

(4sc, dec)x6 (30)

Round 12 :

(3sc, dec)x6 (24)

Round 13 :

(4sc, dec)x4 (20)

Info :

Cut yarn, FO with invisible join. Add fiber fill (stuff a lot to get rounded shape).

— Body pt.1 :

Info :

Start with black yarn

Round 1 :

5sc in a mr (5)

Round 2 :

5inc (10)

Round 3 :

BLO 10sc (10)

Round 4-5 :

10sc (10) – 2 rounds

Info :

Cut yarn and FO with an invisible join. Make another leg but this time don’t cut yarn and ch2 (pic 1).

Round 6 :

Insert the hook in any of the first leg st (pic 2) and make 10sc, 2sc in the 2ch, 10sc, 2sc in the 2ch (24)

— Body pt.2 :

Round 7 :

(3sc, inc)x2, 6sc, inc, 3sc, inc, 5sc (28)

Round 8 :

BLO 28sc (28)

Round 9 :

28sc (28)

Round 10 :

13sc, cc to white 2sc. cc to black 13sc (28)

Round 11 :

12sc, cc to white 4sc, cc to black 12sc (28)

Round 12 :

(3sc, dec)x2, sc, cc to white 2sc, dec, 2sc, cc to black, sc, dec, 3sc, dec, 3sc (23)

Info :

Start stuffing as you go, when you stuff the feet remember to keep them flat

Round 13 :

4sc, dec, 3sc, cc to white sc, dec, 2sc, cc to black 2sc, dec, 5sc (20)

Info :

Finish stuffing. Cut yarn leaving a long tail for sewing (pic 3).

— Arms (x2) :

Info :

Don’t worry if the color change isn’t neat, you are going to cover that part by making the jacket’s front hem

Round 1 :

4sc in a mr (4)

Round 2 :

4inc (8)

Round 3-5 :

cc to black 8sc (8) – 3 rounds

Round 6 :

fold the arm and close it making 4sc (4) Cut yarn leaving a long tail (pic 4).

— jacket\'s front hem :

Info :

Start using black yarn

Round 1 :

slip knot, ch6, starting from the 2nd ch from the hook make: 1sc, 1hdc, ch 2, in the back of the 2nd ch from the hook make 1sc (pics 6-8), sc in the next 3sts.

Info :

Cut yarn leaving a ling tail for sewing (pic 5).

— jacket\'s back hem :

Info :

Count 8 BLO sts (made in R8) in the back of the body (you can mark the first and last sts with a stitch marker.

Round 1 :

Insert hook in the BLO st of R8 and ch5 (the first ch doesn’t count as a st), sl st in the 2nd ch from the hook and make 2sc in the next 2sts.

Round 2 :

sl st in the next st, ch5, sl st in the 2nd ch from the hook and make 3sc in the next 3sts

Round 3 :

sl st in the next st, ch4, sl st in the 2nd ch from the hook and make 2sc in the next 2sts

Info :

Repeat R2 and R3 until you have 7 spikes (you should end with a short one of R3). Cut yarn and FO (pic 9).

— Sewing :

Info :

Sew the head to the body, add fiber fill while Sewing if needed

Info :

Sew the arms to the body at R12-13

Info :

Cut 2 black felt circles using pic 10 as reference and glue them on R7-9

— Body details :

Info :

Note that the size may vary according to the yarn you are using

Info :

Sew the jacket’s front hem following the outline of the white Stitches. With white cotton/acrylic yarn sew the suit’s stripes: sew the legs' part and the upper part separately. Cut black and white felt to make the papillon like pic.

Assembly Instructions

  • Sew the head to the top opening of the body, adding fiber fill while sewing to achieve a rounded head shape and secure it firmly.
  • Attach the arms to the sides of the body at rounds 12-13, positioning them evenly and sewing through the long tail left for a secure join.
  • Sew the jacket's front hem along the outline of the white stitches on the chest, aligning it to cover color-change joins neatly.
  • Glue or sew two black felt circles for the eyes referencing pic 10 and place them centered on rounds 7-9 of the head.
  • Sew the suit's white stripes using cotton/acrylic yarn onto the legs and upper body separately, following the photo references for spacing.

Important Notes

  • 💡Use stitch markers to mark the beginning of each round and the back loop stitches used for the jacket details for accurate placement.
  • 💡Stuff firmly but gradually; overstuffing can distort shapes while under stuffing will give a limp final piece.
  • 💡When changing colors, keep tension even and weave in ends neatly or cover them with the jacket's front hem to hide joins.
  • 💡Pin costume pieces and felt details in place before sewing or gluing to ensure correct symmetry and positioning.

This Jack Skellington amigurumi pattern brings a spooky yet adorable character to your hands with plush chenille textures and crisp black-and-white details. Follow the rounds and assembly notes to craft a memorable Halloween keepsake or gift. Happy crocheting and may your stitches be spooky and even! 🎃🧶

You ask,

we answer.

FAQs

What size will the finished piece be?

The finished amigurumi size will vary with your yarn and tension, but using chenille size 4 and a 5mm hook will give a small to medium doll ideal for display or gifting.

Can I use different yarn weights for this pattern?

Yes, you can use different yarn weights, but your finished size will change; choose an appropriate hook for the yarn weight and adjust stuffing accordingly.

Do I need prior crochet experience for this pattern?

This pattern is rated intermediate and assumes familiarity with rounds, increases, decreases, BLO, and basic sewing techniques for assembly.

How long does this project typically take to complete?

Most crocheters complete this project in 5-7 hours, though time may vary depending on experience level and how much time you spend on costume details and sewing.

What materials are needed to make the eyes and papillon?

Use black and white felt for the eyes and papillon details and secure them with hot glue or hand stitching; felt sizes are roughly 2.5cm circles for the eyes as a guide.