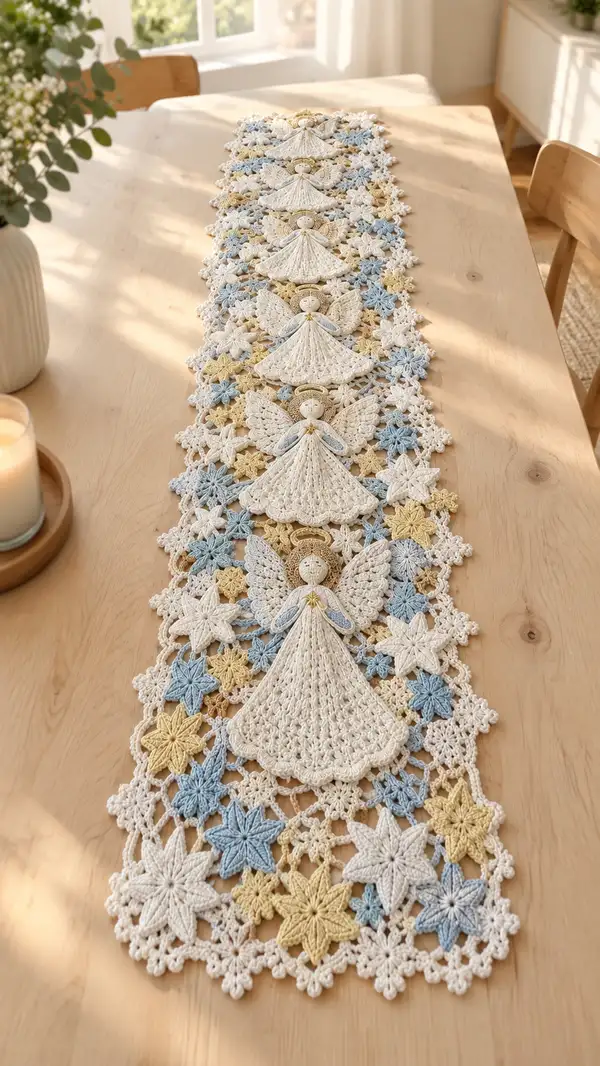
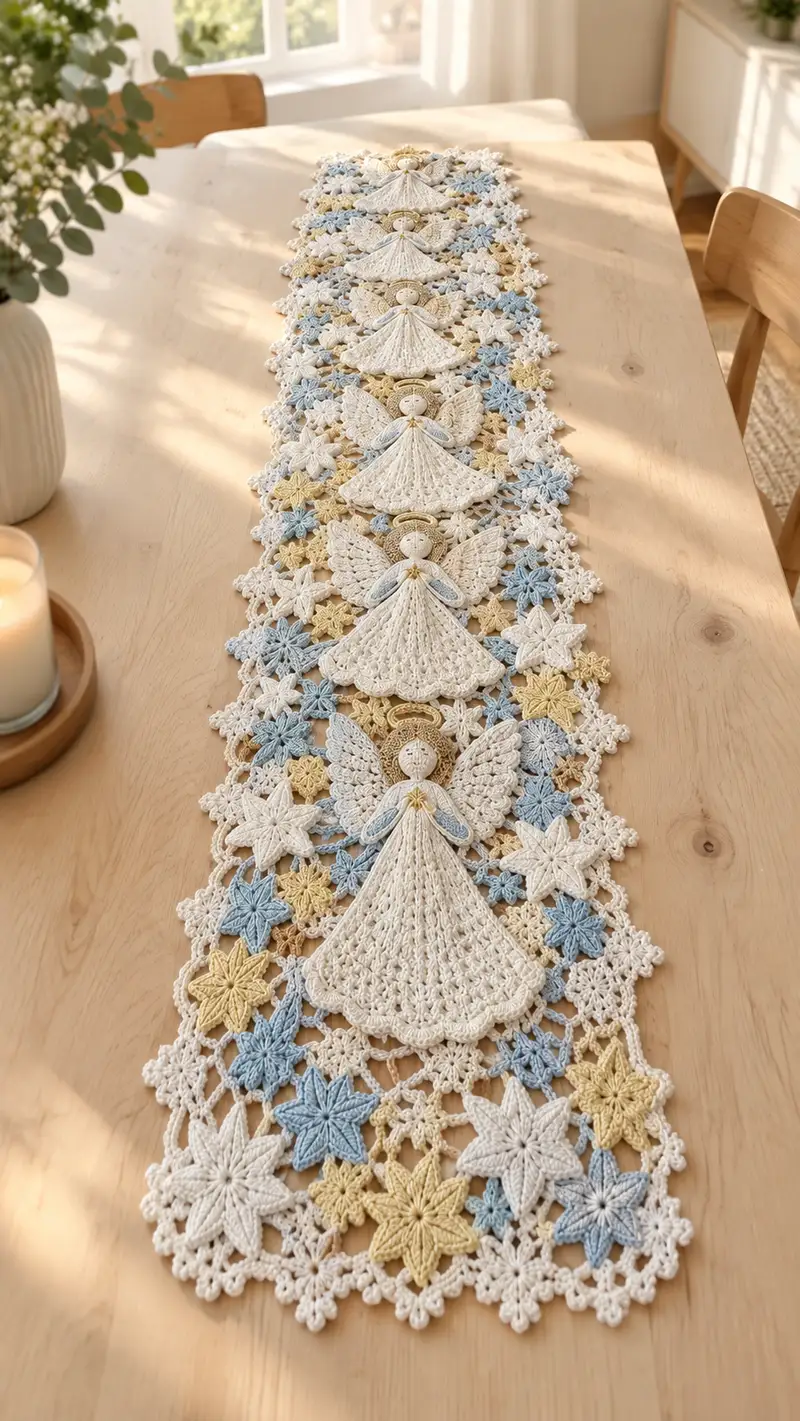
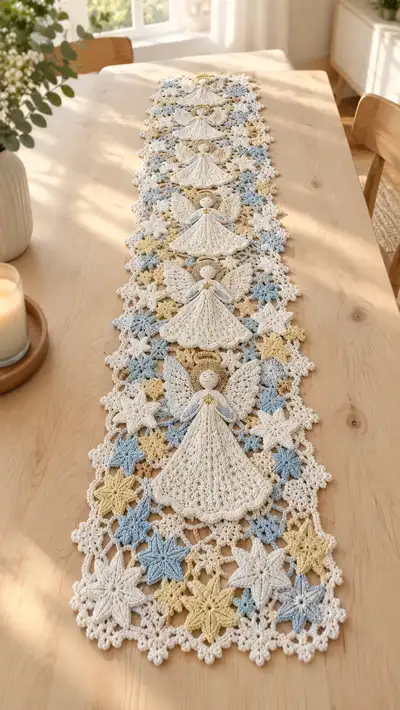
Create a beautifully delicate table runner of repeating lace angels and star motifs, worked in soft cream, pale blue and buttery yellow cotton. This elegant runner features openwork skirts, layered wings, halo details and a scalloped border — perfect for seasonal decoration or a year-round centerpiece. The pattern uses modular motifs joined together for flexibility in length and offers plenty of finishing tips for blocking and assembly. Ideal as a thoughtful handmade gift or a peaceful home accent.
Progress Tracker
0% Complete
— Angel Head :
Round 1 :
6 sc in magic ring (6)
Round 3 :
(1 sc, 1 inc) x 6 (18)
Round 4 :
(2 sc, 1 inc) x 6 (24)
Round 5 :
(3 sc, 1 inc) x 6 (30)
Round 6 :
(4 sc, 1 inc) x 6 (36)
Round 7 :
(5 sc, 1 inc) x 6 (42)
Round 8 :
(6 sc, 1 inc) x 6 (48)
Round 9 :
1 sc in each st (48)
Round 10 :
1 sc in each st (48)
Info :
Place two small stitch markers to mark the left and right centre points for facial placement. If you plan to embroider the face, mark the vertical center and mouth placement now.
Round 11 :
1 sc in each st (48)
Round 12 :
1 sc in each st (48)
Info :
Eyes or french-knot embroidery should be positioned between rounds 11 and 12, spaced about 6-8 sts apart depending on desired expression. If using tiny beads or safety eyes, ensure size is appropriate for small heads (5-6mm) and secure before stuffing.
Round 13 :
(6 sc, 1 dec) x 6 (42)
Round 14 :
(5 sc, 1 dec) x 6 (36)
Round 15 :
(4 sc, 1 dec) x 6 (30)
Info :
Begin very light stuffing: use a small pinch of fiberfill to give the head gentle shape. Do not overfill; the head should remain soft so it sits well on the lace neck. If you prefer unfilled heads (flat discs within motifs), skip stuffing.
Round 16 :
(3 sc, 1 dec) x 6 (24)
Round 17 :
(2 sc, 1 dec) x 6 (18)
Round 18 :
(1 sc, 1 dec) x 6 (12)
Info :
Fasten off leaving a 30cm tail for sewing the head to the halo/base disc. Weave tail inside head with tapestry needle for a neat finish. If you will add a tiny embroidered mouth or nose, use a few stitches of ecru thread now.
Round 20 :
Re-join yarn at top and work 1 sc in each st around (6) to tidy the bottom edge for sewing (6)
Round 21 :
Working FLO: 1 sc in each st (6)
Round 22 :
1 sc in each st (6)
Info :
These extra small rounds form a slight neck rim and create more stable surface for attaching halo and head disc. Do not stuff further; keep head topping neat for attachment.
Round 23 :
Using 1sc in each st, then sl st to join and fasten off leaving long tail for sewing (6)
Info :
If you want a slightly larger head for visible 3D effect, add two more even rounds of 1 sc each before the decreases in round 16; adjust facial placement accordingly.
— Halo (Make 1 per angel) :
Round 1 :
6 sc in magic ring (6)
Round 3 :
(1 sc, 1 inc) x 6 (18)
Round 4 :
Ch1, *sl st in next st, ch2* x 9 to create decorative arc. Finish with sl st. (18 loops)
Info :
Work halo in pale yellow or metallic thread. Leave a 25-30cm tail for attaching halo behind the head; tack halo to back of head with small stitches so it peeks above the hairline.
Round 5 :
Using metallic/golden thread if desired, embroider one tiny line across top to simulate a halo highlight. Fasten off leaving long tail for sewing.
— Neck Disc / Halter Base :
Round 1 :
6 sc in magic ring (6)
Round 3 :
(1 sc, 1 inc) x 6 (18)
Round 4 :
1 sc in each st (18)
Round 5 :
Sl st to create small flat disc with decorative picots: *(ch3, sl st in next st)* around (18 picot arcs)
Info :
This disc sits under the head and anchors the top of the skirt and wings. Work in cream to match skirt. Leave a long tail for sewing the head to the skirt and to attach wings.
— Angel Skirt / Body :
Round 1 :
Start with a magic ring: ch3 (counts as dc), 11 dc in ring, sl st into top of ch3 to close (12 dc) (foundation creates a round of 12)
Round 2 :
Ch3, dc in same st, (2 dc in next) x11, join (24 dc)
Round 3 :
Ch3, *dc in next st, 2 dc in next st* rep around (36 dc)
Round 4 :
Ch3, *dc in next 2 sts, 2 dc in next* rep around (48 dc)
Round 5 :
Ch1, sc in same st, *ch3, skip 2 sts, sc in next* repeat around to create open mesh (48 sc points/loops)
Info :
These initial rounds create a firm circular yoke that will spread into a lacy triangular skirt in later rows. Work loosely for good drape but keep even tension.
Round 6 :
Attach yarn at one mesh space, *(ch5, sc in next mesh), rep around creating a ring of long picot loops (16 loops approx) (16)
Round 7 :
Working into each ch5 loop: *(5 dc shell in loop, sl st in next sc)* rep around (16 shells)
Round 8 :
Ch3, dc across each shell: *(1 dc between shells, ch2, 3 dc over next shell, ch2)* rep around to start forming triangular scallops (count depends on layout; work evenly to keep symmetry)
Round 9 :
1 sc in each st around to tidy (count will equal number of active posts from round 8)
Round 10 :
Begin triangular shaping: ch4 (counts as tr), *sk next 2 sts, 7 dc cluster in next st (shell), ch3, sl st in base of cluster* rep around forming 8 triangular fans (math: 8 fans across) (8 fans)
Info :
Each triangular fan forms a 'skirt panel' — you will repeat lace panels so that the finished skirt reads as a cone when layered on top of the motif background. Keep number of fans consistent for each angel for uniform appearance.
Round 11 :
Ch1, sc around working 1 sc in each fan point and in chain spaces (total will expand; aim for even distribution) (approx 64 sc)
Round 12 :
Working in BLO: 1 sc in each st (64)
Round 13 :
Ch3, *sk 1, (1 dc, ch2, 1 dc) in next st (picot arch), sk 1, dc in next 4 sts* rep around to define lace (approx 64 stitches of post/dc groups)
Round 14 :
Into each picot arch: *sc, ch5, sc* to form decorative hanging loops that will overlap background motifs (64 loop stations)
Round 15 :
Join shells with 5 dc clusters forming elongated vertical ribs: *(ch2, sk chain, 5 dc in next sp, ch2, sl st into next sp)* rep around (counts variable; keep even 8-panel repeat)
Info :
At this stage shape the skirt by gently fanning it and pinning on blocking board. Each skirt should be fanned equally so when sewn onto the background motif it appears conical. Leave a 25cm tail for sewing the top of the skirt to the neck disc.
Round 16 :
1 sc in each st around to tidy and reduce stretching (approx 64)
Round 17 :
Decorative scallop round: *(sl st, ch3, 3 dc, ch3, sl st in next)* repeat around to form small scallops at hem (16 scallops)
Round 18 :
Ch1, sc in each st across to flatten scallops slightly and prepare for sewing (approx 64)
Round 19 :
Working in FLO: *sc, ch2, sc in next* repeat for slight ridge that will sit against the background square (approx 64)
Round 20 :
Fasten off leaving long tail for sewing skirt to neck disc and to background motif.
Info :
If you want a fuller skirt, add 1-2 extra repeats of rounds 10-17 before finishing. Keep stitch counts and symmetry consistent so skirts align along the runner.
— Angel Wings (Make 2 per angel) :
Round 1 :
6 sc in magic ring (6)
Round 3 :
(1 sc, 1 inc) x 6 (18)
Round 4 :
(2 sc, 1 inc) x 6 (24)
Round 5 :
Ch2, *(2 tr, ch2, 2 tr) in next st (shell made), sl st in next sc* rep around to create feathered sections (12 shells)
Round 6 :
Into each shell: *(ch3, (dc, tr, dtr) cluster, ch1, shell repeat)* — form stepped feather rows; work evenly to keep balance (12 feather clusters)
Round 7 :
Ch1, sc around through back loops only to create a crisp ridge along the wing (approx 48 sc)
Round 8 :
Edge picot finish: *(sc, ch3, sl st in tip)* repeat along edge creating delicate feather points (approx 12 picots)
Info :
Work wings in cream. Block each wing flat and slightly curve the outer edge so wings sit naturally around the head. Leave long tails for sewing to the neck disc and the back of the skirt.
Round 9 :
Optional embroidered feather veins: use contrasting sky-blue thread to stitch 3-4 curved veins across each wing. Fasten off and leave tails for sewing.
— Angel Hands / Folded Arms (Make 1 small pair per angel) :
Round 1 :
6 sc in magic ring (6)
Round 3 :
1 sc in each st (12)
Round 4 :
Ch2, hdc across 5 sts to form small elongated hand, turn and hdc back across. (length approx 5 hdc)
Round 5 :
Bend into a shallow U shape and sew edges to form folded hands, leaving a small opening at the top for attachment. Fasten off and leave long tail for sewing to chest of angel.
Info :
Hands are small and largely decorative. Stitch them so they sit centered on the neck disc above the skirt and slightly overlapping for folded prayer posture.
— Large Star Motif (Make many for background) :
Round 1 :
6 sc in magic ring (6)
Round 3 :
(1 sc, 1 inc) x 6 (18)
Round 4 :
Ch5, *sc in next picot, ch5* around to create 6 long loop points (6 loops)
Round 5 :
Into each loop: *(ch2, 7 dc cluster, ch2, sl st into base)* repeat for 6 pointed petals (6 large petals)
Round 6 :
Ch1, sc in each st around to secure petals (approx 42 sc)
Round 7 :
Decorative ridge: *ch3, sl st at petal tip, ch3, sc into valley* rep around creating tiny connecting arches (6 arches)
Round 8 :
Working between petals, make small 5-dc clusters to fill gaps for a denser motif. Fasten off and leave tail for joining (count approx 42 stitches in total frame)
Info :
Large stars are worked in cream or alternating blue/yellow for color rhythm. Block each star to open petals fully before joining.
— Small Star Motif (Make many for filler) :
Round 1 :
6 sc in magic ring (6)
Round 3 :
(1 sc, 1 inc) x 6 (18)
Round 4 :
Ch4, *sl st in next, ch4* around to form 6 short loops (6 loops)
Round 5 :
Into each loop: 5 dc cluster, sl st into base to shape a small pointed petal (6 small petals)
Round 6 :
Fasten off leaving tail for joining. Block flat. (approx 18-24 stitches)
Info :
Use small stars to fill spaces between large stars and angels. Use blue and yellow alternately for a balanced pastel spread.
— Connector Motif / Square (Make multiples to join angels and stars) :
Round 1 :
6 sc in magic ring (6)
Round 3 :
(1 sc, 1 inc) x 6 (18)
Round 4 :
Ch3, *(dc, ch2, dc) in same st, ch3, sl st in 4th st from last cluster* repeat to build a rounded square frame (4 corner cluster points) (approx 24 posts)
Round 5 :
Work 1 sc along each side and 3 sc in each corner cluster to square off edges. Fasten off leaving long tail for join-as-you-go or whip stitch joining (approx 36 sc)
Info :
These small squares act as spacers and joining frames to ensure consistent spacing between angels and stars. Make enough to match the layout in the photo: one square between most motifs works well.
— Runner Border and Lace Background (Join-as-you-go plan) :
Info :
Plan layout: the runner repeats a single angel + cluster of star motifs across its length. For the pictured runner, repeat 5 angel units with clusters between them. Arrange large stars and small stars around skirts and wings as shown in photo. Join motifs with continuous join-as-you-go rounds using sc and ch loops so the background reads as a single lace fabric with motifs attached.
Round 1 :
Begin by placing a large star flat. With new yarn, work a round of 1 sc in each outer petal st and in chain spaces to create registry points for joining (approx 42 sc)
Round 2 :
Attach second motif by working sc into both motifs' join points: *sc into motif A, ch3, sc into motif B* repeat around to join two motifs together forming a small bridge (counts vary with placement)
Round 3 :
Continue joining motifs in rows: join small stars into gaps by slip-stitching into their picot points and crocheting connecting chains as needed. The aim is to create an even lattice of chain spaces approx 2-5 ch long between motif anchors.
Round 4 :
Once motifs are joined into panels, work a decorative connecting round: *ch5, sc into connector square corner, ch5, sl st into next motif join* around to create an airy grid behind each angel's skirt. This grid adds stability and opens the lace further (variable count).
Info :
Keep motifs blocked and pinned before joining. Use lots of pins and a reference photo or paper template to ensure motifs are oriented correctly (heads pointing along the runner's length).
Round 5 :
Edge shaping: With cream yarn, follow outermost posts and chain arches of the assembled panel, working *(sc, ch3, sc) across each valley and (3 sc) across each protruding petal* to form a continuous edge that reads as scalloped. This evens out the border.
Round 6 :
Decorative picot fringe: *(sc, ch4, sl st into top of sc)* repeat along the entire edge to create small picot loops. Pin and block again to set shape.
Round 7 :
Final edging round: sc in each picot loop and finish with 5 small cluster picots along each scallop tip. Fasten off and weave ends.
Info :
If your runner is longer or shorter than pictured, add or remove entire angel modules (each module = one angel + surrounding cluster of stars) until desired length is reached. Keep the number of large stars between angels consistent to maintain pattern balance.
— Border Finishing Round (Scalloped outer round) :
Round 1 :
Attach cream yarn at a corner. Ch1, sc evenly along edge about 1 sc per 3-4 chains of the grid to create base (counts vary by runner width)
Round 2 :
Shell scallop: *(skip 2, 5 dc in next st, skip 2, sl st in next)* repeat along edges to create scallops. Corner: work 7 dc to round corner smoothly
Round 3 :
Ch1, 1 sc in each st across to tidy scallops (counts variable)
Round 4 :
Picot finish: *(sc, ch3, sl st in base)* around scallop tip. Fasten off and block.
Info :
For a delicate finish use a small hook (2.0-2.25mm) on the edge rounds to get crisp picots and an elegant framed look. Block fully to set the scallops and motifs flat.
— Optional Decorative Embroidery and Accents :
Info :
Use small gold thread to embroider halo highlights and a tiny star at the angel's chest. Add French knots at the centre of large star motifs for texture. Secure all embroidery with small anchoring stitches from the back.
Round 1 :
Embroider 3-5 tiny gold stitches across each halo and a small star using 6-strand embroidery thread. Tie and weave knots to the wrong side.
Info :
Do not overload the motifs with embroidery; the lace should remain light and airy. Small touches are enough to add sparkle without bulk.
— Final Blocking and Assembly Notes :
Info :
After sewing and joining all motifs, wet-block the entire runner by pinning it to a foam board or blocking mat in the exact shape desired. Spray or mist evenly, then allow to dry completely. Consider a light starch or fabric stiffener if you want more body for display on a table runner.
Round 1 :
Trim all tails, then carefully weave in ends behind decorative elements using a tapestry needle. Inspect joins and reinforce with invisible whip stitch where necessary.
Info :
For a semi-permanent join use a small dab of fabric glue at hidden points before final weaving to avoid separation during handling. Always allow glue to dry fully before display.
This lace angel runner transforms simple yarn into a peaceful centerpiece you will treasure. The layered angels and pastel stars create a soft, heavenly rhythm perfect for dining tables or sideboards. Each module is meditative to make, and joining them together is like assembling a handmade tapestry. Enjoy blocking and arranging until the runner sits just right — your home will feel cozy and thoughtful. 🕊️🧶