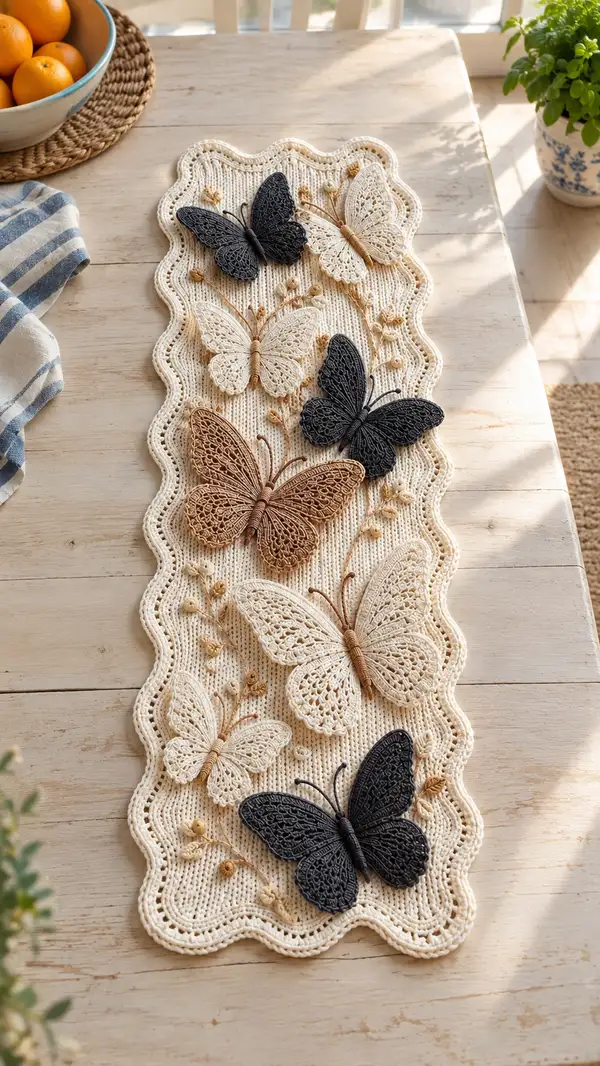
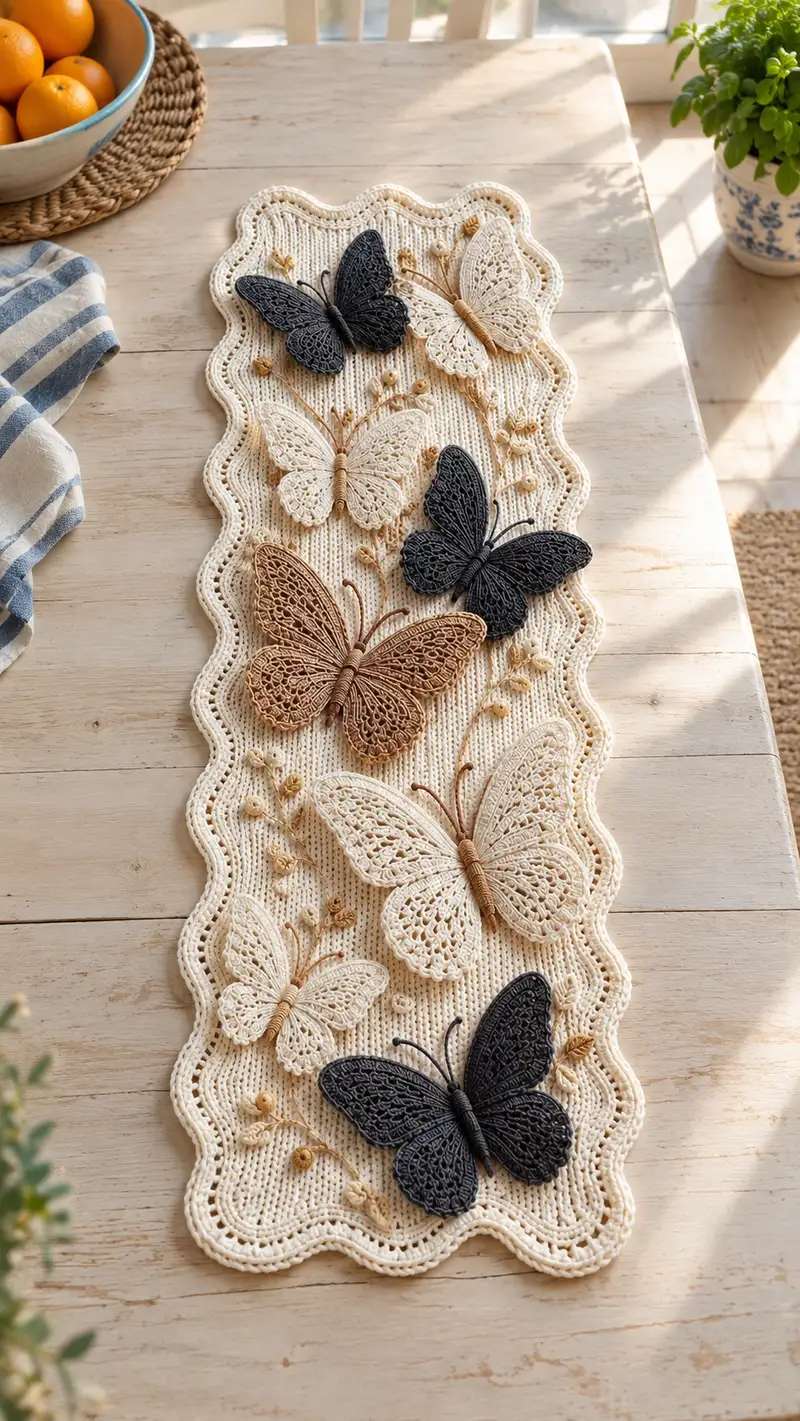
A delicate lace table runner adorned with layered crochet butterflies and embroidered vines. The runner features a soft cream ribbed center, scalloped picot edging, and mixed-size butterflies in cream, tan and charcoal for a natural, vintage-inspired look. Perfect as a centerpiece for dining or entryway tables, this pattern combines textured stitches, openwork wings, and surface embroidery to create a museum-quality handmade accent.
Progress Tracker
0% Complete
— Overview :
Info :
This table runner is worked in three major elements: the rectangular ribbed base, a scalloped edged border worked in rounds, and seven lace butterflies (two large, three medium, two small) that are created separately and appliqued to the surface. Embroidered vines and tiny knotted buds are added last. Use a firm but not overly tight tension to maintain lace detail without creating puckers.
— Gauge & Sizing :
Info :
Gauge: 18 hdc x 12 rows = 4 in (10 cm) in worsted/dk cotton with 3.5mm hook worked in BLO rib pattern. Finished runner pictured measures approximately 36" (91 cm) long x 11" (28 cm) wide excluding scalloped edge. Adjust foundation chain and number of butterfly placements to lengthen or shorten.
— Runner Base (foundation & ribbed body) :
Round 1 :
Foundation: ch 121 (this is the width of the runner body before border; 121 = odd for symmetry and allows centered butterfly placements)
Round 2 :
Row 1: hdc in 3rd ch from hook (counts as first hdc), hdc in each ch across to last 2 ch, hdc in last 2 ch (119 hdc). Ch 1, turn.
Info :
We will work in rows across this foundation to build a ribbed fabric using HDC worked into BLO on alternating rows. Keep right side/up-facing side consistent so butterflies attach to same face.
Round 3 :
Row 2: BLO hdc in each st across (119 hdc). Ch 1, turn.
Round 4 :
Row 3: HDC in each st (119). Ch 1, turn.
Round 5 :
Row 4: BLO hdc in each st (119). Ch 1, turn.
Info :
Alternate BLO rows and regular HDC rows to create a subtle vertical rib texture. Use stitch marker at end of rows on both edges to maintain consistent edge tension.
Round 6-35 :
Continue alternating: odd-numbered rows HDC (119), even-numbered rows BLO HDC (119). Work total 30 rows from Row 2 through Row 31 (this builds the central field). After Round 35 you will have approx. 30 full rows creating a rectangle roughly 32–34" long—adjust number of rows to reach desired length (add or subtract pairs of rows).
Info :
Check length against your table as you work. Keep pieces flat by blocking the rectangle lightly before adding the scalloped border; it's easier to create a uniform border on a straight base.
Round 36 :
Row 31: HDC in each st (119). Ch 1, turn. Fasten off and weave ends if you plan to border in a contrasting color; otherwise continue with same color.
— Border: Scalloped Picot Edge (worked in rounds around runner) :
Info :
Join yarn at one short end. Border is worked in continuous rounds around the rectangle. Each long side will receive repeated shell motifs with corner adjustments; short ends get semicircular scallops to preserve symmetry.
Round 1 :
With cream yarn, join at corner with sl st, ch 1, evenly place 1 sc into each of the first 3 edge rows along short end (approx 3 sts), then *ch 2, sk 2, 5 dc in next st (shell), ch 2, sk 2, 1 sc in next 6 edge rows* rep across long edge until you reach the next short end. (shells spaced approx every 6 sts across the long side)
Round 2 :
Turn corner: at short end work 7 dc evenly spaced (semicircle), ch 1, continue along long side placing 1 sc into center of each shell made previous round; at each shell center make (1 sc, ch 3, sl st into same sc) to form a picot loop; repeat around entire border. Join with sl st to first sc.
Info :
Count shells on one long side and ensure symmetry: if you have 18 shells on one long side, replicate exactly on the other side. This count will define placement of scallops on short ends as well.
Round 3 :
Work single-row scallop edging: *In each shell center work (sl st, sc, hdc, dc, hdc, sc, sl st) then 1 sc in next foundational sc between shells* Repeat around. This gives a raised scallop edge. Join with sl st.
Round 4 :
Picot finish round: In the tip of each scallop (the dc made in Round 3) work (ch 3, sl st into tip) to form a small picot. Fasten off and weave ends. Border should ripple slightly to create the wavy frame seen in the photo.
Info :
If border ripples excessively, press flat with steam blocking; if it remains too flat, mist lightly and shape the scallops with pins while drying.
— Butterfly Templates & General Notes :
Info :
Butterflies are worked flat in lace technique. Each wing is crocheted as a semicircular, fan-like segment, then mirror-wings are joined at the body. Bodies are 3D wraps of yarn (or small tubes of tightly wound yarn) that are stitched down. Antennae are 28–30 gauge wire wrapped in yarn and tucked into the body. Block all wings flat and stiffen lightly if desired before assembly.
— Large Butterfly (Make 2) :
Round 1 :
Body motif: Using dk cotton with 2.75mm hook, mr, ch 1, 6 sc in MR (6)
Round 2 :
Inc round: 6 inc (12)
Round 3 :
(1 sc, inc) x 6 (18)
Info :
This small round forms a short central disk that will be wrapped with yarn to form the butterfly body center. Do not stuff; leave tail to sew to wings.
Round 4 :
Fasten off leaving long tail (approx 20–25"/50–65cm) for wrapping the body. Make two of these small disks for each butterfly; they will be stacked under the body wrap for thickness.
Round 5 :
Wing foundation — Upper wing (right): Ch 12, sl st into 2nd ch from hook, sc in next, hdc in next 3, dc in next 4, tr in next 2, ch 1, turn (foundation arc of 11 sts)
Round 6 :
Row 2: Work lace increase row across arc: (sc in first st, ch 3, sk next st, dc in next, ch 3, sk next) across to end finishing with tr in last st. This opens ruffles and creates chain spaces for lace where there will be picot and cluster detailing.
Round 7 :
Row 3: *(ch 1, sc) into chain space, (ch 3, 3 dc cluster into next dc) repeat across, end with sc into last tr. Total sts approx 16 functional spaces for next rows.
Info :
From Round 5 onward wing shaping uses chain spaces and clusters to create a delicate lace. Keep tension even and do not pull chains tight — wings must block flat.
Round 8 :
Row 4: Working along outer edge: (ch 4, sk cluster, sc into next ch sp) across to create scalloped outer edge. Fasten off and weave tail. Block flat.
Round 9 :
Mirror upper wing for left side: Repeat Rounds 5–8 reversing shaping so wings align symmetrically when placed against body disk.
Round 10 :
Lower wing (right) — foundation: ch 10, sc in 2nd ch from hook, hdc, hdc, dc, ch 2, turn. Create a slightly smaller half-fan using more tight cluster work to produce curved lower wing. Repeat similar lace rows as upper wing but reduce final scallops to 4 big scallops instead of 6. Fasten off and block.
Round 11 :
Lower wing left: Mirror lower wing created in Round 10.
Info :
After wings are blocked, stack the small body disks centrally between the paired wings on top of each other and wrap firmly with matching yarn tail left from Round 4. Wrap around center where wings meet, covering the joint and creating a slightly raised, ribbed body. Continue wrapping until desired body thickness is achieved, securing ends by sewing through to the back.
Round 12 :
Antennae: Cut two 3.5" (9cm) lengths of 30-gauge wire. Wrap each with a thin strand of yarn using a small amount of glue at start to secure. Insert at back of body, bring forward and bend into natural curve. Secure ends by sewing the wrapped wire into the underside of the body disk. Tuck ends and weave in yarn.
Round 13 :
Fine edged overlay: Using steel hook and the same yarn or a slightly darker contrast, crochet a very fine scallop trim around each wing outer edge: work SL ST into each outer loop, ch 3, sl st into same loop to form tiny picot series. This enhances lace detail and silhouette. Fasten off and block again.
Info :
Large butterflies finished wings should measure approx 5–6" wingspan (12–15 cm) tip-to-tip. Make two in the pictured colors (one tan/bronze, one pale cream) and one or two in charcoal depending on your desired arrangement.
— Medium Butterfly (Make 3) :
Round 1 :
Body disk: mr, 6 sc in MR (6). Sl st and leave long tail (approx 18" / 45cm) for body wrap. Make 1 disk per butterfly.
Round 2 :
Upper wing foundation: ch 10, sc in 2nd ch from hook, hdc in next 3, dc in next 3, ch 1, turn. Lace row: into front loops work (ch 3, sc into next sp) across to create airy pattern.
Round 3 :
Outer scallop row: *3 dc in center chain space, ch 2, sl st into next chain space* across; fasten off and block. Repeat for mirror wing and two lower wings with 6–8 outer scallops.
Info :
Medium butterflies are about 3.5–4.5" wingspan (9–11 cm) and are ideal for alternating sizes along the runner. Work wings flat and block before assembly.
— Small Butterfly (Make 2) :
Round 1 :
Body: mr, 6 sc in MR (6) — leave tail 12" for wrapping.
Round 2 :
Wing: ch 7, sc in 2nd ch, hdc 2, dc 2, ch 1, turn; (ch 2, sc into ch sp) across; fasten off. Mirror and make lower wings scaled to match. Block.
Info :
Small butterflies measure approx 2.5–3" wingspan (6–8 cm). These are quick to make and add a layered look when mixed with larger butterflies.
— Body Wrapping & Antennae Details (All sizes) :
Round 1 :
Wrap: With long tail from disk, wind yarn tightly around stacked disks and the joined wing center about 20–40 wraps depending on butterfly size until a plump body is formed. Tuck tail and secure through the underside of body with several whip stitches.
Round 2 :
Antennae: Use 28–30 gauge wire wrapped in yarn. Insert ends into underside of the body and sew anchor stitches through disk. Bend antennae gently outward and trim to shape. Optional: add tiny bead at tip for weight and style.
Info :
For a rigid look, apply a tiny amount of fabric stiffener to wrapped body and allow to dry before attaching to the runner. If you prefer soft bodies, simply secure ends and leave natural.
— Embroidered Vines & Buds (Surface Embroidery on Runner) :
Info :
Use stranded dk cotton in tan and darker brown to embroider vines between butterflies. Work vines using simple chain stitch or stem stitch with a yarn needle. Tiny buds are made with French knots or with 3–4 sc spirals that are then pulled tight to form rosebud knots.
Round 1 :
Plan placements: Before stitching, lay the runner flat and arrange butterflies in their intended positions. Pin each butterfly in place using rustproof pins and confirm spacing. Mark vine start and end points lightly with a removable fabric pen.
Round 2 :
Vines: Thread yarn doubled for body of vine. Using yarn needle, work stem stitch from one anchor point to another in flowing curves. Anchor ends with small whip stitches to runner fabric between the BLO rib rows so that stitches sit flush.
Round 3 :
Buds: Make French knots—wrap the needle 2–3 times around yarn and insert back close to exit point to make small raised buds. For larger buds, make a tiny spiral of 2–3 sc then pull end tight and secure with a few stitches to the base.
Info :
Use buds sparingly and vary size for a natural look. The photo shows clusters of 3–5 tiny buds along some vine branches and single buds at other junctions.
— Attachment & Applique Steps :
Round 1 :
Pin: With butterflies blocked and bodies wrapped, pin each butterfly at its final placement on the runner. Use multiple pins around wings to keep alignment flat and edges even.
Round 2 :
Sewing: Using a strand of matching yarn and a yarn needle, sew through the underside of each wing tip and through the runner with small whip or ladder stitches. Aim for invisible stitching by catching only a few threads of runner fabric at each pick-up.
Round 3 :
Secure bodies: Once wings are sewn, stitch the body disk to the runner with several passes through the underside to anchor; sew fully around the disk base to prevent rotation. Avoid stitching across wing lace as this creates tension lines.
Info :
For heavier butterflies, add two anchor points—one at body center and one at the rear of body—so that wings sit slightly raised but bodies remain stable.
— Decorative Surface Finishing :
Round 1 :
Edge tidying: Once all butterflies are attached, check undersides for stray tails and weave them in. Trim any visible thread ends and tuck them under the body disks where possible.
Round 2 :
Final blocking: Pin the entire runner on a blocking mat and lightly mist with water. Shape scalloped border with pins and position wings to pleasing angles. Allow to dry completely before use.
Info :
If you want a slightly raised wing look (as pictured), place a small square of polyester batting (about 1/8" thick) under each butterfly body before anchoring to add lift without bulk.
— Variations & Color Notes :
Info :
Change the number, size or color of butterflies to suit your table. A symmetric placement uses a center butterfly with mirrored companions; an organic layout offsets sizes as in the photo. Use charcoal for dramatic contrast and tan for muted warmth.
— Stitch Map Summary (Round Counts) :
Info :
Runner base: Approximately 30 pairs of alternating HDC rows (60 rows); Border: 3 rounds of shells and picots; Large butterflies: approx 12–13 micro-rows for wings plus body prep (approx 28 steps each); Medium butterflies: approx 8–10 steps each; Small butterflies: approx 6–8 steps each; Embroidery and assembly: multiple info steps outlined above.
Info :
This pattern contains many small, repetitive lace steps and requires careful counting when working wings and border shells. Keep a notebook of shell counts on each side and mark shell centers to align scallops with wing placements.
Completing this runner is an absolute joy — every scallop and lace wing adds another moment of handcrafted beauty. The neutral tones and layered butterflies create a showroom-worthy centerpiece that still feels warm and handmade. You’ll love the satisfying rhythm of the ribbed body, the delicate blocking of each wing, and the calm, botanical embroidery that pulls everything together. 🦋🧶 Take your time, enjoy the details, and proudly display your new heirloom accent!