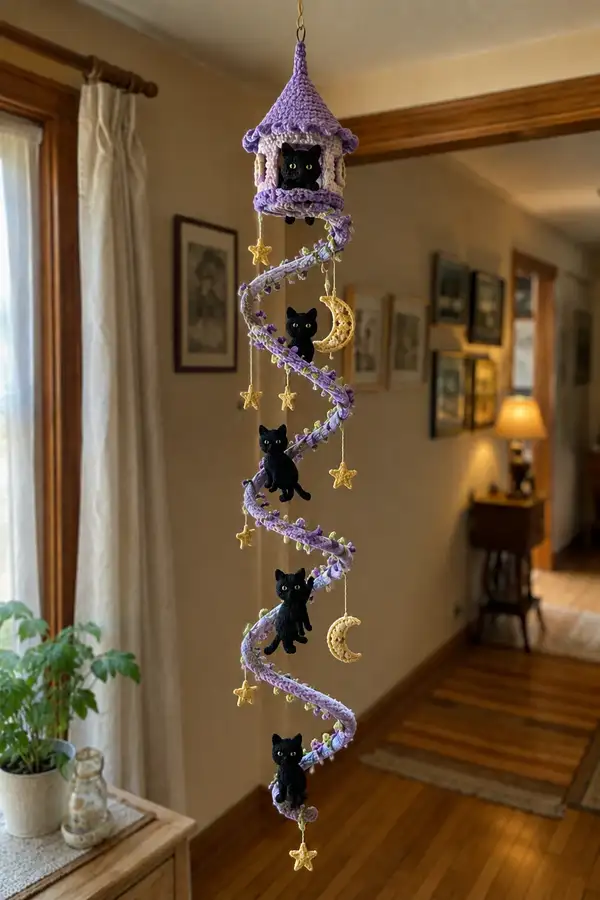
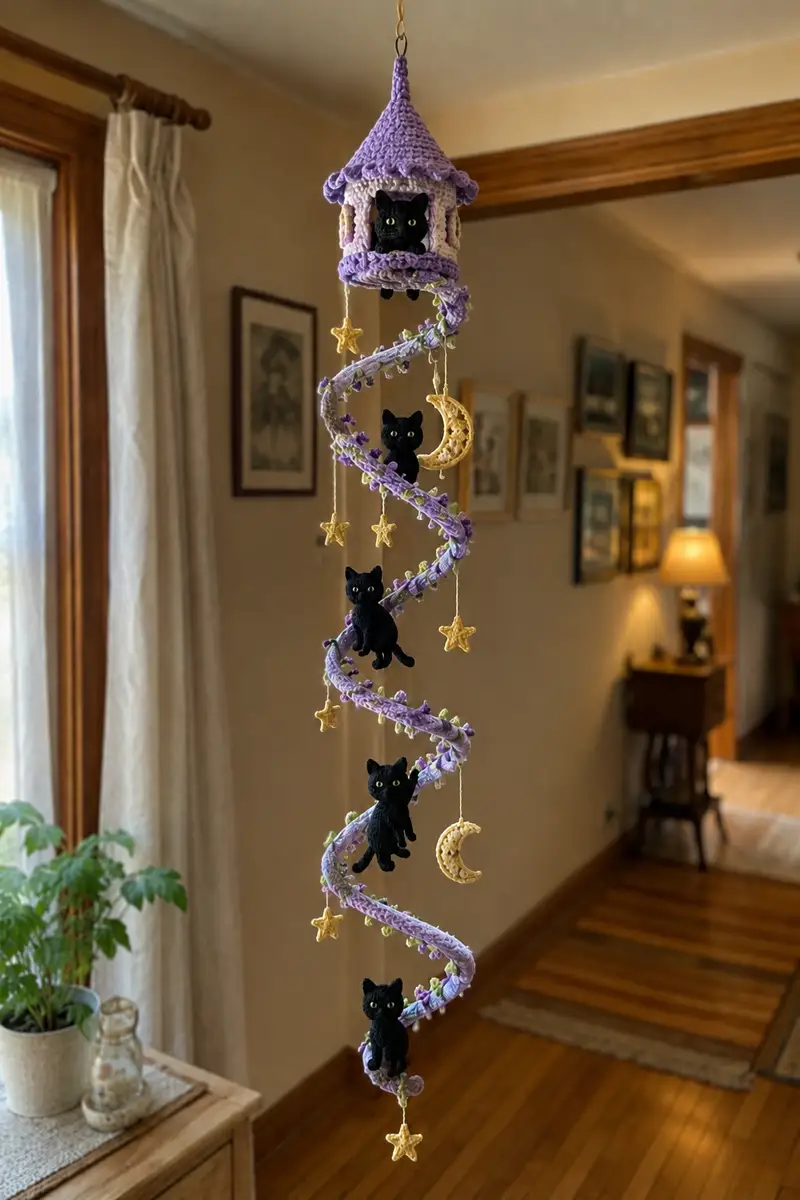
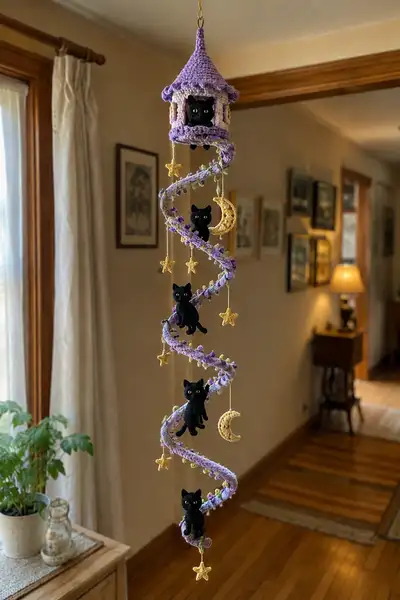
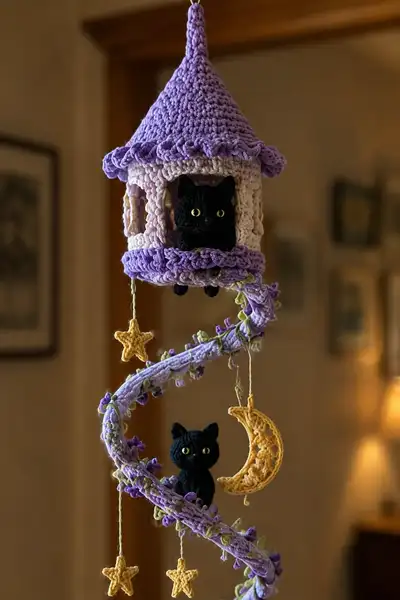
Create a whimsical hanging spiral garland featuring a lavender-topped turret, a curling spiral vine, tiny black amigurumi cats, and dangling crescent moons and stars. This decorative mobile blends soft pastels with bold black kitty accents and delicate embroidered details. Designed to hang in a window, doorway, or as a dreamy nursery accent, it’s made from worsted/light-worsted yarn and flexible armature for sturdy spirals.
Progress Tracker
0% Complete
— Tiny Black Cat Head (Make 4) :
Round 1 :
6 sc in magic ring (6)
Round 3 :
(1 sc, inc) x 6 (18)
Round 4 :
(2 sc, inc) x 6 (24)
Round 5 :
(3 sc, inc) x 6 (30)
Round 6 :
(4 sc, inc) x 6 (36)
Round 7 :
(5 sc, inc) x 6 (42)
Round 8 :
(6 sc, inc) x 6 (48)
Round 9-20 :
1 sc in each st (48)
Info :
Place safety eyes between rounds 11-12, approximately 8-10 stitches apart depending on desired expression. Mark the front center stitch to maintain symmetry for facial placement.
Round 21 :
(6 sc, dec) x 6 (42)
Round 22 :
(5 sc, dec) x 6 (36)
Info :
Begin stuffing head lightly now; the shape should remain slightly firm but not overpacked. Use small tufts to fill cheeks before deeper stuffing.
Round 23 :
(4 sc, dec) x 6 (30)
Round 24 :
(3 sc, dec) x 6 (24)
Round 25 :
(2 sc, dec) x 6 (18)
Round 26 :
(1 sc, dec) x 6 (12)
Info :
Fasten off leaving a 25-30 cm tail for sewing. Finish stuffing firmly for a compact head. Weave the tail through the 6 remaining sts and pull to close, then weave tail into the head interior to secure.
Round 28 :
01-turn: leave as assembly placeholder for ear alignment
Info :
Keep the head slightly larger than body proportions so cats read as whimsical; eyes set slightly wide create alert expression characteristic of these black kitties.
— Tiny Cat Ears (Make 8, 2 per cat) :
Round 1 :
5 sc in magic ring (5)
Round 2 :
1 sc in each st (5)
Round 3 :
(1 sc, inc) x 2, 1 sc (7)
Round 4 :
1 sc in each st around (7)
Round 5 :
(1 sc, dec) x 2, 1 sc (5)
Round 6 :
Fasten off leaving long tail for sewing; fold ear slightly to create a triangular owl/kitty ear and sew closed at base to hold shape
Info :
Position ears on head front/top at a 10-12 stitch distance from center line; pin to check before sewing to ensure symmetrical placement.
— Cat Body (Make 4) :
Round 1 :
6 sc in magic ring (6)
Round 3 :
(1 sc, inc) x 6 (18)
Round 4 :
(2 sc, inc) x 6 (24)
Round 5 :
(3 sc, inc) x 6 (30)
Round 6-8 :
1 sc in each st (30)
Info :
Body color: use black to match heads. Stuff body lightly after round 8 to allow neck attachment later. Keep body proportional—short and slightly tapered to allow cats to sit on spiral ledges.
Round 9 :
(3 sc, dec) x 6 (24)
Round 10 :
(2 sc, dec) x 6 (18)
Round 11 :
(1 sc, dec) x 6 (12)
Round 12-15 :
1 sc in each st (12)
Round 16 :
(1 sc, inc) x 6 (18)
Round 17-20 :
1 sc in each st (18)
Info :
These rounds create a little belly and an attachment area for head/legs. Keep stuffing moderate: belly filled but body still flexible so cat can curve around spiral.
Round 21 :
(2 sc, dec) x 6 (12)
Info :
Fasten off leaving long tail. Use tail to sew head to body by inserting head base into open body top and sewing through round 16-18 area for a snug join. Secure with several passes and weave in ends.
— Cat Legs / Front Paws (Make 8 for 4 cats) :
Round 1 :
6 sc in magic ring (6)
Round 2 :
1 sc in each st (6)
Round 3 :
(1 sc, inc) x 2, 1 sc, 1 inc (8)
Round 4-6 :
1 sc in each st (8)
Round 7 :
1 sc in each st BLO (8)
Round 8-12 :
1 sc in each st (8)
Info :
Stuff paws firmly to create compact little feet. For sitting cats, orient two paws forward (front legs) and two tucked as back legs. Sew front paws to body at round 12-14 area so they dangle over edges when sitting.
Round 13 :
Dec round: (1 sc, dec) x 2 (6)
Round 14 :
Fasten off leaving tail for sewing. Close opening by weaving through remaining stitches and pulling tight.
— Cat Back Legs / Hips (Make 8 for 4 cats) :
Round 1 :
6 sc in magic ring (6)
Round 2 :
(1 sc, inc) x 3 (9)
Round 3-6 :
1 sc in each st (9)
Round 7 :
(2 sc, dec) x 3 (6)
Round 8 :
1 sc in each st (6)
Round 9 :
Fasten off leaving long tail for sewing to body at lower rounds so cats can hang with legs visible under balcony/spiral curves.
Info :
Sew back legs slightly lower on the body to create a seated posture. For cats displayed inside the turret balcony, position back legs to peek out beneath the balcony rim as in the photos.
— Cat Tail (Make 4) :
Round 1 :
ch 12, join to form ring with sl st (12)
Round 2-12 :
1 sc in each st around (12)
Info :
Work the tail as a small tube. Lightly stuff the first half of the tube; leave remaining half flexible so the tail can curl naturally along the spiral or dangle. Fasten off and leave tail for sewing.
— Cat Assembly :
Info :
Sew head to body aligning center fronts. Attach ears to top of head with tips slightly forward. Sew front paws to body front so cats appear to be holding onto spiral edges; attach back legs lower and tails at back base. Use tiny stitches and hide yarn tails inside body.
— Cat Facial Embroidery :
Info :
Use a small amount of pale green or yellow embroidery thread to add irises if desired. Embroider a small nose and mouth with black or dark grey thread; take care on black yarn—use contrasting embroidery thread for small details. Secure all knots inside the head.
— Turret Roof Cone :
Round 1 :
6 sc in magic ring (6)
Round 3 :
(1 sc, inc) x 6 (18)
Round 4 :
(2 sc, inc) x 6 (24)
Round 5 :
(3 sc, inc) x 6 (30)
Round 6 :
(4 sc, inc) x 6 (36)
Round 7 :
(5 sc, inc) x 6 (42)
Round 8 :
(6 sc, inc) x 6 (48)
Round 9-20 :
1 sc in each st (48)
Info :
Work this cone in lavender. These even rounds create the sloped sides of the roof. Try the piece over the turret walls as you progress to check proportion — roof should overhang by 6-8 stitches at the first wall round.
Round 21 :
(6 sc, dec) x 6 (42)
Round 22 :
(5 sc, dec) x 6 (36)
Round 23 :
(4 sc, dec) x 6 (30)
Round 24 :
(3 sc, dec) x 6 (24)
Round 25 :
(2 sc, dec) x 6 (18)
Round 26 :
(1 sc, dec) x 6 (12)
Info :
Before closing the tip completely, insert a short length of cord or looped yarn (approx 5-6 cm) to form the hang loop. Reinforce with extra stitches and secure the end neatly inside the roof.
Round 28 :
If leaving tip closed: close with sl st and weave tail in; if leaving a slight point, fasten off and finish with an I-cord stitched to the top for a more pronounced pointed hat look.
— Turret Walls with Windows :
Round 1 :
Start with a ch 36 and join to form a ring; OR 36 sc in magic ring (36)
Round 2 :
1 sc in each st (36)
Round 3 :
(2 sc, inc) x 9 (45)
Round 4-8 :
1 sc in each st (45)
Info :
Switch to cream/pale pink for an inner turret wall color at this point. The turret walls are worked in a slightly looser open style to create window spaces—we will form windows with chain spaces and dc rows described next.
Round 9 :
*sc 5, ch 5, sk 5* rep around to create open window spaces (45 including ch spaces)
Round 10 :
In each ch-5 sp: (ch 3, 4 dc) to form arched window; sc in solid sections between windows (45)
Round 11-14 :
1 sc in each st (45)
Info :
Work round 11 with a slightly looser tension to maintain an open window. Pin the wall onto the balcony ring (made next) to check placement. The bottom edge will be joined to the balcony ring using slip stitches for a neat join.
— Balcony Ring / Ledge :
Round 1 :
ch 36, join; Rnd 2: 1 sc in each ch (36)
Round 2 :
Rnd 3: (1 sc, inc) x 12 (48)
Round 3 :
Rnd 4-6: 1 sc in each st (48)
Round 4 :
Decorative edge: *ch 3, sl st in next st* around to create scalloped edge. Fasten off and leave tails for sewing to wall bottom.
Info :
Sew turret walls to balcony ring so the balcony sits proud and creates a ledge where a cat can perch. Add a couple of securing stitches from balcony to a central support (wire or cord) for stability when mobile is hung.
— Spiral Vine Core (Armature and Tube) :
Info :
This spiral is made by crocheting a long tubular rope around a flexible armature wire (coated wire or clothesline core recommended). Cut a length of armature wire approx 180-220 cm depending on desired spiral height. If using two wires twisted together, make sure to tape and blunt the ends.
Round 1 :
With lavender yarn, ch 120 (this will form the foundation length—adjust longer for taller mobiles). Join with sl st to form a loop if you prefer a continuous spiral tube; alternatively work back-and-forth in rows around the wire core.
Round 2 :
Work 1 sc in each ch around, placing 2 sc in the center point to keep the tube even across the join (120)
Round 3-40 :
1 sc in each st (120) — continue working rounds to build up a tube approximately 30-40 mm thick. For a taller spiral work up to 60 rounds to create depth and volume
Info :
Feed the wire inside the tube as you go: insert the armature wire into the tube after you have a few rounds worked so you can mold the spiral as you crochet. If you prefer more structure, use a clothesline core and crochet around that; the number of rounds determines the final diameter.
Round 41-60 :
Continue 1 sc in each st (120) until length and thickness feel substantial. Fasten off and leave long tail to whipstitch two ends for a continuous long tube if you worked multiple segments.
Info :
To create the spiral form, gently bend the wire tube into a loose helix; use a supportive column (vacuum hose or a dowel) to shape large curves, then remove support and the tube will hold shape. Secure curves temporarily with pins while attaching cats and charms.
— Decorative Edge and Buds on Spiral :
Round 1 :
Attach contrast purple yarn and work around edge: *sc 6, picot (ch 3, sl st in 3rd ch)* repeat along both edges to mimic tiny buds (120)
Round 2 :
In random intervals attach soft green leaf motifs: ch 4, (sl st in 2nd ch from hook, sc next), sl st to spiral; leave 20-25 such leaves spaced evenly
Info :
Make small buds by crocheting a little popcorn: (5 dc in same st, remove hook, reinsert and sl st through top) using dark purple yarn. Attach buds in clusters of 2-3 every 8-12 stitches for a natural look as in the photo.
— Moon Charm (Make 2) :
Round 1 :
With yellow yarn, ch 10, join, 10 sc around (10)
Round 2 :
(1 sc, inc) x 5 (15)
Round 3 :
1 sc in each st (15)
Round 4 :
Form crescent: ch 6, sl st into round at position creating open crescent curve; repeat sculpting chains and sc until you achieve a crescent outline. Alternatively, use a granny-arc method: in chosen half of circle sl st and ch to create open lace space (see Info)
Info :
To produce a lacy crescent like in the photo: work a half-round of chain arches across 6-8 stitches of the circle edge: *ch 4, sl st in next st* repeating across the top. Fasten off and leave tail to attach with thin embroidery thread to hang.
Round 5 :
Weave tail and block crescent gently to accent lace holes; optional surface embroidery to highlight inner crescents.
— Star Charm (Make 6) :
Round 1 :
ch 6, join with sl st to make ring
Round 2 :
(*ch 3, 3 dc in ring, ch 3, sl st in ring*) x 5 to form five points; fasten off leaving tail (5 points)
Round 3 :
Optional: embroider detail lines on each point with single crochet surface stitch to give depth. Attach hanging loops with a short strand of yarn.
Info :
Star charms are worked with a fine hook (2.5-3.0 mm) and yellow yarn for a tight shape; size can be adjusted by ch count in round 1 and number of dc in each point.
— Small Leaf Motifs (Make 30+) :
Round 1 :
ch 6; sc in 2nd ch from hook, hdc, dc, hdc, sc (leaves approx 5 st)
Round 2 :
Fasten off leaving tail for sewing. Attach leaves at staggered intervals along spiral; add tiny buds near each leaf cluster.
Info :
Make leaves in soft green and alternate directions to make spiral look natural. Use a small pin to arrange before sewing permanently.
— Hanging Cord & Assembly Hardware :
Info :
Cut three lengths of strong cord (approx 8-10 cm each) to suspend moons/stars and cats. Use a central cord to run through turret and spiral core to provide vertical support. Knot and secure each charm with triple knots and a dab of fabric glue if needed.
Round 1 :
Create hanging loops: make a short I-cord of ch 3, sc back along chain 20 times, then fold and sew ends inside roof tip. This forms the top hanger.
Info :
Before finishing, test balance: hold central hanger and check spirals/cats hang evenly; adjust positions by shifting attachment points up or down on the spiral tube and retying cords.
— Final Notes and Finishing Touches :
Info :
Use embroidery thread for small eye highlights to make cats’ irises pop. Spray fabric stiffener lightly on moons and stars if they flop. Weave in all ends neatly and check for loose stitches. Reinforce any high-stress joins (like where the spiral joins the balcony) with extra rows of single crochet or additional stitching.
Info :
When attaching cats to the spiral, use a few stitches around the belly and a finishing knot under the spiral tube to make sure they sit snugly and won’t shift when the mobile rotates gently.
This delightful spiral garland is a little architectural dream that brings playful charm to any hanging space. Each tiny cat and twinkling charm is lovingly crocheted and assembled into a mobile you’ll be proud to display. The detailed steps guide you from roof tip to spiral base so every element fits perfectly together. Enjoy the calming, repetitive rhythm of stitching as this magical garland comes to life! 🧶✨