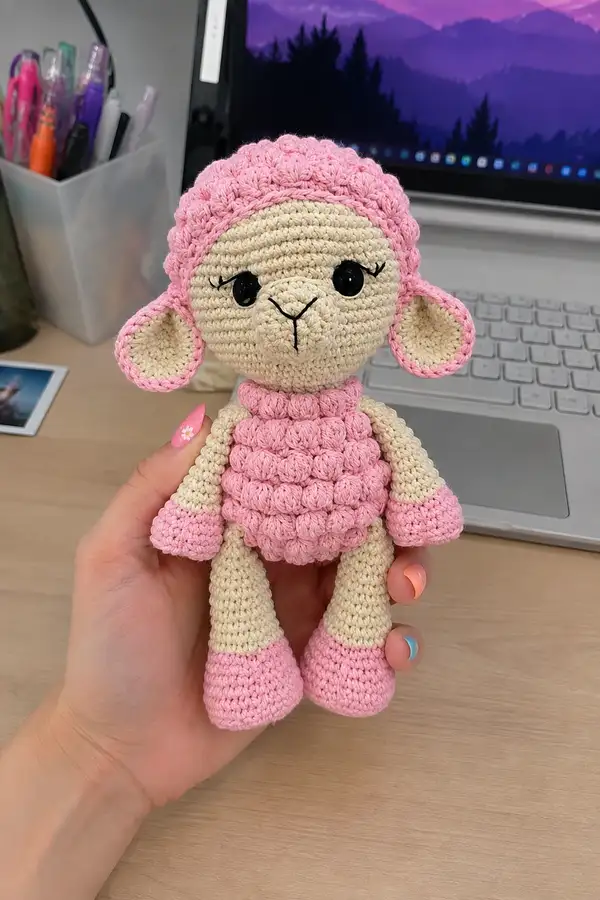
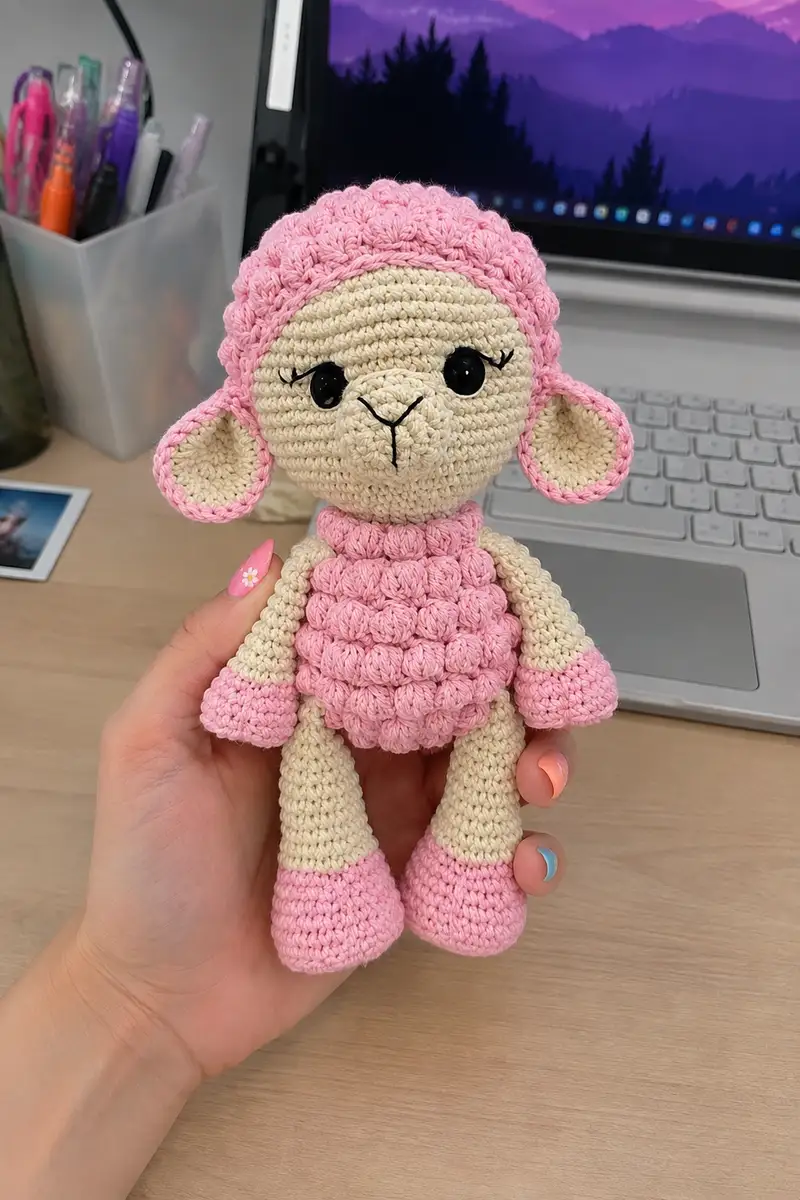
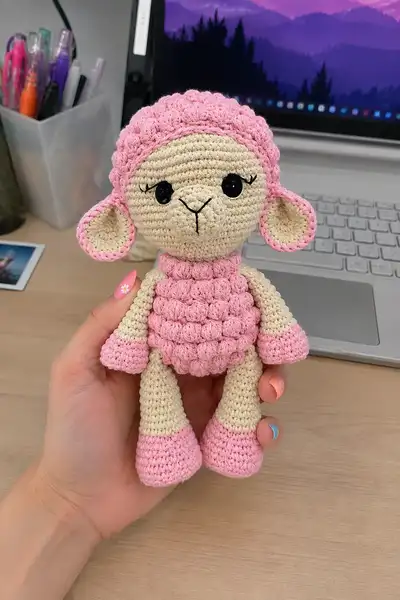
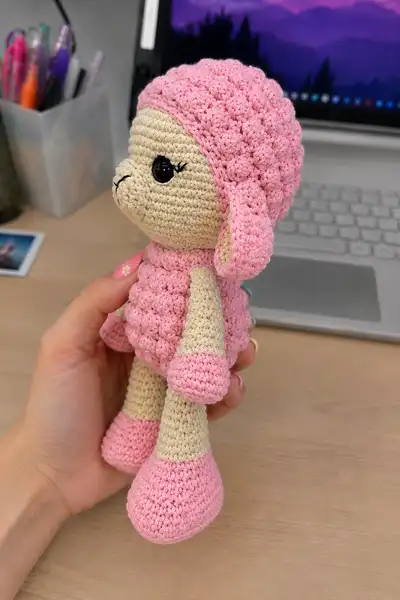
Create a cuddly Lili the sheep with this detailed amigurumi pattern. Lili features a soft round body with textured "popcorn" wool, a sweet face with a small snout, tiny ears with pink inner details, and a jaunty beret-style hat. The pattern uses medium cotton yarn and a small hook for tight stitches, producing a sturdy toy about 20 cm tall. Perfect as a gift or a charming shelf friend, this pattern includes step-by-step rounds, placement tips, and assembly guidance.
Progress Tracker
0% Complete
— Notes & Techniques :
Info :
Work amigurumi in continuous spiral rounds unless otherwise specified. Use a smaller hook than the yarn recommendation for tight fabric so stuffing won't show. The original Lili is approx. 20 cm tall with the listed materials. Popcorn ("шишечка") is made as 5 unfinished double crochets into one stitch and then finished together; the pattern uses this frequently for wool texture.
Info :
When pattern says CA or KA this is the magic ring. When working turning rows, finish each row with sl st and ch1 as noted; when working spirals do not join. Place safety eyes before stuffing the head fully and always check placement against round numbers specified.
— Body :
Info :
The body is worked initially in turning rows (flat) in the chosen wool color (the sample uses pink as a coat color under the wool). After a set of turning rows shaping, the piece is then worked in rounds with popcorn clusters to form the fluffy surface. We will follow the translated sequence and expand with detailed tips.
Round 1 :
CA (magic ring) – 10 sc, sl st, ch1 to turn. (10)
Round 2 :
(sc, popcorn) x5 — work sequence across the row: sc in next st, work popcorn in the following st; repeat total 5 times. End with sl st, ch1. You will have 10 textured clusters/positions visible across the short row. (10 positions)
Info :
When working popcorn in short turning rows, make sure to keep the popcorns on the right side of the fabric. A popcorn is 5 incomplete dc (yarn over, pull up loop) in the same stitch, then yarn over and pull through all loops and sl st to secure on the surface.
Round 3 :
10 inc evenly across – work 2 sc in each stitch to expand width (10 inc) (20)
Round 4 :
(sc, popcorn) x10 – work sc then popcorn in alternating stitches across the turned row; sl st, ch1. This yields 10 popcorns across the row. (20 positions)
Round 5 :
(sc, inc) x15 – repeat (1 sc, 1 inc) fifteen times across to shape into a wider oval base; sl st, ch1. (30)
Round 6 :
(sc, popcorn) x15 — create popcorn clusters across the widened base. End row with sl st, ch1. (30 positions)
Info :
Switch to spiral rounds after this foundation if you prefer a seamless body. The original pattern continues with repeating sections of sc and popcorns to reach a stable circumference. Keep edges neat and monitor width by counting popcorns; the body will eventually be worked in full rounds to create a tube shape.
Round 7 :
(sc, inc) x6, (sc, popcorn) x9, (sc, inc) x6 — this mixes increases and texture to begin forming the belly and the upper body (42)
Round 8 :
1 sc in each st around maintaining popcorn placement; work popcorn clusters into the same stitches as previous popcorns to build the fluffy texture up the sides. (42)
Round 9 :
Repeat Round 8 — 1 sc each st (42)
Round 10 :
(3 sc, inc) x6 (48) — gentle increase to widen the torso for belly shaping (48)
Info :
At this stage switch to working full rounds in spiral; place a marker at the first stitch and move marker each round. Continue alternating rounds of even sc and rounds introducing popcorn clusters to achieve the wooly look.
Round 11 :
1 sc in each st (48)
Round 12 :
(sc, popcorn) x24 — create 24 popcorn clusters spaced evenly: work a popcorn in every other stitch. This produces an all-over textured band. (48 positions)
Round 13 :
1 sc each st across smoothing round; push popcorns to the surface as you go. (48)
Round 14 :
(4 sc, inc) x8 (56) — increase evenly to give more volume for the back and chest area. (56)
Info :
Begin stuffing the bottom of the body once you have enough depth (after Round 14) to hold stuffing. Add a small amount now to shape the underside, gradually more later so you can still sew legs in place without overfilling.
Round 15 :
1 sc each st (56)
Round 16 :
(sc, popcorn) x28 — work all-around popcorns spaced evenly. This will form the main wooly texture on the body’s midsection. (56 positions)
Round 17 :
1 sc each st (56)
Round 18 :
(3 sc, dec) x8 (48) — begin shaping in toward the neck area. (48)
Info :
Stuffing :
Stuff the body fairly firmly at this point but leave the upper cavity a little looser for head attachment. Use small amounts of fiberfill pressed into corners and around leg and arm attachment points for stability.
Round 19 :
(2 sc, dec) x8 (40)
Round 20 :
(1 sc, dec) x8 (32)
Round 21 :
(sc, popcorn) x16 — add a top ring of popcorns around the neck area to transition to the head’s furry neckline and to hide the seam. (32 positions)
Round 22 :
1 sc each st (32)
Round 23 :
(1 sc, dec) x8 (24) — tightening the neck opening. (24)
Round 24 :
1 sc each st (24)
Info :
Fasten off leaving a long tail for sewing the head. Finish stuffing to desired firmness through the neck opening — firm but not stiff so the head sits nicely. Set body aside for assembly.
— Head :
Info :
Switch to head color: white or flesh/tan depending on the face contrast you prefer. The head is crocheted in spiral rounds to create a smooth sphere; safety eyes are inserted between rounds 29 and 30 spaced 11 sc apart (this distance is derived from the original translation — check placement visually and adjust for expression).
Round 1 :
6 sc in magic ring (6)
Round 3 :
(1 sc, inc) x6 (18)
Round 4 :
(2 sc, inc) x6 (24)
Round 5 :
(3 sc, inc) x6 (30)
Round 6 :
(4 sc, inc) x6 (36)
Round 7 :
(5 sc, inc) x6 (42)
Round 8 :
(6 sc, inc) x6 (48)
Round 9-10 :
1 sc in each st (48)
Round 11 :
(5 sc, inc) x6 (54)
Round 12-23 :
1 sc in each st (54) — work 12 rounds even to build head height (Rounds 12–23 inclusive).
Info :
Place safety eyes between Rounds 29 and 30 of the head height counting from the first magic ring round. In this adjusted scheme we maintain 54 sts for rounds 12–23 (12 rounds). For eye placement in this pattern, you will insert eyes at the front center between Round 23 and Round 24 of the head (i.e. after the tall even section) — measure 11 sc apart across the head. Use pins to confirm symmetry and adjust spacing slightly to match the reference face.
Round 24 :
1 sc in each st (54)
Round 25 :
(7 sc, dec) x6 (48)
Round 26 :
(6 sc, dec) x6 (42)
Info :
Begin stuffing the head firmly at this point. Add small amounts of fill and press into the forehead area and cheeks for a round, full head. Continue stuffing as you decrease to avoid lumps.
Round 27 :
(5 sc, dec) x6 (36)
Round 28 :
(4 sc, dec) x6 (30)
Round 29 :
(3 sc, dec) x6 (24)
Round 30 :
(2 sc, dec) x6 (18)
Round 31 :
(1 sc, dec) x6 (12)
Round 32 :
6 dec (6) — close to 6 sts make final tightening
Info :
Fasten off leaving a long tail for sewing to the body. If you are surface embroidering cheeks or a mouth, leave a slightly longer tail to easily bring through the piece when attaching facial features later. Weave the tail into the inside if not sewing yet.
— Head Continuation: Face Details & Popcorn Collar :
Info :
If you want wool around the face like the sample, add a ring of popcorns around head lower rows before final decreases: reverse to the round 21 area and insert popcorns spaced every other stitch to create a furry collar that will be sewn to the body to hide the neck seam.
Round 21a :
At Round 21 (where you still had 54 sts) work (sc, popcorn) x27 across the round to add fur texture — do this before you begin decreases. This will add a decorative furry collar. (54 positions)
Info :
Install safety eyes as recommended earlier — in this pattern place two safety eyes between rounds 22–23 of your head, approx. 11 sc apart. Secure firmly and trim any exposed posts, then continue stuffing to final shape. If using embroidered eyes, mark placement before stuffing.
— Nose (Snout) :
Info :
The small snout is worked in turning rows in the chosen contrast color (skin or tan) and sewn between Rounds 23–29 on the head front. The original pattern uses 4 short rows to form a small oval snout.
Round 1 :
CA – 6 sc, sl st, ch1 to turn (6)
Round 2 :
6 inc across – 12 (6 prib) (12)
Round 3 :
(sc, inc) x6 (18)
Round 4 :
18 sc even – finish off leaving long tail for sewing. Mark placement then sew between Head Rounds 23 and 29 centered under the eyes. (18)
Info :
Embroider nostrils and mouth after sewing snout in place. Use small backstitches or French knots for nostrils with dark thread/yarn. For a small smile, stitch a short curved line under the snout in brown or black yarn.
— Legs (Make 2) :
Info :
Legs are worked in turning rows initially to create a flatter hoof area, then in spiral for the leg shaft. They are attached to the body around Round 7 of the torso (see assembly notes). The pattern uses a color change to a lighter flesh/face color for the lower leg/hoof area and then returns to the main coat color.
Round 1 :
CA – 6 sc, sl st, ch1 turning (6)
Round 2 :
6 inc (12) – sl st, ch1 (12)
Round 3 :
(sc, inc) x6 (18) – sl st, ch1 (18)
Round 4 :
(2 sc, inc) x6 (24) – sl st, ch1 (24)
Info :
Switch to spiral rounds now for leg shaft. When working in spiral for legs, mark the first stitch and continue without joining. Work in the back loop only (BLO) for two rounds to create a visible ankle ridge if you prefer.
Round 5-6 :
24 sc BLO (2 rounds) (24)
Round 7 :
(6 sc, dec) x3 (21) — shaping the leg slightly (21)
Round 9 :
(5 sc, dec) x3 (18)
Round 10-12 :
18 sc even (3 rounds) (18)
Info :
Change color to base/body color (white/cream) now if you began with a darker hoof color. Insert a small amount of stuffing into the foot before proceeding up the leg shaft; feet should be quite firm while legs are lighter.
Round 13 :
Change color to main coat: 18 sc (18)
Round 14 :
(3 sc, dec) x3 (15)
Round 15-20 :
15 sc even (6 rounds) — increase length as needed to reach desired proportion. (15)
Round 21 :
(2 sc, dec) x3 (12)
Round 22 :
(1 sc, dec) x3 (9)
Info :
Fasten off leaving a long tail for sewing. Add a little stuffing to the upper leg and leave the rest for final shaping when attaching to the body; legs should be firm at the foot and softer at the top for easy sewing.
— Arms (Make 2) :
Info :
Arms are crocheted in turning rows first for the paw/hoof area and then in spiral to create the arm shaft. Attach arms at body rounds 15–16 for a sitting/standing balance similar to the reference.
Round 1 :
CA – 6 sc, sl st, ch1 (6)
Round 2 :
6 inc (12) sl st, ch1 (12)
Round 3 :
(sc, inc) x6 (18) – sl st, ch1 (18)
Info :
Work 18 sc in spiral for the next few rounds to make a short arm tube. Keep the paw moderately stuffed and the upper arm less packed for a natural hang after sewing.
Round 4-5 :
18 sc even (2 rounds) (18)
Round 6 :
(4 sc, dec) x3 (15)
Round 7-9 :
15 sc even (3 rounds) (15)
Round 10 :
Change to main coat color (if started with hoof/contrast). 15 sc even (15)
Round 11-14 :
15 sc even (4 rounds) — extend as needed for arm length (15)
Round 15 :
(3 sc, dec) x3 (12) — prepare for shoulder seaming. (12)
Info :
For the right arm add an additional 6 sc worked into a row at the back to offset color change placement as instructed in the original; for the left arm add 3 sc to move the color join. This preserves symmetry when attaching to the body and placing hoof/marks on the back.
Round 16 :
12 sc even — fasten off leaving a long tail for sewing. Stuff the arm paw more firmly while leaving the shoulder area light. (12)
— Ears (Make 2) :
Info :
Ears consist of two pieces: an outer ear in main coat color and an inner ear in pink (or chosen inner color). They are worked in turning rows then joined together and folded to create a slight cupped shape, then sewed to the head top between head rounds 5–8 depending on preference.
Outer Ear Round 1 :
CA – 6 sc, sl st, ch1 (6)
Outer Ear Round 2 :
6 inc (12), sl st, ch1 (12)
Outer Ear Round 3 :
(sc, inc) x6 (18), sl st, ch1 (18)
Outer Ear Round 4 :
(2 sc, inc) x6 (24), sl st, ch1 (24)
Inner Ear Round 1 :
CA – 6 sc (6)
Inner Ear Round 2 :
6 inc (12)
Inner Ear Round 3 :
(sc, inc) x6 (18)
Joining Info :
Lay the inner pink ear on top of the outer ear, align edges, fold the ear in half and slip stitch 3 sc through both layers across the base to create the ear cup. Fasten off and leave a long tail to sew the ear to the head.
Final Ear Round :
After folding, sl st 3 sc across the base binding both halves and leave tail for sewing. Repeat for the second ear (2 ears total).
— Hat (Beret) :
Info :
The beret is worked in turning rows initially then joined into a round. The hat uses several popcorns to match the body texture and creates a small fabric disk that sits comfortably on the sheep’s head. The pattern below follows the original: CA – 10 sc then rounds of popcorns and increases to create a shallow dome.
Round 1 :
CA – 10 sc, sl st, ch1 (10)
Round 2 :
(sc, popcorn) x5 (10) — [5 shishechki], sl st, ch1; this forms the initial textured ring.
Round 3 :
10 inc (20) — evenly work 2 sc in each st (20)
Round 4 :
(sc, popcorn) x10 (20) — texture ring (20)
Round 5 :
(sc, inc) x15 (30) — broaden the dome (30)
Round 6 :
(sc, popcorn) x15 (30)
Round 7 :
(4 sc, inc) x6 (36)
Round 8 :
(sc, popcorn) x18 (36)
Round 9 :
(5 sc, inc) x6 (42)
Round 10 :
(sc, popcorn) x21 (42)
Round 11 :
(6 sc, inc) x6 (48)
Round 12 :
(sc, popcorn) x24 (48)
Round 13 :
42 sc even (slightly flatten by working in BLO to create a brim if desired) — if you prefer a defined brim, work 1 sc in each st BLO. (48)
Round 14 :
42 sc even or finish with 42 sc and sl st to join, leaving long tail to sew to head. (48)
Info :
Fasten off, leave a long tail to sew the beret to the head on a slight forward tilt. The beret can also be lightly stuffed with a tiny wisp of fiberfill if you prefer it to sit rounded; otherwise leave flat and tack in a few places to secure.
— Tail (Optional) :
Info :
Optional small tail for a sheep is a tiny ball or a short cone; the original reference does not emphasize a tail but you can add one for extra charm. Work a tiny ball of popcorns or a 6-round sphere approx. 1.5–2 cm in size.
Round 1 :
6 sc in magic ring (6)
Round 3 :
(sc, inc) x6 (18)
Round 4 :
18 sc even — fasten off leaving tail for sewing. Stuff lightly. (18)
Info :
Sew the tail to the back lower body approximately between body Rounds 10–12. Secure with several stitches and hide the tail end inside the body.
— Assembly & Finishing Touches :
Info :
Before assembly, block or shape hat slightly on a ball head or bowl if desired to sit nicely. All pieces should be lightly stretched into shape and trimmed of excess yarn tails. Use pins to position pieces on the body before sewing.
Round :
Attach the head to the body by sewing neck opening of head to the top of the body where you left the neck opening (body round 23 area). Use a ladder stitch or whip stitch with small stitches to create a smooth seam. Pull stuffing inward as needed to shape neck.
Info :
Sew legs symmetrically at body Round 7 area — measure distance between legs to match reference: legs about 6–8 stitches apart across the front center. For a stable base, make sure feet are flat and toes point forward when sewing. Add small whipped stitches at base to flatten feet if needed.
Round :
Sew arms on at body Rounds 15–16 on each side approximately 12–14 stitches down from top seam. Slightly angle arms forward for a natural reach. Secure with firm stitches and weave in tails.
Round :
Sew ears to top sides of head between head Rounds 5–8 and about 12–15 stitches apart. Fold ears slightly when sewing to give a natural curved shape. Add a few invisible stitches behind each ear to attach to the skull securely.
Info :
Sew the beret so it covers part of the popcorn collar if you have added a fuzzy ring. Pin beret in place and tack around 6 anchor stitches to secure it; finish by weaving in the tail and hiding it into the head.
Round :
Weave all tails inside and secure with yarn needle. Optionally add blush to cheeks using pastel/chalk or a tiny bit of rose-colored rub applied lightly; seal with textile fixative if desired.
Info :
Optional: embroider small mouth and nostrils with embroidery floss. If using safety eyes, ensure they are firmly locked behind a tight knot; for toys intended for children under three, embroider eyes instead of using safety eyes.
This charming Lili sheep brings together classic amigurumi structure with a fluffy popcorn texture that makes it so lovable! Each instruction guides you through shaping, texturing, and assembling to create a polished, huggable friend. Whether you make it as a gift or keep it for yourself, the process is soothing and the result is delightful. 🧶🐑 Share your finished Lili and celebrate handmade joy!