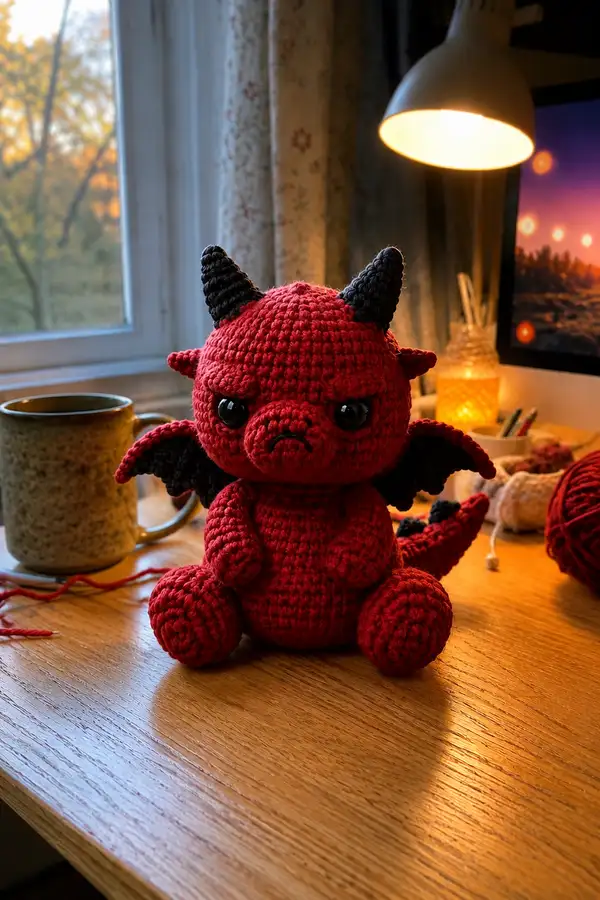
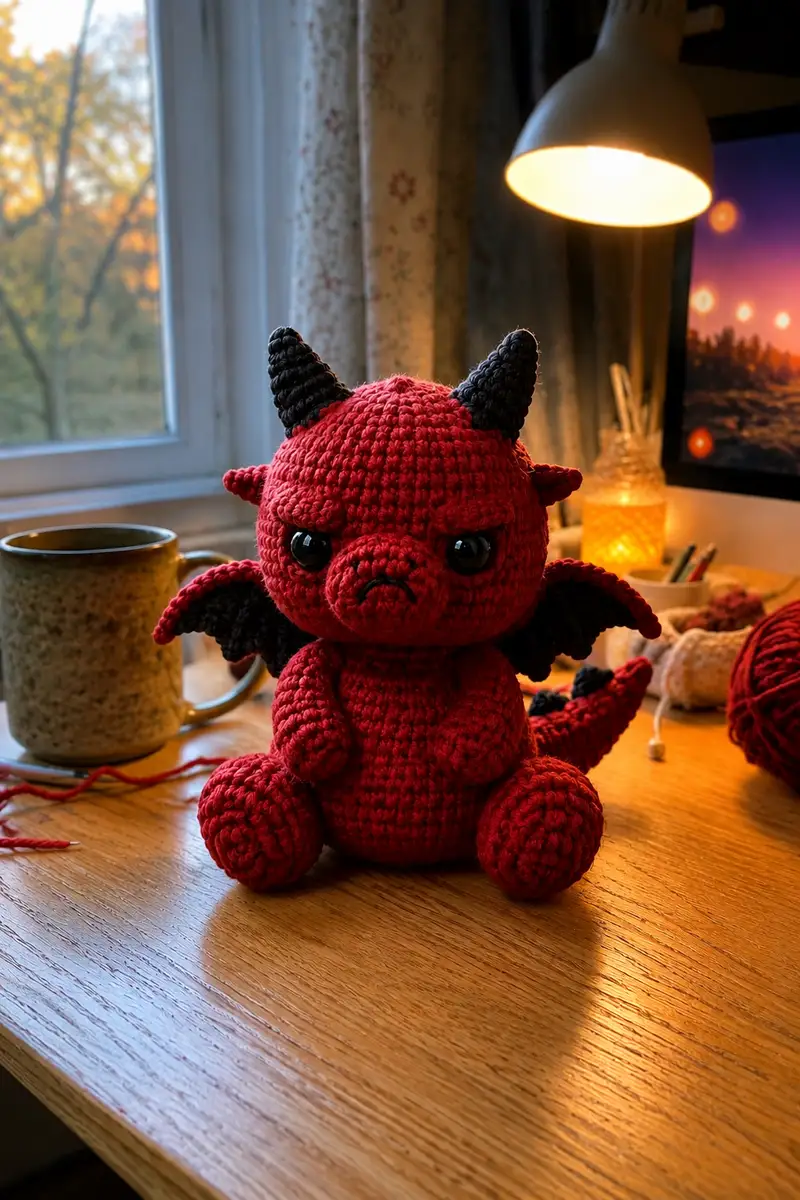
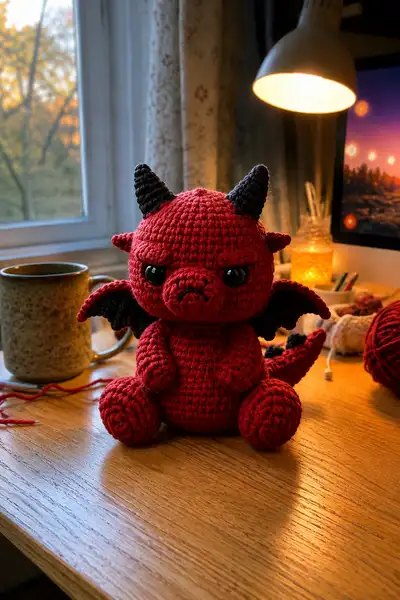
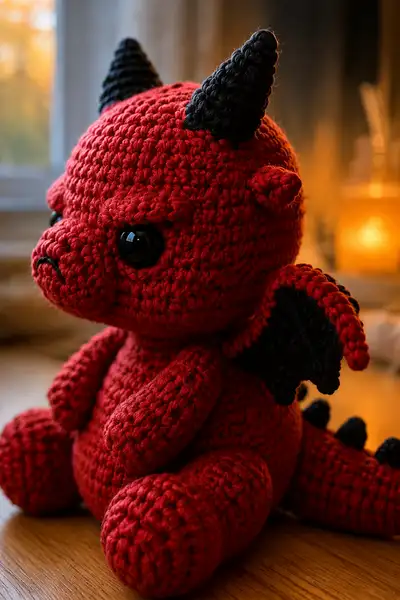
Create a squeezable, pouty-faced baby dragon with tiny black horns, scalloped black wings and a curled spike-tail. This pattern recreates the plush, round shapes and grumpy expression shown in the photos. Detailed round-by-round instructions, eye placement guidance, and assembly tips let you build this red-and-black charmer step by step.
Progress Tracker
0% Complete
— Notes :
Info :
All pieces are worked in continuous rounds unless stated otherwise. Use a stitch marker to mark the first stitch of each round and move it up each round. Numbers at the end of rounds indicate total stitches for that round. Yarn color: main body is deep red; accents (horns, wings membrane, tail spikes) are black. Gauge is not critical but should be tight enough to hide stuffing.
— Head :
Round 1 :
6 sc in magic ring (6)
Round 3 :
(1 sc, inc) x 6 (18)
Round 4 :
(2 sc, inc) x 6 (24)
Round 5 :
(3 sc, inc) x 6 (30)
Round 6 :
(4 sc, inc) x 6 (36)
Round 7 :
(5 sc, inc) x 6 (42)
Round 8 :
(6 sc, inc) x 6 (48)
Info :
Head shaping completed to round 8 (48 sts). This provides a nice round, baby-headed shape. Choose placement for horns and ears; mark positions now (see eye placement below).
Round 9-12 :
1 sc in each st (48)
Info :
Move marker up each round. By round 12 the head is taller than it is wide, creating a large forehead area for the grumpy brow effect.
Round 13 :
1 sc in each st (48)
Info :
Eye placement: place safety eyes between rounds 13 and 14, approximately 10-12 stitches apart (center-to-center). For the expression seen, position eyes fairly low on the face—about 6 stitches down from the point where the head begins to curve (mark between rounds 13 and 14). If using 12mm eyes, place them about 11 stitches apart; if using 14mm, reduce spacing to 10 stitches apart.
Round 14-16 :
1 sc in each st (48)
Info :
Muzzle placement: the snout will be attached centered approximately 3 rounds below the eyes. Mark the center front stitch before attaching the snout so you can align the piece symmetrically.
Round 17 :
(6 sc, dec) x 6 (42)
Round 18 :
(5 sc, dec) x 6 (36)
Info :
Start stuffing the head lightly now. Use small amounts of fiberfill and push into the top of the head first, then build fullness in the cheeks and sides. Stuff firmly but leave the lower neck area slightly softer for a neat join to the body.
Round 19 :
(4 sc, dec) x 6 (30)
Round 20 :
(3 sc, dec) x 6 (24)
Round 21 :
(2 sc, dec) x 6 (18)
Info :
Check placement of the snout and eyes before closing too far. If you plan to secure eyes with safety washers, do it while the head is still open but after enough stuffing so eye backs press against the wool comfortably.
Round 22 :
(1 sc, dec) x 6 (12)
Round 24 :
Change to black yarn and 1 sc in each st (6)
Info :
Finish the head with a short neck: continue 2-4 rounds in black if you want the top ring in black before sewing horns. If you do not want black at the very bottom, fasten off and leave a long tail for sewing to the body. Keep the head tightly stuffed and close using yarn needle after attaching snout and sewing features.
— Snout / Muzzle :
Round 1 :
6 sc in magic ring (6)
Round 3 :
(1 sc, inc) x 6 (18)
Round 4 :
1 sc in each st (18)
Round 5 :
(2 sc, dec) x 6 (12)
Info :
Turn the piece gently so the last round forms a pronounced muzzle pad. Stuff the snout firmly to hold its rounded shape. The stuffed snout should protrude slightly from the face to create the pout.
Round 6 :
1 sc in each st (12)
Round 7 :
(1 sc, dec) x 4 then 4 sc (8) — make slight flattening row for embroidery area
Round 8 :
1 sc in each st (8)
Round 9 :
Fasten off leaving 15-20cm tail for sewing
Info :
Sew snout to head: align so the bottom of the snout sits roughly 2-3 rounds below the eye line and centered between the eyes. Use mattress stitch or whip stitch, then embroider the downturned mouth using black yarn with a few backstitches to create the pouty curve.
— Body :
Round 1 :
6 sc in magic ring (6)
Round 3 :
(1 sc, inc) x 6 (18)
Round 4 :
(2 sc, inc) x 6 (24)
Round 5 :
(3 sc, inc) x 6 (30)
Round 6 :
(4 sc, inc) x 6 (36)
Round 7 :
(5 sc, inc) x 6 (42)
Round 8-12 :
1 sc in each st (42)
Info :
If you want the body to have a squat, chubby look (as in the photographs), maintain 42 sts around for 5 rounds. For a slimmer body add rounds of (6 sc, inc) to increase circumference. Stuff body starting from the bottom later; keep top open for head joining.
Round 13 :
(6 sc, dec) x 6 (36)
Round 14-18 :
1 sc in each st (36)
Round 19 :
(5 sc, dec) x 6 (30)
Info :
Position legs: mark two opposite positions for legs before stuffing (approximately at round 1-3 of the bottom when the body is inverted). Legs attach to the lower front of the body so the doll can sit. If you prefer a forward-sitting posture, place leg attachments slightly forward of center.
Round 20 :
(4 sc, dec) x 6 (24)
Round 21 :
(3 sc, dec) x 6 (18)
Round 22 :
(2 sc, dec) x 6 (12)
Round 23 :
(1 sc, dec) x 6 (6)
Round 24 :
Fasten off leaving long tail for sewing head. Do not completely close; use tail to sew head to body opening and secure tightly.
Info :
Before closing the body fully, stuff to a medium-firmness. Add extra fill at the base so the toy sits well. Attach the head by placing the neck opening of the head into the body opening and sewing around with the long tail, matching rounds to maintain an even seam.
— Arms (Make 2) :
Round 1 :
6 sc in magic ring (6)
Round 3 :
(1 sc, inc) x 6 (18)
Round 4 :
1 sc in each st (18)
Info :
These are short rounded arms. Keep them dense by working with a slightly smaller hook or tighter tension. Stuff the hand portion firmly to keep a rounded paw shape.
Round 5-8 :
1 sc in each st (18)
Round 9 :
(3 sc, dec) x 4 + 2 sc (14)
Round 10 :
1 sc in each st (14)
Round 11 :
(2 sc, dec) x 3 + 2 sc (11)
Round 12 :
1 sc in each st (11)
Round 13 :
(1 sc, dec) x 3 + 2 sc (8)
Round 14 :
1 sc in each st (8)
Round 15 :
Stuff the arm (hand area firm, upper arm slightly softer). Fasten off leaving long tail for sewing (approx. 20-25cm)
Info :
Sew arms to the sides of the body roughly between rounds 10-14 on the body (counting from top). Use the long tail and stitch through both arm and body securely. Slight inward tilt is nicer for a cuddly pose.
— Legs (Make 2) :
Round 1 :
6 sc in magic ring (6)
Round 3 :
(1 sc, inc) x 6 (18)
Round 4 :
(2 sc, inc) x 6 (24)
Round 5 :
(3 sc, inc) x 6 (30)
Round 6-9 :
1 sc in each st (30)
Info :
Legs are chunky to create a stable base. Stuff the foot area quite firmly, especially at the toe-facing side, so the dragon sits upright without toppling. Keep a firm disk of stuffing in the sole for stability.
Round 10 :
(4 sc, dec) x 5 (25)
Round 11 :
1 sc in each st (25)
Round 12 :
(3 sc, dec) x 5 (20)
Round 13 :
1 sc in each st (20)
Round 14 :
(2 sc, dec) x 5 (15)
Round 15 :
1 sc in each st (15)
Round 16 :
(1 sc, dec) x 5 (10)
Round 17 :
1 sc in each st (10)
Round 18 :
Fasten off leaving long tail. Sew legs to body bottom between rounds 1-4 (body is inverted while attaching) spacing them evenly to allow sitting posture.
Info :
Attach legs so that the feet point slightly outward for a natural sitting stance. Use extra reinforcement stitches through each leg base and body to keep legs secure when the toy is handled.
— Top Horns (Make 2) :
Round 1 :
6 sc in magic ring with black yarn (6)
Round 3 :
(1 sc, inc) x 6 (18)
Round 4 :
(2 sc, inc) x 6 (24)
Round 5 :
1 sc in each st (24)
Round 6 :
(3 sc, dec) x 6 (18)
Round 7 :
1 sc in each st (18)
Round 8 :
(2 sc, dec) x 4 + 6 sc (14)
Round 9 :
1 sc in each st (14)
Round 10 :
(1 sc, dec) x 4 + 6 sc (10)
Round 11 :
1 sc in each st (10)
Round 12 :
Fasten off leaving long tail for sewing. Stuff lightly to keep cones upright.
Info :
Sew horns to top of head. Place them symmetrically roughly 6-8 stitches back from the brow line and about 6-8 stitches from the centerline. Slight outward tilt gives a playful look.
— Side Ear Knobs (Make 2) :
Round 1 :
4 sc in magic ring (4)
Round 3 :
1 sc in each st (8)
Round 4 :
(1 sc, dec) x 2 (6)
Round 5 :
Fasten off leaving tail for sewing
Info :
Sew small ear knobs to the sides of the head between rounds 12-14, approximately 3-4 stitches behind eye row. These add extra expression and frame the face.
— Wings (Make 2) :
Info :
Each wing is worked in red for the outer ridge and black for the inner membrane. The wing is mostly flat; we work in continuous rounds to shape scalloped edge then surface crochet black membrane into place.
Round 1 :
With red yarn ch 9, join to first ch with sl st to form a ring, or work 8 sc into a magic ring equivalent (8)
Round 2 :
1 sc in each st around (8)
Round 3 :
(1 sc, inc) x 4 (12)
Round 4 :
1 sc in each st (12)
Round 5 :
(2 sc, inc) x 4 (16)
Round 6 :
1 sc in each st (16)
Round 7 :
BLO 1 sc in next 16 sts (16)
Round 8 :
Switch to black yarn. 1 sc in each st BLO to create inner membrane (16)
Round 9 :
Work scalloped edge along outer curve: *skip 1, 5 dc in next st, skip 1, sl st* rep along the outer rim to create wing scallops (approx 5-6 scallops depending on tension) (same stitch count as previous round)
Round 10 :
1 sc around through both layers where present to create a clean edge and join black membrane to red ridge (16)
Info :
Shape wing by holding scaffold between fingers and pinning to the body to check size. Sew wing to back of body between rounds 12-16 with black side facing inward and red ridge outward. Slight upward curve looks natural.
Round 11 :
Fasten off leaving long tail for sewing
— Tail Tube :
Round 1 :
6 sc in magic ring (6)
Round 3 :
(1 sc, inc) x 6 (18)
Round 4-10 :
1 sc in each st (18)
Info :
Tail length in the photos is slightly longer than the body depth and gently tapers. Keep the tail stuffed lightly so it curves naturally. Leave tail open at the base for sewing into the back of the body.
Round 11 :
(4 sc, dec) x 3 (15)
Round 12 :
1 sc in each st (15)
Round 13 :
(3 sc, dec) x 3 (12)
Round 14 :
1 sc in each st (12)
Round 15 :
Fasten off leaving long tail for sewing
— Tail Spikes (Make 6) :
Round 1 :
4 sc in magic ring with black yarn (4)
Round 3 :
1 sc in each st (8)
Round 4 :
(1 sc, dec) x 2 (6)
Round 5 :
Fasten off leaving tail for sewing. Stuff very lightly — these are tiny firm cones.
Info :
Sew spikes along the top of tail spaced evenly (6 spikes), with the largest spikes nearest the tail base and progressively smaller toward the tip. Use the long tails to stitch through the tail tube and secure spikes in a straight row.
— Decorative Back Ridges (Optional small cones, Make 3) :
Round 1 :
4 sc in magic ring (4)
Round 3 :
1 sc in each st (8)
Round 4 :
Fasten off leaving tails for sewing
Info :
These tiny cones are sewn down the center back above the tail base to echo the spike motif and add texture on the back. Space them evenly and angle them slightly outward for a natural effect.
— Facial Embroidery / Expression :
Info :
Use black yarn or embroidery thread and a yarn needle. To create the pouty frown reproduce a short inverted curve centered on the snout - two mirrored small vertical stitches then a curved single stitch forming a downturned mouth. For the furrowed brow, work 2-3 short satin stitches or duplicate-stitch rows above each eye to create a slight ridge that gives the grumpy expression.
Round 1 :
Embroider mouth and brow using small, tight stitches. Knot and weave ends inside the head.
Info :
When embroidering, anchor your thread with small hidden stitches inside the piece to keep surface tidy. Trim any visible tails and use a dab of fabric glue if worried about slippage (not needed for dense yarn work usually).
— Final Assembly :
Info :
Before final assembly, pin all parts in place and photograph from different angles to check symmetry. Use matching yarn for sewing to make seams invisible. Add extra stuffing where needed after partially sewing and before fully closing seams.
Round 1 :
Sew the head to the body: place head into body opening so rounds align and use mattress stitch or whip stitch around the neck opening to create a smooth join. Pull seams snug but not puckered.
Round 2 :
Sew arms to body sides between body rounds 10-14; attach legs to bottom between rounds 1-4 of body. Sew wings centered on back between rounds 12-16. Sew horns and ear knobs to head as marked previously. Attach tail to back center between rounds 4-8 of body, curving tail gently outward.
Info :
Reinforce attachments by stitching through several rounds and then weaving the tail into the body interior. For safety if toy will be handled by children, add extra stitches and consider using extra glue washers for safety eyes.
Round 3 :
Weave in all tails inside the body and trim. Make final adjustments to stuffing if needed and shape wings and horns by slightly bending or squashing lightly to create the look in the photos.
Info :
Optional: add blush using powdered eyeshadow or a small dab of pink paint to the cheeks for a softer look. Seal lightly with a textile fixative if needed.
This adorable Little Grumpy Red Devil Dragon comes together with classic amigurumi shaping and charming small details. Each step is designed to help you craft a plush friend with personality, from the pouty mouth to the swept-back horns and scalloped wings. The result is irresistibly cute, a perfect gift or desk companion that will make you smile every time you look at it. 🧶💖✨