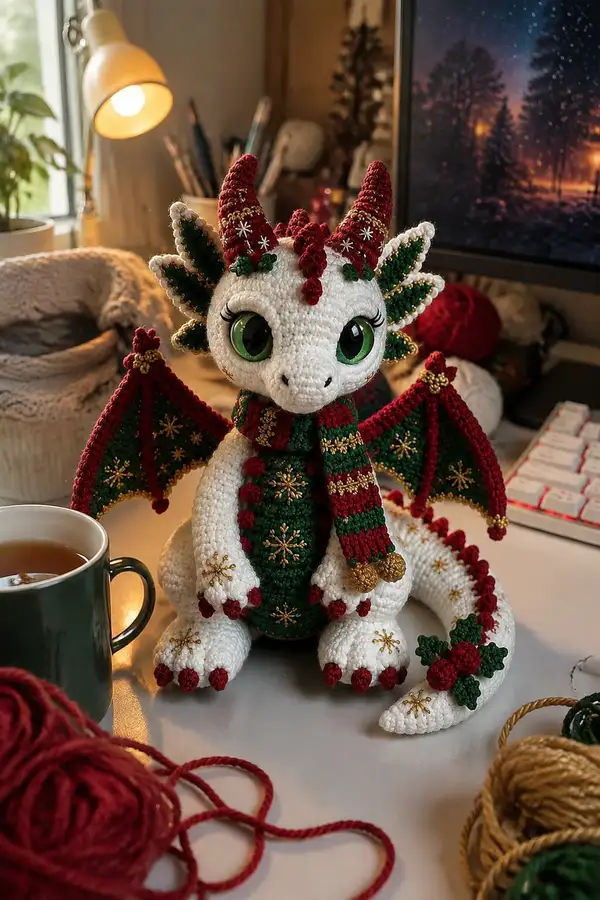
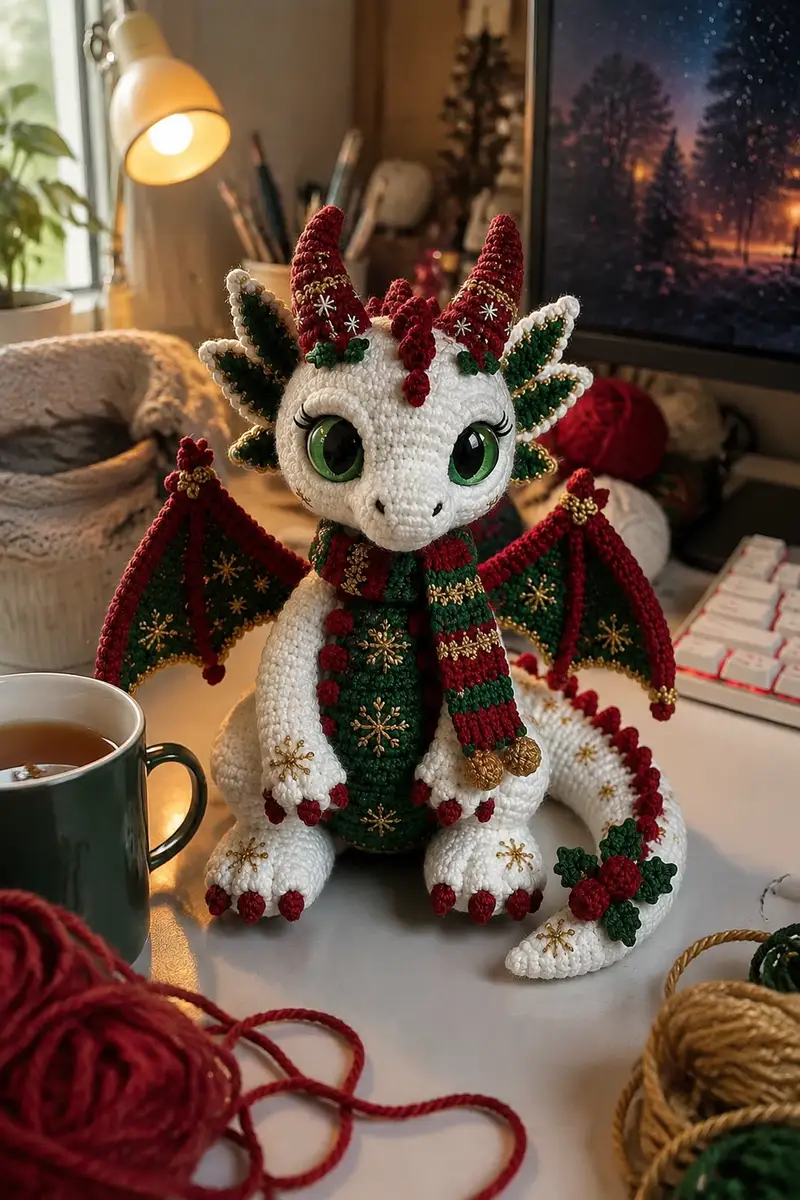
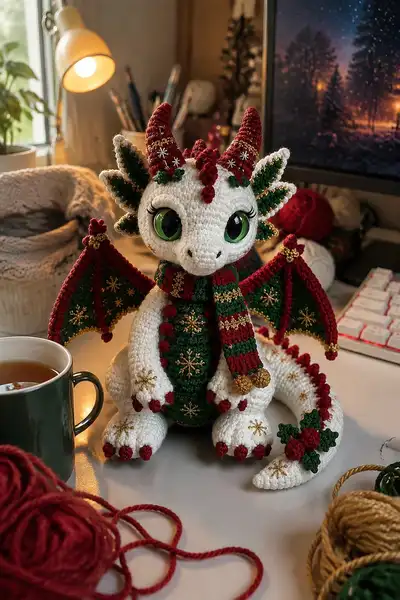
Create a festive, cuddly Christmas dragon with dazzling green eyes, candy-cane stripes, gold bead snowflakes and ornate wings. This pattern guides you through every stitch to recreate the white-bodied dragon with red and green holiday details, textured spine, curled tail, scarf and decorative pom-poms. Detailed step-by-step instructions, assembly tips and finishing decorations are included so you can make a show-stopping holiday companion.
Progress Tracker
0% Complete
— Head :
Round 1 :
6 sc in magic ring (6)
Round 3 :
(1 sc, inc) x 6 (18)
Round 4 :
(2 sc, inc) x 6 (24)
Round 5 :
(3 sc, inc) x 6 (30)
Round 6 :
(4 sc, inc) x 6 (36)
Info :
Work in continuous rounds (do not join) and place a stitch marker in first st to track rounds. Use tight tension for amigurumi. Begin main color (Creamy White).
Round 7 :
(5 sc, inc) x 6 (42)
Round 8 :
(6 sc, inc) x 6 (48)
Round 9 :
(7 sc, inc) x 6 (54)
Round 10 :
1 sc in each st (54)
Round 11 :
1 sc in each st (54)
Round 12 :
1 sc in each st (54)
Info :
Eye placement: the finished head will position safety eyes between rounds 13 and 14. Mark where the center line of the face will be. For this head size place eyes approximately 12 stitches apart (count along round 13). Use pins to test look before installing.
Round 13 :
1 sc in each st (54)
Round 14 :
1 sc in each st (54)
Info :
Install safety eyes between rounds 13-14, spaced 12 stitches apart (measure center-to-center). Continue with embroidery details later. Add white yarn sewing at inner eye lash if desired after stuffing.
Round 15 :
1 sc in each st (54)
Round 16 :
(7 sc, dec) x 6 (48)
Round 17 :
(6 sc, dec) x 6 (42)
Info :
Start shaping muzzle slightly by working tighter decreases toward the front rows. Begin light stuffing at the base of the head focusing on cheeks; use small amounts to keep face soft but full.
Round 18 :
(5 sc, dec) x 6 (36)
Round 19 :
(4 sc, dec) x 6 (30)
Round 20 :
(3 sc, dec) x 6 (24)
Info :
Work facial shaping: use a yarn needle to embroider nostrils and dimples after the head is closed. Continue stuffing the head firmly but not overstuffed to allow sewing to the body later.
Round 21 :
(2 sc, dec) x 6 (18)
Round 22 :
(1 sc, dec) x 6 (12)
Info :
Fasten off leaving a long tail (~30-40cm) for sewing to neck. Finish stuffing through the neck opening so the head keeps its shape during assembly. Weave tail through remaining sts to close partially, but keep opening for neck insertion into body later if you prefer a sewn neck joint.
Round 24 :
Optional elongated neck: If you desire a longer neck, instead of closing at round 23, stop decreases at 12 sts and work 4-6 rounds even (12 sts) to make a neck tube. Then fasten off leaving a tail for sewing.
Round 25 :
Info: Use safety eye lashes or embroider long lashes now using black embroidery thread—stitch small curved lashes across top of eye for expressive look.
Round 26 :
Info: Reinforce the eye surrounds by stitching a small row of sc around the eye aperture from the inside if needed to tighten the fabric and eliminate gaps around safety eyes.
— Horns (Make 2) :
Round 1 :
5 sc in magic ring with red (5)
Round 2 :
(sc, inc) x 5 (10)
Round 3 :
1 sc in each st (10)
Round 4 :
(2 sc, inc) x 3, 4 sc (13) — adjust slightly to create tapered cone
Round 5 :
1 sc in each st (13)
Round 6 :
(3 sc, inc) x 3, 4 sc (16)
Info :
Create horn texture by alternating BLO rounds every 2 rounds: work 2 rounds in normal sc then 1 round in BLO to create spaced ridges; stuff lightly after rounds 5-8, tapering stuffing toward tip.
Round 7 :
1 sc in each st (16)
Round 8 :
(3 sc, dec) x 4 (12)
Round 9 :
(2 sc, dec) x 3, 3 sc (9)
Round 10 :
(1 sc, dec) x 3 (6)
Round 11 :
6 sc (6) - stuff more if necessary
Round 12 :
6 dec to close and fasten off leaving a long tail for sewing. Add gold embroidery: wrap a thin strand of metallic gold around the base and stitch small crosses to mimic the pattern in the photo.
— Ear Frills (Make 4 leaf-layers; 2 left, 2 right) :
Round 1 :
6 sc in magic ring in green (6)
Round 3 :
(1 sc, inc) x 6 (18)
Round 4 :
1 sc round even (18)
Round 5 :
Switch to white for outer ruffle: 1 sc in each st (18)
Round 6 :
Edge: *ch1, 3 sc in next st, skip 1* around to make scallop (approx 9 scallops). Fasten off and block slightly
Info :
Each ear is layered: make one inner green leaf then overlay with a slightly larger white scalloped leaf. Stagger and sew with small invisible stitches so green peeks through. Add metallic gold beading along scallop edge by embroidering with metallic thread and tiny gold seed beads after assembly.
— Body :
Round 1 :
6 sc in magic ring (6)
Round 3 :
(1 sc, inc) x 6 (18)
Round 4 :
(2 sc, inc) x 6 (24)
Round 5 :
(3 sc, inc) x 6 (30)
Round 6 :
(4 sc, inc) x 6 (36)
Round 7 :
(5 sc, inc) x 6 (42)
Round 8 :
1 sc in each st (42)
Round 9 :
1 sc in each st (42)
Info :
Begin color change for belly panel: mark the front center of the body. The belly uses Evergreen color and is worked separately and then sewn on or crocheted in with surface joining. For a clean edge change yarn on last yarn-over of the stitch before the belly area.
Round 10 :
Continue in main body color for back rounds (42)
Round 11 :
1 sc in each st (42)
Round 12 :
1 sc in each st (42)
Round 13 :
(6 sc, dec) x 6 (36)
Info :
Start stuffing the body from the bottom upwards after round 14. Keep stuffing moderately firm; the body supports head and limbs so aim for medium-firm to firm depending on preference.
Round 14 :
1 sc in each st (36)
Round 15 :
(5 sc, dec) x 6 (30)
Round 16 :
(4 sc, dec) x 6 (24)
Round 17 :
1 sc in each st (24)
Round 18 :
(3 sc, dec) x 6 (18)
Round 19 :
(2 sc, dec) x 6 (12)
Round 20 :
(1 sc, dec) x 6 (6)
Info :
Fasten off leaving a long tail to stitch neck/ head into body opening. Alternatively, stop decreasing at 12 sts to create a neck cavity for inserting the head. When attaching, stuff slightly more to create a gentle neck curve.
— Belly Panel (Green) :
Round 1 :
6 sc in magic ring in Evergreen (6)
Round 3 :
(1 sc, inc) x 6 (18)
Round 4 :
(2 sc, inc) x 6 (24)
Round 5 :
1 sc in each st (24)
Round 6 :
1 sc in each st (24)
Info :
Belly is approximately 6 rounds wide; if desired, make a slightly larger oval by increasing another round. When finished, sew to the front of the body aligning center rows to body rounds 9-13. Use mattress stitch for invisible join.
Round 7 :
Edge: work 1 sc around edge evenly to create smooth join (24)
— Arms (Make 2) :
Round 1 :
6 sc in magic ring (6)
Round 3 :
(1 sc, inc) x 6 (18)
Round 4 :
1 sc in each st (18)
Round 5 :
1 sc in each st (18)
Info :
To form paw shape change to red at last yarn-over of round 5. Work the tip of each finger as separate little bumps or use small 3-sc clusters around the edge to create claws, as pictured red claws.
Round 6 :
Switch to Festive Red for claws. *sc 2, ch1, slip stitch into next 2 sts* around to create slight scallops for claw base (18)
Round 7 :
Return to white and sc in each st (18)
Round 8 :
Work 6 sc, inc, 6 sc, inc pattern to slightly flatten paw end (20)
Round 9 :
1 sc in each st (20)
Round 10 :
(3 sc, inc) x 5 (25) — begin widening upper arm
Round 11 :
1 sc in each st (25)
Round 12 :
(4 sc, inc) x 5 (30)
Round 13 :
1 sc in each st (30)
Round 14 :
(5 sc, inc) x 5 (35)
Round 15 :
1 sc in each st (35)
Info :
Stuff the paw portion firmly. Stuff the arm lightly up to the shoulder so it remains slightly flexible. If you want poseable arms insert a thin floral wire before the stuffing round then continue stuffing around it and bend and secure normally.
Round 16 :
Decrease to create shoulder: (5 sc, dec) x 5 (30)
Round 17 :
(4 sc, dec) x 5 (25)
Round 18 :
Fasten off leaving long tail for sewing. Sew arms to sides of body aligning top of arm at body rounds 10-12 for natural placement.
— Legs (Make 2) :
Round 1 :
9 sc in magic ring (9)
Round 2 :
(sc, inc) x 9 (18)
Round 3 :
(2 sc, inc) x 6 (24) then continue sc to finish round (24)
Round 4 :
1 sc in each st (24)
Round 5 :
(3 sc, inc) x 6 (30)
Round 6 :
1 sc in each st (30)
Round 7 :
(4 sc, inc) x 6 (36)
Info :
Form foot by increasing additional rounds to create a flattened sole. Work even rounds and then shape toe area by decreasing several sts in the front quarter to create three toe lobes. Add red claws as small 3-sc bumps sewn on later.
Round 8 :
1 sc in each st (36)
Round 9 :
1 sc in each st (36)
Round 10 :
Shape toes: across the front 12 sts work (2 sc, dec) x 4 to create toe indent (24) and keep remaining 24 sts even, then rotate to form foot shape
Round 11 :
Stuff foot firmly and continue with 1 sc in each st (24)
Round 12 :
(2 sc, inc) x 6 (30)
Round 13 :
1 sc in each st (30)
Round 14 :
(3 sc, inc) x 6 (36)
Round 15 :
1 sc in each st (36)
Round 16 :
(4 sc, dec) x 6 (30)
Round 17 :
(3 sc, dec) x 6 (24)
Round 18 :
(2 sc, dec) x 6 (18)
Round 19 :
Fasten off leaving long tail to sew legs to bottom of body. Position legs at body rounds 1-6 evenly spaced; stitch securely. Add embroidered gold snowflake detail on top of foot if desired.
— Tail :
Round 1 :
6 sc in magic ring (6)
Round 3 :
(1 sc, inc) x 6 (18)
Round 4 :
(2 sc, inc) x 6 (24)
Round 5 :
1 sc in each st (24)
Round 6 :
1 sc in each st (24)
Round 7 :
Begin tapered length: work rounds even for 8-12 rounds decreasing 2 sts every 6 rounds until you reach ~12-14 sts across tail tip
Round 8 :
Info: Add red scallop spine: with red yarn make small 3-sc popcorns spaced every 4-6 sts along one side of tail. Sew holly leaf cluster near tip using small green leaf motifs made earlier.
Round 9 :
Continue stuffing tail as you go, stuffing more at the base and tapering to the tip. Leave long tail for sewing to rear of body at center base.
Round 10 :
Optional curl shaping: add a few rounds of HDC to stiffen tail tip and create a curl by sewing through tail and forming C shape before final stuffing and sewing.
— Wing Membrane (Make 2) :
Round 1 :
Start with 10 sc in magic ring in Evergreen (10)
Round 3 :
(1 sc, inc) x 10 (30)
Round 4 :
1 sc in each st (30)
Round 5 :
(2 sc, inc) x 10 (40)
Round 6 :
Work even 1 sc rounds for structure (40)
Info :
Shape the wing by creating a triangular shape: after initial round increases, shape outer edge by working decreases at strategic points. The wing pattern below creates two seams for the inner support ribs using red striping later on.
Round 7 :
Start shaping: on one quarter of the round work (3 sc, dec) x 6 to create a pointy outer edge; keep rest even (approx 36)
Round 8 :
1 sc in each st (36)
Round 9 :
Switch to Festive Red and work a rib seam: all sc along designated rib positions (use stitch markers to mark two rib lines symmetric across wing). Work 3 rounds in red to create raised ribs.
Round 10 :
Return to Evergreen and work 1 sc in each st (36)
Round 11 :
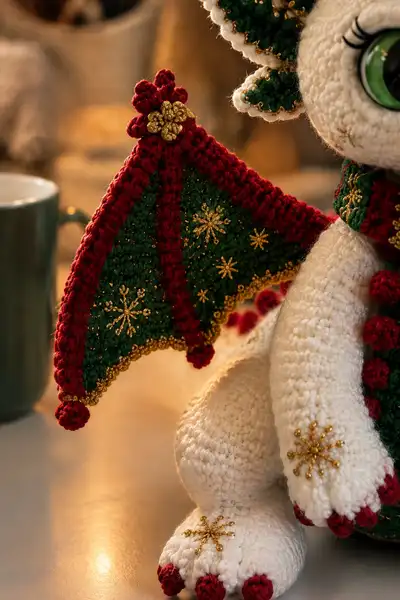
Edge: with red yarn sc around edge then with gold thread single crochet picot border to mimic gold beaded scallop (sc, ch2, sl st in 2nd ch) around edge
Round 12 :
Add outer pom-pom at wing tip: small 6-sc red bobble (make as 6 sc in mr, fasten off leaving tail to attach at wing corner)
Round 13 :
Use metallic gold embroidery thread to add snowflake details. Use a simple embroidered starburst: bring thread from back to front and couch tiny gold beads at points. Secure from the inside with a knot and weave in tails.
Info :
For sturdier wings, slip a thin piece of floral wire along the red rib seams before closing; bend to shape and cover with yarn to hide ends. Alternately use a layer of interfacing inside sewn in if you do not want wire.
— Wing Edge Trim & Final Ruffle :
Round 1 :
With red yarn sc around entire wing edge (approx 80 sts; count to match wing circumference) creating a firm border
Round 2 :
Switch to gold metallic thread: sc around in slip-stitch style to attach seed beads every 4th stitch for beaded scallop (seed bead on thread before each sc) — this gives the golden beaded scallop seen on photo
Round 3 :
Work small red bobble clusters along inner joints where wing meets body (make 6 mini bobbles to match photo)
Info :
Edge counts are approximate; adjust to match your wing circumference. Always measure and plan your bead spacing before stitching to keep symmetry.
— Scarf and Pom-Poms :
Round 1 :
Chain 80 (or desired length) in red and turn, join into a tube by slip stitching through back loops to create neat ribbed tubular scarf
Round 2 :
Work stripes: 4 rows red, 4 rows green, alternating until scarf reaches desired length. End with 2 rows of red followed by gold metallic slip stitch on edges.
Round 3 :
Make small pom-poms: wrap yarn 40 times, tie center, cut loops, trim to small neat pom-poms and attach to scarf ends. For decorative gold baubles make two 6-sc gold bobble motifs and sew to end.
Info :
Scarf width: approx 6-10 rows depending on yarn and hook. Make the stripes crisp by carrying yarn along and catching floats at the back, or cut and weave ends for cleaner appearance. Sew scarf loosely around neck so it sits naturally.
— Decorative Snowflake Embroidery :
Info :
Snowflakes are embroidered with metallic gold thread and tiny seed beads. Use a simple 6-point starburst: stitch 6 spokes radiating from a central bead and add a bead at the tip of each spoke. Secure thread tails by weaving into surrounding stitches from the inside.
Technique :
Example snowflake: bring gold thread through center, pull bead over knot, then make 6 straight stitches outwards (approx 6-8 mm) and back to center; at mid-point add small bead by couching and secure.
Info :
Space snowflakes evenly across belly and wings. Pin the motif first to get placement right, then stitch and attach beads. Keep tension even to avoid puckering the fabric.
— Small Decorative Motifs (Holly Leaves & Berries) :
Round 1 :
Holly leaf: ch6, sl st in 2nd ch from hook, sc, hdc, 2 dc in next, hdc, sc, sl st to base. Make 2-3 leaves in dark green and sew in cluster.
Round 2 :
Berry: 6 sc in magic ring in red, fasten off leaving tail to sew three berries into a small cluster and attach to tail tip or scarf end
Info :
Sew holly cluster to tail tip or as shoulder ornament. Add a small gold bead center on cluster for a festive touch. Place clusters symmetrically if making more than one.
— Assembly and Final Finishing :
Info :
Before assembly: block ear frills slightly and flatten wings gently to shape. Place all motifs prior to sewing to trial positions. Use pins to adjust look and symmetry.
Round 1 :
Sew head to body: insert head neck opening into top of body opening. Use mattress stitch around neck attaching evenly to body rounds 18-20. Keep head slightly forward-facing for personality.
Round 2 :
Sew arms to sides at body rounds 10-13, making sure thumbs/paws face forward. Sew legs to bottom of body spaced so the dragon sits upright and stable.
Round 3 :
Attach wings: position wings starting at body rounds 6-10. Sew along base firmly, adding extra reinforcement stitches through body loops for stability. Add inner rib stitches to hide any seam.
Round 4 :
Sew horns and ear frills to top of head: horns sit above and slightly forward of ears and ear frills layered behind ears. Sew holly cluster to tail tip and attach pom-poms to scarf ends.
Info :
Weave in all ends securely through several stitches and hide tails inside body to avoid visible knots. For toy safety, consider sewing safety eyes extra securely or embroider eyes for younger children.
Round 5 :
Optional weight: add a small pouch of pellets in the bottom of body before final closure for stability, wrap pellet bag in fabric and place under stuffing so it is not directly against skin.
Round 6 :
Final check: sit the dragon and adjust stuffing or re-sew any pieces for a balanced posture. Add final bead decorations with fabric glue if necessary and allow to dry fully.
Info :
To achieve the exact look seen in the images, use metallic gold thread sparingly and place embroidered snowflakes at the belly center, feet tops, and wing membranes. Add eyelashes with black embroidery thread near top of eyes for extra charm.
This enchanting Christmas dragon combines traditional amigurumi construction with seasonal details to create a collectible holiday companion. Each careful stitch and embroidered snowflake adds personality and charm, making it a perfect mantel or gift piece. Follow the detailed rounds and info tips to recreate every ornate detail, from the beaded wing edge to the holly-tail cluster. Enjoy the cozy process and display your finished dragon with pride! 🧶🎁🎄