About This Magic Pine Cone Amigurumi Pattern
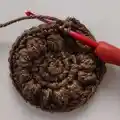
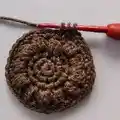
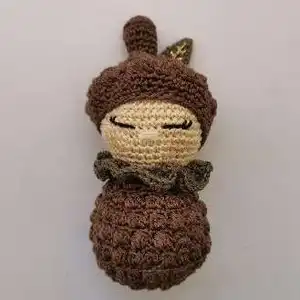
This pattern teaches you how to crochet a sweet Magic Pine Cone amigurumi complete with a textured bobble-body, ruffled collar, little hat, stalk and embroidered leaf. It includes a pictorial bobble stitch tutorial and clear round-by-round instructions to help you through shaping. The finished piece is compact and charming, perfect for gifting or keeping on a shelf.
Designed for intermediate crocheters, this pattern uses basic increases, decreases and bobble stitches to create delightful texture. Full assembly and embroidery guidance is included for a polished finish.
Why You'll Love This Magic Pine Cone Amigurumi Pattern
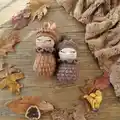
I absolutely love this pattern because it combines a cozy autumn aesthetic with playful texture from the bobble stitch, making each piece feel handcrafted and unique. I enjoy how the small size lets you finish a complete amigurumi in a single afternoon. The pattern encouraged me to experiment with tiny embroidered details which bring so much personality to the face. Sharing the step-by-step bobble stitch helped me teach friends this fun technique and see their excitement when their pieces come to life.
Switch Things Up
I love how easily this pattern adapts to different colorways; try soft pastels for a whimsical version or rich earth tones for a classic autumn look.
I often change the yarn weight and hook to make larger or smaller versions; bulky yarn with a larger hook gives a chunky, cuddly pine cone while fine yarn makes a dainty mini keychain.
I sometimes embroider different facial expressions by shifting the eye placement or changing the length of the lashes to give each pine cone its own personality.
For a spicier texture, adjust the number of loops in the bobble stitch as described in the tutorial so you get more pronounced bumps on the body.
You can swap the ruffled collar color from green to a contrasting shade to make it pop or use variegated yarn for more visual interest.
To make a poseable version, consider adding a short piece of thin wire inside the stalk before stuffing so the hat can be slightly angled.
I like creating small accessory sets—make matching tiny acorns or leaves to display alongside your pine cone for a themed vignette.
Use safety eyes for a glossier look or embroider the eyes for a softer, baby-safe finish; I prefer embroidered eyes for toys meant for little ones.
Try sewing on tiny felt additions like a scarf or tiny crocheted props like a mushroom to create a whole scene or character set.
If gifting, add a loop to the top of the hat and turn your pine cone into a holiday ornament; this is a favorite quick customization I make each season.
Common Mistakes & How to Fix Them
✗ Skipping a stitch marker while working continuous rounds causes you to lose track of the beginning of the round; place a stitch marker at the start of every round and move it each round.
✗ Not stuffing evenly results in lumps or flat spots that distort shaping; stuff gradually, shaping as you go and use small amounts of stuffing at a time for an even result.
✗ Pulling the yarn too tight on increases or decreases will tighten the fabric and change the size; maintain consistent, relaxed tension and count stitches after shaping rounds.
✗ Forgetting to leave a long tail when fastening off prevents neat sewing of parts; always leave enough yarn for sewing when the pattern instructs and weave the tail into seams securely.