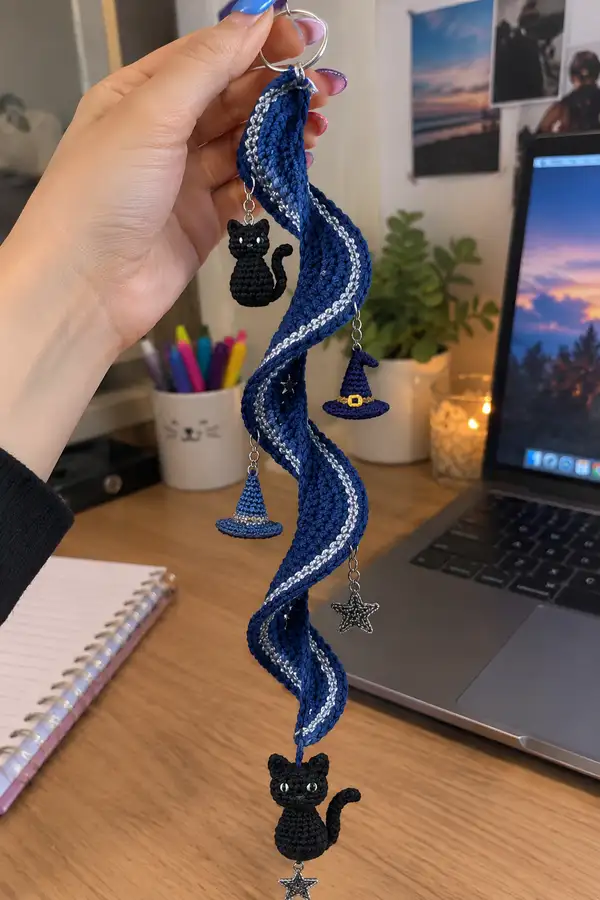
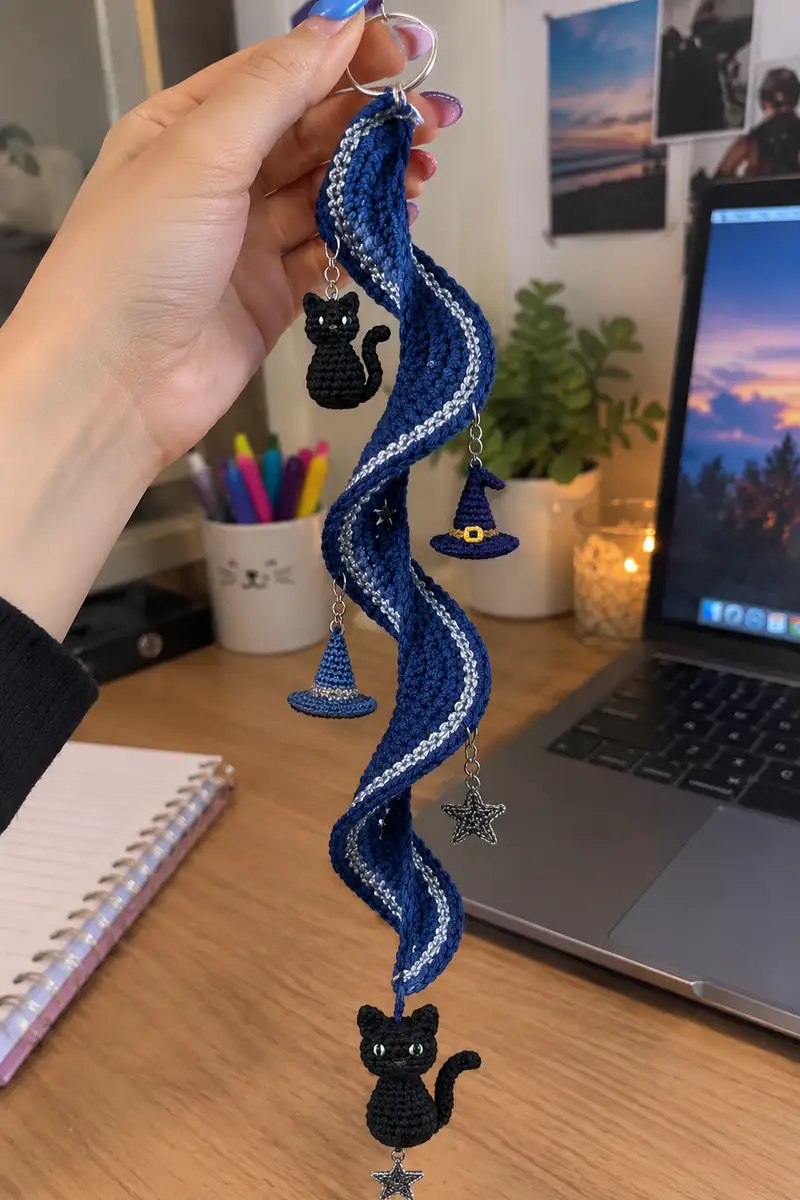
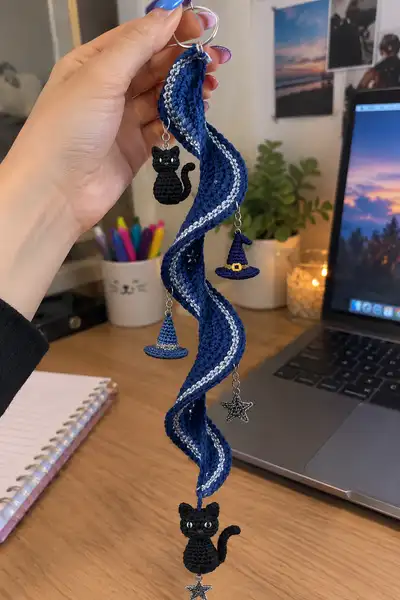
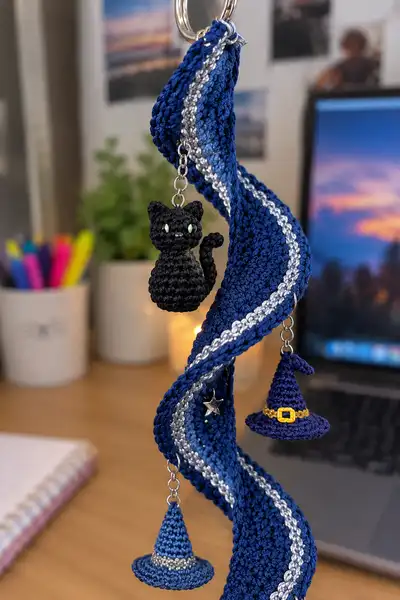
A whimsical midnight spiral keychain featuring a long navy spiral ribbon with a shimmering silver stripe, tiny crochet witch hats and two petite black cat charms. This compact, decorative accessory hangs from a keyring and adds a magical, handmade touch to bags, keys, or as a gift. The pattern includes detailed step-by-step instructions for the spiral, miniature cats, hats, tail, and assembly.
Progress Tracker
0% Complete
— Notes :
Info :
This pattern is written in US terms. Work tightly to avoid stuffing showing through. Use stitch markers to mark the first stitch of each round. When attaching charms to short chain segments, use small jump rings and close them fully with pliers. The spiral is worked flat in rows then joined at the ends to a keyring and gently twisted to create the spiral shape. Mini charms (cats and hats) are worked in continuous rounds (do not join unless specified).
— Materials & Gauge :
Info :
Gauge is less critical for amigurumi charms but for the spiral aim for approx 2.5-3.0 cm width and 25-30 cm length when using fingering/sport cotton and 2.25mm hook. If your spiral comes out larger, swap to a smaller hook to keep neat proportions.
— Cat Charm (Make 2) :
Round 1 :
6 sc in magic ring (6)
Round 3 :
(1 sc, inc) x 6 (18)
Round 4 :
(2 sc, inc) x 6 (24)
Round 5 :
(3 sc, inc) x 6 (30)
Info :
These rounds form the very small lower base of the cat. Use tight tension to create a neat bottom. If your yarn is bulky, consider reducing increases to reach desired small size.
Round 6 :
1 sc in each st around (30)
Round 7 :
(4 sc, inc) x 6 (36)
Round 8 :
1 sc in each st around (36)
Round 9 :
(5 sc, inc) x 6 (42)
Info :
Begin forming the bulbous lower body. At rounds 6-9 the cat gets wider; check your stitch counts every round to keep math consistent. If making one larger cat, add extra increase rounds in multiples of 6.
Round 10-13 :
1 sc in each st around (42)
Round 14 :
(5 sc, dec) x 6 (36)
Round 15 :
(4 sc, dec) x 6 (30)
Info :
Start stuffing the lower body firmly but not overly tight. For a heavy stable bottom, add a small amount of fiberfill and press evenly with a stuffing tool. Keep stuffing shallow to allow smooth transition to upper body/head area.
Round 16 :
(3 sc, dec) x 6 (24)
Round 17 :
(2 sc, dec) x 6 (18)
Round 18 :
1 sc in each st around (18)
Info :
We will create a gentle neck now. Do not overstuff the neck; keep it lean so the head sits naturally. If you prefer a more pronounced separation between body and head, add 1-2 rounds even before the head increases for extra neck length.
Round 19 :
Increase in alternating pattern to start head: (1 sc, inc) x 6 (24)
Round 20 :
(2 sc, inc) x 6 (30)
Round 21 :
(3 sc, inc) x 6 (36)
Round 22-25 :
1 sc in each st around (36)
Info :
Place safety eyes between rounds 23-24, spacing them roughly 6-8 stitches apart (for 36-st head aim for 7-8 sts between eyes). If using embroidery, mark placement with pins and stitch later. Add tiny white embroidery dot later for eye highlights.
Round 26 :
(4 sc, dec) x 6 (30)
Round 27 :
(3 sc, dec) x 6 (24)
Round 28 :
(2 sc, dec) x 6 (18)
Info :
Begin closing the head. Continue stuffing gradually as you decrease to maintain smooth shape and to avoid a gap. Use a blunt needle to push stuffing into tight curves.
Round 29 :
(1 sc, dec) x 6 (12)
Round 31 :
Fasten off leaving long tail for sewing (6). Weave tail through remaining stitches and pull closed. Secure with knot and weave tail inside the charm for invisibility.
Info :
Sew in safety eye washers if using safety eyes and add a dab of fabric glue to the washers for extra security if this keychain may be handled roughly. Add a tiny embroidered nose and mouth: using black or dark grey yarn, stitch a tiny vertical nose and a short left/right mouth line using backstitch.
— Cat Ears (Make 4, 2 per cat) :
Round 1 :
4 sc in magic ring (4)
Round 2 :
inc in each st around (8)
Round 3 :
(1 sc, inc) x 4 (12)
Round 4 :
1 sc in each st around (12)
Round 5 :
Fold ear flat and sc through both layers across 6 sts to close base (6)
Info :
Sew ears to top of head, positioning them at roughly rounds 21-22 of the head (count around and pin first). Angle ears slightly outward for natural look. Use invisible stitches to attach and hide tails inside head.
— Cat Tail (Make 2) :
Round 1 :
6 sc in magic ring (6)
Round 2 :
1 sc in each st around (6)
Round 3-5 :
1 sc in each st around (6)
Round 6 :
(1 sc, inc) x 3 (9)
Round 7-9 :
1 sc in each st around (9)
Round 10 :
(2 sc, inc) x 3 (12)
Round 11-12 :
1 sc in each st around (12)
Info :
Optional: insert a short length (3-4 cm) of thin craft wire into tail to make it poseable; fold wire back on itself and wrap the ends with tape before stuffing to prevent sharp ends. Stuff lightly, leaving tail flexible. Attach tail to lower back of the cat body at the seam where the body and head meet using whip stitch; shape tail with gentle curve before fully securing.
— Tiny Witch Hat A (Brim Hat, Make 1) :
Round 1 :
6 sc in magic ring (6)
Round 3 :
(1 sc, inc) x 6 (18)
Round 4 :
(2 sc, inc) x 6 (24)
Round 5 :
1 sc in each st around (24)
Info :
This section creates the brim foundation; be careful with tension as the brim should lie flat. If brim cups, try a larger hook for brim rounds; if it ruffles, try a smaller hook or remove excess increases.
Round 6 :
(3 sc, inc) x 6 (30)
Round 7 :
1 sc in each st around (30)
Round 8 :
Switch to BLO. 1 sc in each st BLO around (30)
Info :
Switch to BLO on round 8 to create a small ridge at the base of the cone that helps the brim sit neatly. Add a contrast chain or tiny stitch row in metallic/gold to imitate a buckle band if desired.
Round 9 :
Work cone: sl st to next st to rotate and begin cone shaping; ch1, 1 sc in same st and next 2 sts (3 sc), then (dec, 1 sc) repeat to start tapering. For clarity:
Round 9 Detail :
(1 sc in next 2 sts, dec) x 10 (30 -> 20) perform dec pattern to bring to 20
Round 10 :
(2 sc, dec) x 6 + (2 sc) adjustments to reach 14 (14)
Round 11 :
(1 sc, dec) x 4 + 2 sc adjustments to reach 10 (10)
Round 12 :
Dec in every other stitch to reach 6 (6)
Round 13 :
Fasten off leaving a long tail to sew the cone to the brim. Fold and sew cone neatly to brim center, slightly stuffing cone if you prefer a plump shape (very small amount).
Info :
Add a tiny golden buckle by stitching a small rectangle with yellow yarn across the front of the brim about 4-6 stitches from the cone base. Use embroidery yarn or duplicate stitch for crisp detail.
— Tiny Witch Hat B (Pointed Cone Hat, Make 1) :
Round 1 :
6 sc in magic ring (6)
Round 3 :
(1 sc, inc) x 6 (18)
Round 4 :
(2 sc, inc) x 6 (24)
Round 5 :
1 sc in each st around (24)
Round 6 :
(3 sc, inc) x 6 (30)
Round 7-9 :
1 sc in each st around (30)
Round 10 :
(3 sc, dec) x 6 (24)
Round 11 :
(2 sc, dec) x 6 (18)
Round 12 :
(1 sc, dec) x 6 (12)
Round 14 :
Fasten off leaving long tail for sewing. Slightly stuff tip if desired. Bend top of pointed hat to give it a whimsical droop and sew shape closed or secure with a tiny stitch.
Info :
Attach this hat to a jump ring or short chain to hang from the spiral. If you want it to look layered, sew a small rim at the base using a contrasting color or metallic thread as shown in the photos.
— Small Star Charm (Make 2) :
Round 1 :
Ch 5, join with sl st to form ring
Round 2 :
*Ch2, 3 dc in ring, sl st in ring to form one point; repeat from * 4 more times to form 5 points, fasten off and leave tail to attach to jump ring*
Info :
These tiny star charms can alternatively be purchased metal charms rather than crocheting. If crocheting, stitch tightly and use metallic thread for a shiny effect and tiny size.
— Spiral Ribbon (Main Long Spiral) :
Info :
The spiral ribbon is worked flat in rows to create a long tapered strip and finished with an edging. The stripe is worked using a metallic silver thread carried in second or third loop for that centerline effect. The strip will be about 25-30 cm long and around 2.5-3.0 cm wide after blocking and gentle twisting.
Round 1 :
Ch 8, sc into 2nd ch from hook and across back loops to create a firm base (7 sc)
Round 2 :
Ch1, turn, sc into each st across (7)
Round 3 :
Ch1, turn, sc in first 2 sts, inc in next st, sc in next 3 sts, inc in last st (9)
Round 4 :
Ch1, turn, sc across (9)
Round 5 :
Ch1, turn, sc in first 3 sts, inc, sc next 3, inc, sc last 2 (11)
Info :
Start carrying silver yarn along the center stitches from round 6 onwards. To do this, lay the silver thread alongside the navy yarn and work it together or float it across the backs of stitches; secure at start and end points every 8-10 cm with a small stitch to prevent catching.
Round 6 :
Ch1, turn, sc across (11) — working navy main and carrying a strand of silver through the 4th-8th stitches of this row to create a central stripe effect
Round 7 :
Ch1, turn, sc in first 4 sts, inc, sc next 5, inc in last st (13)
Round 8-10 :
Ch1, turn, 1 sc in each st across (13)
Round 11 :
Ch1, turn, sc in first 4 sts, inc, sc next 6, inc in last 2 (15)
Round 12-14 :
1 sc in each st across (15)
Round 15 :
Ch1, turn, (4 sc, inc) x 3 + 3 sc adjustments to reach (18)
Round 16-20 :
1 sc in each st across (18)
Info :
Work the center silver stripe by switching to silver yarn for a short row every two rows: for example, slip the first 3 sts with navy, then with silver work 6 sc across the center stitches, then slip back to navy for the final 3 sts. Alternatively hold the silver thread alongside navy and crochet both threads together for a continuous metallic line. Secure floats at the row ends to prevent catching.
Round 21 :
Ch1, turn, 1 sc in each st across (18)
Round 22 :
Ch1, turn, (5 sc, inc) x 3 (21)
Round 23-28 :
1 sc in each st across (21)
Round 29 :
Ch1, turn, (6 sc, inc) x 3 (24)
Round 30-36 :
1 sc in each st across (24)
Info :
At about round 36 decide final width. If you prefer a tapered effect for a spiral that flares and then narrows, alternate small increases and decreases every 10-12 rows. Keep the metallic center visible by carrying the silver through the middle stitches on each row.
Round 37 :
Ch1, turn, (7 sc, inc) x 3 (27)
Round 38-46 :
1 sc in each st across (27)
Round 47 :
Ch1, turn, (7 sc, dec) x 3 (24)
Round 48-54 :
1 sc in each st across (24)
Round 55 :
Ch1, turn, (6 sc, dec) x 3 (21)
Round 56-60 :
1 sc in each st across (21)
Round 61 :
Ch1, turn, (5 sc, dec) x 3 (18)
Round 62-66 :
1 sc in each st across (18)
Round 67 :
Ch1, turn, (4 sc, dec) x 3 (15)
Round 68-72 :
1 sc in each st across (15)
Round 73 :
Ch1, turn, (3 sc, dec) x 3 (12)
Round 74-76 :
1 sc in each st across (12)
Round 77 :
Fasten off leaving long tail for joining to keyring (12). Block the strip lightly to smooth edges and encourage a gentle curl.
Info :
To create the spiral/twist: fold the strip in half lengthwise and stitch a narrow seam along one short end to make a loop to attach to the split ring, attach the split ring, then allow the strip to hang and twist naturally. You can guide the twist by wrapping the strip around a cylindrical object and damp-blocking or by sewing a few small spaced stitches along the back to hold the spiral shape.
Round 78 :
Edge: join navy yarn to long side and sc evenly around the entire long edge (approx 90-110 sc depending on length) to create a finished border; work 1 sc in each row-end and 2-3 sc in each corner end to keep the border flat.
Round 79 :
Silver piping: With silver thread, work 1 row of sl st or hdc along the center fold (if you carried silver, emphasize it now by stitching a decorative line through the center). Fasten off and weave ends.
Info :
Attach small jump rings at spaced points along the spiral (for example, one near the top, one near the middle, one near the lower quarter) to hang the charms. Use small lengths (1.5-2 cm) of jewelry chain between the jump ring on the strip and the charm to allow charms to dangle freely and not tangle together.
— Assembly & Hanging Preparation :
Info :
Lay out all components at the spacing you prefer. Typical spacing in the pictured item is: top ring to first charm 3-4 cm, between charms 6-8 cm, and final charm near bottom about 3-4 cm from end. Use pliers to attach chain segments to jump rings sewn into spiral edge, then attach charms to the chain with jump rings.
Round 80 :
Attach a small finished loop of navy yarn (ch 6, join) to bottom tip and add a tiny star charm using a jump ring if desired. Fasten off and weave ends securely.
Info :
Secure all jump rings closed tightly with pliers. Weave in any remaining yarn ends into the spiral body using a yarn needle. Add a small dot of clear craft glue to the interior of jump rings for extra security if the keychain will be used daily.
Round 81 :
Final finishing: gently steam-block or wet-block the spiral and adjust twist until satisfied. Allow to dry fully before trimming any excess threads.
Info :
If you want alternating silver highlights on both sides of the spiral, add another carried silver strand and pick it up every 3-4 rows on the reverse side; otherwise one strong central stripe is visually clean and matches the pictured design.
This magical keychain brings together sculptural crochet and tiny amigurumi charm work to make a truly special little talisman. With navy waves, a sparkling silver stripe, twinkling stars, witch hats and two adorable black cats, this project is perfect for a weekend crafting treat. The assembly is satisfying and the result makes a lovely gift or a unique accessory to brighten your keys or bag. 🧶✨🔮