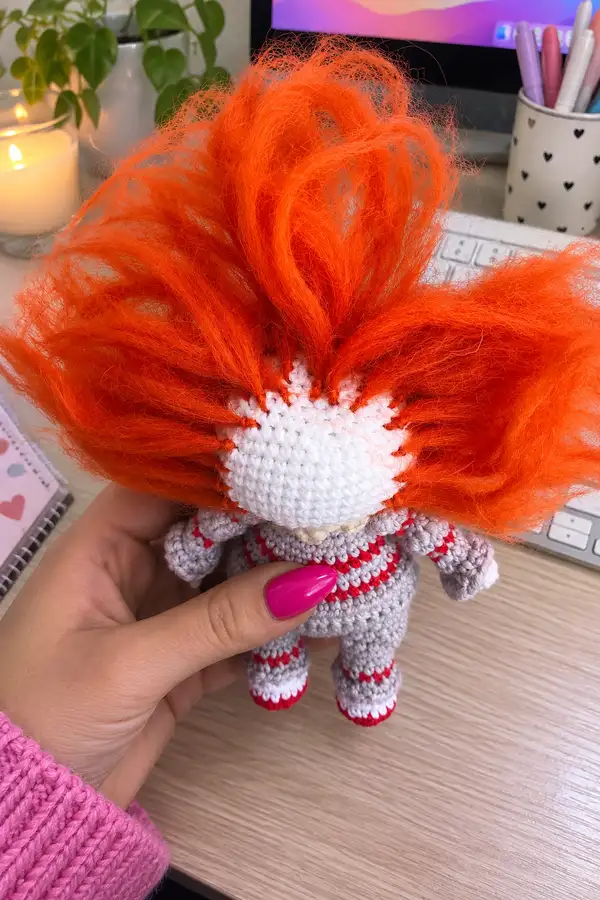
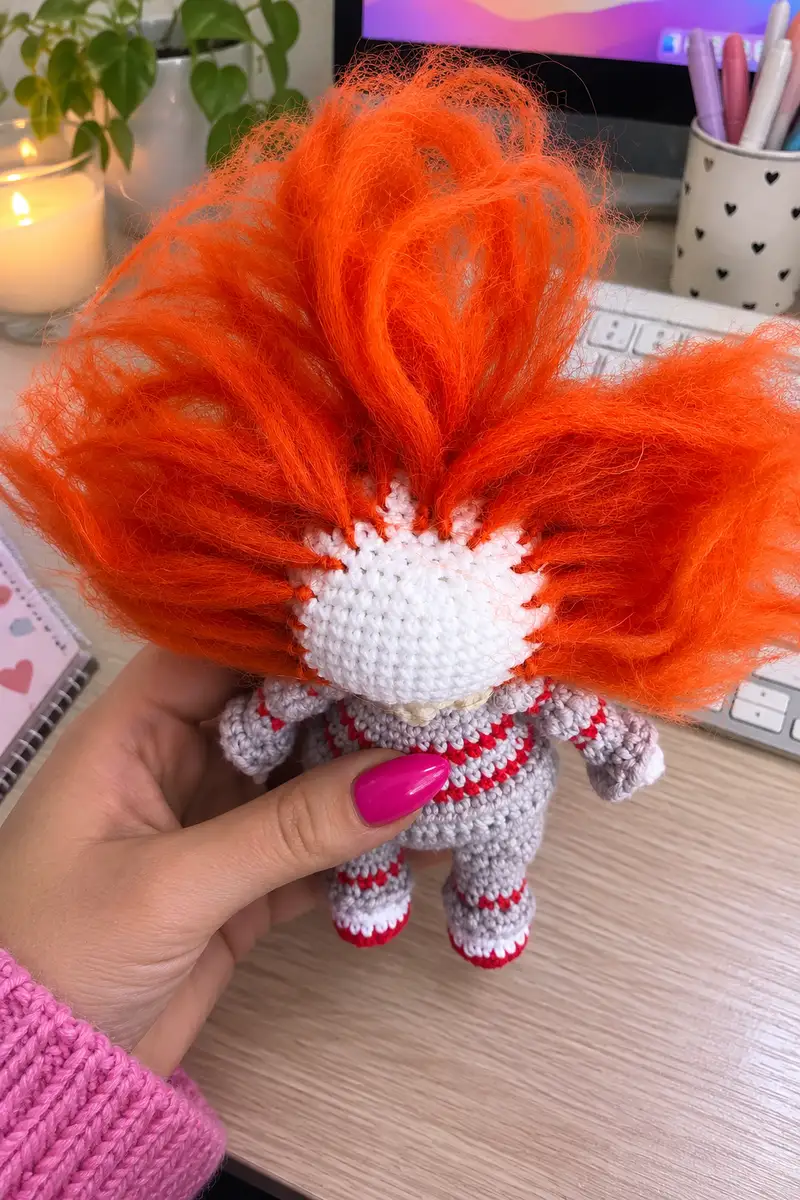
Make three spooky mini horror dolls inspired by classic movie characters: a bright orange-haired clown, a black-suited puppet, and a striped-sweater villain with a tiny hat. Each doll measures about 14-15 cm using YarnArt Jeans yarn and a small hook. The pattern includes detailed round-by-round construction, hair/hat techniques, wire insertion tips for poseable limbs, and finishing touches to capture the personalities shown.
Progress Tracker
0% Complete
— Notes and Gauge :
Info :
Using YarnArt Jeans DK and a 2.25 mm hook the finished dolls will be approx. 14-15 cm tall. Work tightly to avoid stuffing showing through. All parts are worked in continuous rounds unless otherwise stated. Use a stitch marker to mark the first stitch of each round. When changing color, carry yarn inside if stripes will be close, or fasten off and weave tails if colors are large sections.
— Shared Head (Base) — Use for Each Doll (Make 3) :
Round 3 :
(1 sc, inc) x 6 (18)
Round 4 :
(2 sc, inc) x 6 (24)
Round 5 :
(3 sc, inc) x 6 (30)
Round 6 :
(4 sc, inc) x 6 (36)
Info :
At this stage the head is broadening. If you intend a slightly larger head, do one extra increase round (e.g. (5 sc, inc) x 6 = 42) before proceeding. For the three dolls pictured use 36 sts as a base for compact heads.
Round 7 :
(5 sc, inc) x 6 (42)
Round 8 :
(6 sc, inc) x 6 (48)
Round 9-12 :
1 sc in each st (48)
Info :
Place safety eyes between rounds 11 and 12 for large-eyed look (for the puppet and clown), or between rounds 10-11 for slightly smaller forehead. Always position eyes about 6-9 stitches apart depending on desired expression. Mark eye placement with pins and step back to view symmetry.
Round 13 :
(6 sc, dec) x 6 (42)
Round 14 :
(5 sc, dec) x 6 (36)
Round 15 :
1 sc in each st (36)
Info :
Begin stuffing lightly now to ensure the top of the head retains shape. Use small pieces of fiberfill pressed into place with a stuffing tool or blunt chopstick to prevent lumps.
Round 16 :
(4 sc, dec) x 6 (30)
Round 17 :
(3 sc, dec) x 6 (24)
Round 18 :
(2 sc, dec) x 6 (18)
Info :
Stuff head firmly but not rock-hard — aim for firm enough that faces sewn on keep their shape. Add more stuffing as you progress through decreases so the head doesn't collapse.
Round 19 :
(1 sc, dec) x 6 (12)
Round 21 :
Fasten off leaving long tail for sewing to body. Do not close yet for doll variants where face is embroidered after adding hair or features. For puppet and clown attach eyes and stitch facial marks now before final shaping.
— Head Variant A: Pennywise-Style Clown Face & Hair :
Info :
Use white yarn for head. After Round 12 (eye placement), insert 5 mm safety eyes positioned slightly lower to make a childlike forehead. Embroider red mouth and facial lines with red embroidery yarn after hair is attached.
Round 22 :
Re-open round 21 if closed. Round up to neck: join additional beige/white row around neck with 1 sc in each st (6) if needed to create a neck base. Work 2-3 even rounds (1 sc in each st) to build neck height (6-6-6)
Info :
For the clown use felting wool or long-pile mohair for hair. Attach hair by sewing felted roving to the top seam or by crocheting a separate wig cap and gluing/whipping into place.
Round 23 :
Work a rim round around the lower head using 6 sc in existing 6 stitches to create the neck flange. This supports the collar and joins to body later.
Info :
Clown hair technique: Create a felted wig by felting roving onto a round of felt or crochet a wig cap with the same head circumference (start with MR 6 and follow increasing rounds to reach the same circumference as the head, then attach). Alternatively make dense looped hair by pulling lengths of wool through head stitches and trimming into shape.
— Head Variant B: Jigsaw/Billy-Style Puppet Face :
Info :
Use white yarn for face. Place safety eyes with red rims (or embroider red circles around black eyes) between rounds 11-12. Embroider red cheek spirals using chain stitch or surface satin stitch after assembly. For the puppet effect leave a slightly flatter face by stuffing lightly at center.
Round 22 :
After Round 20, create a neck base of 2 rounds: 1 sc in each st (6) x2 to produce a short neck (6)
Info :
Jigsaw hair is made from black yarn locks: cut many 6-8 cm lengths, fold in half and pull through head stitches in a row across top, then trim to desired length to create a bob of locks. Space locks evenly so they frame the face.
— Head Variant C: Freddy Krueger Face :
Info :
Use beige or skin-tone yarn for Freddy. Place small safety eyes between rounds 10-11. Freddy's face includes a subtle scar texture - you can achieve this with little raised stitches using small sl st or surface crochet in contrasting darker beige. Keep eyes small and slightly closer set for an older look.
Round 22 :
Add 2 rounds of neck base: 1 sc in each st (6) x2. Fasten off leaving tail for sewing.
— Shared Body (Base) — Make 3 Bodies, Adjust Colors per Doll :
Round 3 :
(1 sc, inc) x 6 (18)
Round 4 :
(2 sc, inc) x 6 (24)
Round 5 :
(3 sc, inc) x 6 (30)
Round 6-8 :
1 sc in each st (30)
Info :
At round 6 change to character body color: grey for clown, black for puppet jacket (we will shape jacket later), brown/striped for Freddy. If making stripes, change color at the end of a round to keep tidy edges.
Round 9 :
1 sc in each st BLO (30)
Round 10-14 :
1 sc in each st (30)
Info :
Begin stuffing the body gently after Round 12. For a flat bottom to stand slightly, add a little denser stuffing at the base and keep the bottom wider by delaying decreases for a few rounds.
Round 15 :
(3 sc, dec) x 6 (24)
Round 16 :
(2 sc, dec) x 6 (18)
Round 17 :
(1 sc, dec) x 6 (12)
Info :
Leave an opening at the top for attaching the head. Fasten off leaving long tail for sewing. If you plan to join the head and body seamlessly, leave shoulder rounds unstuffed slightly to allow insertion of head neck.
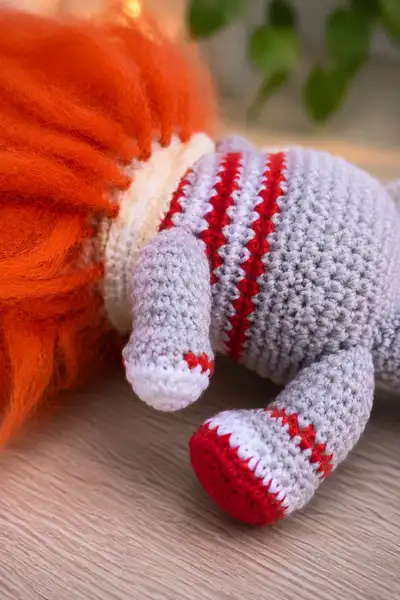
— Body Variant A: Pennywise Clown Suit :
Info :
Use grey as main suit color with red accents. After Round 8, alternate grey and red every 1-2 rounds to create the striped suit pattern on torso and legs as shown in the reference. Use surface crochet or embroidery to add small red buttons if desired.
Round 19 :
Work two even rounds in grey (if adding color stripes change each round): 1 sc in each st (24)
Round 20-24 :
Join legs by working in oval rounds: change to leg construction pattern below and finish stuffing. Shape lower torso to allow hip gaps where legs will be attached.
— Body Variant B: Jigsaw/Puppet Jacket (Black) :
Info :
After Round 8, work 3 rounds in black for the jacket top. For the jacket front detail work 2 extra rounds in BLO to form a lapel ridge. Add two small buttons sewn to the front using matching thread after assembly.
Round 19-24 :
Work 6 rounds even in black (24) then shape waist and prepare for leg attachment by decreasing slightly: (2 sc, dec) x 6 = 18
— Body Variant C: Freddy Sweater & Trousers :
Info :
Freddy sweater is alternating red and green stripes. Change color each round: after Round 8 work alternating red/green for 6-8 rounds to create the sweater. Switch to brown/black for trousers and continue even rounds to hip. Add a small V-neck by leaving a slight gap at two front stitches and finishing with red detail for the neck patch (see accessory section).
— Legs (Make 6: 2 per Doll) :
Round 3 :
(1 sc, inc) x 6 (18)
Round 4-6 :
1 sc in each st (18)
Info :
Create shoe color by switching color for last 4-6 rounds: red shoes for clown, black shoe tips for Freddy and puppet. Stuff foot firmly and shape toe with small amount of stuffing then continue leg tube.
Round 7-12 :
1 sc in each st (18)
Round 13 :
(3 sc, dec) x 3 = (3 sc, dec) x 3 ? Wait — math: To shape calf reduce evenly: (3 sc, dec) x 3 gives 15. Instead do (2 sc, dec) x 3 to get 15. (2 sc, dec) x 3 (15)
Round 14-18 :
1 sc in each st (15)
Round 19 :
Shape upper leg: (2 sc, inc) x 3 (18)
Round 20 :
1 sc in each st (18). Fasten off leaving long tail for sewing. Insert wire if making poseable legs: push wire up through foot and out top, fold end and secure with a few stitches, then continue stuffing around wire.
Info :
Make both legs identical and stuff feet firmer than upper leg. When sewing to body use remaining top stitches to create a secure seat at the hip; embroider a small line to hide joining seam if needed.
— Arms (Make 6: 2 per Doll) :
Round 3-4 :
1 sc in each st (12)
Round 5 :
Switch to hand color or keep same depending on character. For Freddy and puppet hands are white/beige; for clown same grey as suit with red tips. 1 sc in each st (12)
Info :
If you plan to insert blade wires (Freddy), crochet the blade pocket now: leave a small cavity in the arm by not stuffing completely and inserting wire base later. Stuff hand firmly with small amount of each finger area to shape palm and thumb, then work wrist narrowing rounds.
Round 6-9 :
1 sc in each st (12)
Round 10 :
(2 sc, dec) x 3 (9)
Round 11-14 :
1 sc in each st (9)
Round 15 :
Fasten off leaving long tail for sewing. Lightly stuff arms; hands should be firmer and arms less firm. For puppet arms work thin white cuff by switching colors for last 2 rounds.
Info :
Attach arms at body rounds approx at mid-torso — pin in place and check symmetry. For puppet hands sew a small red dot or stripe to mimic painted glove tips.
— Freddy Krueger Hat (Make 1) :
Round 3 :
(1 sc, inc) x 6 (18)
Round 4 :
(2 sc, inc) x 6 (24)
Round 5-7 :
1 sc in each st (24)
Round 8 :
To make brim: working in BLO of next round do (5 sc, inc) x 4 (28)
Round 9 :
Work 1 sc in each st around brim (28). Fold brim up and sew a few stitches to hold shape. Fasten off and weave ends.
Info :
Use brown yarn and steam-block slightly for a softer brim. Sew hat to top of head covering the hairline slightly for a natural look.
— Pennywise Balloon (Accessory) :
Round 3 :
(1 sc, inc) x 6 (18)
Round 4 :
1 sc in each st (18)
Round 5 :
(4 sc, dec) x 3 = (4 sc, dec) x 3 math gives 15, so instead do (3 sc, dec) x 3 (12)
Round 6 :
(1 sc, dec) x 4 (8)
Round 7 :
Fasten off, leave tail to sew to a thin black wire stem. Stuff lightly and shape balloon. Wrap wire in black floral tape to make stem and insert into hand or hold with thread.
Info :
Cover wire with yarn or floral tape to prevent sharp ends from poking through stuffing. Secure balloon by stitching base to hand or using glue for permanent placement.
— Freddy Blades (Make 4) :
Round 1 :
ch 7, starting in second ch from hook sc 6 across (6)
Round 2 :
Working in rounds around strip: 2 sc in first st, 1 sc in next 5 sts, 2 sc in last, turn to work other side 1 sc in each of 6 sts (14)
Round 3-4 :
1 sc in each st (14)
Round 5 :
Fold blade lengthwise, join edges with sl st or single crochet to make a flat blade; insert a thin wire inside and stuff slightly if desired. Sew closed and anchor into a small pocket on the glove hand of Freddy using multiple secure stitches.
Info :
Ensure wire is fully secured and ends folded over to avoid sharpness. Use a thinner hook to make a tighter blade if required.
— Hair & Wig Techniques (Clown & Puppet) :
Info :
Clown (Pennywise) hair: create a felted wig cap by crocheting a cap that matches the head circumference (follow head increases to reach same number of sts), then felt orange roving into place with felting needle, or stitch lengths of roving into the cap and trim to shape. For a dramatic mane, leave hair longer and brush out with a stiff brush to fluff.
Info :
Puppet hair: use black yarn locks of approx 6-8 cm. Fold each length in half, insert fold through head stitch using hook to form a lark's head knot; tighten and trim. Make locks dense on top, sparser at the sides so face is visible.
— Facial Embroidery & Makeup :
Info :
Use embroidery yarn or stranded cotton for facial features. For red lips and lines use satin stitch and backstitch for precision. For Jigsaw cheeks embroider red spirals by chaining a spiral with red yarn on surface, or create a small felt spiral and sew on. Add light pastel blush to cheeks if desired.
— Assembly (Detailed Steps) :
Info :
Before sewing parts, block and lightly steam if using cotton yarn to smooth shapes. Pin all parts in place. Sew head to body using ladder stitch through the neck tail and body opening. Use firm, even tension for strong seams. Add accessories and final embroidery after assembly.
— Finishing Touches :
Info :
Sew small buttons to puppet jacket; stitch tiny red pocket square on puppet chest with a little red yarn. For Freddy, attach hat, stitch a tiny red triangular bow or neck patch and position blades. For clown, attach ruffled collar created by crocheting ch 20 and working sc in each ch with 2 sc in every third stitch to make ruffles; stitch around neck.
— Final Quality Checks :
Info :
Check all loose ends—weave into inside of toy and trim. Tug gently on sewn features to ensure secure attachment. For toys intended for children under 3, embroider eyes and avoid safety eyes and wires.
This mini horror doll set combines precise amigurumi shaping with theatrical finishing to create memorable collectible characters. Each small doll is packed with personality — fiery clown hair, painted puppet cheeks, and Freddy's tiny hat and blades. The step-by-step rounds and frequent Info notes guide you from magic ring to final stitch with confidence. 🧶 Make a set for gifts, display, or to practice small-scale detailing. Happy crafting and share your spooky creations! 🎃🪡