🧶 Beautiful ✨ Detailed 💝 Adorable

Mini Turtle Amigurumi Pattern

Mini Turtle Amigurumi Pattern
4.5★ Rating
2-3 Hours Time Needed
4.0K Made This
✂️

Beginner Friendly Level

Perfect for those just starting their crochet journey, with clear instructions and simple techniques

⏱️

Bite-Sized Project

Finishes in 2-4 hours—perfect for an afternoon of creative relaxation.

🎁

Tiny Treasure

Small, sweet, and gift-worthy creations that fit perfectly in the palm of your hand with detailed charm.

About This Mini Turtle Amigurumi Pattern

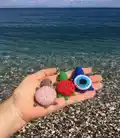
This pattern creates a charming mini turtle amigurumi with a separate shell, belly, head, legs and tail. The design uses simple single crochet rounds, increases and decreases to shape each part. You can customize colors and even use plush yarn for a softer head variant. Ideal as a small gift, keychain, or pocket-sized companion.

Mini Turtle Amigurumi Pattern crochet pattern - detailed view of completed project

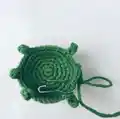
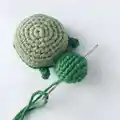
Step-by-step instructions and photos guide you through joining the shell and belly while crocheting legs and tail. The finished toy is compact and quick to make with minimal materials.

Why You'll Love This Mini Turtle Amigurumi Pattern

I absolutely love this pattern because it turns simple stitches into a delightful little character that fits in the palm of your hand. I enjoy how quickly each mini turtle comes together, making them perfect last-minute gifts or craft market items. The pattern is versatile — I often change yarn colors and add tiny embroidered details to make each turtle unique. Sewing and finishing are satisfying and quick, so I always end up making more than I planned!

Mini Turtle Amigurumi Pattern step 1 - construction progress Mini Turtle Amigurumi Pattern step 2 - assembly progress Mini Turtle Amigurumi Pattern step 3 - details and accessories Mini Turtle Amigurumi Pattern step 4 - final assembly and finishing

Switch Things Up

I love customizing color schemes for these mini turtles; try bright contrasting colors for a playful look or subdued tones for a natural feel.

I often swap the yarn weight and hook size to change the finished size—use a bulkier yarn and larger hook for a chunkier version or thin thread and smaller hook for a tiny collectible.

I sometimes replace safety eyes with embroidered eyes or half beads for a different expression; if you use half beads, glue them securely and consider adding embroidery for eye whites.

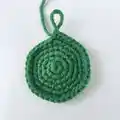
I like to add tiny embroidered patterns on the shell—hexagons, flowers, or spiral lines look great and add character to each turtle.

For a softer head, I use plush yarn and follow the alternate head instructions in the pattern; it creates a cuddlier texture that contrasts nicely with a firm cotton shell.

If I want the turtle as a keychain, I attach a jump ring through the top of the shell before finishing and leave a longer yarn tail to secure the hardware.

I sometimes add a bit of wire to the legs if I want a poseable mini turtle; make sure to wrap the wire in yarn or tape before inserting.

To create a family set, I change just one color per turtle so they look cohesive but unique—perfect for gift sets or displays.

I recommend experimenting with shell embroidery and bead embellishments to make seasonal or themed turtles like holiday or ocean-themed designs.

When gifting, I tuck the mini turtle into a small organza bag or attach a handmade tag—little presentation touches make the finished piece feel extra special.

Common Mistakes & How to Fix Them

✗ Skipping the instruction to work in BLO when joining shell and belly; always crochet in the back loops only of both pieces to create a neat seam and room to attach legs. ✗ Cutting the yarn after making the belly or shell before joining; do not cut the yarn so you can continue joining parts and crocheting legs and tail seamlessly. ✗ Overstuffing the head or body which creates lumps and distorts the shape; stuff gradually and evenly to maintain a smooth silhouette. ✗ Placing safety eyes too close together can make the face look odd; insert safety eyes between rounds 5-6 and leave 8-9 single crochet between the eyes for correct positioning.

Mini Turtle Amigurumi Pattern

Make a tiny, adorable mini turtle with this easy-to-follow crochet pattern. You will create a shell, belly, head, legs and tail using simple single crochet stitches and basic shaping. Perfect for gifts, keychains, or an amigurumi collection — customize colors to match your style.

Beginner Friendly 2-3 Hours

Materials Needed for Mini Turtle Amigurumi Pattern

— Main Fabric

  • 01
    Alize Cotton Gold (100g-330m) - small amounts in shades: green, light green, white, black
  • 02
    Optional additional colors for shell decoration or variations
  • 03
    Plush yarn (optional) for an alternative head variant

— Tools Required

  • 01
    Crochet hook size 1.25 mm
  • 02
    Safety eyes or half beads size 6mm
  • 03
    Optional safety eyes size 10mm (for plush head variant)
  • 04
    Glue (if using half beads for eyes)
  • 05
    Stuffing material (polyester fiberfill)
  • 06
    Shell embroidery needle (for decoration), if you want
  • 07
    Scissors
  • 08
    Yarn needle for sewing and weaving ends
  • 09
    Pins or stitch markers (optional) for assembly

Progress Tracker

0% Complete

— Shell :

Round 1 :

1r-6 sc into MR

Round 2 :

2r-6 inc (12)

Round 3 :

3r-(1sc, inc)*6(18)

Round 4 :

4r-(2sc ,inc)*6(24)

Round 5 :

5r-(3sc, inc)*6(30)

Round 6 :

6r-(4sc, inc)*6(36)

Round 7-8 :

7r-8r- (2 rnds) 36sc (36)

Info :

Fasten off and cut yarn.

— Belly :

Round 1 :

1r-6sc into MR

Round 2 :

2r-6 inc (12)

Round 3 :

3r-(1sc, inc)*6(18)

Round 4 :

4r-(2sc, inc)*6(24)

Round 5 :

5r-(3sc, inc)*6(30)

Round 6 :

6r-(4sc, inc)*6(36)

— Joining (shell and belly, making legs and tail) :

Infos :

Do not cut off the yarn. Join shell and belly with it. We will crochet legs and tail during joining the parts. Put shell and belly together facing wrong sides. Work in BLO of both shell and belly and make

Joining Instruction :

3sc, ch4, starting in the 2nd ch from hook, make 3sc in the chain (leg), sl st in that stitch, where we started crocheting ch4, 9sc, ch 4, starting in the 2nd ch from hook, make 3sc in the chain (leg), sl st in that stitch, where we started crocheting ch 4, 5sc, ch 3, starting in the 2nd ch from hook, make 2sc in the chain (tail), sl st in that stitch, where they started crocheting ch 3, 4sc, ch 4, starting in the 2nd ch from hook, make 3sc in the chain (leg), sl st in that stitch, where they started crocheting the ch 4, 9sc, ch 4, starting in the 2nd ch from hook 3sc in the chain (leg), sl st in that stitch, where they started crocheting the ch4, 3sc (36)

— Head :

Info :

Then continue crocheting the head across the opening you created at the beginning of crocheting round: (a description of crocheting a head for a turtle from plush yarn is provided at the end of the pattern)

Round 1 :

1r- 6 inc (12)

Round 2 :

2r-12 inc (24)

Round 3-6 :

3r-6r-(4 rnds) -24 sc (24)

Round 7 :

7r-(2sc, dec)*6(18)

Info :

If you use safety eyes, insert them between rounds 5-6. Leave 8-9 sc between the eyes

Info :

Stuff the piece

Round 8 :

8r-(1sc, dec)*6(12)

Round 9 :

9r-6 dec (6)

Info :

Fasten off. Pull the opening using front lops. Leave yarn tail for sculpting.

Info :

If you use half beads as eyes, make sculpting between rounds 5-6, leaving 8-9sc between the eyes. Insert the needle in one eye point and come out at the opposite side. Insert the needle 1 sc away from where you just come out and bring the needle in the first eye point. Pull a little, fasten off and cut the thread. Weave in ends inside the head.

Info :

Glue on the half beads.

Info :

Embroider eye whites with white yarn

— Head (plush yarn variant) :

Round 1 :

1r- 6 inc (12)

Round 2 :

2r- 12 inc (24)

Round 3-5 :

3r-5r-(3 rnds) 24sc (24)

Round 6 :

6r-(2sc, dec)*6(18)

Info :

If you use safety eyes, insert them between rounds 4-5. Leave 8-9 sc between the eyes

Info :

I used safety eyes size 10 mm

Round 7 :

7r-(1sc, dec)*6(12)

Round 8 :

8r-6 dec (6)

Info :

Fasten off, pull opening using front loops. Cut off yarn, weave in ends.

Info :

If you want, you can decorate the shell with embroidery

Info :

Your mini Turtle is ready.

Assembly Instructions

  • Put shell and belly together facing wrong sides and join them without cutting the yarn, working in the back loops only of both pieces.
  • While joining shell and belly, crochet legs and tail as instructed: make chain loops and 3 sc clusters for legs and a 2 sc chain for the tail, finishing the joining round with 36 stitches in total.
  • Continue crocheting the head across the opening created at the beginning of the joining round and stuff the head firmly before the final decreases.
  • Insert safety eyes between rounds 5-6 (leave 8-9 sc between eyes) or glue half beads after sculpting; embroider eye whites with white yarn if desired.

Important Notes

  • 💡Do not cut the yarn after making the belly or shell; you will use the same yarn to join the parts and crochet legs and tail.
  • 💡Work the joining round in BLO (back loops only) of both shell and belly to make a neat seam and allow room for legs and tail.
  • 💡Insert safety eyes between rounds 5-6 and leave 8-9 single crochets between the eyes for correct placement.

This tiny turtle pattern makes pocket-sized charm and smiles wherever it goes. Handcrafted with love and tiny stitches, it is perfect for gifts, keychains, or playful decor. Try different yarns and colors to create an entire family of mini turtles! 🐢🧶

You ask,

we answer.

FAQs

What size will the finished piece be?

The finished mini turtle is approximately 6 cm long, 3 cm wide and 2.5 cm high when using Alize Cotton Gold yarn and a 1.25 mm hook; your size may vary with different yarn or tension.

Can I use different yarn or hook sizes for this pattern?

Yes, you can use different yarn weights and hook sizes, but the final size and stitch counts will change; thicker yarns and larger hooks will produce a larger, chunkier turtle.

When should I insert the safety eyes?

Insert safety eyes between rounds 5-6 of the head (leave 8-9 single crochet between the eyes) as noted in the pattern, or follow the plush-head variant guidance for alternative placement.

Do I need special skills to make the joining round?

Basic amigurumi skills like single crochet, increases, decreases and working in BLO are sufficient; follow the joining instructions carefully to crochet the legs and tail while joining the shell and belly.