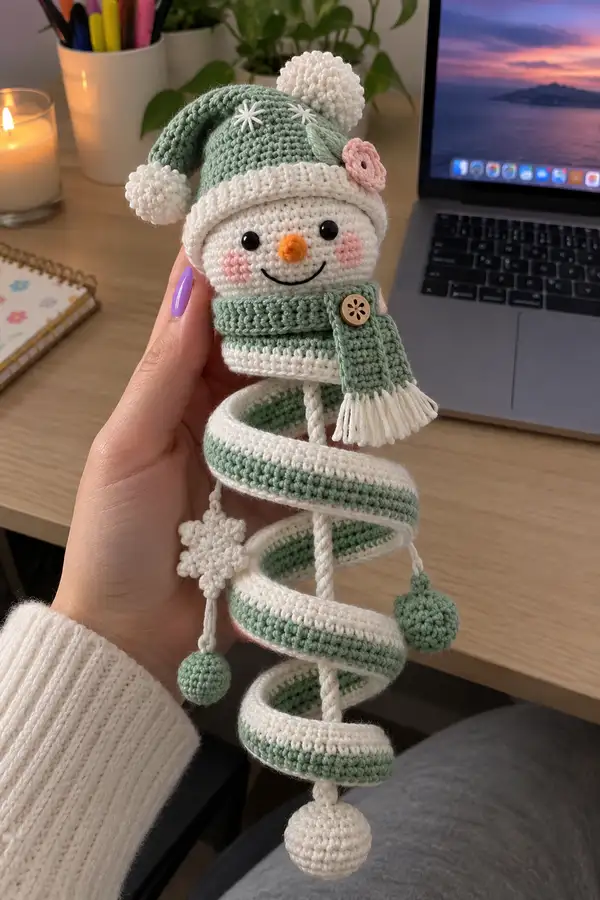
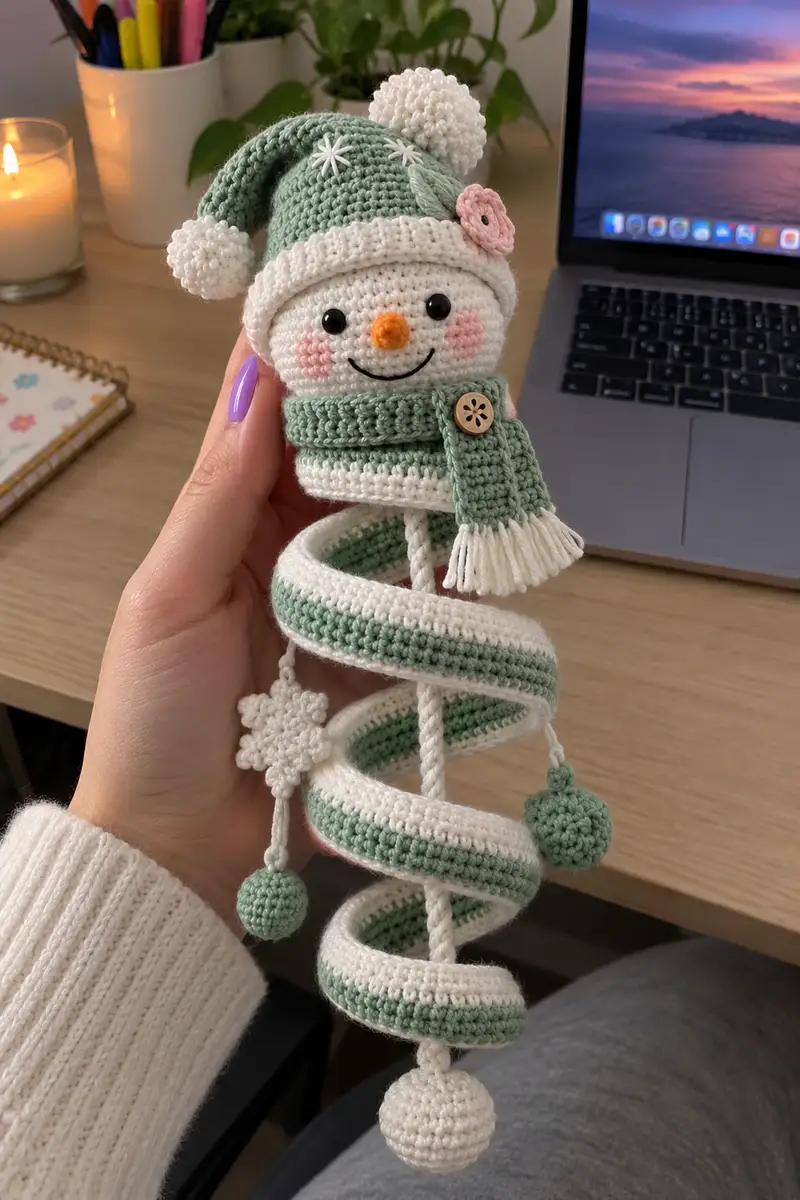
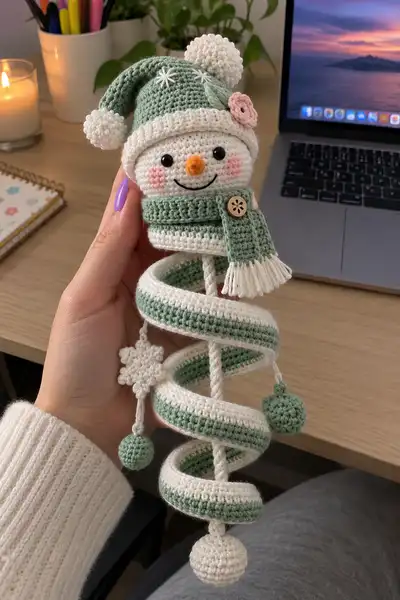
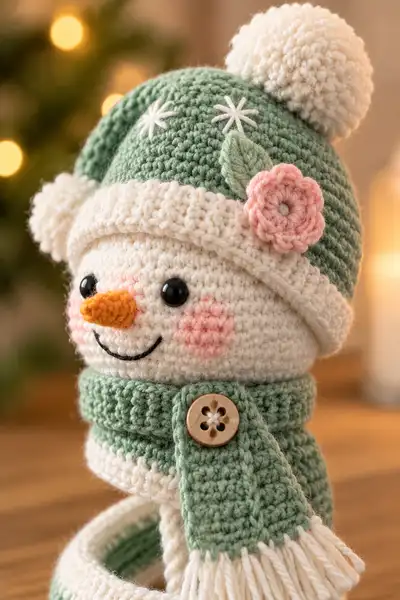
Hand-crocheted spiral snow friend with a soft mint-green slouchy hat, pom-poms, a wood-buttoned scarf and a whimsical spiral body. This charming hanging ornament features embroidered snowflakes, a tiny carrot nose, blush cheeks and floral accents for a delicate, handmade look. Perfect for seasonal decor, gift-giving, or a cozy crafting session — the spiral shape makes it a delightful keepsake to display on a tree or hang in a window.
Progress Tracker
0% Complete
— Head :
Round 1 :
6 sc in magic ring (6)
Round 3 :
(1 sc, inc) x 6 (18)
Round 4 :
(2 sc, inc) x 6 (24)
Round 5 :
(3 sc, inc) x 6 (30)
Round 6 :
(4 sc, inc) x 6 (36)
Round 7 :
(5 sc, inc) x 6 (42)
Round 8 :
(6 sc, inc) x 6 (48)
Round 9-14 :
1 sc in each st (48)
Info :
Place safety eyes between rounds 11 and 12, approximately 10 stitches apart (adjust for expression). Mark center front with a stitch marker to align nose and mouth.
Round 15 :
1 sc in each st (48)
Round 16 :
1 sc in each st (48)
Round 17 :
(6 sc, dec) x 6 (42)
Round 18 :
(5 sc, dec) x 6 (36)
Info :
Begin stuffing the head firmly but not overfilled so the hat rim will sit nicely. Stuff in small amounts using a stuffing tool to reach edges.
Round 19 :
(4 sc, dec) x 6 (30)
Round 20 :
(3 sc, dec) x 6 (24)
Round 21 :
(2 sc, dec) x 6 (18)
Round 22 :
(1 sc, dec) x 6 (12)
Info :
Fasten off leaving a long tail. Finish stuffing through the hole, close with a yarn needle and weave tail into head for a neat finish. Leave neck edge tidy for sewing the head onto the spiral core later.
— Carrot Nose :
Round 1 :
4 sc in magic ring (4)
Round 3 :
(1 sc, inc) x 4 (12)
Round 4 :
1 sc in each st (12)
Round 5 :
(2 sc, dec) x 3 (9)
Round 6 :
(1 sc, dec) x 3 (6)
Round 7 :
1 sc in each st (6)
Info :
Lightly stuff the nose and shape into a tapered carrot. Fasten off leaving a long tail for sewing. Use bright orange for a classic carrot and sew centered between eyes, slightly pointing down.
— Hat (main slouch) :
Info :
Work hat in mint green; the brim will be worked in cream in separate rounds. Hat is worked from top down to create a slouchy shape with a fold-over brim.
Round 1 :
6 sc in magic ring (6)
Round 3 :
(1 sc, inc) x 6 (18)
Round 4 :
(2 sc, inc) x 6 (24)
Round 5 :
(3 sc, inc) x 6 (30)
Round 6 :
(4 sc, inc) x 6 (36)
Round 7 :
(5 sc, inc) x 6 (42)
Round 8 :
(6 sc, inc) x 6 (48)
Round 9-18 :
1 sc in each st (48)
Info :
Begin forming slight slouch by adding 2 decreases spaced evenly every 6-8 rounds if you want a more tapered top. For this slouchy look keep rounds even until brim is attached.
Round 19 :
(6 sc, dec) x 6 (42)
Round 20 :
1 sc in each st (42)
Round 21 :
(5 sc, dec) x 6 (36)
Round 22 :
1 sc in each st (36)
Round 23 :
(4 sc, dec) x 6 (30)
Round 24 :
1 sc in each st (30)
Round 25-28 :
1 sc in each st (30)
Info :
Leave a long tail for sewing. If making a removable hat, do not fasten off; instead continue to attach brim without closing top. For a fixed hat, fasten off and set aside to attach to head later. Embroider stars with white yarn now if desired.
Round 29 :
Fasten off mint green and join cream for brim. Attach to last round at RS.
Round 30 :
With cream, 1 sc in each st around (30)
Round 31 :
With cream, BLO 1 sc in each st around (30)
Round 32 :
With cream, BLO 1 sc in each st around (30)
Info :
Fold the brim along the BLO ridges to create the rolled brim. Sew the fold in place along the inside with whip stitch for a secured rolled rim that frames the face.
Round 33 :
Make two small side pom-poms: with cream make 6 sc in magic ring (6) then 6 inc (12) then 1 sc rounds and close; leave tails for sewing.
Round 34 :
Make a large top pom-pom separately using many wraps of cream yarn, join at center and fluff. Sew in place at top center of hat.
Round 35 :
Fasten off and weave ends. Add embroidered stars by stitching 6-point star motifs with white yarn, using a long-armed needle to pass stitches through hat rounds 11-15 for decorative placement.
— Scarf :
Info :
Scarf is worked flat in back-and-forth rows in mint with cream fringe. Make a long narrow rectangle approximately 34 rows to allow wrapping once around the neck. Work foundation chain to desired width (we use 16 ch for a 16-st wide scarf).
Row 1 :
Ch 16, 1 sc in 2nd ch from hook and across (15)
Row 2 :
Ch 1, turn, 1 sc in each st (15)
Row 3 :
Ch 1, turn, 1 sc in each st (15)
Row 4-18 :
Repeat Row 2 (15) until row count reaches 16 total rows or desired length (15)
Info :
For textured look on scarf, you can change to HDC for every 3rd row to create slight ribbing. Add fringe by cutting cream yarn 6cm lengths and attaching groups across ends with a lark's head knot.
Row 19 :
Optional button tab: ch 3, join to edge and sc 3 across tab; fasten off leaving tail to sew wooden button in place.
— Spiral Tube (Main Body Coil) :
Info :
The spiral body is worked as a long continuous tubular piece that will coil around a central rope core. Work in rounds continuously in the round to create a tube with a 36-st circumference. Color changes every 2 rounds create mint-white stripes as in the sample.
Round 1 :
6 sc in magic ring (6)
Round 3 :
(1 sc, inc) x 6 (18)
Round 4 :
(2 sc, inc) x 6 (24)
Round 5 :
(3 sc, inc) x 6 (30)
Round 6 :
(4 sc, inc) x 6 (36)
Round 7-8 :
1 sc in each st (36)
Info :
Change to mint green if you began in cream or vice versa. Carry unused color up the inside of the tube to avoid many ends. Begin alternating colors every 2 rounds: 2 rounds mint, 2 rounds cream.
Round 9-68 :
Continue 1 sc in each st (36) changing color every 2 rounds to form stripes. Work until tube length measures approximately 28-34 cm (or as long as needed to form 4-5 spiral loops). (36)
Info :
If you want a thicker coil you can make the circumference 42 sts by adding (5 sc, inc) increases in round 6 instead of (4 sc, inc). The photographed coil uses 36 sts circumference for a compact look.
Round 69 :
(4 sc, dec) x 6 (30)
Round 70 :
(3 sc, dec) x 6 (24)
Round 71 :
(2 sc, dec) x 6 (18)
Round 72 :
(1 sc, dec) x 6 (12)
Info :
Fasten off leaving a long tail to sew bottom closed. Stuff the bottom lightly to create a gentle weighted end that helps the coil hang and keep its spiral balance. Leave the tube open at the top to allow the central rope core to be inserted and attached.
— Central Rope Core (make 1) :
Info :
This core is a firm twisted rope that runs through the center of the spiral tube and gives the piece structure and a place to secure the head. You can make a crocheted rope, use a wooden dowel, or use braided cord. Here we crochet a rope tube and stuff it firmly.
Round 1 :
Ch 6, join to work in rounds (6)
Round 2 :
1 sc in each around (6)
Round 3-12 :
1 sc in each around (6) until rope is same length as spiral tube (6)
Info :
Stuff rope very firmly. If you prefer a rigid core, insert floral wire or a thin wooden dowel before stuffing the rope tube fully. Make sure the ends are secured by weaving yarn through the final rounds and knotting internally.
— Bottom Weighted Ball (attach to rope end) :
Round 1 :
6 sc in magic ring (6)
Round 3 :
(1 sc, inc) x 6 (18)
Round 4 :
(2 sc, inc) x 6 (24)
Round 5 :
1 sc in each st (24)
Round 6 :
(2 sc, dec) x 6 (18)
Round 7 :
(1 sc, dec) x 6 (12)
Info :
Stuff firmly and close. This ball anchors the bottom and helps the spiral hold its shape. Sew it to the end of the rope core by inserting the rope into the ball and stitching the ball rim securely around the rope base.
— Small Hanging Balls/Pom-Poms (Make 3) :
Round 1 :
6 sc in magic ring (6)
Round 3 :
1 sc in each st (12)
Round 4 :
(2 sc, dec) x 3 (9)
Round 5 :
(1 sc, dec) x 3 (6)
Round 6 :
6 dec (3) - if 3 is too small, stop at 6 sc and close (6)
Info :
Fasten off leaving long tails. Stuff and sew onto short chains attached along the spiral to mimic dangling pom-pom decorations. Alternatively, make full pom-poms from wrapped yarn for fluffier balls.
— Snowflake Motif :
Round 1 :
6 sc in magic ring (6)
Round 2 :
Ch 3, sl st in next st x 6 to make little points (6)
Round 3 :
Sl st into every alternate stitch, ch 5, sl st into same st to form a larger arm; rep around to make 6 arms (6)
Round 4 :
Finish off and weave in ends. Make 1-2 snowflakes and attach to spiral loops at chosen positions.
Info :
Use cotton or a stitch-locked yarn to keep delicate snowflake shape; stiffen with a light starch if desired before attaching to spiral.
— Flower and Leaf Embellishments :
Flower Round 1 :
6 sc in magic ring (6)
Flower Round 2 :
(1 sc, inc) x 3 (9)
Flower Round 3 :
Ch 2, (3 dc, ch 2, sl st) into next st to form petal; rep around for 3 petals, fasten off (flower)
Leaf Round 1 :
Ch 6, 1 sc in 2nd ch from hook, hdc, dc, hdc, sc across (5)
Info :
Sew flower and leaf to hat brim at side, positioning as in reference image. Use pale pink for flower and mint for leaf, secure with invisible stitches and a small dab of glue inside flower if desired.
— Embroidered Stars and Facial Details :
Info :
Use white yarn doubled for embroidered stars on hat: bring needle up at center, work 6 straight stitches radiating out, then weave additional stitches between arms to create a little asterisk blossom as shown.
Mouth :
Embroider a curved smile using backstitch with black yarn between rounds 12-13 on the head, centered below the eyes; follow curvature of stitches for a smooth look.
Cheeks :
Apply pale pink blush by sewing small round motifs using pink yarn (6 sc in magic ring, flatten lightly) or use a tiny amount of craft pastel dabbed onto the cheeks for a soft effect.
— Pom-Pom (Hat Top Big) :
Info :
Make a large pom-pom using heavy wrapping of cream yarn around a pom-pom maker or cardboard, trim and shape to a round puff, and sew securely to top of hat. The hat also uses two small pom-poms on the sides if you prefer a symmetrical look.
— Assembly & Coiling :
Info :
To assemble, insert the rope core into the spiral tube, position the bottom weighted ball on the rope and sew closed. Coil the tube around the rope to form the layered spiral loops. Adjust loops to match the reference spacing (about 4-5 loops with 2-3 cm between each loop).
Attach Head :
Sew the head to the top of the rope core: position head so the neck opening sits flush on the top of the spiral tube. Use mattress stitch with the long tail from the head and weave through the top round of the tube for a secure join.
Attach Scarf :
Wrap scarf around neck area between hat brim and top spiral. Sew scarf tab with button to front to secure scarf in place. Add a small wooden button as in the reference image for charm (sew button through scarf and into the top rounds of the tube).
Attach Decorations :
Sew small hanging balls and snowflake motifs to the spiral outer edge using short chains (approx 6 ch) and secure each decoration with a tight knot and a few stitches. Place flower on hat side, embroidered stars on hat body, and secure pom-poms to hat edges.
Final Finish :
Weave in all remaining ends, trim extra tails, and shape pom-poms and the spiral loops. Lightly steam or block the hat brim if needed to flatten and set the shape.
Info :
Check overall balance; if spiral sags, add a small amount of plastic canvas or a thin wire inside the tube opposite the rope core to support the outer loop geometry. For a hanging ornament, attach a loop of thread or a small metal ring into the top pom-pom cap before closing.
This little mint-and-cream spiral snow friend is a joy to stitch from start to finish — from the tiny embroidered snowflakes on the hat to the whimsical spiral body that hangs and bounces with personality. Each element, from the wooden-button scarf to the soft pom-poms, adds a handcrafted charm that will brighten a mantel, tree or window. Enjoy assembling the pieces and personalizing details to make it uniquely yours — I hope this pattern brings you as much delight to make as it does to display! 🧶❄️