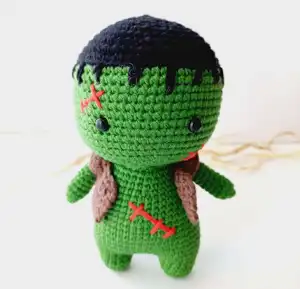
About This Monster Frankenstein Amigurumi Pattern
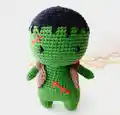
This pattern makes a small Monster Frankenstein amigurumi with a round head, simple body, two legs, two arms, and a removable sweater. You will use single crochet shaping with increases and decreases to create a soft, cuddly toy. The design includes fun details such as embroidered scars and a jagged hairline to give personality.
Instructions are given round-by-round with photos to guide placement and assembly. The pattern is easy to adapt in color and size by changing yarn or hook size.
Why You'll Love This Monster Frankenstein Amigurumi Pattern
I absolutely love this pattern because it transforms a few simple stitches into a character with tons of personality. I enjoy adding the little embroidered scars and the jagged hair fringe — they make each doll unique. The construction is satisfying: legs join to the body so the assembly is neat and sturdy. I also appreciate how easily the sweater and vest style can be customized to make a whole collection of tiny monsters.
Switch Things Up
I love personalizing this pattern by changing yarn colors — I often use different shades of green or even pastel tones for a softer look.
You can make the doll larger or smaller by swapping yarn weight and hook size; bulky yarn gives a chunky cuddle friend while finer yarn creates a tiny keychain pal.
I sometimes embroider different facial expressions: move the eyes slightly closer or farther apart, or add a small mouth to change personality.
For sturdier limbs, try lightly stuffing the arms or inserting a small piece of wire for posability, then wrap with yarn to cover the wire safely.
Swap the sweater color and texture to create outfits — add stripes, buttons, or tiny appliques for character and variety.
Try safety eyes of different sizes to alter the look; smaller eyes make a more delicate face, while larger eyes add cuteness and expression.
I often stitch decorative blanket stitches around the embroidered scars to make them more pronounced and give a vintage monster feel.
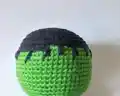
Change the hairline shape for different hairstyles — make it jagged, rounded, or add small tufts to the sides to personalize each doll.
Use felt for tiny accessories like a collar or patch sewn onto the sweater for an extra handmade touch that requires no extra crocheting.
If you want a sturdier base, add a small cardboard disk inside the feet during assembly; it helps the doll stand and keeps the bottom neat.
Common Mistakes & How to Fix Them
✗ Forgetting to change color at the correct round will leave an obvious seam; follow the color-change note exactly at Round 11 to switch to green yarn and weave in ends neatly.
✗ Not cutting the yarn after the first leg will prevent joining correctly to the body; cut the first leg thread and only leave the second leg attached so you can continue to the body as instructed.
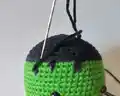
✗ Overstuffing the head can distort facial placement and hairline; stuff gradually, checking shape and eye placement before adding the hair fringe.
✗ Skipping stitch counts during shaping causes uneven rounds and mismatched decreases; count stitches after every increase or decrease round to ensure correct stitch counts.
✗ Pulling embroidery thread too tight for scars will pucker the fabric and distort shape; use gentle tension and secure ends safely behind the work.