About This Mr. Buckwheat Amigurumi Pattern
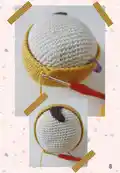
This pattern teaches you to crochet Mr. Buckwheat, a sweet hooded amigurumi with small horns, embroidered mouth, and felt eyes. The design includes detailed round-by-round instructions for head, hood, body, arms and legs so you can follow easily. It uses cotton 12-ply yarn and a small hook to create a neat tight fabric for stuffing and durability.
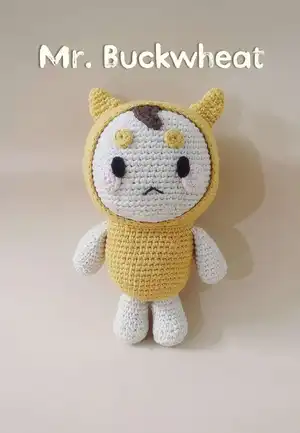
Ideal for makers who enjoy small toy projects with simple shaping and assembly. The finished toy measures about 7.87" using the recommended materials and hook size.
Why You'll Love This Mr. Buckwheat Amigurumi Pattern
I absolutely love this pattern because it balances simplicity and charm perfectly — the shaping is straightforward but the final look is delightfully expressive. I enjoyed designing the little hood and horns because they add personality with minimal extra work. Working in rounds gives a smooth, professional finish that I always find satisfying. I also love how easy it is to customize with different colors or tiny accessories to make each Mr. Buckwheat unique.
Switch Things Up
I love how easy it is to change colors in this pattern to create different characters; try pastel shades for a softer look or bright primary colors for playful appeal.
I often adjust size by changing yarn weight and hook size: using a bulky yarn with a larger hook gives a chunky, cuddly version while thinner yarn produces a tiny keychain-friendly doll.
For different eyes, substitute safety eyes where appropriate or embroider eyes for a fully handmade, child-safe toy.
I like to add accessories like a tiny crocheted scarf, hat, or a little felt leaf to personalize each Mr. Buckwheat.
Experiment with embroidery for different mouth expressions — a small smile, surprised O, or sleepy eyes can change the personality dramatically.
If you want posable limbs, consider adding thin wire inside the arms or legs during assembly, but use caution if making toys for small children.
Try mixing textured stitches on the hood or body for a fun tactile element; surface slip stitch stripes or a popcorn stitch accent can add interest.
Swap the horn shape to make different creatures — make them longer for a unicorn look or flatter for bunny ears by changing rounds in the horn section.
I recommend trying different stuffing levels: firmer stuffing gives a sturdier toy while softer stuffing makes a cuddlier, floppy friend.
I often sew on tiny felt props like a little bag or button accents to give each finished piece a story and make them gift-ready.
Common Mistakes & How to Fix Them
✗ Not stuffing the head as you crochet can make it hard to shape correctly later; stuff gradually during rounds to maintain an even shape and firmness.
✗ Forgetting to leave long tails when fastening off small pieces prevents neat sewing; always leave a long tail for sewing and final placement.
✗ Skipping the step of sewing the hood to the head before finishing the hood decreases symmetry; put the head inside the hood and crochet or sew as instructed for an even finish.
✗ Using a hook that is too large creates loose stitches and shows stuffing; use the recommended 3.00 mm hook and maintain tight tension for a tidy amigurumi.
✗ Placing facial features without checking placement first can look off-balance; pin or use stitch markers to test placement before permanently sewing or gluing.