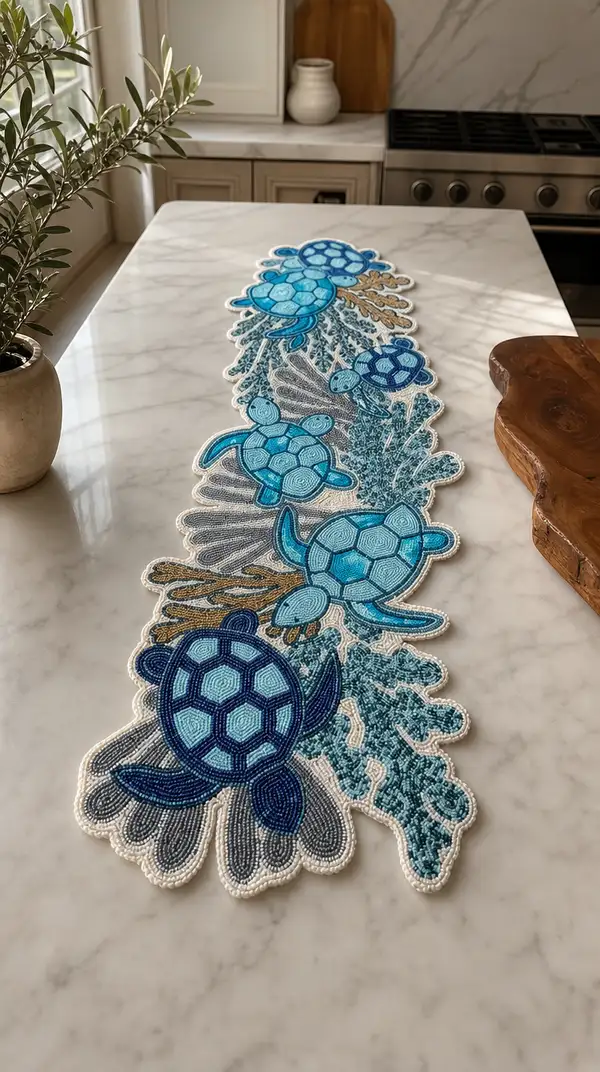
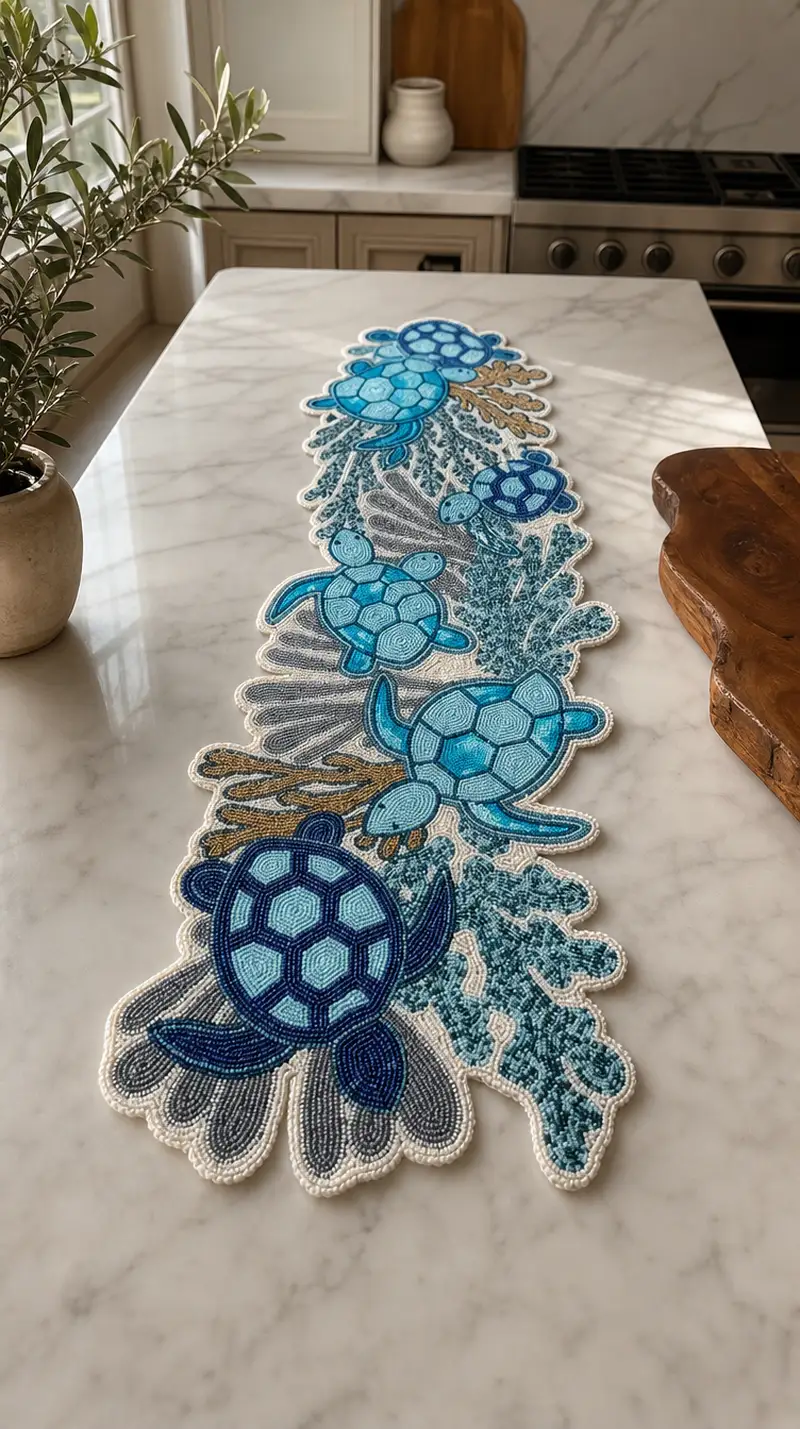
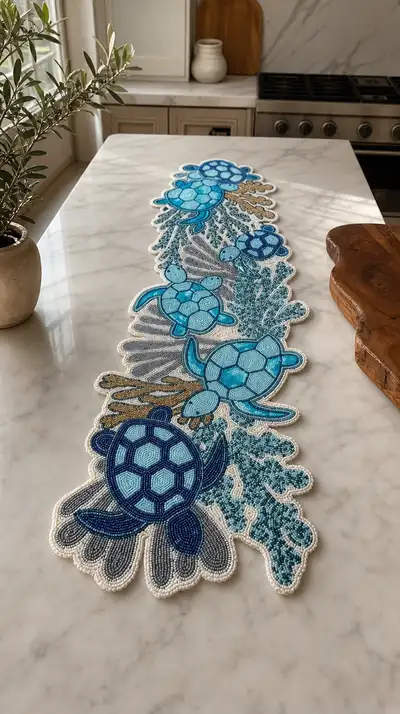
A stunning ocean-inspired table runner featuring five detailed sea turtle appliques, coral, shells and a scalloped border. This long, elegant runner uses layered motifs, tapestry colorwork and applique assembly to create a textured underwater scene in blues, teals and sandy neutrals. Finished with a delicate cream scalloped edge, it makes a beautiful centerpiece for coastal and modern farmhouse tables.
Progress Tracker
0% Complete
— Overview :
Info :
This runner is constructed from individual flat motifs: five sea turtles (Turtle A through E), three large coral/seaweed panels, two shell motifs, small filler pieces and then a final cream scalloped border joined around the assembled motifs. Work motifs flat in the round or as spirals, block pieces to size, overlap and sew them down following the photo layout, then work the scalloped border around the perimeter.
Info :
All rounds in motif sections begin at the magic ring unless otherwise noted. Work tightly to avoid gaps. When changing colors frequently, carry yarn on the WS or weave in ends as you finish short sections.
— Turtle Motif Template (Make 5 - varying sizes and colorways) :
Info :
The following template creates a flat turtle composed of a central shell disk, shell pattern rounds, a thin rim, then separately worked head and four flippers which are sewn to the shell. Use lighter-to-darker blues to achieve the layered look. For each turtle, the shell rounds are the main body and the head/flippers are worked as small appliques.
Shell Round 1 :
6 sc in mr (6)
Shell Round 2 :
6 inc (12)
Shell Round 3 :
(1 sc, inc) x 6 (18)
Shell Round 4 :
(2 sc, inc) x 6 (24)
Shell Round 5 :
(3 sc, inc) x 6 (30)
Info :
Change to a contrasting medium blue now for the first tessellated hexagon marking of the shell if doing multi-tone shells. Carry unused color on the wrong side or weave in as you go.
Shell Round 6 :
(4 sc, inc) x 6 (36)
Shell Round 7 :
(5 sc, inc) x 6 (42)
Shell Round 8 :
(6 sc, inc) x 6 (48)
Info :
Begin to visualize the hexagon pattern: we will create lightly raised segments by working one round in BLO to give a slight ridge that will form the shell segments.
Shell Round 9 :
1 sc in each st BLO (48)
Shell Round 10 :
1 sc in each st (48)
Shell Round 11 :
(6 sc, inc) x 6 (54)
Shell Round 12 :
1 sc in each st (54)
Info :
For the tessellated hexagons, you can embroider outlines in a darker tone after finishing the shell, or use surface crochet/ slip stitch outlines in a contrasting color. If embroidering, do it before attaching flippers so you can anchor threads under them.
Shell Round 13 :
(7 sc, inc) x 6 (60)
Shell Round 14 :
1 sc in each st (60)
Shell Round 15 :
(8 sc, inc) x 6 (66)
Info :
Switch to a slightly lighter accent color for the shell center highlight and work two rounds to create visual depth if desired. Alternatively, continue with the same color for a uniform shell.
Shell Round 16 :
1 sc in each st (66)
Shell Round 17 :
1 sc in each st (66)
Shell Round 18 :
(8 sc, dec) x 6 (60)
Shell Round 19 :
(7 sc, dec) x 6 (54)
Info :
Work a shallow rim to give the shell a defined edge. You can use FLO or a contrasting color to make it visible; the rim helps anchor the flippers and head when sewing them on.
Shell Round 20 :
(6 sc, dec) x 6 (48)
Shell Round 21 :
1 sc in each st (48)
Shell Round 22 :
Work 1 sc in each st FLO (48)
Shell Round 23 :
Sl st evenly around to create a neat edge and fasten off. Leave long tail for sewing (about 16-18 inches).
Info :
Fasten off and weave in ends on the wrong side. Block the shell flat to desired proportions. Repeat shell rounds for each turtle, adjusting hook or rounds for size differences: reduce/increase rounds at Rounds 15-17 to change final diameter by a few centimeters.
— Turtle Head (Make 5) :
Head Round 1 :
6 sc in mr (6)
Head Round 3 :
(1 sc, inc) x 6 (18)
Head Round 4 :
(2 sc, inc) x 6 (24)
Info :
For a flatter head that sits naturally against the shell, keep rounds shallow. Add a small mouth/nostril embroidery after attaching with a darker blue or black embroidery thread.
Head Round 5 :
1 sc in each st (24)
Head Round 6 :
(3 sc, dec) x 6 (18)
Head Round 7 :
1 sc in each st (18)
Head Round 8 :
(1 sc, dec) x 6 (12)
Head Round 9 :
1 sc in each st (12)
Head Round 10 :
Sl st, fasten off leaving tail for sewing.
Info :
Place safety eye position markers on the shell before sewing heads into place (eyes are embroidered or tiny beads - safety eyes are not recommended for table linens that might be laundered often). For a clean look, embroider small eyes at the side of the head before sewing.
— Flipper Template (Make 20: 4 per turtle) :
Flipper Round 1 :
6 sc in mr (6)
Flipper Round 2 :
6 inc (12)
Flipper Round 3 :
(1 sc, inc) x 6 (18)
Flipper Round 4 :
(2 sc, inc) x 6 (24)
Info :
Flatten the flipper as you work round 5 to create a paddle shape - change to FLO for a slight ridge on the outer edge.
Flipper Round 5 :
1 sc in each st FLO (24)
Flipper Round 6 :
(2 sc, dec) x 6 (18)
Flipper Round 7 :
(1 sc, dec) x 6 (12)
Flipper Round 8 :
Sl st and fasten off leaving tail for sewing; flatten slightly and press with blocking to define paddle.
Info :
Sew two front flippers slightly forward and two rear flippers slightly back. For a swimming pose, offset front flippers as though the turtle is reaching forward; pin in place before sewing.
— Turtle Assembly (Each Turtle) :
Info :
Position the head at the leading edge of the shell—usually aligned with a shell segment seam. Pin and tack with small stitches, then use an invisible whip stitch or mattress stitch to secure around the base. Repeat for each flipper, matching curvature to the shell rim.
Info :
After sewing pieces, add surface slip stitch outlines to each shell hexagon with a darker navy to mimic the raised pattern. Work tidy backstitch-style lines with a tapestry needle if preferred.
— Large Coral/Seaweed Panel A (Make 1) :
Panel Round 1 :
10 ch, join to make a loop and work 12 sc into loop (12)
Panel Round 2 :
6 inc, 6 sc (18)
Panel Round 3 :
(1 sc, inc) x 6, 6 sc (24)
Panel Round 4 :
1 sc in each st (24)
Info :
Coral is best worked as an organic freeform shape. Use alternating colors of aqua and teal with small clusters of bobble-like texture. Work irregular increases on edges to create branches.
Panel Round 5 :
(2 sc, inc) x 6 (30)
Panel Round 6 :
1 sc in each st (30)
Panel Round 7 :
(3 sc, inc) x 6 (36)
Panel Round 8 :
1 sc in each st (36)
Panel Round 9 :
Bobble cluster: *ch1, bobble in next st*, rep across a chosen edge (creates texture)
Info :
Work short chains and picot/bobble clusters on edges to make fronds. Vary the frequency to create natural-looking coral clusters.
Panel Round 10 :
Increase selectively on outer loops: work (1 sc, inc) across 8 edge locations to create branching (44)
Panel Round 11 :
1 sc in each st (44)
Panel Round 12 :
Work 2 rounds of floating speckled texture using slip stitches in contrasting light aqua randomly across the WS to suggest coral polyp texture
Panel Round 13 :
Fasten off and shape by trimming stray loops and blocking. Repeat similar approach for Panel B and C with different color emphasis and slightly different branching patterns.
— Shell Motif (Make 2) :
Shell 1 Round 1 :
6 sc in mr (6)
Shell 1 Round 2 :
6 inc (12)
Shell 1 Round 3 :
(1 sc, inc) x 6 (18)
Shell 1 Round 4 :
(2 sc, inc) x 6 (24)
Shell 1 Round 5 :
(3 sc, inc) x 6 (30)
Info :
Shell motifs are flatter and slightly elongated—work last rounds using BLO to create a ridged scallop shape that echo the scalloped border.
Shell 1 Round 6 :
1 sc in each st BLO (30)
Shell 1 Round 7 :
(4 sc, inc) x 6 (36)
Shell 1 Round 8 :
1 sc in each st (36)
Shell 1 Round 9 :
Work a decorative outer scallop: *skip 1 st, (5 dc in next st), skip 1 st, sl st in next st* around to form shell frill
Shell 1 Round 10 :
Fasten off and block flat.
— Background Filler & Texture (Large area filler rounds) :
Filler Round 1 :
Work foundation chain to match runner length on your chosen gauge (this pattern uses motifs assembled lengthwise; create a 160-180 ch foundation bounding line for reference)
Filler Round 2 :
1 sc evenly across foundation chain, turn and continue in rows to create narrow panels of textured stitches for depth (use seed stitch by alternating sc/hdc)
Filler Round 3-8 :
1 sc in each st across, rep until filler panels reach the width required between motifs
Info :
Filler sections are intentionally textural but low-profile to allow the turtles and coral to stand out. Use speckled slip stitch or popcorn clusters in muted teal tones to suggest bubbles and water movement.
Filler Round 9-12 :
Work two rounds of alternating FLO and BLO stitches to create subtle ridges that run lengthwise beneath the motifs
Filler Round 13 :
Fasten off and block to match motif edges so seams are even when sewing pieces together
— Joining Motifs & Runner Layout :
Info :
Lay your motifs on a flat surface in the desired order (see photo reference): start with a large turtle near one end, then a shell, coral cluster and alternate turtle sizes so the composition flows. Overlap edges slightly (about 1/4" - 1/2") so there is no gap when joined.
Info :
Sew motifs using a yarn needle and matching thread. Use an invisible whip stitch along overlapped edges. For stronger joins, mattress stitch through the inner rounds where layers meet. Press seams flat with steam, avoiding direct heat on synthetic yarns.
Info :
If you prefer a more permanent join, crochet a slip-stitch seam through both layers around each overlapped edge to secure. This gives a neat, slightly raised seam that adds to the textured look.
— Scalloped Border / Final Edging :
Border Round 1 :
With cream yarn, join at any outer edge point and work 1 sc evenly around entire assembled runner, working through both layers where seams meet. Aim for a smooth continuous edge (working 1 sc per 6-8 mm depending on gauge)
Border Round 2 :
1 sc in each st (even around corners and curves), adjust by adding 1-2 sc in particularly tight curves to avoid puckering
Border Round 3 :
*ch3, skip 1 sc, sl st in next sc* repeat to create small loops for scallop foundation. Fasten off and turn if necessary
Border Round 4 :
Work scallops: in each ch3 loop work (5 dc, ch1, sl st) to form a shell; repeat around to create an even scalloped edge
Border Round 5 :
Fasten off, weave in ends. Block the entire runner flat and gently shape scallops with steam or pin-blocking for final presentation.
Info :
Edge rounds may require adjustive increases or decreases along curves; add or subtract single crochet stitches between scallops to maintain even spacing. Blocked scallops should sit neatly with crisp points.
— Detailed Stitch Decoration (Optional) :
Decoration Round 1 :
Using darker navy, use surface slip stitch to outline each hexagon on turtle shells. Work slowly and keep tension even to avoid puckering. Fasten off between shells.
Decoration Round 2 :
Embroider small bubble clusters with French knots or small seed stitches in light aqua around coral clusters and filler panels for extra texture
Info :
Surface embroidery and slip stitching give the runner the depth seen in the photo. Keep decoration minimal and strategic to avoid making the surface bulky.
— Final Finishing :
Info :
Weave in all ends on the WS, then wet-block the entire runner to its final size. Pin scallops and motifs so proportions match photo and allow to dry fully. Trim stray fibers and lightly steam to set shape.
Info :
For laundering, use a gentle cycle in cool water or hand wash. Reshape and reblock if needed after washing to maintain scallop shape and motif flatness.
This ocean table runner brings handmade coastal charm to any table—each turtle, shell and coral frond is thoughtfully constructed and sewn into a cohesive, textural composition. The layered applique technique creates movement and depth while the delicate cream scallop border finishes it with elegance. Whether you display it every day or save it for special gatherings, it will always draw compliments and conversation. 🐢🌊🧶