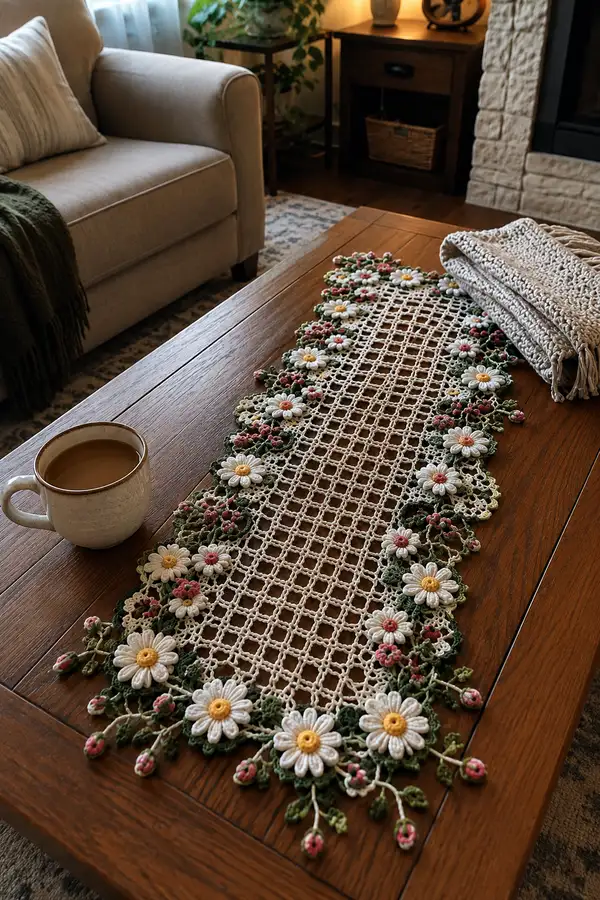
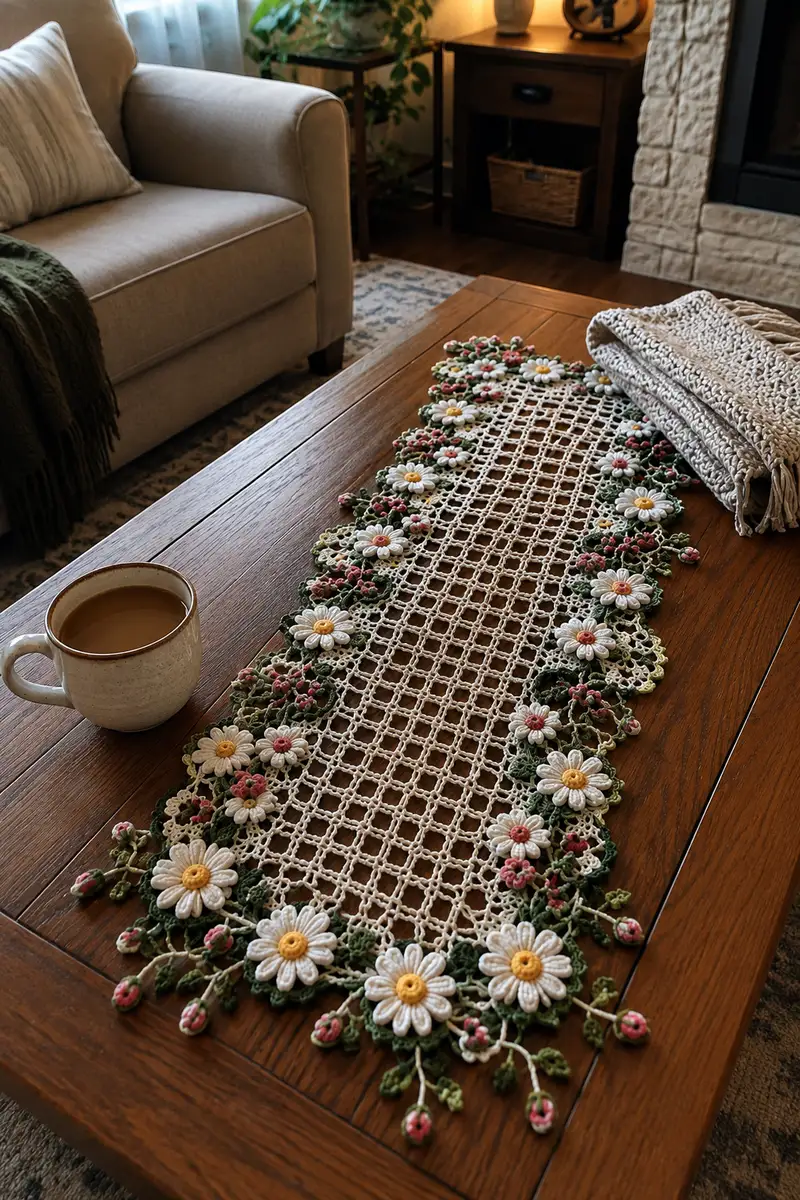
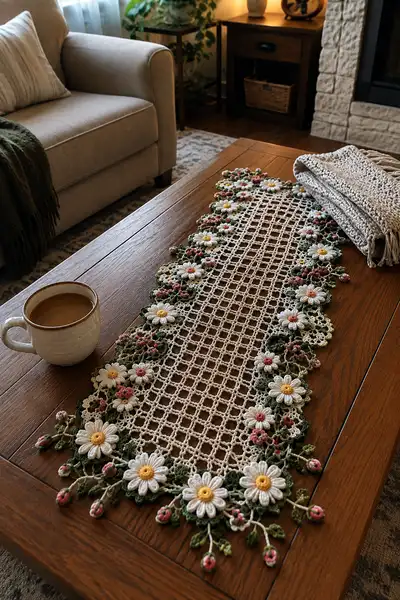
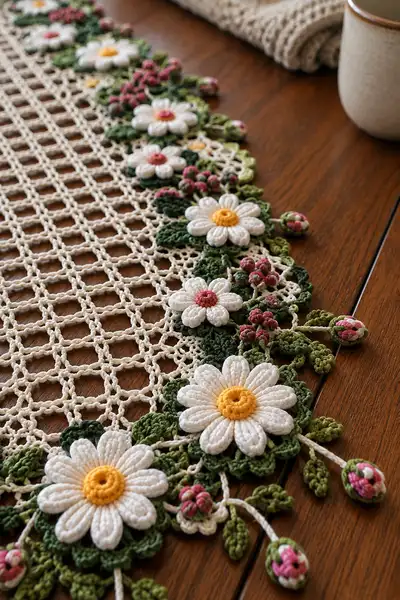
An elegant open-mesh table runner edged with sculpted daisies, leafy vines and tiny berry buds. Delicate cream latticework forms the central field while layered white daisies, soft green leaves and rose-pink buds create a dimensional botanical border. Perfect for a coffee or console table, this runner adds a handmade cottage-chic touch to any room. Uses cotton yarn and hook sizes that keep the lace crisp and drapey.
Progress Tracker
0% Complete
— Pattern Overview :
Info :
This runner is composed of three principal components: the central open mesh strip (worked as a wide rectangular grid), a set of daisy motifs (worked individually and layered), and a border system of leaves, small buds and vine chains that connect motifs and form a scalloped edge. Work motifs flat on a table and assemble by crochet join and whip stitch. Gauge is important for keeping symmetrical repeats.
Materials :
Use sport/DK cotton yarn for a clear stitch definition. Recommended hooks: 3.25mm for mesh and vines, 2.75mm for petals and buds to keep shapes firm. Blocking pins and light starch are optional for crisp flowers.
— Center Mesh (Work 1 center panel) :
Round 1 :
Chain 114 (this gives a center grid approx 10" wide; adjust multiples of 6+2 for your table width). Turn.
Round 2 :
Sc in 2nd ch from hook, *ch3, skip 3 ch, sc in next ch* across to last ch, sc in last ch (grid base row; counts variable by length).
Round 3 :
Ch1, turn. Sc in first sc, *ch3, sk next ch3 sp, sc in next sc* repeat across to end, sc in last sc. (Establish the open mesh pattern)
Round 4-7 :
Repeat Round 3 (maintain grid; total rows so far 6). Each row preserves the mesh structure; keep tension even for square holes.
Info :
Work the mesh with a consistent chain length (ch3 loops). Count the ch3 spaces at the end of each row to ensure you didn't miss an extra sc. Place a stitch marker every 10 ch3 spaces to help keep count over long rows.
Round 8 :
Change to cream if not already using it. Ch1, turn. Sc in first sc, *ch3, sc in next sc* across. (Center grid continues, row 8)
Round 9-18 :
Repeat Round 8 until you have worked 18 rows of mesh from the starting row (approximately 18-20 grid rows produce a runner of pictured proportion). Keep edges neat by always working last sc into last stitch of row.
Info :
Measure center panel frequently. If you plan a longer runner, continue repeats in multiples of the ch3 units. This pattern uses a symmetric count so both long edges align with the daisy border spacing.
Round 19 :
Begin edge forming round: Ch1, turn. Sc in each sc across, and in each ch3 space work (sc, ch3, sc) to create picot-ready loops along both long edges. (This creates base loops for joining border motifs)
Round 20 :
Turn work and sc evenly across to tidy edge; ensure loops align with grid holes (this prepares for motif attachment). Fasten off leaving long tails for joining.
Info :
Blocking the center panel now will help hold the grid square while you prepare motifs. Pin to a rectangular shape and spray lightly with water; allow to dry flat.
— Daisy Motif (Make 12 large daisies and 12 small daisies) :
Round 1 :
With yellow center color, make a MR, ch1, 6 sc in MR, pull tight (6)
Round 2 :
Inc in each st around (12)
Round 3 :
(1 sc, inc) x6 (18) — create a slightly domed center
Round 4 :
Work 1 round sc in BLO (18) to create a firm base for petals
Info :
For large daisies use a tighter hook (2.75mm) on petal rounds to keep petals sculpted. For the smaller daisies use the same hook as the mesh for a flatter petal.
Round 5 :
Change to white for petals. Ch2 (counts as first hdc), *in next st work: (hdc, dc3tog cluster made around post: yo,x3, pull through), hdc, picot (ch3 sl st into top of hdc)* repeat around to make 6 petal anchors (work evenly; total anchor points 6)
Round 6 :
Petal forming round: In each anchor do: (ch1, insert hook into anchor, pull up long loop to double loop height, repeat 3 times in same anchor to create 4 tall loops on hook, yo and pull through all loops), sl st at base to secure petal. Repeat to make 6 tall petals (6 petals)
Round 7 :
Repeat Round 6 to make a second layer of petals offset between first petals if desired; for large daisies work 2 petal layers (still 6 petals per layer).
Round 8 :
Fasten off white, weave in ends long enough for sewing. If making small daisies, omit Round 7 and stop here for a single-layer daisy.
Info :
When forming petals, maintain consistent loop height. Use stitch marker to mark first petal so petals are even. For sculpted petals pull loops to same height before finishing petal.
Round 9 :
Optional embroidered eye: With contrasting pink, sew a small center knot over yellow if you want a 'pink-eyed' center instead of plain yellow. Otherwise stitch the yellow center to the underside of the petals using a whip stitch to hold petals slightly cupped.
Round 10 :
Block each daisy: pin petals slightly curved outward on a corkboard and steam lightly. This helps the petals hold shape for assembly.
— Daisy Backing & Leaf Rosette (Make 24 leaf rosettes) :
Round 1 :
With deep olive green, MR, ch1, 6 sc in MR (6)
Round 2 :
Inc in each st around (12)
Round 3 :
(1 sc, inc) x6 (18)
Round 4 :
Work into each st: sc, ch3, sc (this creates 6 small loops to anchor leaf lacy edge)
Info :
These backing rosettes are the base for leaves and set the daisy slightly above the vine. Make enough for each daisy (one per daisy) and for a small extra rosette behind berry clusters.
Round 5 :
Leaf edging round: In each ch3 loop work: (sc, hdc, 3 dc, hdc, sc) to make scalloped leaves (6 scallops)
Round 6 :
Work a final round sc around to tidy the edge; fasten off leaving tail for sewing daisies to rosette (18)
Info :
Sew the white petal layer to this rosette by matching the center yellow disk to the center of the rosette. Use whip stitch around the MR base, and add a few hidden stitches through the leaf rosette to anchor securely.
— Small Berry Bud (Make 36 buds and 24 tiny bud clusters) :
Round 1 :
With rose-pink, MR, ch1, 6 sc in MR (6)
Round 3 :
1 sc in each st around (12)
Round 4 :
Make bobble texture: *ch2, skip next st, 5 dc cluster in same st (bobble), ch2, sl st into next st* repeat 4 times to make textured surface. Fasten off leaving tail for sewing. Optional tiny stuffing pinch inside before closing for rounder bud.
Info :
For variegated buds, use two contrasting pinks held together for one or two rounds to create a marbled effect. Keep stuffing minimal to preserve lacey look.
— Leaf (Make 48 full leaves and 48 small leaves) :
Round 1 :
With lighter green, ch8, sc in 2nd ch from hook, hdc in next ch, dc in next 2 ch, hdc in next ch, sc in next ch, sl st in last ch (creates a pointed leaf shape). Turn, work same on opposite side of chain: sc in first ch, hdc, dc2, hdc, sc, sl st in base.
Round 2 :
Edge round: Into each dc work (hdc, dc, hdc) to make a raised rib down the center. Fasten off leaving long tail for attaching to vines.
Info :
Make leaves in two tones: deep olive for larger base leaves and lighter green for accents. Pin leaves in slight curve when sewing to create natural shape.
— Vine & Stem Chains (Work continuous vine segments to attach motifs) :
Round 1 :
Attach lighter green to the mesh edge base loop (see Center Mesh Round 19). Ch20, sl st back into same base loop to form short stem. Repeat this every 6th base loop along the long edge to create vine anchor points.
Round 2 :
From each stem anchor, work: ch8, 1 sc in 3rd ch from hook, *ch3, sl st into next mesh base loop* to create interlaced chains across edge if desired. Secure chains at intervals with sl st into mesh to hold shape.
Round 3 :
Form branching stems: At ch4 from base, attach a small leaf or bud by working sc into the leaf's tail and continuing chain. This produces natural branches of leaves and buds along vine lines.
Info :
Vines are intentionally irregular: vary chain lengths (6-14 ch) and add 2–4 leaves or buds per vine. Pin each vine to desired arrangement on mesh before final securing to ensure balanced composition.
— Joining Daisies and Rosettes to Mesh Edge :
Round 1 :
Position a prepared daisy+rosette along the long edge so its base aligns with a base loop created in Center Mesh Round 19. Using the long tail of the rosette, whip stitch around 8–10 evenly spaced points to secure to mesh base loops.
Round 2 :
After attaching each daisy, crochet a short vine chain (ch6–10) outwards from the mesh and attach a small bud cluster or leaf at its tip. Repeat this process alternating large daisies with a cluster of 3 small buds and 2 leaves between them to match the pictured rhythm.
Info :
When placing daisies, alternate large and small daisies for a scalloped rhythm. Space daisies approximately every 9–12 mesh ch3 spaces depending on your initial center width. Mark placements with pins before final sewing.
— Decorative Edge Lace (Scallop connectors and picot edging) :
Round 1 :
Using deep olive, pick up at mesh edge between two daisies. Work (sc, ch3, sc) into each ch3 base loop to form small picot arches all along the edge; this softens transition from mesh to border.
Round 2 :
In each arch work: (sc, hdc, 3 dc, hdc, sc) to form scallops that will cradle leaf rosettes and daisies. Make scallops where daisies will sit slightly larger (add an extra dc to the 3 dc group to make a larger cradle).
Round 3 :
Between scallops work 3 chain loops to form lace windows; sl st back into mesh base at every third scallop to keep the edge stable. Fasten off and weave ends on WS.
Info :
Adjust scallop sizes so daisies sit comfortably without overlapping neighbor daisies. Use pins to test final placement before securing with slip stitches.
— Small Floral Cluster (Make 12 clusters) :
Round 1 :
Make a small 3-flower cluster: MR with pink, 5 sc in MR, sl st to join (5). Fasten off leaving tail.
Round 2 :
Sew this tiny 5-st disk into a small grouping of leaves and between scallops along the mesh; attach three buds and two small leaves around it to make a filler cluster.
Info :
Clusters fill the gaps between main daisies and prevent the border from looking sparse. Mix light pink and darker pink buds within clusters for depth.
— Finishing Edge and Corner Treatments :
Round 1 :
At the short ends of the runner, form a rounded cascade: after last mesh base loop, work extended vine chains with 3–4 buds each creating a tassel-like blossom spray. Attach one large daisy near each corner and allow several buds to dangle.
Round 2 :
Create symmetrical corner scallops by adding extra leaf rosettes and a bridging chain back into the corner mesh loops to avoid sudden termination of vines; join with sl st and weave ends long for reinforcement.
Info :
Keep corner treatments balanced but slightly larger than side motifs to anchor the runner visually. You can add a small fringe if desired, but the pictured runner uses only floral sprays.
— Assembly & Join Strategy :
Round 1 :
Lay the center mesh flat and pin all daisies, rosettes, leaf rosettes, clusters and vines in the positions shown in the photo: alternating large daisies with clusters, roughly every 9-12 mesh ch3 spaces along each long edge. Mirror on both sides for symmetry.
Round 2 :
Sew daisies to mesh first using the long tails from rosettes with whip stitch. Secure each daisy with 8–12 evenly spaced passes. Then crochet vine chains directly into adjacent base loops to join nearby elements (use sl st or sc joins so join is tidy).
Info :
Work on a large flat surface. Use pins to hold placement, and do not permanently attach anything until you are satisfied with overall layout. Take photos as you pin to remember positions while sewing.
— Final Blocking and Edge Reinforcement :
Round 1 :
Wet-block assembled runner: pin to final dimensions on a blocking surface, stretching gently so the mesh squares become even and scallops open naturally. Pin each petal and leaf to desired curve with rust-proof pins.
Round 2 :
Allow to dry fully (6–12 hours). If you prefer extra stiffness for tabletop use, apply a light spray starch while blocking and let dry.
Info :
Blocking transforms the runner from a limp assembly to a neat, stable piece. Check all joins again after blocking and add extra stitching if any motifs shifted.
— Optional: Adding a Second Daisy Layer (for extra depth) :
Round 1 :
If you desire extra dimensional daisies, make a second smaller petal round using white and stack it under the first petals by sewing through the yellow center and through the rosette. Add 6 tiny inner petals using half-loops to increase fullness.
Round 2 :
Sew this double-layered daisy following the same attachment method as single daisies and secure with small stitches to the rosette base to prevent rotation.
Info :
Double-layer daisies look best at the main focal points (corner daisies and the central daisies along the runner). Keep the smaller daisies single-layer to avoid overcrowding.
— Troubleshooting Rounds (Tips while you work) :
Round 1 :
If a petal flops, drop a few stitches in the petal anchoring round and retighten by sewing through the base and adding a small bit of starch while blocking.
Round 2 :
If the mesh becomes skewed, unravel to the previous edge anchoring round and re-count ch3 spaces; adjust the number of ch3 repeats to ensure symmetry across the width.
Info :
Keep a small notebook and record any changes in counts or adjustments you make so you can reproduce the runner or create a matching pair later.
Completing this open-mesh lace runner is a rewarding, meditative project that brings vintage charm to your table. The sculpted daisies and tiny berry buds add a delightful 3D effect that guests will notice and admire. Pinning, blocking and careful assembly transform many small pieces into one elegant, cohesive work of art. 🧶🌼 Your table will feel refreshed and handmade gifts from this pattern will be treasured. 💚