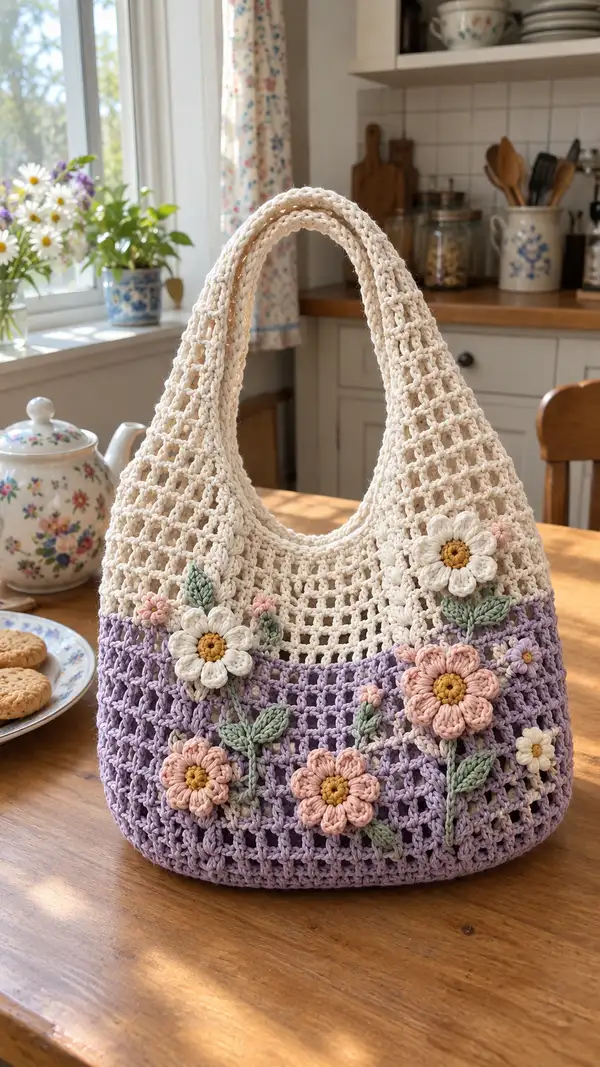
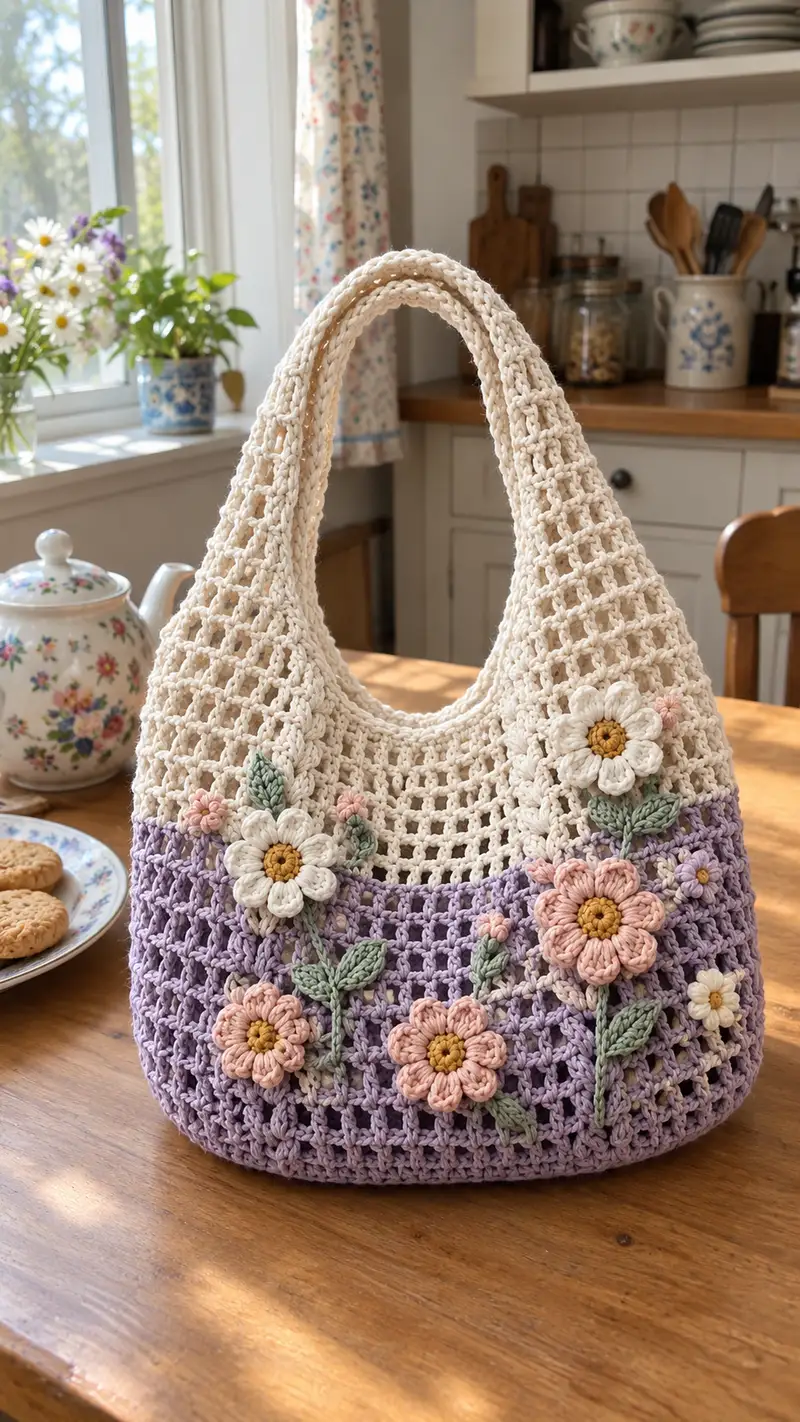
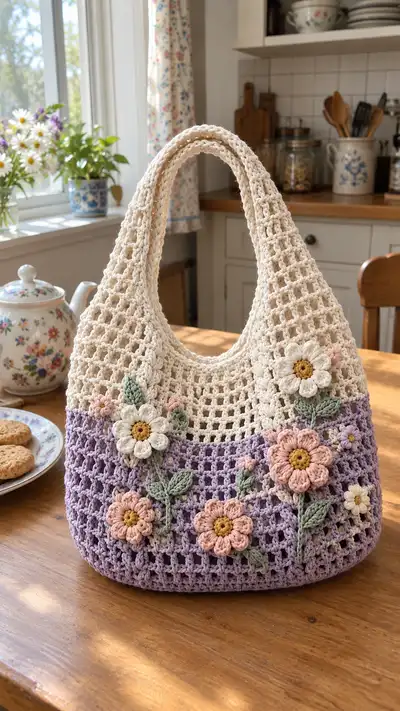
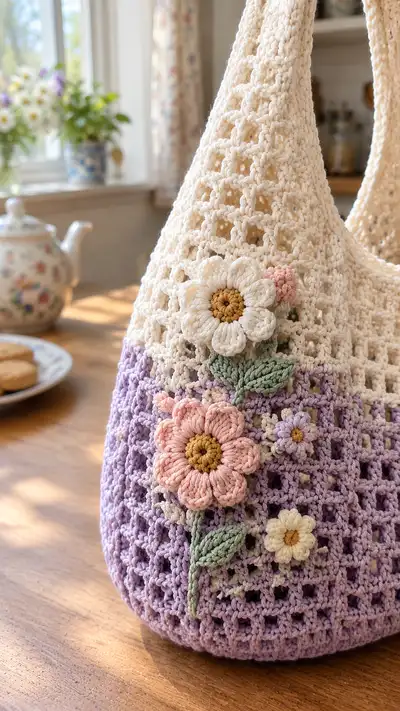
A soft, slouchy mesh market bag worked in cotton-weight yarn with a cream upper body and a lavender base, decorated with dimensional pastel flowers and leaves. The open lattice stitch gives a lightweight, airy structure while the sturdy base and double-layered handles make it practical for everyday use. Decorative 3D flowers in peach, cream and mustard add a charming cottagecore touch. This pattern includes full step-by-step rounds for base, mesh body, handles and detailed applique9s.
Progress Tracker
0% Complete
— Notes :
Info :
This pattern is written in continuous rounds (do not join) unless instructed otherwise. Use a stitch marker to mark the first stitch of each round and move it up as you go. Measurements given are approximate; adjust hook size to match gauge and desired firmness. Work the base tightly for structure and the mesh body in a slightly more open tension to maintain the airy lattice. All round counts in parentheses indicate the total number of stitches at the end of that round.
— Finished Dimensions :
Info :
Approximate finished bag height (excluding handles): 11-13 inches (28-33 cm). Width at base approximately 11-12 inches (28-30 cm). Depth approximately 4-5 inches (10-12 cm). Using thicker or thinner yarn and different hook sizes will alter final size.
— Base (worked flat in continuous rounds) :
Round 1 :
6 sc in magic ring (6)
Round 3 :
(1 sc, inc) x 6 (18)
Round 4 :
(2 sc, inc) x 6 (24)
Round 5 :
(3 sc, inc) x 6 (30)
Round 6 :
(4 sc, inc) x 6 (36)
Round 7 :
(5 sc, inc) x 6 (42)
Round 8 :
(6 sc, inc) x 6 (48)
Round 9 :
(7 sc, inc) x 6 (54)
Round 10 :
(8 sc, inc) x 6 (60)
Round 11 :
(9 sc, inc) x 6 (66)
Round 12 :
(10 sc, inc) x 6 (72)
Info :
At the end of Round 12 your base should sit flat; if it cups, tighten tension, or if ruffling occurs, omit one increase evenly in the last round. This circular base will form the bottom panel of the bag. If you prefer an oval base for extra depth, increase in opposite sides instead—this pattern uses a round base for symmetry.
Round 13 :
1 sc in each st around (72)
Round 14 :
1 sc in each st around (72)
Info :
Work 2-3 rounds of single crochet to build up a firm base wall before transitioning to the mesh. Keep stitches tight here to resist sagging. If your yarn splits, drop to a slightly larger hook briefly for these rounds and then resume with designated hook for mesh for consistent drape.
— Joining Base to Body (start mesh) :
Round 15 :
Change to lavender color. *Ch 3 (counts as dc), sk next st, dc in next st, ch1, sk next st* around, ending with dc in last indicated stitch and sl st to top of first ch-3 to join. Maintain spacing so you have 36 dc/ch-1 mesh spaces around. (36 dc, 36 ch-1 spaces)
Info :
We will work a two-row mesh repeat to create square lattice holes. The ch-1 spaces become the centers of the squares; the following round will place dc in those ch-1 spaces to form tidy edges. If your count does not match 36, adjust by 1-2 stitches to align the repeat evenly around the base.
Round 16 :
Ch 3 (counts as dc), dc in each ch-1 space around, ch1 between each dc when instructed to preserve the grid: *dc in ch-1 sp, ch1* repeat to end. Sl st to top of first ch-3. (36 dc)
Round 17 :
Ch 3, *sk next st, dc in next st, ch1, sk next st* repeat around to re-establish lattice (36 dc, 36 ch-1)
Round 18 :
Repeat Round 16 (36 dc)
Info :
From here on, continue alternating the two-row mesh sequence: odd rounds form the open squares (dc separated by ch-1), even rounds fill dc into the ch-1 spaces. This creates the stable yet airy lattice seen in the bag. Keep tension even and do not pull too tight on chains or holes will close up.
Round 19 :
Repeat Round 17 (36 dc, ch-1 spaces)
Round 20 :
Repeat Round 16 (36 dc)
Round 21 :
Repeat Round 17 (36 dc, ch-1)
Round 22 :
Repeat Round 16 (36 dc)
Round 23 :
Repeat Round 17 (36 dc, ch-1)
Round 24 :
Repeat Round 16 (36 dc)
Info :
Change color to cream at the start of Round 25 to create the cream upper section. Carry lavender up internally for a few stitches if you prefer a tidy carry, or fasten off lavender and weave ends later.
Round 25 :
Change to cream. Ch 3, *sk next st, dc in next st, ch1, sk next st* repeat around (36 dc, 36 ch-1)
Round 26 :
Ch 3, *dc in each ch-1 space, ch1 between* repeat around (36 dc)
Round 27 :
Repeat Round 25 (36 dc, ch-1)
Round 28 :
Repeat Round 26 (36 dc)
Round 29 :
Repeat Round 25 (36 dc, ch-1)
Round 30 :
Repeat Round 26 (36 dc)
Info :
Work the cream upper section for a total of 16 rounds in cream (Rounds 25-40) to match the photo's proportion between the handle base and the color transition. This will give a soft cream top section above the lavender base. If you prefer a taller or shorter cream section, add or subtract mesh repeats in pairs to keep the pattern aligned.
Round 31 :
Repeat mesh pattern (36 dc)
Round 32 :
Repeat mesh pattern (36 dc, ch-1)
Round 33 :
Repeat mesh pattern (36 dc)
Round 34 :
Repeat mesh pattern (36 dc, ch-1)
Round 35 :
Repeat mesh pattern (36 dc)
Round 36 :
Repeat mesh pattern (36 dc, ch-1)
Round 37 :
Repeat mesh pattern (36 dc)
Round 38 :
Repeat mesh pattern (36 dc, ch-1)
Round 39 :
Repeat mesh pattern (36 dc)
Round 40 :
Repeat mesh pattern (36 dc, ch-1)
Info :
At the top of Round 40 the bag body is at the height where handles will begin. Count your current rounds to ensure symmetry for both handles and that there are even mesh repeats between them. We will create two integrated handles across the next 8-12 rounds by forming rectangles with sc ribbing.
— Handles (integrated, make 2 panels) :
Round 41 :
Switch to working in rows for handle shaping across a front panel: Identify handle placement on the RS: count 9 mesh spaces from the side seam, skip the next 8 mesh spaces for handle opening, attach yarn and work sc into the next 8 ch-1/dc motifs to form the first handle bridge. *Working back and forth over the 8-motif span: Row 1: ch1, turn, 8 sc across into the top of dc/ch-1 motifs (8 sc) — this forms the base of handle bridge.*
Info :
Pin both handle openings before working to ensure even spacing. Each handle opening is created by working sc panels across a set number of mesh motifs (8 motifs recommended). You will create a 3-row or 4-row sc band to stiffen the handle before rejoining rounds in the main body. If you prefer a longer strap, increase the number of motifs spanned or add more rows.
Round 42 :
Row 2 (handle panel): ch1, turn, 8 sc across (8 sc)
Round 43 :
Row 3: ch1, turn, 8 sc across (8 sc)
Round 44 :
Row 4: ch1, turn, 8 sc across (8 sc). Fasten off, and repeat the same process on the opposite side for handle 2 using the same number of motifs and rows so both handles mirror.
Info :
For a double-thickness handle like in the photo, return to each handle panel and work an additional set of 3-4 rows of sc across the same panel, then fold the panel in half and seam the long edges together with sc or sl st for a sturdy, padded strap. Alternatively, you can crochet a strap separately and sew it on.
Round 45 :
Rejoin yarn to main round at a place next to handle and continue mesh pattern around: ch3, *sk next st, dc in next st, ch1* around for 4 rounds to re-establish the lattice and blend handle seams (36 dc)
Round 46 :
Continue mesh repeat (36 dc)
Round 47 :
Continue mesh repeat (36 dc)
Round 48 :
Continue mesh repeat (36 dc)
Info :
Work 4 rounds after handle integration to ensure panels settle nicely into the lattice. Now build handle thickness: for each handle, pick up along the top opening and work single crochet rounds around the strap edge for reinforcement. This step provides the padded look pictured.
Round 49 :
Handle reinforcement round: With RS facing, attach cream yarn to side of the handle band, ch1, sc evenly around the outer edge of the folded handle (approx. 28-32 sc depending on length), sl st to join. Repeat on the opposite handle. (approx. 28-32 sc each)
Round 50 :
Work 1 more sc round around each handle edge, placing 1 sc in each stitch to bulk up the strap (approx. 28-32 sc). Fasten off and weave in ends.
Info :
If you prefer a more padded handle, insert a length of cotton rope or interfacing before closing the strap seam. Be sure to cover raw cord ends with yarn to prevent snagging in the mesh.
— Upper Edge & Finishing Rounds :
Round 51 :
With cream yarn, ch1, sc in each dc and ch-1 area (treat ch-1 spaces as single spots to anchor): Work 72 sc evenly around the top opening to create a sturdy edge. (72 sc)
Round 52 :
1 sc in each st around (72)
Round 53 :
BLO 1 sc in each st around to create a neat ridge between the bag body and handle opening (72)
Info :
Work 2-3 finishing rounds to tidy the opening. A BLO round creates a subtle ridge that matches the soft, padded handle look. Fasten off and weave in all ends securely on the WS.
— Large Flower A (Make 1 - Peach, multi-layer) :
Round 1 :
Using mustard for center, magic ring, 6 sc in ring; pull tight and sl st to join (6)
Round 2 :
Inc in each st around (12)
Round 3 :
(1 sc, inc) x 6 (18)
Info :
Secure center and fasten off mustard. Join peach for petals. Use a smaller hook (3.5mm) for petal details for a tighter, raised petal look.
Round 4 :
Join peach with sl st to any st, ch1, *(sc in same st, ch2, 7 dc in next st, ch2, sc in same st)* repeat around to create 6 large petals. End with sl st to first sc. (6 petals)
Round 5 :
Fasten off peach. For a layered look, join a lighter peach or blush on top of each petal: Sl st into the top of a petal, ch1, 6 dc in petal top post, sl st to secure. Repeat for each petal to create a doppeld petal effect. Fasten off and weave in ends.
Info :
Petal shaping uses clusters of dc (or puff stitches if you prefer) to add dimension. Make sure petals are evenly spaced; use pins to block petals if needed before sewing to the bag.
— Medium Flower B (Make 2 - Cream) :
Round 1 :
Mustard center: magic ring, 6 sc (6)
Round 2 :
Inc in each st (12)
Round 3 :
Switch to cream, join with sl st, *ch2, 5 dc in next st, sl st to next st* repeat around to make 6 petals. Fasten off and weave ends. (6 petals)
Info :
Create two of these mid-sized cream flowers in different placements: one near a large peach flower and another near the bag top for the layered cluster look seen in the photo.
— Small Flower C (Make 3 - White/Yellow) :
Round 1 :
Mustard center: magic ring, 6 sc (6)
Round 2 :
Switch to off-white, join, *ch2, 3 dc in next st, sl st to next st* repeat around for 6 tiny petals. Fasten off. (6 petals)
Info :
Use these small flowers to fill gaps and add visual interest. They sew on easily and help blend the colored transition between lavender and cream.
— Flower Center Detail Option (Raised Center) :
Round 1 :
Using mustard, magic ring, (ch1, 12 hdc) in ring, pull tight, sl st to join (12)
Info :
This creates a slightly higher, cramped center for a more dimensional flower center. Change technique per flower size for varied texture across the bouquet.
— Leaves (Make 6-8 in Sage) :
Leaf 1 :
Ch 8; row 1: sc in 2nd ch from hook, hdc in next, dc in next 2, hdc in next, sc in next, sl st in last (shaped tip) — now work on opposite side of chain: sc, hdc, dc 2, hdc, sc. Sl st to base and fasten off. (approx 14 sts per leaf)
Info :
Make slightly elongated leaves for the photo look. For veining, use a strand of the same sage yarn and embroider a central line of surface slip stitches down the leaf once blocked and sewn in place.
Leaf 2 :
Repeat Leaf 1 (Make 6-8 leaves total varying sizes by using ch 6 for smaller or ch 10 for larger leaves)
— Flower Stem & Stem Embellishment :
Info :
Stems in the photo are narrow twisted ropes with a slight texture. Crochet stems by chaining required length then working back along the chain with slip stitches or sc in back loops only to create a rope-like stem.
Stem 1 :
Ch 30, sl st in each ch back to base (30 sl st). Fasten off leaving long tail for sewing. Make stems of varying lengths for different flowers (ch 16-36 depending on placement).
Info :
Alternatively, braid 3 strands of yarn and stitch them to the bag to create a rustic braided stem if you want more bulk and strength. Always leave long working tails to sew stems securely into the mesh holes.
— Assembly & Flower Placement :
Info :
Before sewing applique9s to the bag, arrange flowers and leaves on the bag to create pleasing clusters. The photo shows a central cluster on the front: one large peach flower slightly right of center, two medium cream flowers (one above to the left, one to the right), several small white flowers scattered and leaves filling vertical space with stems extending downward. Pin and photograph the layout to ensure symmetry before sewing.
Step 1 :
Position the large peach flower about 6-8 rows up from the lavender-cream color change on the front center-right. Use blunt-tip pins to temporarily secure each motif.
Step 2 :
Sew each flower center to the bag first with matching thread - use small whip stitches from the inside of the bag to keep sewing invisible on the RS.
Step 3 :
Sew petals down at 2-3 anchor points per petal to prevent flipping. Avoid stitching all the way around the petal edge so petals retain 3D shape.
Step 4 :
Sew stems into the mesh: bring the stem tail from the inside and stitch through mesh intersections at 2-3 points along the stem length. Knot securely on the WS and weave tail through several stitches for extra hold.
Step 5 :
Sew leaves along stems, positioning them at natural intervals. Embroider veins if desired with surface slip stitches in matching sage color.
Info :
Work all sewing from the inside when possible to hide tails. If you want removable decorations (for washing), attach flowers with small snaps or buttons sewn to the back of motifs and the bag interior.
— Extra Decorative French Knot Buds (Make 6-10) :
Info :
Create small buds by making tiny picot clusters or French knots using yarn doubled for bulk. For a stitched bud: insert needle, pull yarn through leaving 1cm tail, make 3-4 wraps and pull taut, knot on the inside. Space them along stems as in the photo.
— Optional Lining :
Info :
If you prefer a lined bag, cut fabric to the bag's interior dimensions leaving 1cm seam allowance. Sew a fabric lining with an opening in the top seam, slide into the bag and blind-stitch the top to the crochet edge. Lining protects delicate mesh and prevents small items from poking through.
— Closing and Final Touches :
Round 54 :
Weave in all loose ends with tapestry needle and bury tails inside mesh. Trim excess.
Round 55 :
Lightly steam or spritz applique9s with water and shape petals by hand while drying to ensure pleasing sculptural shape.
Info :
Optionally attach a small interior loop and button for a closure. Use small, unobtrusive hardware and sew through several mesh intersections for secure anchoring.
Final :
Your bag is complete. Re-check seams and reinforcement on handles. If any areas feel loose, reinforce by stitching through several layers of mesh and handle seam for strength.
This pastel floral mesh bag is equal parts functional and whimsical — a beautiful, handmade carry-all that feels like carrying a small garden wherever you go. The airy lattice keeps the silhouette light while the sturdy base and reinforced handles make it practical for everyday use. Sewing on the little 3D flowers is the sweetest part — a small crafting moment that transforms the bag into something truly personal. 🧶🌸 Carry it to market, on picnics, or give as a thoughtful gift — every stitch tells a story. Happy crocheting! 🌿✨