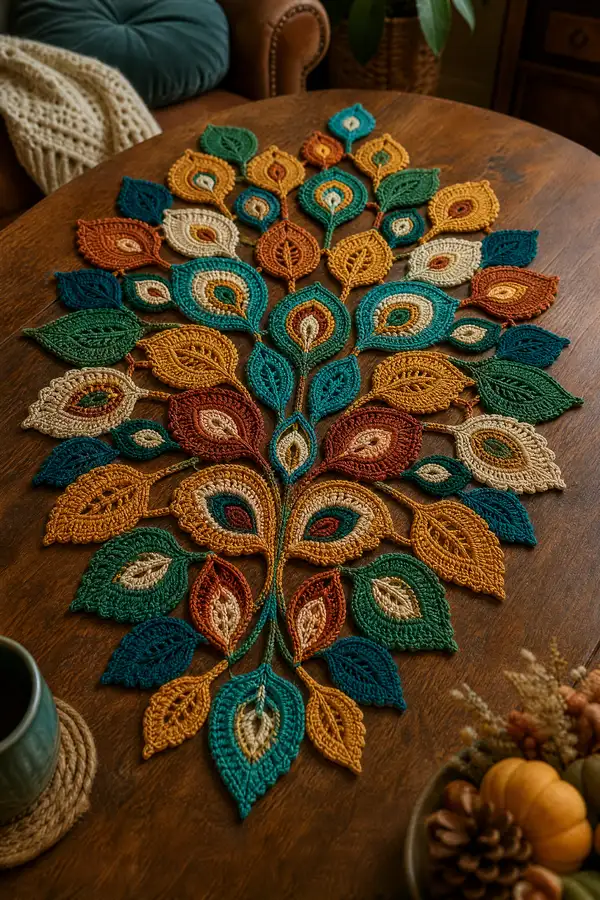
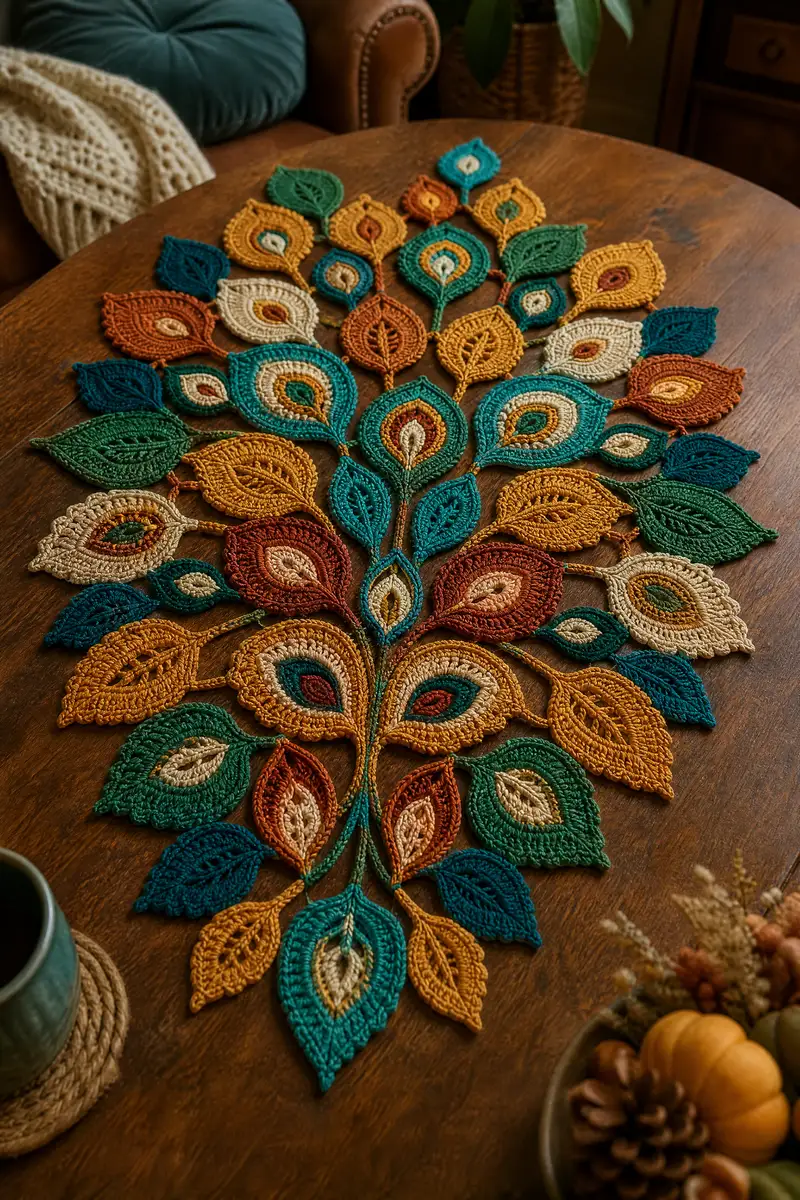
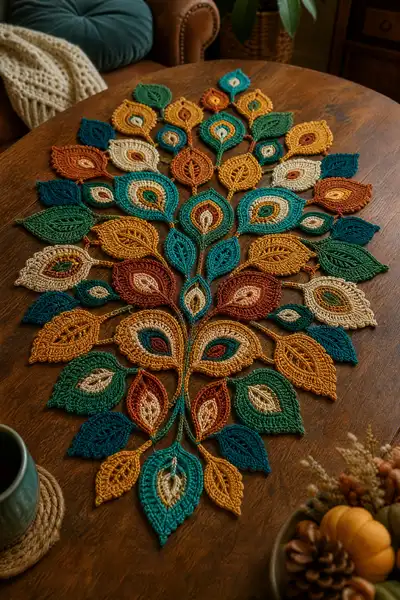
A richly textured peacock-feather table runner featuring layered leaf/feather motifs in jewel tones. This pattern builds multiple sizes of feather motifs, leafy stems and a scalloped border for a striking table centerpiece. Designed to be worked motif-by-motif and joined as you go, it uses color changes, textured stitches, and BLO ridges for depth. Perfect for seasonal décor or as a statement dining table accent.
Progress Tracker
0% Complete
— Large Peacock Feather Motif (Make 6) :
Round 3 :
(1 sc, 1 inc) x 6 (18)
Round 4 :
(2 sc, 1 inc) x 6 (24)
Round 5 :
(3 sc, 1 inc) x 6 (30)
Info :
Change to inner-contrast color now to create the inner 'eye'. Finish round with a slip stitch to join and pull color through. Carry or fasten off remaining tail and weave in later.
Round 6 :
Join new color. ch1, 1 sc in same st, 1 sc in next st, (hdc, dc) in next 2 sts, 1 hdc, 1 sc across to create a slightly raised oval center. Work evenly to maintain 30 sts total by including 1 sc in each remaining st (30)
Round 7 :
Switch to main motif color. ch2 (counts as hdc), (2 hdc in next st) x 6 spaced around the center, 1 hdc in other sts to end with 36 sts (36)
Round 8 :
(3 sc, 1 inc) x 9 (45)
Info :
Start working BLO in coming rounds to add a raised ridge that mimics feather texture. Use a stitch marker to mark the center back stitch for later shaping.
Round 9 :
1 sc in each st BLO (45)
Round 10 :
(4 sc, 1 inc) x 9 (54)
Round 11 :
1 sc in each st (54)
Round 12 :
(5 sc, 1 inc) x 9 (63)
Info :
Change to accent outline color if desired. Using FLO for this round will create a fine ridge that frames the feather eye nicely.
Round 13 :
1 sc in each st FLO (63)
Round 14 :
(6 sc, 1 inc) x 9 (72)
Round 15 :
1 sc in each st (72)
Round 16 :
(7 sc, 1 inc) x 9 (81)
Info :
To shape the feather to a pointed leaf, we begin directional increases on the sides and leave center back relatively straight. Mark the top-most stitch of the motif for later placement of the stem.
Round 17 :
Work in rounds increasing only at the extremes: (8 sc, 1 inc) x 9 (90)
Round 18 :
1 sc in each st (90)
Round 19 :
(9 sc, 1 inc) x 9 (99)
Round 20 :
1 sc in each st (99)
Info :
Working the next rounds in dc clusters will create a lacy, open surround reminiscent of peacock feather ribs. Ensure your stitch count is correct before moving to taller stitches.
Round 21 :
Switch to dc: ch2 (counts as DC), 1 dc in next st, (ch1, sk1, 2 dc in next st) around to maintain 99 'visual' stitches; adjust to end evenly. Treat groups of 3 sc as one dc cluster to keep count.
Round 22 :
1 dc in each dc (approx 99) keeping tension relaxed for open texture.
Round 23 :
(3 sc, dec) x 18 (approx 81) - begin gentle decreases along the widest row to bring the edges back in for feather tip
Round 24 :
(4 sc, dec) x 13 (approx 65) - continue shaping to tapered point
Info :
At this stage the motif should be roughly teardrop-shaped. Light blocking on a flat surface can help even out the lobes before final edging. Leave long tail for joining the central stem later.
Round 25 :
(5 sc, dec) x 11 (approx 55)
Round 26 :
(4 sc, dec) x 11 (approx 44)
Round 27 :
(3 sc, dec) x 11 (approx 33)
Round 28 :
(2 sc, dec) x 11 (approx 22)
Round 29 :
(1 sc, dec) x 11 (approx 11)
Round 30 :
6 dec to close point neatly or adjust to maintain shape (approx 6)
Info :
Fasten off and leave a 20-25cm tail for seam joining. Block motif flat, pinning into teardrop shape with point facing out. Repeat to make six large feather motifs in your selected color combos.
— Medium Feather Motif (Make 8) :
Round 3 :
(1 sc, 1 inc) x 6 (18)
Round 4 :
(2 sc, 1 inc) x 6 (24)
Round 5 :
(3 sc, 1 inc) x 6 (30)
Info :
Change color for inner eye on round 6 to create contrast. These medium motifs are built to sit around the large ones as secondary accents.
Round 6 :
Join accent color. ch1, 1 sc in each st around (30)
Round 7 :
Switch back to main motif color. (4 sc, 1 inc) x 6 (36)
Round 8 :
1 sc in each st BLO (36)
Round 9 :
(5 sc, 1 inc) x 6 (42)
Round 10 :
1 sc in each st (42)
Info :
Introduce a decorative ridge: Round 11 in FLO creates a framed outline that reads as a feather rim in the finished layout.
Round 11 :
1 sc in each st FLO (42)
Round 12 :
(3 sc, 1 inc) x 10 + 2 sc (approx 52)
Round 13 :
1 sc in each st (52)
Round 14 :
Work a row of dc and ch1 spaces around to introduce slight openness: (1 dc, ch1, sk1) around maintaining visual spacing
Round 15 :
Work decreases on outer edge to form the point: (5 sc, dec) x 8 (approx 44)
Info :
Fasten off leaving long tail for joining. Block to teardrop shape. These medium feathers are slightly narrower than large ones—arrange them between the larger motifs when assembling the fan.
— Small Leaf Motif (Make 16) :
Round 3 :
(1 sc, 1 inc) x 6 (18)
Round 4 :
(2 sc, 1 inc) x 6 (24)
Round 5 :
1 sc in each st (24)
Round 6 :
(3 sc, 1 inc) x 6 (30)
Info :
Small leaves are used as filler between feathers and also as decorative tips at the outer edge. You can make them in a single color or with an inner-contrast ring on round 2 or 3.
Round 7 :
1 sc in each st BLO (30)
Round 8 :
(4 sc, 1 inc) x 6 (36)
Round 9 :
1 sc in each st (36)
Round 10 :
Gradual decreases to form point: (3 sc, dec) x 8 + 0 sc (approx 28)
Round 11 :
(2 sc, dec) x 7 + 1 sc (approx 21)
Round 12 :
(1 sc, dec) x 7 + 0 sc (approx 14)
Round 13 :
7 dec to close small point neatly (approx 7). Fasten off, leave long tail for joining.
Info :
Weave in ends or leave tails for invisible joining. Blocking will help small leaves lay flat for neat placement.
— Tiny Accent Eye Motif (Make 18) :
Round 3 :
1 sc in each st (12)
Round 4 :
(2 sc, 1 inc) x 4 = 16. Fasten off leaving short tail to stitch into the center of medium feathers to emphasize the eye.
Info :
Tiny eyes give depth to the concentric feather layers. Secure with a few stitches through the center to keep them from shifting during washing.
— Central Stem / Spine (Make 1 long) :
Info :
The central spine is worked as a long crocheted chain with base posts to which motifs are joined. Make a chain the length of the runner you want (approx 120-160 ch for a medium table runner). We will build surface slip-stitched connections to attach motifs at measured intervals.
Round 1 :
ch120 (adjust length to suit your table and how many motifs you will place). Turn and sc in 2nd ch from hook and in each ch to end (119 sc)
Round 2 :
ch1, 1 sc in each st BLO across for subtle rib texture (119)
Round 3 :
ch1, 1 sc in each st (119)
Round 4 :
To create attachment tabs every 6-8 sts, ch6 at spacings: *sc in next 6 sts, ch6, skip 0* repeat to end. This forms short loops to sew motif stems through for a stronger join. Fasten off and weave in ends.
Info :
If you prefer, make two shorter spines and join them under the central fan for better flexibility. Blocking the spine before attaching motifs helps keep it flat.
— Feather Stem (Make one per feather motif) :
Round 1 :
Attach small-cord color at top-center back of each motif. ch12, sl st back along chain to make a thin cord (12)
Round 2 :
Work surface sc along the cord for thickness: sl st, ch1, 1 sc in each ch across. Fasten off leaving long tail to sew the cord securely to the central spine.
Info :
Make stems in a darker green or brown to read as veins in the runner. Stems should be long enough to reach central spine with slight slack so motifs can be positioned at angles.
— Decorative Veining (Surface Crochet & Embroidery) :
Info :
With a contrasting color and yarn needle or by surface slip stitch, embroider a central vein and smaller lateral veins into each motif. This step is worked after blocking—use a running chain stitch or surface slip stitch following the natural curve from point to eye.
Round 1 :
Thread yarn needle with contrasting color. Come up at base of motif center, make running surface slip stitches outward to point about 8-12 times to create ribbing. Secure at back and weave in.
Info :
Vary the length and number of lateral veins depending on the motif size. On large feathers add 6-8 lateral veins; medium 4-6; small 2-3. This is a visual step—do not change structural stitch counts here.
— Joining Motifs to Stem (Joining As You Go Option) :
Info :
Lay out your central spine and pin motifs in the desired fan arrangement. Space large motifs centrally with medium and small motifs filling out the sides. Use the long tails from feather stems to sew through the spine loops made earlier. Alternatively you can use slip-stitch joining or whipstitch for a flatter seam.
Step 1 :
Position 6 large feathers evenly along the upper half of the spine, leaving central two spots closest to runner center. Sew each feather stem through a spine loop with at least 4 secure stitches and back them up with a second pass for stability.
Step 2 :
Sew medium feathers between the large ones, staggering slightly forward or back for a layered look. Secure the small leaves and tiny eyes into gaps as fillers. Keep motifs flat and prevent overlapping thickness by flattening edges as you sew.
Info :
Use blocking pins to hold motifs in place on top of the spine while sewing. This prevents shifting and ensures an even fan shape.
— Scalloped Border / Outer Edge :
Round 1 :
With border color attached to outermost motifs, sl st around perimeter of the assembled fan to create a continuous working edge. If gaps are present, bridge them with ch3 then sl st into next motif edge to maintain continuity.
Round 2 :
sc evenly around all edges to tidy join areas (approx 4-6 sc per motif side depending on size). Keep counts consistent for neat scallop foundation.
Round 3 :
*Skip 2 sc, (5 dc in next sc), skip 2 sc, sl st in next sc* repeat around to form shells. Work carefully to space shells evenly for balanced scallops.
Round 4 :
In each shell: sl st to center dc, ch1, 1 sc in center, ch1, sl st to base to create small picot-like peak for refined edge. Fasten off and weave in all ends.
Info :
For a deeper border repeat shell rows or change to taller stitches (tr) for a more ornate edge. Blocking after border is particularly effective to open shells and set scallops flat.
— Small Edge Leaves & Fillers (Make 12) :
Round 3 :
(1 sc, 1 inc) x 6 (18)
Round 4 :
1 sc in each st BLO (18)
Round 5 :
(2 sc, 1 inc) x 6 (24)
Round 6 :
1 sc in each st (24)
Round 7 :
Decrease to form point: (3 sc, dec) x 5 + 1 sc (approx 20)
Round 8 :
(2 sc, dec) x 6 + 2 sc (approx 14)
Round 9 :
Close with (1 sc, dec) x 4 (approx 8). Fasten off leaving tails for sewing.
Info :
Use these as accents at the tip edges of the fan or between larger motifs to fill visual gaps. Make in an accent color to draw the eye outward.
— Assembly & Final Finishing Rounds :
Info :
With all motifs blocked and dry, lay out the fan on a large flat surface and pin motifs lightly in place. Start joining from the center and work outward, attaching stems to the spine with several secure mattress or whip stitches. Keep alignment symmetrical left and right as you go.
Round 1 :
Using the long tail from the central lower motif, sew the base of the motif to the spine at the marked central point with 12 secure stitches and a knot behind; weave in tail.
Round 2 :
Sew adjacent large motifs next, then medium motifs to their positions. Use long tails to weave through both motif back loops and spine loops for an invisible join. Keep stitch tension firm but not puckered.
Round 3 :
After all motifs are sewn, use small running slip-stitch along inner seams on the underside to brace joins. This prevents shifting in transit and makes the runner stable on the table.
Info :
Once sewn, add surface embroidery veins and small accent eyes. Lightly steam block the whole runner (do not press) to set shape. Allow to dry fully before use.
Round 4 :
Finally, with border color, work one round of slip stitches around the entire runner underside to tidy loose stitches, then finish with the scalloped outer edge as described earlier.
Info :
Check for loose ends and weave them through seams so they are invisible. If the runner is destined for frequent use, consider a light spray of fabric stiffener along the spine underside to reduce shifting.
Completing this peacock fan table runner is a rewarding mix of repetitive meditative crochet and creative layout design. Each motif you stitch brings more color and character until the fan blooms across your table. Enjoy the blocking and joining stage—the runner truly comes alive there. 🧶 Place it on a wooden table for a warm, seasonal centerpiece and delight in the compliments! 🌿✨