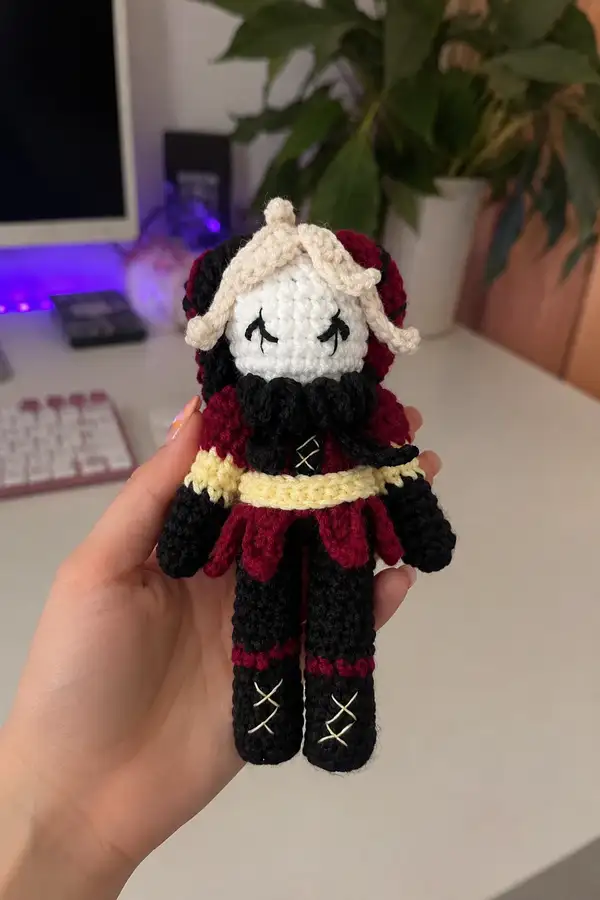
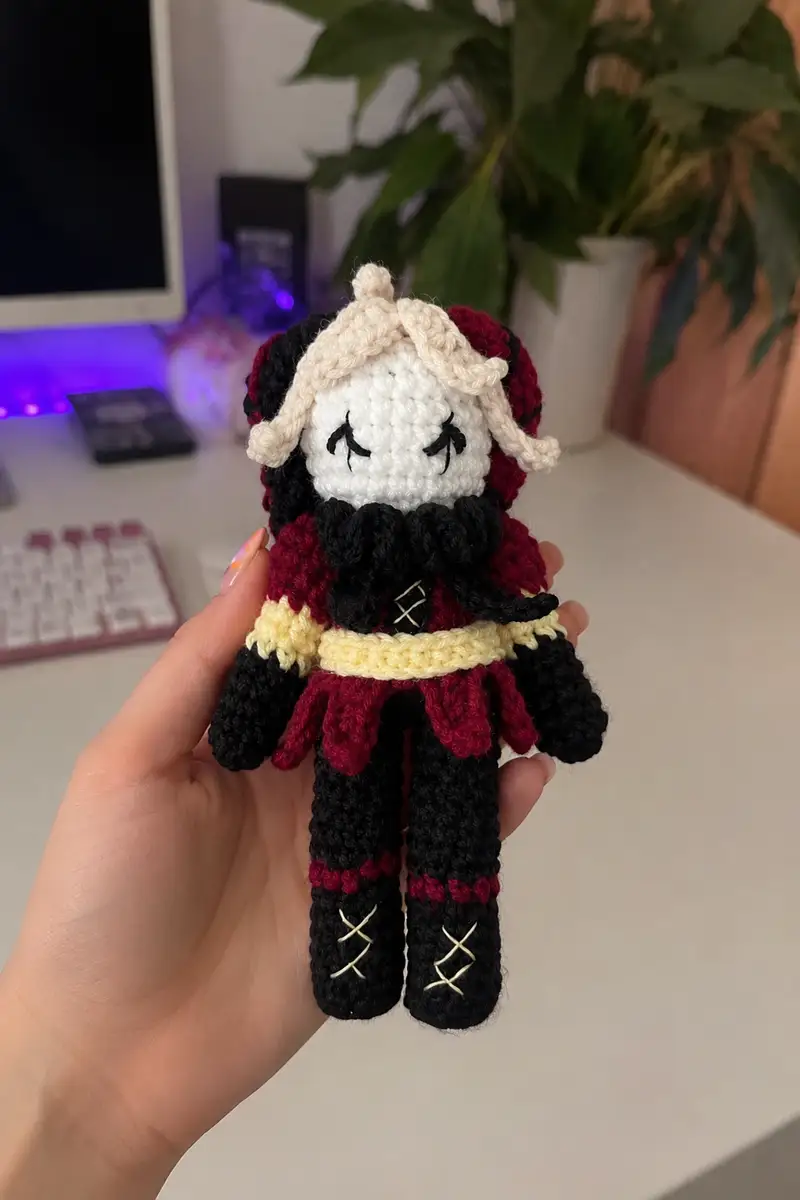
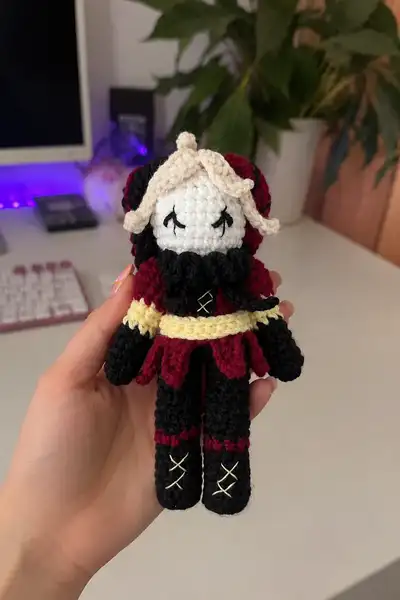
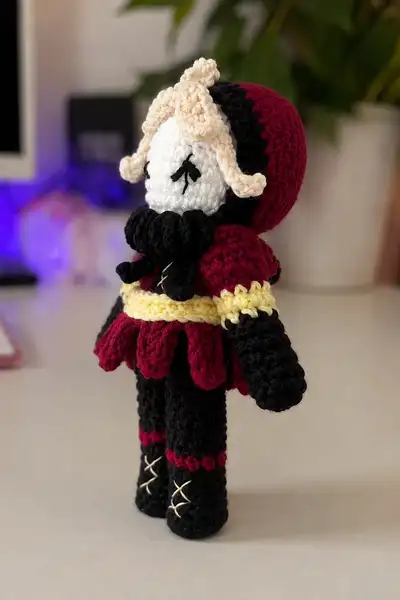
Create a charming Pierrot-style jester amigurumi with this detailed pattern. This mini doll features a two-tone hood, creamy face plaque, curled blonde locks, a dramatic black ruffled collar, a petal skirt, long legs with boot laces, and delicate embroidered eyes. The pattern walks you through every round, color change, and assembly tip so you can recreate the exact look shown in the photos.
Progress Tracker
0% Complete
— Head / Hood :
Round 1 :
6 sc in magic ring (6)
Round 3 :
(1 sc, 1 inc) x 6 (18)
Round 4 :
(2 sc, 1 inc) x 6 (24)
Round 5 :
(3 sc, 1 inc) x 6 (30)
Round 6 :
(4 sc, 1 inc) x 6 (36)
Round 7 :
(5 sc, 1 inc) x 6 (42)
Round 8 :
(6 sc, 1 inc) x 6 (48)
Info :
Work these first eight rounds in burgundy for the main hood/back. This creates the full circumference for the head. Keep a stitch marker at the start of each round to prevent accidental extra stitches.
Round 9-14 :
1 sc in each st (48)
Info :
Rounds 9-14 establish the hood height. At the end of round 14 mark the front center stitch: find the stitch directly opposite the back seam and place a removable marker. This will be the center of the face opening where you will later sew the face plaque.
Round 15 :
1 sc in each st (48)
Round 16 :
1 sc in each st (48)
Info :
If you'd like the side panels of the hood to appear black as in the photo, make two small black side panels separately now (see 'Side Hood Panels' section) and stitch them in place before final decreases for a tidy two-tone seam.
Round 17 :
(6 sc, 1 dec) x 6 (42)
Round 18 :
(5 sc, 1 dec) x 6 (36)
Round 19 :
(4 sc, 1 dec) x 6 (30)
Info :
Do not fasten off yet. Stop decreasing when you have a fairly narrow neck opening but leave it loose enough to stitch the head to the body later. Begin light stuffing here if the head is collapsing; pack lightly so the front face area can be left a bit flexible for sewing on the face plaque.
Round 20 :
(3 sc, 1 dec) x 6 (24)
Round 21 :
(2 sc, 1 dec) x 6 (18)
Round 22 :
(1 sc, 1 dec) x 6 (12)
Info :
Fasten off leaving a long tail for later sewing to the body. Do not close completely — we will use this opening to attach the neck to the body and adjust stuffing at that time.
— Face Plaque (Make 1, White) :
Round 1 :
6 sc in magic ring (6)
Round 3 :
(1 sc, 1 inc) x 6 (18)
Round 4 :
(2 sc, 1 inc) x 6 (24)
Round 5 :
(3 sc, 1 inc) x 6 (30)
Round 6-12 :
1 sc in each st (30)
Info :
The face plaque is an elongated oval; rounds 6-12 increase face height. If you want a slightly narrower face, work only through round 10 instead. Block the plaque lightly by pressing with a warm iron through a damp cloth if the yarn permits to make it flat and even.
Round 13 :
(3 sc, 1 dec) x 6 (24)
Round 14 :
(2 sc, 1 dec) x 6 (18)
Info :
Before you do further decreases, position and embroider the facial features: the sleepy X-eyes and the tiny center mouth line. Use black yarn and a tapestry needle. Place eyes centered horizontally about 4-6 stitches apart depending on taste, approximately two rounds down from the top edge of the plaque.
Round 15 :
(1 sc, 1 dec) x 6 (12)
Info :
Fasten off leaving a long tail for sewing. Lightly stuff the face plaque with a thin, even layer of fiberfill; the plaque should be fairly flat yet slightly padded so it sits nicely against the hood when sewn.
— Side Hood Panels (Make 2, Black) :
Round 1 :
6 sc in magic ring (6)
Round 3 :
(1 sc, 1 inc) x 6 (18)
Round 4-6 :
1 sc in each st (18)
Info :
These small panels are semi-oval appliques used to create the black side-of-hood effect. Flatten and sew them lightly along the hood sides, aligning the long axis vertically so they cover about rounds 10-16 of the hood sphere. Make two identical pieces.
Round 7 :
(2 sc, 1 dec) x 4 + 2 sc (14)
Round 8 :
1 sc in each st (14)
Info :
Sew panels to the hood before finishing head decreases for a clean join. Use the tail left from the hood to secure through both hood and panel for a nearly invisible seam.
— Collar / Ruffle (Black) :
Round 1 :
Make a small chain of 24, join into ring with sl st (24)
Round 2 :
1 sc in each ch around (24)
Round 3 :
(ch 3, 3 dc in next st, sl st in next st) x 8 (creates 8 ruffle lobes)
Round 4 :
Work 3 sc evenly in each lobe to neaten (24)
Info :
The collar is a separate piece that is later sewn around the neck opening on top of the body. Use a dense gauge to ensure the ruffle stands up. You can add more lobes or use puff stitches if you want a thicker ruffle.
— Body / Torso :
Round 1 :
6 sc in magic ring (6)
Round 3 :
(1 sc, 1 inc) x 6 (18)
Round 4 :
(2 sc, 1 inc) x 6 (24)
Round 5 :
(3 sc, 1 inc) x 6 (30)
Round 6-8 :
1 sc in each st (30)
Info :
These rounds form the body circumference. Work in burgundy for round 1-8 to match the skirt/upper body color. Place a stitch marker at the front center to align the belt and skirt petals later.
Round 9 :
Change to pale yellow yarn. 1 sc in each st BLO (30)
Round 10 :
1 sc in each st (30)
Info :
Round 9 creates the belt ridge using BLO in pale yellow. Carry the yellow yarn inside the body if you prefer hidden tails. You can also crochet over tails to anchor them.
Round 11-12 :
Change back to burgundy. 1 sc in each st (30)
Round 13 :
(3 sc, 1 dec) x 6 (24)
Round 14 :
(2 sc, 1 dec) x 6 (18)
Info :
Round 13 begins waist shaping to allow the skirt petals to flare. Before closing further, we will attach the skirt petals around rounds 11-13 area so they sit at the belt line.
Round 15 :
1 sc in each st (18)
Round 16 :
(1 sc, 1 dec) x 6 (12)
Info :
Stuff the body moderately now, firmer than the head but not rock-hard — you want the doll to sit well but still be slightly squeezable. Leave the neck opening wide enough to sew the head later using the tail left from the head.
Round 18 :
Fasten off leaving long tail for sewing.
— Skirt Petal (Make 10-12) :
Petal - Round 1 :
Ch 8, sc in 2nd ch from hook, sc across (7)
Petal - Round 2 :
Ch 1, turn, 2 sc in first st, 1 sc in next 3 sts, 2 sc in last 2 sts (9)
Petal - Round 3 :
Ch 1, turn, (sc in each st) (9)
Petal - Round 4 :
Sl st through the base of the chain to form a small lobe and fasten off leaving a tail for sewing
Info :
Each petal is worked flat and then sewn to the body at the belt line (rounds 9-12 area). For this Pierrot doll make 10 petals for even spacing; you can sew them so each petal covers approximately 3 stitches on the belt round.
Petal - Assembly :
Using the tail, sew each petal to the body around the belt, spacing them evenly. The petals should overlap slightly to create a continuous skirt. Tuck the petal bases under the pale yellow belt to hide seams.
— Left Arm (Make 1) :
Round 1 :
6 sc in magic ring (6) (work in black)
Round 3 :
1 sc in each st (12)
Round 4 :
1 sc in each st (12)
Info :
Rounds 1-4 form the hand/mitten. Stuff the hand firmly so it keeps shape; amigurumi hands should be well stuffed so the fingers are suggested by the round shape.
Round 5 :
Change to pale yellow for cuff. 1 sc in each st BLO (12)
Round 6 :
Change to burgundy. 1 sc in each st (12)
Round 7-12 :
1 sc in each st (12) work up the arm length to shoulder (6 rounds for a medium-length arm)
Info :
Stuff the arm lightly — dense at the hand, gradually lighter toward the shoulder so it attaches smoothly to the body. Leave a long tail for sewing to the torso at the arm join around body round 8-10.
Round 13 :
(1 sc, 1 inc) x 4 + 4 sc (16) optional flare for sleeve
Round 14 :
1 sc in each st (16)
Round 15 :
Fasten off leaving long tail for sewing
Info :
Sew arms to the sides of the body aligned with the belt line so they sit naturally. See assembly steps for exact round numbers and placement tips.
— Right Arm :
Make same as Left Arm :
Repeat all rounds from the Left Arm section to make a matching arm. Ensure both arms are stuffed similarly and sewn symmetrically to the body.
— Left Leg (Make 1) :
Round 1 :
6 sc in magic ring (6) (work in black)
Round 3-6 :
1 sc in each st (12)
Info :
These rounds create the foot circumference. Stuff the foot area firm. The leg will be a long tube; maintain tight tension to avoid visible stuffing showing through stitches.
Round 7-16 :
1 sc in each st (12) work until desired leg length (10 rounds for a tall leg)
Round 17 :
Change to burgundy. 1 sc in each st (12) (creates the knee cuff stripe)
Round 18-22 :
Change back to black. 1 sc in each st (12)
Info :
Leave a long tail for sewing. Lightly stuff the leg with fiberfill so it is flexible but holds shape. For poseable legs insert a thin wire before final stuffing if desired; bend ends to form small loops and pad with extra stuffing so wire ends do not poke out.
Round 23 :
Fasten off leaving tail for sewing
— Right Leg :
Make same as Left Leg :
Repeat all rounds from the Left Leg section making sure stripe placement and lengths match symmetrically.
Info :
After both legs are completed, embroider the criss-cross boot laces using pale yellow yarn. Use a tapestry needle and stitch an X pattern starting about 6 rounds down from the top edge of the foot to mimic the photo. Secure and weave in ends inside the leg.
— Hair Curls (Make 4-6, Pale Blonde) :
Curl 1 - Round 1 :
Ch 18, sc in 2nd ch from hook and across to end (17)
Curl 1 - Round 2 :
In the chain foundation work: 2 sc in each stitch across to create a spiral curl effect (34)
Curl 1 - Finish :
Fasten off leaving a long tail; coil the piece into itself and sew the end so it forms a tight spiral. Make 4-6 curls depending on desired fullness.
Info :
Attach two curls to the front sides of the face plaque to create the looped blonde bangs in the photo and secure one curl on top as a small topknot. Tuck the base of each curl under the hood edge for neatness.
— Scarf / Bow (Black) :
Round 1 :
Ch 18, sc in 2nd ch from hook to end (17)
Round 2-3 :
1 sc in each st (17)
Info :
Fold the narrow strip and stitch the center to form a tied scarf shape. Sew the scarf around the collar or fasten it across the front for the same dramatic look. Leave tails long enough to curve over the ruffle like the reference image.
— Boot Lace Embroidery :
Step :
Using pale yellow yarn and a tapestry needle, stitch X-shaped laces on the front of each foot: anchor near the shoe top, make a diagonal stitch to the opposite side, repeat with the other diagonal creating an X. Repeat twice stacked vertically to mimic photo. Secure and weave ends inside the leg.
Info :
Use small even stitches and pull snug but not tight to avoid puckering the fabric. If you used safety eyes you will not be able to reposition them after sewing the face plaque.
— Assembly Notes :
Info :
Sew the face plaque to the front of the hood aligning the top center of the plaque with the front center stitch marked on the hood. Use the tail from the plaque to run tidy whip stitches around the edge, tacking the plaque every 4-6 sts so it sits flat without bubbling.
Info :
Sew the collar around the neck opening on top of the body then overlay the scarf so seams are hidden. Attach head to body by sewing the head opening to the body top opening with mattress or whip stitch using the tails left from both pieces. Take small, even stitches and stuff more if needed before final closure.
Info :
Position arms on either side of the body just below the belt line (roughly aligning with body rounds 9-12). Use pins to compare both sides before sewing. Use ladder stitch for an invisible seam and sew through the body stitches and arm top evenly for a secure join.
Info :
Attach legs to the bottom of the body. Place them about 6-8 stitches apart depending on the circumference and the doll's balance point. If necessary add a few extra stitches at the hip seam to stabilize standing position.
Info :
Sew any remaining decoration such as petals, hair, and scarf tails. Weave in all ends through several stitches on the inside to secure. Trim tail ends close to the fabric but not so short they pull out easily.
Final Touch :
Add a tiny dab of blush using fabric-safe color or a small application of pastel chalk on cheeks if desired. Secure any loose threads with a small dot of fabric glue hidden under seam if you want extra security.
This charming Pierrot Jester comes alive stitch by stitch — from the curled blonde bangs to the dramatic black ruff and laced boots. Each modular piece is satisfying to make and fun to assemble, resulting in a collectible doll full of personality. 🧶 The detailed rounds and Info sections guide you through color changes and placements so your finished doll looks polished. Enjoy the process, and share your finished jester with pride! 🎭