🧢 Beautiful ✨ Detailed πŸ’ Adorable

Pillow-dog Amigurumi Pattern

Pillow-dog Amigurumi Pattern
4.0β˜… Rating
5-7 Hours Time Needed
3.5K Made This
βœ‚οΈ

Intermediate Level

Ideal for those with basic crochet experience, featuring slightly more advanced stitches and techniques to expand your skills.

⏱️

Weekend Treat

Takes 5-7 hours, making it an enjoyable project to finish over a couple of days.

🧸

Cute Companion

An adorable friend to cherish, handcrafted with love to bring comfort and joy for years to come.

About This Pillow-dog Amigurumi Pattern

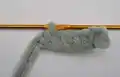
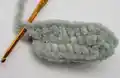
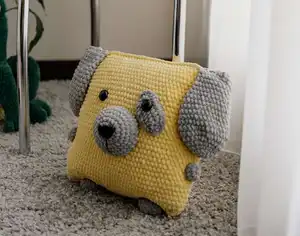
This pattern creates a square pillow with charming dog features β€” ears, nose, spot, legs and arms β€” crocheted separately and sewn on. It uses plush (velor) yarn to achieve a soft, cuddly surface and simple single crochet rounds to build the pillow and details. The instructions include every round for all parts plus clear assembly placement notes and photos for guidance.

Pillow-dog Amigurumi Pattern crochet pattern - detailed view of completed project

Suitable for crocheters familiar with single crochet, increases and invisible decreases, this pattern is great for gifting and home decor. Materials list and tool suggestions are included, along with tips for stuffing and attaching features securely.

Why You'll Love This Pillow-dog Amigurumi Pattern

I absolutely love this pattern because it turns simple stitches into a playful, tactile pillow that both kids and adults adore. I enjoy how the plush yarn gives a luxurious, soft finish without complicated techniques, making the finished pillow look professionally made. Sewing the facial features and tiny legs is such a satisfying finishing step that brings the dog to life. I love gifting this pillow because it feels personal and handmade, and it always brings a smile to the recipient's face.

Pillow-dog Amigurumi Pattern step 1 - construction progress Pillow-dog Amigurumi Pattern step 2 - assembly progress Pillow-dog Amigurumi Pattern step 3 - details and accessories Pillow-dog Amigurumi Pattern step 4 - final assembly and finishing

Switch Things Up

I love customizing this pillow-dog by changing colors; swap the yellow and gray for pastel tones to make a nursery-friendly version.

I often change yarn weight and hook size to adjust the finished size β€” use a thicker yarn for a chunky pillow or a thinner yarn for a mini version.

I sometimes replace bead eyes with embroidered eyes for a child-safe option; black acrylic yarn works well to embroider expressive eyes and a mouth.

I add tiny accessories like a crocheted bow or a scarf around the neck to personalize each pillow for gifting.

To make the pillow more durable, I sew internal seams twice where legs and arms attach so they withstand more handling and play.

I experiment with different stuffing levels to change the pillow’s softness β€” less stuffing for a slouchy pillow, more for a plumper look.

I like to embroider freckles or eyebrows near the eyes to alter the dog’s expression and personality.

Try adding a zipper to one side if you want a removable cover for washing; leave an opening when sewing the top and insert a zipper before finishing.

For a posable version, I insert wire into the arms before closing, which allows gentle posing of the ears or limbs.

If I want a matching set, I make smaller or larger versions by scaling the starting chain and number of rounds and keep the same attachment placement ratios.

Common Mistakes & How to Fix Them

βœ— Not fixing the beginning of each new circular piece can make your rounds twist or shift; secure the starting point with a pin or a small thread loop to maintain consistent shape. βœ— Understuffing the pillow causes a floppy, uneven shape while overstuffing creates visible lumps; stuff gradually and evenly, checking the shape frequently to achieve a smooth finish. βœ— Placing eyes without checking round placement can make the face look unbalanced; mark and count rounds exactly (eyes on round 24, distance 13 sc between eyes) before attaching. βœ— Sewing features without leaving a long thread will make future adjustments difficult; always leave long tails for sewing and hiding ends for a clean finish. βœ— Skipping stitch counting during decreases leads to incorrect stitch counts and mismatched halves; count after each round and use markers at key points when shaping. βœ— Pulling stitches too tight when sewing parts on can pucker the pillow surface; use gentle tension and pin parts in position before securing to maintain smooth seams.

Pillow-dog Amigurumi Pattern

Make a soft, squishy pillow shaped like an adorable dog with this complete crochet pattern. You will create a 30x30 cm plush pillow with removable details using plush yarn and simple single crochet techniques. The pattern includes full round-by-round instructions, materials, and assembly guidance so you can finish a charming handmade gift. Perfect for giving to children or adding a whimsical accent to your home.

Intermediate 5-7 Hours

Materials Needed for Pillow-dog Amigurumi Pattern

β€” Main Fabric

  • 01
    Kamtex Velor plush yarn (95 m / 100 g) - Color: Yellow (main pillow) - quantity: approx. as needed for 30x30 pillow
  • 02
    Kamtex Velor plush yarn (95 m / 100 g) - Color: Gray (ears, nose, spot, legs, arms) - quantity: approx. as needed for details
  • 03
    Acrylic yarn for sewing - Colors: Yellow, Gray, Black - small amounts for seams and embroidery
  • 04
    Filler - hollowfayber (polyester stuffing) - enough to fill pillow loosely then tighten
  • 05
    Alternative plush yarns suggested: Himalaya Dolphin Baby or YarnArt Dolce

β€” Tools Required

  • 01
    Crochet hook size 4-5 mm (use size specified on yarn package; 4-5 mm recommended)
  • 02
    Black beads for eyes 20-22 mm (2 pieces)
  • 03
    Needle for sewing and embroidery
  • 04
    Polyester stuffing (hollowfayber)
  • 05
    Acrylic yarn for sewing and embroidery (yellow, gray, black)
  • 06
    Pins to fix the beginning of rounds or place parts for sewing

Progress Tracker

0% Complete

β€” Pillow :

Info :

Use yellow plush yarn

Round 1 :

90 ch, connect with the first loop

Round 2 – 35 :

90 sc

Info :

Sew the pillow top with 45 sc (or sew with acryl yellow yarn and needle). We fasten the thread and hide inside the pillow

β€” Ear (2 details) :

Info :

Use gray plush yarn

Round 1 :

6 sc in magic Ring {6}

Round 2 :

(inc) – repeat 6 times {12}

Round 3 :

(1 sc, inc) – repeat 6 times {18}

Round 4 :

(2 sc, inc) – repeat 6 times {24}

Round 5 :

(3 sc, inc) – repeat 6 times {30}

Round 6 :

(4 sc, inc) – repeat 6 times {36}

Round 7 – 11 :

36 sc

Round 12 :

19 sc, dec, 13 sc, dec {34}

Round 13 :

34 sc

Round 14 :

19 sc, dec, 11 sc, dec {32}

Round 15 :

18 sc, dec, 10 sc, dec {30}

Round 16 :

30 sc

Round 17 :

17 sc, dec, 9 sc, dec {28}

Round 18 – 19 :

28 sc

Info :

Sew two halves with 14 sc and Leave a long thread for sewing.

β€” Leg (2 details) :

Info :

Use gray plush yarn

Round 1 :

6 sc in magic Ring {6}

Round 2 :

(inc) – repeat 6 times {12}

Round 3 :

(1 sc, inc) – repeat 6 times {18}

Round 4 :

18 sc

Info :

Leave a long thread for sewing.

β€” Arm (2 details) :

Info :

Use gray plush yarn

Round 1 :

6 sc in magic Ring {6}

Round 2 :

(inc) – repeat 6 times {12}

Round 3 :

12 sc

Info :

Leave a long thread for sewing.

β€” Nose :

Info :

Use gray plush yarn

Round 1 :

6 sc in magic Ring {6}

Round 2 :

(inc) – repeat 6 times {12}

Round 3 :

(1 sc, inc) – repeat 6 times {18}

Round 4 :

(2 sc, inc) – repeat 6 times {24}

Round 5 :

(3 sc, inc) – repeat 6 times {30}

Round 6 :

(4 sc, inc) – repeat 6 times {36}

Round 7 :

(5 sc, inc) – repeat 6 times {42}

Info :

Leave a long thread for sewing.

Info :

Use black acryl yarn and embroider the nose and leave a long thread.

β€” Spot :

Info :

Use gray plush yarn

Round 1 :

9 ch, we begin to knit from the second loop from the hook 7 sc, in the first loop of the chain we knit 3 sc. Continue to crochet on the other side of the chain: 7 sc, inc.

Round 2 :

inc, 6 sc, (inc) – repeat 3 times, 7 sc, inc, 1 sc

Round 3 :

inc, 9 sc, inc, 2 sc, sl st.

Info :

Leave a long thread for sewing.

β€” Assembly :

Info :

Fill the pillow loosely. Sew the nose to the 12-22 rounds (see photo) in the center of the pillow, fill it. make the seam of the black thread down and fasten it and hide inside the nose. Sew a spot to the right of the nose.

Info :

We fix the eyes (or sew) on the 24 round, the distance between the eyes is 13 sc (we sew one eye on the spot). (See photo)

Info :

Fill the pillow tightly, evenly, so that there are no "balls". Sew one edge of the ear to 6 sc from the beginning of the pillow, and bend the other edge back. Hands sew between 10-13 rounds from the side.

Info :

We fill, sew the bottom of the pillow with a yellow acryl yarn and needle. Sew legs at a distance of 17-18 sc. (see photo)

Assembly Instructions

  • Fill the pillow loosely at first, then adjust stuffing until you achieve a smooth surface; finish stuffing firmly but not overly tight.
  • Sew the nose to rounds 12-22 (centered on the pillow) and embroider the black seam downward, fasten and hide the thread inside the nose.
  • Attach the spot to the right of the nose and sew one eye onto the spot as shown in the photo.
  • Fix the eyes on round 24, spacing them 13 sc apart, or sew beads in place securely through the fabric and spot.
  • Sew one edge of each ear to 6 sc from the beginning of the pillow, bend the other edge back and secure for the droopy ear look.
  • Sew the arms between rounds 10-13 from the side and place legs across the bottom spaced about 17-18 sc apart; finish bottom seam with yellow acrylic yarn.

Important Notes

  • πŸ’‘Do not forget to fix the beginning of each new circle with a pin or thread to prevent twisting and to keep your rounds aligned.
  • πŸ’‘Stuff the pillow evenly and avoid overstuffing to prevent lumps β€” stuff gradually and shape as you go for a smooth finish.
  • πŸ’‘Pin all parts in place before sewing to check placement and symmetry, especially for eyes, nose, ears and legs.
  • πŸ’‘Leave long threads on small parts for sewing and hiding ends; finishing threads too short makes assembly harder.

This soft pillow-dog pattern is a delightful mix of cuddly plush yarn and simple crochet techniques to make a lovable home accent. It works up into a cozy 30x30 pillow perfect for gifting or decorating a nursery. Make one in bright colors or soft pastels and enjoy the smiles it brings. 🧢🐢

You ask,

we answer.

FAQs

What size will the finished piece be?

The finished pillow measures approximately 30x30 cm using the recommended Kamtex Velor yarn and the suggested hook size; exact size may vary with yarn and tension.

Can I use different yarn weights for this pattern?

Yes, but changing yarn weight will affect the final size and texture; adjust your hook size accordingly and make a gauge swatch if you want precise sizing.

Do I need prior crochet experience for this pattern?

This pattern is rated intermediate; you should be comfortable with single crochet, increases, invisible decreases and basic sewing for assembly.

How long does this project typically take to complete?

Most crocheters complete this project in 5-7 hours, though time may vary based on experience level, yarn choice, and assembly detail.