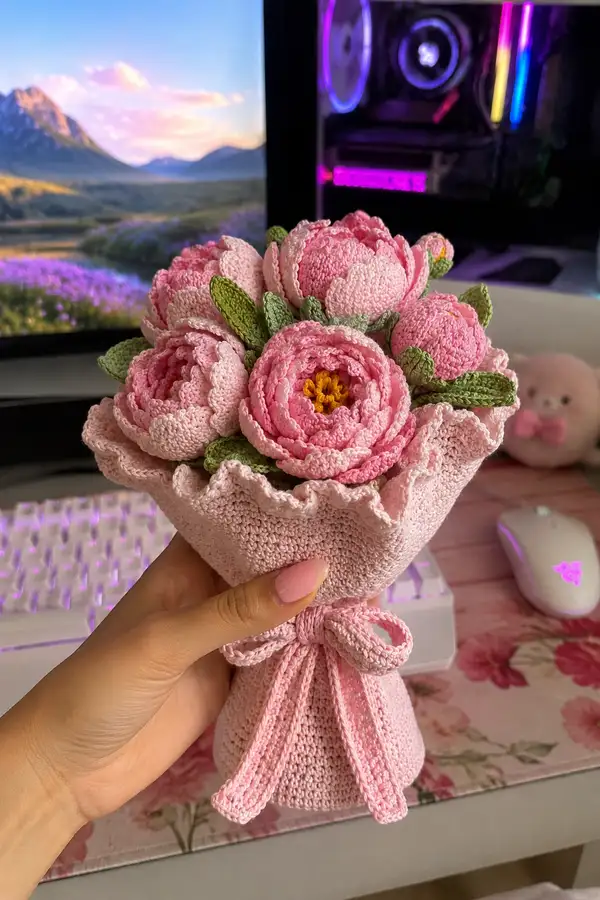
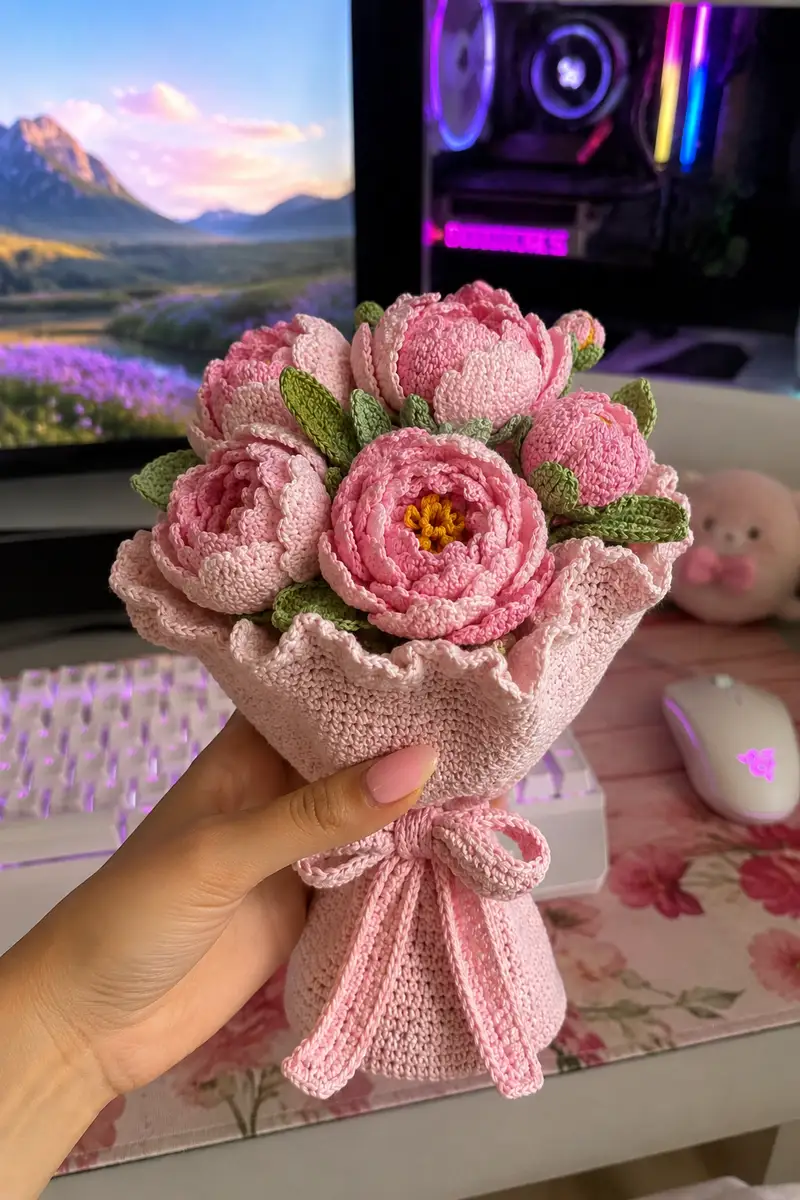
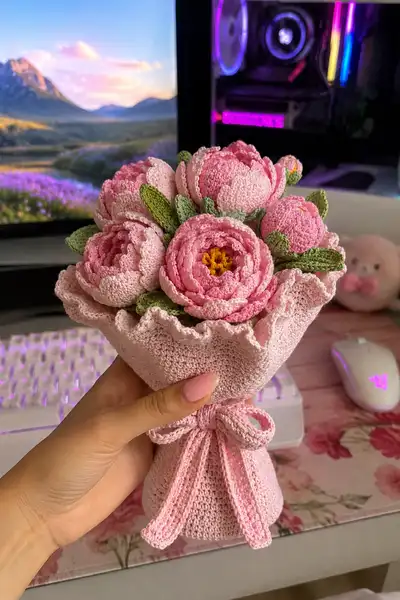
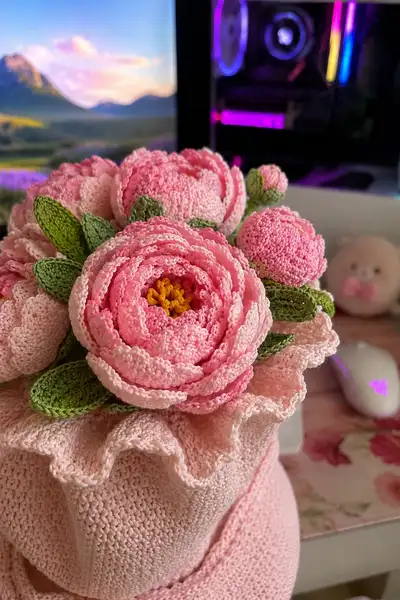
Create a romantic handcrafted pink peony bouquet with layered petals, delicate buds and textured leaves. This pattern builds each flower as layered petal strips coiled into lush blooms, then arranges stems into a ruffled wrap with drawstring. Perfect as a long-lasting gift or pretty desk accent—detailed instructions, shaping tips and assembly notes included.
Progress Tracker
0% Complete
— Peony Center (Stamens) :
Round 1 :
6 sc in magic ring (6)
Round 2 :
Inc in each st around (12)
Round 3 :
(1 sc, inc) x 6 (18)
Round 4 :
(2 sc, inc) x 6 (24)
Round 5 :
1 sc in each st (24)
Info :
Use bright yellow/golden yarn. These rounds form the base disk for stamens; add texture with picots or short loops in following rounds to resemble clusters of stamens
Round 6 :
(1 sc, picot) x 12 around edge (24 picots) - picot = ch3, sl st in 3rd ch from hook into same st
Round 7 :
Sl st into next st, ch1, 1 sc in same st, *ch2, 1 sc in next st* rep around (24 sc, 12 ch2 spaces)
Round 8 :
Working into ch2 spaces: (hdc, dc, hdc) in each ch2 space (36) - creates raised petal-like stamen clusters
Info :
Stuff very lightly at this stage; the center should be slightly padded but flexible to allow coiling of inner petal layer around it
Round 9 :
1 sc around (36)
Round 10 :
Fasten off leaving 20cm tail for sewing center to first petal layer
Info :
Make 5 centers for a bouquet of 5 large blooms. Centers may be glued slightly to secure if needed; otherwise sew when assembling flowers
— Large Petal Strip (Make 5 per large blossom) :
Row 1 :
Ch 60 (or ch 50-70 to adjust fullness) - counts determine final diameter; ch counts must be even for repeat patterns
Row 2 :
Turn, sc in 2nd ch from hook and each across (59)
Row 3 :
Ch1, turn, sc in first 5 sts, (inc, sc in next 5) rep across ending with sc in last st (approx 69) - add regular increases to create gentle flare
Row 4 :
Ch1, turn, sc across even (69)
Info :
Work with medium pink. Rows create long scalloped petal band. If using cotton, work slightly tighter than usual to ensure the strip holds its shape when coiled.
Row 5 :
Ch1, turn, (sc, hdc, dc, hdc, sc) in next stitch, sk 2, sl st in next, *sk 1, (sc, hdc, dc, hdc, sc) in next st, sk 2, sl st in next* rep across to create scalloped petals (approx 11 scallops across)
Row 6 :
Ch1, turn, working into each scallop: sl st, ch3, (3 dc) in center, ch3, sl st across scallop top to emphasize ridge (retain counts similar to previous row)
Row 7 :
Ch1, turn, sc in each st across (counts remain approx equal to base row 69)
Info :
Alternate rows of shaping and even sc to get a textured petal strip. If you want fuller petals, increase base chain by 10-20 chains and repeat scallop pattern accordingly.
Row 8 :
Repeat Row 5 (scallop row) to build depth (69)
Row 9 :
Ch1, turn, sc across (69)
Row 10 :
Repeat Row 6 to raise petal centers (69)
Row 11 :
Ch1, turn, sc in each st (69)
Row 12 :
Edge finish: (sc, ch2, sc) in first st, *sk 1, (sc, ch2, sc) in next st* rep across to create small picot edge for realistic petal rim (approx 115 edging points)
Row 13 :
Fasten off leaving long tail (approx 25-30cm) for coiling and sewing. Block lightly flat if needed to shape scallops before coiling.
Info :
Make 5 large petal strips for five large peonies. For medium and small blossoms make shorter chains (see Medium Petal Strip and Small Petal Strip sections). Keep tails long to sew strips together during coiling.
— Medium Petal Strip (Make 4 per medium blossom) :
Row 2 :
Turn, sc in 2nd ch from hook across (45)
Row 3 :
Ch1, turn, (sc, sc, inc) x 11 then sc in last 2 sts (approx 56) — small even increases to flare the strip
Row 4 :
Ch1, turn, sc across (56)
Info :
Use mid-pink shade. Medium strips are shorter and used for inner petal layers to create a graduated bloom.
Row 5 :
Ch1, turn, *sk1, (sc, hdc, dc, hdc, sc) in next st, sk1, sl st* rep across to make scallops (approx 9 scallops)
Row 6 :
Ch1, turn, work small raised clusters into scallop centers: sl st, ch3, 3 dc, ch3, sl st across each scallop (approx 27 dc clusters)
Row 7 :
Ch1, turn, sc across (56)
Row 8 :
Edge: (sc, ch2, sc) every other st across edge to create soft ruffled rim. Fasten off leaving long tail for sewing
Info :
Make 4 medium strips per medium flower and 2-3 for smaller filler blooms depending on fullness desired.
— Small Petal Strip / Inner Petals (Make 6-8 per small blossom) :
Row 2 :
Turn, sc in 2nd ch and across (27)
Row 3 :
Ch1, turn, (sc, inc) x 9 then sc last 9 sts (approx 36)
Row 4 :
Ch1, turn, sc across (36)
Row 5 :
Ch1, turn, *(sc, hdc, dc, hdc, sc) every 4th st* rep across to form 6-7 tiny scallops (36)
Row 6 :
Ch1, turn, sc across and finish with picot edge: (sc, ch2, sl st) across to create tiny delicate rims. Fasten off leaving long tail for coiling
Info :
These inner petals form the tight center layers. Use deeper pink for closest inner petals for a natural gradient effect.
— Bud (Make 4-6 small buds) :
Round 1 :
6 sc in magic ring (6)
Round 2 :
Inc in each st (12)
Round 3 :
(1 sc, inc) x 6 (18)
Round 4 :
1 sc around (18)
Round 5 :
(2 sc, inc) x 6 (24)
Round 6 :
1 sc around (24)
Round 7 :
(2 sc, dec) x 6 (18)
Info :
Begin stuffing lightly. Buds are small and should be firm but not over-packed so they keep rounded shape when sewed to stems
Round 8 :
(1 sc, dec) x 6 (12)
Round 10 :
Fasten off leaving long tail for sewing to stems. Optional: Add a small leaf cap by crocheting 6 sc into a small circle and flattening on bud base
Info :
For very realistic buds, use a slightly variegated pink or add a darker pink tip by stitching a short overlay of darker yarn across the bud top after assembling.
— Leaf (Make 10-14 leaves in two sizes) :
Round 1 :
Ch 10, 1 sc in 2nd ch from hook, hdc in next, dc in next 3, hdc, sc in last, continue on opposite side of chain: hdc, dc, dc, hdc, sc (approx 18 sts total)
Round 2 :
Chain 1, turn and work into both loops to create defined middle: *sc in next 2, hdc in next 2, dc in next 4, hdc in next 2, sc in next 2* rep to the end keeping shape (approx 18)
Info :
Work leaves flat. Use BLO on second round to create a raised vein or embroider a long center vein with surface slip stitch to add realism.
Round 3 :
FLO: sc across edge to create slight curl along one edge if desired (18)
Round 4 :
Fasten off leaving long tail for sewing. Block lightly by pinning to shape and spraying with water if using cotton yarn
Info :
Make roughly 6 larger leaves (ch12 base) and 6-8 smaller leaves (ch8 base). Use two green shades to give depth, attach lighter shade on top of darker one for layered effect.
— Stem Tube (Make one for each bloom and bud) :
Round 1 :
Ch 6, join with sl st to form small ring, 6 sc in ring (6)
Round 2-6 :
1 sc in each st around (6) - continue until tube length is approx 12-18 cm depending on stem length desired
Info :
If you plan to insert floral wire, cut wire to length, fold end inward to avoid sharp points, insert into tube, then push stuffing around the wire to hide it. Wrap floral tape over seam if desired.
Round 7 :
Optional: Switch to lighter green and work 1 round of BLO sc to create a seam-like texture (6)
Round 8 :
Fasten off leaving long tail to sew base of bloom or bud to the top of the tube securely
Info :
Make stems slightly longer than final arrangement height to allow trimming and proper placement when wrapping bouquet. Make 5-7 stems for pictured arrangement (3 large, 2 medium, 2 buds).
— Assembling a Flower (Large) :
Step 1 :
Prepare one stamens disk and one large petal strip. With right side of petal strip facing up, lay center at one end of the strip and begin coiling the strip around center, overlapping scallops slightly so petals nest naturally.
Step 2 :
Sew through strip and center at the base every 6-8 stitches using long tail from petal strip. Ensure coil is tight at the center, loosen slightly as you add outer layers for a blooming effect.
Info :
Insert the stem tube under the center and stitch through both petal layers and center to attach stem. Pull seam tight and weave tail into stem tube for security.
Step 3 :
Attach medium petal strips around the inner coil overlapping with large strip edges if needed. Sew evenly around base to secure and shape petals with fingers to open petals in desired direction.
Step 4 :
Add small petal strips inside center if needed to fill any gaps and create a dense inner heart. Use a few hand stitches to keep inner layers in place without flattening center. Adjust petals outward for final shape.
Info :
Make 3 large flowers, 2 medium flowers and 2-3 small filler blooms for the completed bouquet shown. Vary petal strip lengths and shades to create a natural, graduated look.
— Bud Attachment :
Step 1 :
Sew bud to top of a prepared stem tube using long tail from bud. Place a small leaf cap beneath bud and sew into place to hide join.
Info :
Position buds to sit slightly higher than open blooms to create vertical interest in arrangement. Add small embroidery of darker pink thread to the bud tips for realistic detail.
— Wrapper / Bouquet Cover :
Round 1 :
Using blush pink yarn, ch 4, join to make a ring. Work 8 sc in ring (8)
Round 2 :
Inc in each st (16)
Round 3 :
(1 sc, inc) x 8 (24)
Round 4 :
(2 sc, inc) x 8 (32)
Round 5 :
(3 sc, inc) x 8 (40)
Round 6-14 :
1 sc in each st around (40) - continue evenly to build cylinder for base of wrapper (approx 9 rounds to desired height)
Info :
The base of the wrapper is a simple tube sized to fit bouquet stems. Measure assembled stems and adjust number of rounds until base height covers lower third of stems.
Round 15 :
Switch to BLO and work 1 sc in each st for 2 rounds to create a ridge (40)
Round 16-22 :
1 sc in each st around (40) - continue until total wrapper height equals approx 12-15 cm depending on bouquet scale
Info :
For the ruffled top, you will increase quickly to create a flared ruffle. Keep wrapper tube unstuffed and flexible so it can be tied and folded as pictured.
Round 23 :
(1 sc, inc) x 20 (60) - begin ruffle formation
Round 24 :
(2 sc, inc) x 20 (80)
Round 25 :
(3 sc, inc) x 20 (100)
Round 26 :
Ch1, *sc in next 2, picot in next (ch3, sl st in 3rd ch), sc in next 2* repeat around on the widened round to create ruffled scalloped edge (100)
Round 27 :
Fasten off leaving long tail for seaming back seam of wrapper and weaving through drawstring loops
Info :
Fold ruffle outward and pin while assembling bouquet to achieve natural frill. If you prefer a deeper ruffle, add an additional increase round before scallop edge.
— Drawstring & Bow :
Row 1 :
Make drawstring cord: ch 120 (or length to wrap twice around wrapper) - or adjust length for larger bouquets
Row 2 :
Work 1 sc in each ch back to start to create sturdy cord. Fasten off and weave tail in. Tie into bow shown or make two shorter cords for a tidy wrap
Info :
For a neater cord, use two strands held together or chain with slip stitch back along the chain. Block bow lightly and fluff before final placement.
— Final Assembly :
Step 1 :
Arrange stems: Trim stems to desired length. Group 3 large blooms as focal cluster, place 2 medium flowers and buds around them, adding leaves strategically to hide seams and base of blooms.
Step 2 :
Secure stems together with floral tape or yarn wrapping about 4-5 cm below flower bases to hold bouquet head shape. Add additional tape where stems cross.
Info :
If stems are wire, cover with floral tape first or wrap with matching yarn to avoid metal showing through wrapper. Bend and shape petals and leaves for a natural arrangement before inserting into wrapper.
Step 3 :
Slide the wrapped stems into the wrapper tube. Fold ruffle outward, gather base and thread drawstring through the BLO ridge rounds or add ch loops as eyelets if desired.
Step 4 :
Tie a bow with drawstring and adjust ruffle. Pin or tack a few stitches inside wrapper to ensure bouquet sits upright and does not come loose; weave in all tails.
Info :
Add small finishing touches: stitch a few beads into centers for sparkle, or use a diluted blush cosmetic for soft cheek color on petal edges. Lightly steam or press petal edges if using cotton to open scallops.
— Optional Finishing Details & Tips :
Tip 1 :
To create two-tone petals, work inner rows in a darker shade and finish outer scallops in a lighter shade, joining color at an Info row change and weaving tails firmly.
Tip 2 :
Block larger petal strips on a flat surface with pins and a light mist of water; cotton holds the shape and allows the coils to look crisp when assembled.
Tip 3 :
For poseable blooms, use thinner, flexible wire inside stems, but ensure the wire ends are wrapped and padded to prevent poking through petals or wrapper.
Info :
Keep a record of how many strips of each type you make so future bouquets match in scale. Practice one small bloom first to master coiling tension before committing all strips.
You did it — a gorgeous everlasting pink peony bouquet full of texture and soft color! Each layered petal and tiny bud comes together to create a piece that looks rich and romantic without any watering required. This bouquet is perfect for gifting, decorating a desk, or keeping as a cheerful accent in your home. 🧶🌸 Treat yourself or someone special to this lasting floral treasure — and enjoy every stitch of the process! 🎀