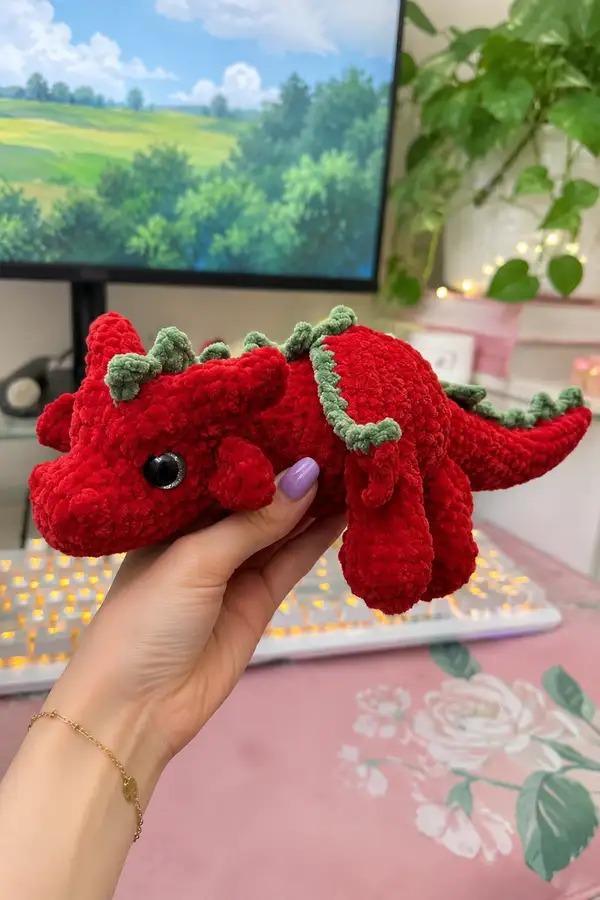
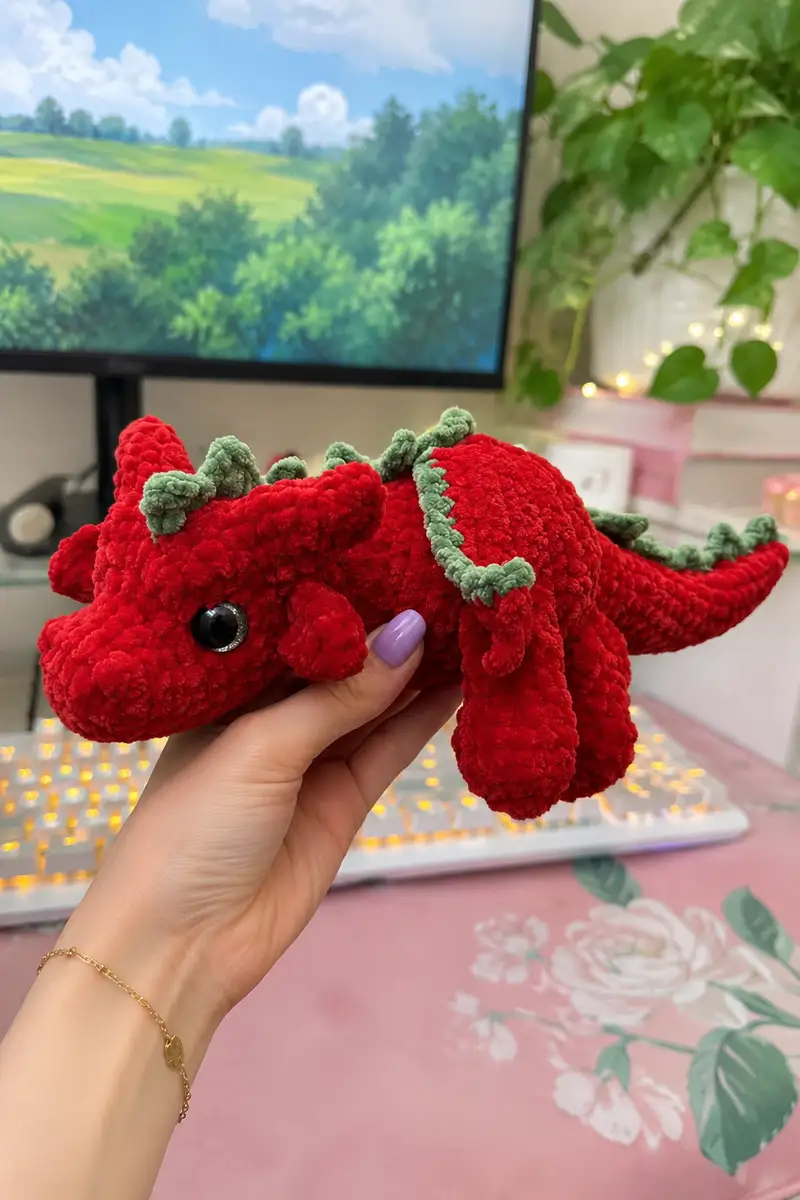
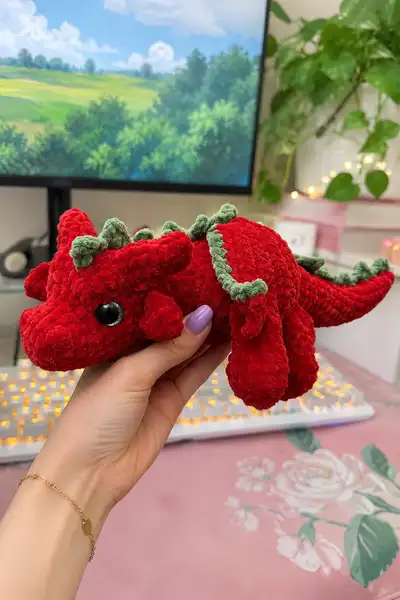
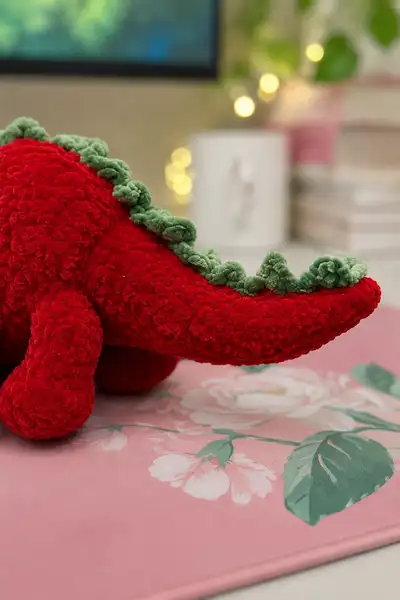
This sweet plush red dragon is made in soft chenille/velvet yarn with contrasting sage-green ruffled spikes along its back and tail. It features rounded paws, a tapered tail, a cute snout with sewn-on little horns, and sparkling safety eyes for an expressive face. The plush texture and simple shaping make it a tactile, huggable companion and a charming handmade gift. Detailed step-by-step instructions and assembly tips help you recreate every feature shown.
Progress Tracker
0% Complete
— Head :
Round 1 :
6 sc in magic ring (6)
Round 3 :
(1 sc, inc) x 6 (18)
Round 4 :
(2 sc, inc) x 6 (24)
Round 5 :
(3 sc, inc) x 6 (30)
Round 6 :
(4 sc, inc) x 6 (36)
Round 7 :
(5 sc, inc) x 6 (42)
Round 8 :
(6 sc, inc) x 6 (48)
Round 9-16 :
1 sc in each st (48)
Info :
Place safety eyes between rounds 12-13, approximately 8-10 stitches apart for the pictured expression. When placing eyes, count stitches carefully and test spacing on the unstuffed head to ensure symmetry.
Round 17 :
(6 sc, dec) x 6 (42)
Round 18 :
1 sc in each st (42)
Round 19 :
(5 sc, dec) x 6 (36)
Round 20 :
1 sc in each st (36)
Info :
Begin stuffing the head lightly now. Add small amounts of fiberfill at a time, push filling into the snout and eye sockets gently to keep shape smooth.
Round 21 :
(4 sc, dec) x 6 (30)
Round 22 :
1 sc in each st (30)
Round 23 :
(3 sc, dec) x 6 (24)
Round 24 :
1 sc in each st (24)
Round 25 :
(2 sc, dec) x 6 (18)
Round 26 :
1 sc in each st (18)
Round 27 :
(1 sc, dec) x 6 (12)
Round 28 :
1 sc in each st (12)
Round 30-32 :
1 sc in each st (6)
Info :
Finish stuffing the head firmly but not overstuffed; the head should keep shape and compress slightly to the touch. Fasten off leaving a long tail for sewing to the body or use these rounds to attach directly to the neck opening of the body later.
— Snout and Horns (Make 1 snout extension, 2 small horns) :
Round 1 :
6 sc in magic ring (6)
Round 3 :
1 sc in each st (12)
Round 4 :
(2 sc, dec) x 3 (9)
Round 5 :
1 sc in each st (9)
Info :
Leave long tail and stuff lightly; sew the snout to the front of the head overlapping rounds 9-13 on the head for a smooth junction. For the tiny horns: make 2 small cones.
Horn Round 1 :
6 sc in magic ring (6)
Horn Round 3 :
(1 sc, inc) x 6 (18)
Horn Round 4 :
(2 sc, dec) x 6 (12)
Horn Round 6 :
1 sc in each st (6)
Info :
Make 2 horns, stuff lightly, fasten off leaving long tails to hand-sew on either side of the snout near the top to match the photo. Make sure to place them symmetrically.
— Body :
Round 1 :
6 sc in magic ring (6)
Round 3 :
(1 sc, inc) x 6 (18)
Round 4 :
(2 sc, inc) x 6 (24)
Round 5 :
(3 sc, inc) x 6 (30)
Round 6 :
(4 sc, inc) x 6 (36)
Round 7 :
(5 sc, inc) x 6 (42)
Round 8 :
(6 sc, inc) x 6 (48)
Round 9-12 :
1 sc in each st (48)
Info :
This body is made as a single oval tube. If you prefer the head to be sewn on later, leave the top opening of the body unclosed; otherwise you will attach the head using the long tail from the head. Keep rounds even and use stitch markers to note the front center for limb placement.
Round 13 :
(6 sc, dec) x 6 (42)
Round 14-16 :
1 sc in each st (42)
Round 17 :
(5 sc, dec) x 6 (36)
Round 18-20 :
1 sc in each st (36)
Info :
Begin stuffing the body moderately at round 18-20. The body should be firm at the lower portion to support the legs but slightly softer under the head for a natural neck join.
Round 21 :
(3 sc, dec) x 6 (30)
Round 22-23 :
1 sc in each st (30)
Round 24 :
(2 sc, dec) x 6 (24)
Round 25-26 :
1 sc in each st (24)
Round 27 :
(1 sc, dec) x 6 (18)
Round 28-30 :
1 sc in each st (18)
Info :
Leave the body open at the front top (for head insertion) if you plan to sew head on after stuffing. Use pins to mark left/right and front/back: front center is the place where the snout will face and where you'll center the eyes and horn placement.
— Arms (Make 2) :
Round 1 :
6 sc in magic ring (6)
Round 3 :
1 sc in each st (12)
Round 4-7 :
1 sc in each st (12)
Round 8 :
(2 sc, dec) x 4 (12)
Round 9-12 :
1 sc in each st (12)
Info :
Stuff the paws fairly firmly, tapering stuffing toward the wrist so the arm sits nicely against the body. Leave a long tail to sew the arm to the body; position arms at body rounds 20-23 on each side (see assembly instructions).
Round 13-14 :
1 sc in each st (12)
Round 15 :
Fasten off leaving a long tail for sewing
— Legs (Make 2) :
Round 1 :
6 sc in magic ring (6)
Round 3 :
(1 sc, inc) x 6 (18)
Round 4 :
(2 sc, inc) x 6 (24)
Round 5 :
(3 sc, inc) x 6 (30)
Round 6-10 :
1 sc in each st (30)
Round 11 :
(2 sc, dec) x 6 (24)
Round 12-14 :
1 sc in each st (24)
Round 15 :
(1 sc, dec) x 6 (18)
Round 16-20 :
1 sc in each st (18)
Round 21-24 :
1 sc in each st (18)
Info :
Legs are sewn to the bottom of the body at the widest section (around body rounds 6-10 depending on placement). Stuff the feet very firmly for stability so the dragon sits as shown in the photos.
Round 25 :
Fasten off leaving long tail for sewing
— Tail :
Round 1 :
6 sc in magic ring (6)
Round 3 :
(1 sc, inc) x 6 (18)
Round 4 :
(2 sc, inc) x 6 (24)
Round 5 :
(3 sc, inc) x 6 (30)
Round 6-12 :
1 sc in each st (30)
Info :
The pictured tail is long and tapered; work the wider section first and then begin gradual decreases. If you want a poseable tail, insert a length of florist wire through the tube before final stuffing (wrap wire ends in tape to prevent poking through).
Round 13 :
(3 sc, dec) x 6 (24)
Round 14-17 :
1 sc in each st (24)
Round 18 :
(2 sc, dec) x 6 (18)
Round 19-22 :
1 sc in each st (18)
Round 23 :
(1 sc, dec) x 6 (12)
Round 24-27 :
1 sc in each st (12)
Round 28 :
(1 sc, dec) x 6 (6)
Round 29-32 :
1 sc in each st (6)
Round 33 :
6 dec (0) - close tip and weave in tail
Info :
Stuff the tail progressively as you decrease; keep the thicker base of the tail firmer than the tip. Attach the tail to the back center of the body spanning body rounds 8-12 to get the same low-slung look.
— Back Spikes / Scales (Make 12 and seam together along back) :
Spike 1 Round 1 :
6 sc in magic ring (6) using sage-green yarn (or chosen contrast)
Spike 1 Round 2 :
6 inc (12)
Spike 1 Round 3 :
(1 sc, inc) x 6 (18)
Spike 1 Round 4 :
1 sc in each st (18)
Spike 1 Round 5 :
(2 sc, dec) x 6 (12)
Spike 1 Round 6 :
(1 sc, dec) x 6 (6)
Spike 1 Round 7 :
6 dec (0) - finish and leave long tail for sewing
Info :
Make 12 spikes of the same size. For the ruffled look in the photo, after sewing each cone in position, stitch a short chain or small shell along the base to give a scalloped edge. Space spikes evenly along the top center line of the body and continue onto the tail to the tip.
Spike Assembly :
Sew spikes to the top center of the body starting just behind the head and continue down the tail. Overlap bases slightly and use the long tail left from each spike for a secure whip stitch.
— Cheek Fins / Side Bumps (Make 2) :
Round 1 :
6 sc in magic ring (6)
Round 3 :
1 sc in each st (12)
Round 4 :
(2 sc, dec) x 3 (9)
Round 5 :
1 sc in each st (9)
Round 6 :
Fasten off leaving tail for sewing
Info :
Sew cheek bumps to the sides of the head just behind the eyes, aligning them so they tuck under the first back spike. Pin placement before stitching so both sides are symmetrical.
— Decorative Ridge (Optional - single round shell edge along body seam) :
Round 1 :
With sage-green yarn, join at front center top and ch1, sc evenly along top seam where spikes meet the body to tidy any gaps (count should match body top stitches used)
Round 2 :
*ch2, 3 dc in next st, sl st next st* repeat along top to form small shells creating the pictured ruffle (adjust spacing so shells sit between spikes)
Info :
This decorative ridge is optional but reproduces the soft leafy ruffle seen in the photo. Work loosely with ch2 and 3 dc shells so the texture sits on top without flattening the plush body.
— Finishing Touches :
Info :
Weave in all tails. Use small stitches to sew the head to the body if not joined during construction. Embroider small nostrils with black yarn using a satin stitch or tiny french knots. Add small embroidered highlights on eyes with white yarn if desired.
Info :
For sparkle like the photo, use safety eyes with decorative rims. Install eyes before fully closing the head and double-check symmetry. If making this for small children, consider embroidered or safety-locked eyes rated for toys.
Info :
Block final seams by pinning parts into position on the body and use mattress or invisible stitch to attach each limb and the head. Add extra stitches where needed for stability; for a display piece you can stitch through the limb and body several times to secure.
This plush red dragon brings kit-friendly charm and playful personality to your handmade collection. Using velvet chenille yarn and a few simple shaping tricks, you can create a tactile, squishy companion that looks delightful on a desk or shelf. Each carefully placed spike and sewn seam adds to the overall character, so take your time and enjoy the stitching process. 🧶💚 This cuddly dragon also makes an excellent personalized gift — have fun customizing colors and details!