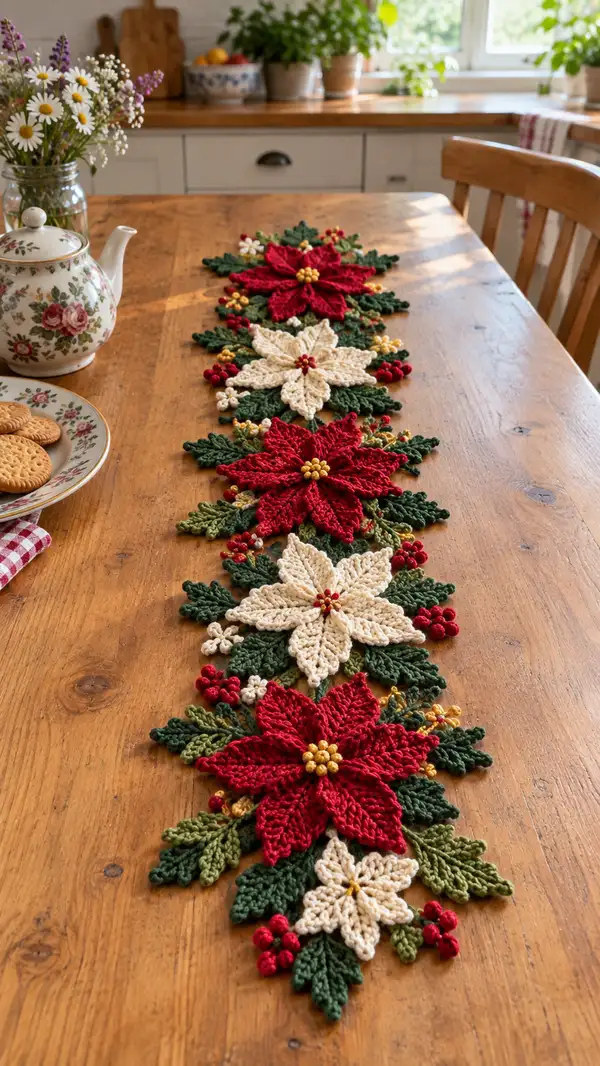
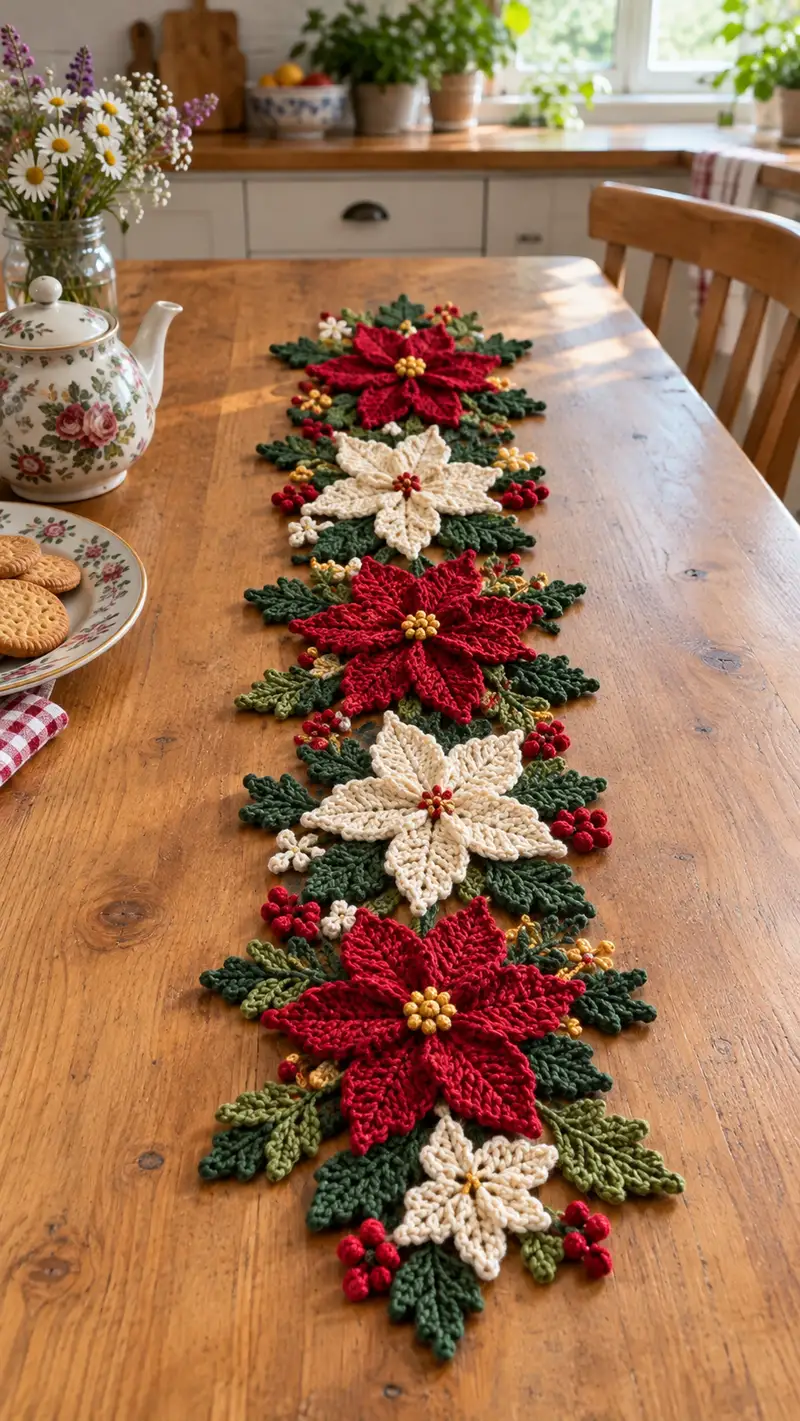
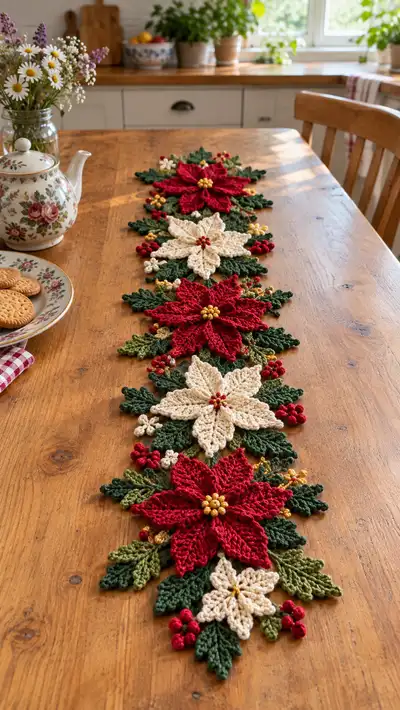
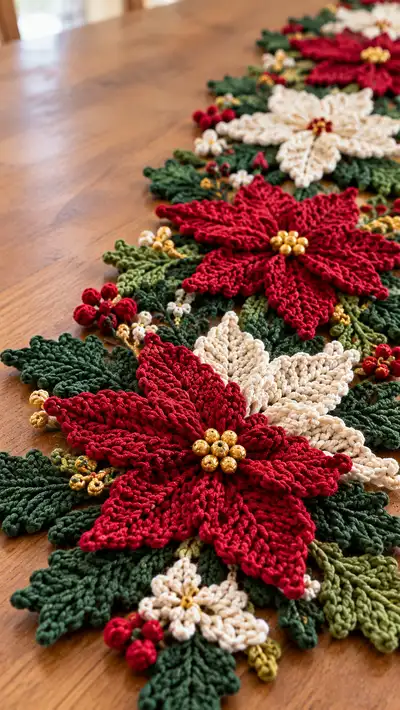
Create an elegant, festive poinsettia table runner featuring layered red and cream blooms, textured green leaves and tiny berry and gold bead clusters. This pattern builds individual flower motifs and leafy connectors that are joined to form a long runner shown in the photos. Perfect for holiday decorating, the finished piece is richly textured with layered petals, raised veins on leaves, and bright bead accents for a polished seasonal centerpiece.
Progress Tracker
0% Complete
— Large Poinsettia Flower (Make 1 motif with 6 outer petals and 6 inner petals) :
Round 1 :
6 sc in magic ring (6)
Round 3 :
(1 sc, inc) x6 (18)
Round 4 :
(2 sc, inc) x6 (24)
Round 5 :
(3 sc, inc) x6 (30)
Round 6 :
(4 sc, inc) x6 (36)
Round 7 :
1 sc in each st (36)
Info :
Center foundation: This round builds the small circular base that will anchor six petal bases. Use stitch markers at st 1 and then every 6th stitch to mark petal starting points (36/6=6 sts per segment).
Round 8 :
Place a marker at every 6th st to denote petal bases. Sl st to marker 1 and ch 3 to begin first petal foundation
Round 9 :
Petal 1 (worked into ch-3 foundation): ch8, sc in 2nd ch from hook, hdc in next, dc in next 2, tr in next, dc in next 2, hdc in next, sc in last ch, sl st into next marked base st of center. Repeat for all 6 petals to complete a first-layer set (petal count = 6). Fasten off color if changing.
Info :
For a sculpted petal, keep tension slightly firm. The ch8 loop creates an elongated petal shape. Block petals flat with pins to set shape before proceeding to inner petal layer.
Round 10 :
Return to center: Join yarn at base between two petals with sl st, ch1, 6 sc around center between petals evenly to create a raised ring (36) - space 6 sc between each petal base to maintain structure (36)
Round 11 :
(4 sc, inc) x6 (42)
Round 12 :
1 sc in each st (42)
Info :
Round 11 expands the inner ring so the second (inner) layer of petals will sit slightly elevated and overlap the outer petals. Keep rounds tidy — this ring will also hide the seam between layers.
Round 13 :
Form inner petal foundations: Sl st into every 7th st to form six evenly spaced starting points; at each starting point ch6 to form a loop for an inner petal
Round 14 :
Inner Petal 1: (worked into ch-6 foundation) sc in 2nd ch from hook, hdc in next, dc in next 2, hdc in next, sc in last ch, sl st into base. Repeat for all 6 inner petals. These inner petals are shorter than outer petals for depth.
Round 15 :
Edge inner petals: Join yarn at outer edge of each inner petal, ch1, sc evenly around the petal edge placing 1 sc in tip and 1 sc in each major stitch to create a neat edge (approx. 8 sc per petal). Repeat on all 6 petals (48)
Info :
When edging petals, work in the back of the petal loops toward the center to create a tidy layered look and hide join stitches underneath outer petals. Keep counts even per petal for symmetry.
Round 16 :
Form raised vein stitch on inner petals: Join yarn at petal base, ch1, sc in base then *(ch3, skip 1, sl st) across center of petal forming chain ridge; secure with sc at tip)* repeat along each petal center to make a raised vein effect. Repeat for all inner petals.
Round 17 :
Work a short pick-up round around the whole flower base: join at any base, ch1, 1 sc in each st around across petal join area to tidy and unify layers (approx. 72)
Round 18 :
(6 sc, inc) x8 (80)
Info :
Round 18 creates a slightly larger foundation to anchor the outer petal tips and to give the flower body a fuller look. Use this round when you plan to decorate the flower center with bead clusters.
Round 19 :
Outer petal detail pass: Working behind outer petal loops, join yarn at petal base, ch1, (sc, hdc, 2 dc, hdc, sc) across each outer petal to add texture and fullness. Repeat for each outer petal (approx. 6 segments x 7 sts = 42)
Round 20 :
Edge outer petals: Sl st into the tip of each outer petal, ch3, (pic, sl st) in tip to create a tiny decorative point; then sc back along base to next petal. Repeat for all 6 outer petals.
Info :
These decorative picots at the tips add a delicate, petal-like point. If you prefer a softer petal tip, substitute a sc cluster instead of picot.
Round 21 :
Optional BLO ridge: With same color, join at base of petals and work 1 sc in each st BLO around the flower base to create a shallow textured ridge (approx. 80)
Round 22 :
Change to second flower color for layered depth or remain in same color: Info : Change to [red] or [cream] depending on motif. Carry unused yarn inside lightly or fasten off and weave in later.
Round 23 :
Decorative bead loops: Ch5 between some petals to create small loops for bead clusters (6–8 loops). Work sl st to next segment to anchor loops. These loops later receive gold bead clusters and berry clusters.
Round 24 :
Secure central bead cluster base: With small gold yarn or thread, make a small 6-bobble cluster in the center as follows: attach thread through center, ch2, *(yarn over twice, insert hook into center, yo and pull up loop, yo and pull through two loops) 6 times in same center to create 6 raised bobbles; finish with sl st; secure and knot on back. (6 raised bobbles)
Info :
If you prefer beads rather than yarn bobbles, thread 6 gold beads onto a short length of fishing line or strong thread and stitch through the flower center, knotting securely and hiding ends under the flower base.
Round 25 :
Trim and weave: Fasten off leaving a 12–15 cm tail for sewing; weave the tail through the back of the flower and under the petal bases to secure. Repeat for each large poinsettia motif you will assemble in the runner.
Info :
Make two tones of this motif: deep red for main blooms, cream/ivory for alternate blooms. Blocking petals with a wet steam or spray and pinning onto blocking mats will help set shape before assembly.
— Medium / Cream Flower (Make 1 per alternate motif) :
Round 1 :
6 sc in magic ring (6)
Round 3 :
(1 sc, inc) x6 (18)
Round 4 :
(2 sc, inc) x6 (24)
Round 5 :
1 sc in each st (24)
Round 6 :
Form 6 short petals: *ch6, sc in 2nd ch from hook, hdc, dc, hdc, sc, sl st to next marked base* Repeat x6 (6 petals)
Info :
Cream flowers are slightly smaller; make inner petals shallow and fewer picots for a delicate look. Use soft tension so the cream petals lay gracefully over the leaf layer.
Round 7 :
Edge petals: join yarn along petal edges and sc evenly across each petal (approx. 6-8 sc per petal) (48)
Round 8 :
Raised vein: join at petal base and create a chain ridge through center of each petal (ch3, sl st) capturing a raised seam. Repeat on all petals.
Round 9 :
Central bead cluster: create small 5-bobble cluster using gold or red thread into center (5 bobbles) or stitch 5 small gold beads with thread and secure at back.
Round 10 :
Finish: Fasten off with a long tail for sewing onto leaf base. Block lightly and set aside.
Info :
Make these cream flowers to alternate between the red flowers for a balanced runner. The smaller size makes them perfect as a filler motif between larger blooms.
— Small 5-Petal Filler Flower (Make multiple) :
Round 1 :
mr, ch1, 5 sc in ring; pull tight (5)
Round 2 :
1 sc in each st (5)
Round 3 :
*ch5, sl st into next sc to form a petal loop* Repeat x5 (5 loops)
Round 4 :
Work 1 sc in each ch-5 loop (approx. 5 sc per loop) to create 5 small petals (approx. 25)
Round 5 :
Finish with a tiny bead or embroidered dot in center; fasten off, leaving tail for sewing.
Info :
These tiny five-petal flowers tier in the foliage as delicate fillers and are worked quickly. Use cream or gold accents to highlight surrounding berry clusters.
— Large Leaf (Make multiple in 2 shades) :
Round 1 :
Ch12, sc in 2nd ch from hook, hdc in next, dc in next 3, hdc in next, sc in next, sl st into last ch to form a small pointed tip (this is leaf center chain)
Round 2 :
Turn to work along one side of foundation chain: ch1, (sc, hdc, 2 dc, hdc, sc) across corresponding foundation chains to tip (approx. 8 sts)
Round 3 :
Work same along opposite side: turn, join at base, (sc, hdc, 2 dc, hdc, sc) back to base creating symmetrical leaf (approx. 16 total around leaf)
Round 4 :
Picot edge (optional): join at base, ch1, sc around, placing a picot at tip (ch3, sl st into 3rd ch) for a textured tip. Fasten off leaving tail for assembly.
Info :
Work leaves in forest green for the main body and a lighter green for accent leaves. For a raised central vein, before finishing, join yarn at base and sc up center to tip using FLO to make a seam ridge, then sc back down (counts vary by leaf size).
Round 5 :
Raised vein option: join at base, ch1, sc in base, *ch2, sc in next center ch* repeat to tip to create a faint central ridge. Repeat on all leaves for consistent texture.
Round 6 :
Fasten off: Leave long tail for sewing. Block each leaf flat and pin veins straight while damp until dry for crisp shape.
— Small Leaf & Sprig (Make many small accents) :
Round 1 :
Ch8, sc in 2nd ch from hook, hdc, dc, hdc, sc, sl st into last ch to form a small leaf (approx. 6)
Round 2 :
Work sc around to neaten edge: join at base and 1 sc in each stitch around (approx. 10)
Round 3 :
Optional: work 1 sc in FLO down center to create midrib. Fasten off leaving tail for attachment.
Info :
Small leaves and sprigs are plentiful in the runner and are clustered around flower bases to frame blooms. Use the lighter green for contrast and to create depth.
— Berry Cluster (Make many in red) :
Round 1 :
Using 3.5 mm hook and red yarn: mr, ch1, 6 sc in ring (6)
Round 2 :
Make bobble: *(yo twice, insert hook into ring, yo and draw up loop, yo and pull through two loops) repeat 3 times to form a raised bobble; sl st to next st* Repeat making 3 small bobbles around to form a cluster of 3 berries. Secure and fasten off leaving long tail for sewing.
Round 3 :
Optional stuffing: add a tiny pinch of stuffing inside bobble before closing to make berries plump. Sew through the base to secure shape.
Info :
Stitch berry clusters onto leaf junctions in groups of 3 or 4 for a natural look. Use darker red for main berries and a slightly brighter red for highlights if desired.
— Gold Bud Cluster (Bud stems and bead-wrapped buds) :
Round 1 :
Using gold yarn and 3.5 mm hook: ch6, 1 sc in 2nd ch from hook and in each ch back to base forming a tiny bud tube (5)
Round 2 :
Make 3–5 of these tiny tubes and group them: sew small gold beads onto the ends with thread or wrap a tiny gold bead at the tip of the tube and sew in place. Secure ends and fasten off for each bud.
Info :
These gold bud clusters are the tiny metallic details seen in the photos; place them sparingly around flower clusters and near leaf groupings for sparkle. Use pearly beads or metallic seed beads as alternatives.
— Joining Chain & Connector Motif (Make chain connectors to join motifs into runner) :
Round 1 :
To join motifs: With green yarn join to the back of a leaf base with sl st, ch20 for a short connector or ch30 for a longer connector (length variable depending on spacing desired)
Round 2 :
At midpoint of chain, join a small leaf or tiny filler flower: sl st into chain, attach small leaf using sc around the base of the leaf and sl st back into chain; continue to chain end and sl st back into second motif base to join. Fasten off and weave tails.
Round 3 :
Alternate connectors: Some connectors are created by chaining and then working 1 sc in each chain back to the motif to create a braided, raised connector. This helps stabilize the runner and give a natural vine look.
Info :
Plan your motif spacing: in the sample image each large poinsettia is separated by smaller motifs and vine connectors to create an elongated horizontal composition. Lay motifs on table and pin positions before permanently joining.
— Border & Edge Finishing :
Round 1 :
When runner is fully joined, tidy the outer silhouette by working an edging in dark green: join at any outer leaf tip with sl st, ch1, sc in each outer edge st around exposed edges, placing picots or tiny popcorns at intervals for decorative points.
Round 2 :
*sc across flat edges, at leaf tips ch3 picot, sl st back into picot base; continue around entire runner creating a uniform border. Count stitches as necessary to maintain evenness (varies by runner length).
Info :
Edge helps the runner sit flat on the table and unifies the different motifs into a single cohesive piece. Work edging after all pieces are joined and blocked to avoid distorting shapes during assembly.
— Blocking & Final Assembly Notes :
Round 1 :
Block each major motif (large poinsettia, cream flowers, leaves) individually: spray lightly and pin into shape on blocking mat. Allow to dry fully for 24 hours.
Round 2 :
Arrange motifs on a flat surface or long table to match the photo composition before permanently joining. Use pins to hold placement and photograph layout for reference before sewing.
Round 3 :
Sew bead clusters and berry clusters in place after all motifs have been joined, securing with multiple passes of thread on the back of the runner.
Info :
Weave in all tails into adjacent motifs and trim close to work. Use a small amount of fabric glue to secure any particularly loose bead knots if desired.
Finishing this poinsettia table runner brings a real sense of holiday warmth to any table. Each layered flower and textured leaf adds depth and handcrafted charm that guests will notice. Working the runner end-to-end is a satisfying, meditative process — and the bead and berry accents make the finished piece sparkle. 🧶 Make one for your own table or stitch several smaller motifs to gift to friends and family. Happy stitching and enjoy the cozy results! ✨🎄