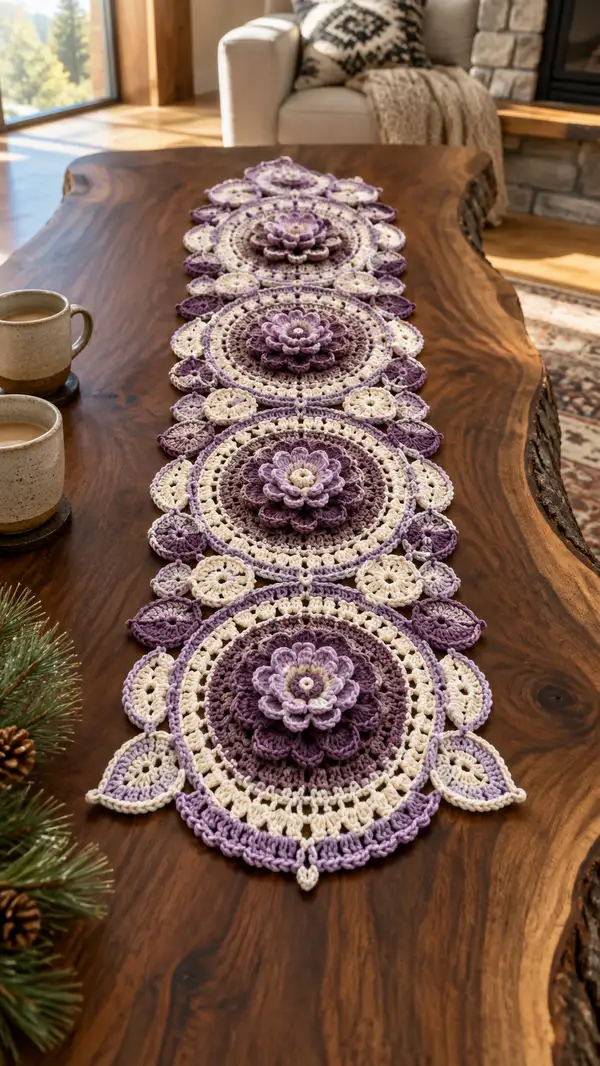
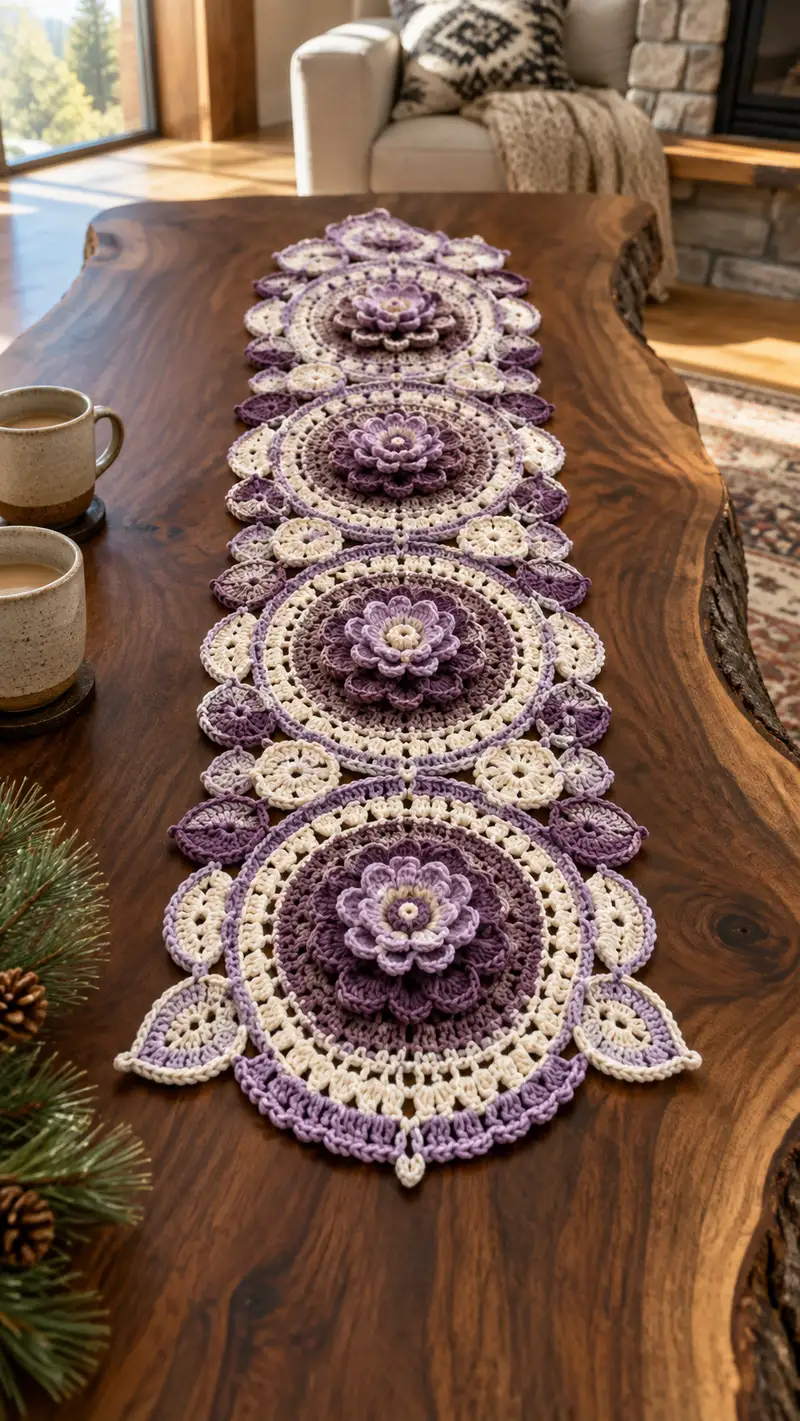
Create a stunning floral medallion table runner featuring layered 3D blossoms in purple, lavender and cream. This runner is made from repeating circular medallions connected with delicate rings and leafy accents, finished with a scalloped edge for an elegant look. The pattern uses puff and cluster stitches to achieve sculpted petals and openwork rings for light, lacy texture. Perfect for tabletops, buffets, or as a centerpiece runner to brighten any room.
Progress Tracker
0% Complete
— Overview & Notes :
Info :
This pattern is constructed from repeating circular medallions (complete floral motifs), small connecting rosettes and leaf motifs. You will make 4 full medallions, 6 small rosettes between them, and 10 leaves arranged around the outer edges. Work each medallion in three color rounds (plum, lavender, cream) to reproduce the layered look in the photo. Block each motif before joining. Use a 4.0mm hook for the main work; if your fabric is too loose, drop to 3.75mm or 3.5mm.
Info :
When color changes are required, finish the last pull-through of the previous stitch with the new color to create smooth transitions. Carry unused yarn behind the work only when it will be hidden by subsequent rounds.
— Medallion (Make 4 identical motifs) :
Round 1 :
Starting in Plum: 6 sc in mr (6)
Round 3 :
(1 sc, 1 inc) x 6 (18)
Round 4 :
(2 sc, 1 inc) x 6 (24)
Round 5 :
(3 sc, 1 inc) x 6 (30)
Round 6 :
(4 sc, 1 inc) x 6 (36)
Info :
These increase rounds produce a stable base circle for the layered flower. Keep tension even to avoid ripples. If you prefer a slightly larger medallion, add one more increase round (5 sc, inc) to reach 42 sts before moving on.
Round 7 :
1 sc in each st (36)
Round 8 :
1 sc in each st (36)
Round 9 :
Change to Lavender. *ch 3 (counts as dc), sk next st, dc in next st; rep from * around for 18 dc clusters & 18 ch-1 spaces (36 dc including ch-3 tops)
Info :
Use lavender for a soft petal highlight. If carrying the plum yarn behind, carry it loosely to avoid pulling the fabric tight.
Round 10 :
*In each ch-1 space: (puff stitch made of 5 partial dc loops, draw through all 5 loops and ch 1) reserving the last loop to anchor—see Puff Info below; sl st to next dc to separate petals; rep around (18 puff petals). Finish last sl st in starting ch-3.
Info :
Puff stitch technique: Yarn over, insert hook, pull up loop (repeat 5 times) to leave 6 loops on hook, yarn over and pull through all loops, ch 1 to close puff. Keep loops tall and even for sculpted petals.
Round 11 :
Slip to the top of a puff petal, ch 2 (counts as hdc), 2 hdc around same petal base, *3 hdc in each puff base, sl st between petals to separate; rep around to create a full ring of 3-hdc petal clusters (54 hdc total approx)
Round 12 :
Change to Plum. ch 1, sc in each hdc around (54)
Round 13 :
(3 sc, inc) x 12 (66)
Info :
Round 13 expands the base to provide room for the second petal layer. Count to verify 66 stitches; adjustments can be made by shifting the repeat number by 1 to center petals.
Round 14 :
1 sc in each st (66)
Round 15 :
Change to Lavender. *ch 3, sk 2, (3 dc, ch 1, 3 dc) into next st (popcorn petal), ch 3, sl st into next st to anchor; rep around to make 11 petal shells separated by chain loops (count shells as 11 petals across circumference)
Info :
Petal shells create a second dimensional ring. If your counts do not match 11 shells, adjust by shifting shells or changing the number of sc rounds before this round by ±6 stitches to balance spacing.
Round 16 :
Into each petal shell: (sl st to center of shell, ch 4, 4 dc into shell center, ch 4, sl st back to shell center) creating a looped elevated petal—rep for each shell (11 looped petals)
Info :
Add a tiny amount of fiberfill beneath each looped petal before closing the last loops if you want extra lift (use a small tuft per petal and secure by weaving in ends through base).
Round 17 :
Change to Plum: sl st to a ch-4 loop base, ch 1, sc 8 evenly around each looped petal base (8 x 11 = 88 sc) using 8 sc per loop to anchor and form a denser petal base
Round 18 :
1 sc in each st (88)
Round 19 :
Change to Cream. (4 sc, inc) x 22 (110)
Info :
This cream round provides contrast and becomes the openwork ring base for the outer lace. Check stitch math: 22 repeats of (4sc+inc)=5 stitches each = 110 total.
Round 20 :
*ch 5, sk 3 sc, sc in next sc; rep around creating 22 ch-5 loops spaced over 110 sts. Join with sl st to first ch-5 top.
Round 21 :
In each ch-5 loop: (sc, hdc, 3 dc, hdc, sc) to create petite shell motifs around the ring; rep across 22 loops (shells made)
Info :
This round forms a decorative shell ring that frames the petal center. If shells pucker, block this motif flat and re-tighten with steam or wet-blocking.
Round 22 :
Change to Plum. ch 1, sc in each stitch around including between shells to fill gaps (approx 110-122 sc depending on shell stitch merges). Adjust to keep fabric smooth.
Round 23 :
(2 sc, inc) x 37 (111)
Info :
Round 23 prepares for the outermost ring that will take decorative leaves and small rosettes. The exact stitch total may vary slightly—aim for a multiple that will work with the leaf/joining scheme described below; 111 is used here for even spacing with 11 petals and 22 shells.
Round 24 :
1 sc in each st (111)
Round 25 :
Change to Cream. *ch 7, sl st into the 6th sc ahead (creating elongated loop), rep around to create 11 long loops around the perimeter for leaves/rosettes. Join with sl st.
Info :
These elongated loops are the placement markers for leaf motifs and small rosettes. If your loop spacing creates too many or too few, revise Round 23 to reach a compatible multiple (111 divided by 11 = 10.09; you may adjust to 110 or 120 for even math).
Round 26 :
Into each ch-7 loop: make a small cream rosette: (into loop: ch 2, 10 dc evenly spaced, join with sl st) to make a small round medallion; rep into all loops creating 11 small rosettes around the medallion
Info :
If you prefer the small rosettes to be lavender instead of cream, change color before starting this round for a subtle two-tone ring.
Round 27 :
Switch to Plum. Working around each small rosette, sl st to its center, ch 3, (2 dc, ch 2, 3 dc) into rosette center to form a decorative surround; sl st to base to secure; rep for 11 rosette surrounds
Round 28 :
Change to Cream. Join between each rosette surround with ch 5 and sl st into the next base point, creating connecting loops between rosettes; rep for full circle
Info :
At this stage the medallion will have a strong, layered center and a scalloped perimeter of 11 rosette units. Block motif flat, pinning each rosette evenly, and allow to dry before joining to other motifs.
Round 29 :
Edge Round: With Plum, ch 1, sc around entire motif through back loops where possible to create a neat edging (approx 130-140 sc). If extra stitches appear, reduce/increase slightly to keep the edge lying flat.
Round 30 :
Final Decorative Picot Edge in Cream: *sc 3, picot (ch 3, sl st into 3rd ch), sc 3, sl st into next st; rep around to add a delicate picot scallop. Fasten off and weave in ends.
Info :
Make 4 identical medallions using rounds 1-30. Ensure consistent blocking and tension across all motifs. If you need additional height in the center flower, add an extra puff layer between Rounds 10-12 following the same puff pattern.
— Leaf Motif (Make 10) :
Round 1 :
In Cream: ch 6, sc in 2nd ch from hook, hdc in next, dc in next 2, hdc in next, sc in last (create a short leaf chain foundation—6 stitches used)
Round 2 :
Working on opposite side of chain foundation: sc in first st, hdc in next, 3 dc in next two sts (forming leaf body), hdc in next, sc in last (mirror the first side), sl st to join at base forming a pointed leaf shape
Round 3 :
Change to Plum: ch 1, sc evenly around leaf edge (approx 18 sc). Fasten off leaving long tail for sewing.
Info :
Make 10 leaves: 5 for each side of the runner. Pin leaves to the blocked medallions in the positions shown in the photo before joining to ensure symmetry.
— Small Connecting Rosette (Make 6) :
Round 1 :
In Cream: 6 sc in mr (6)
Round 3 :
Change to Lavender: (1 sc, inc) x 6 (18)
Round 4 :
sl st into center, ch 4, make 8 dc around centre into spaces to create a tiny open rosette; fasten off leaving tails for joining
Info :
These small rosettes sit between the large medallions to create the connected chain. You will make 6 and join them to link the 4 medallions (2 rosettes between each pair of medallions as pictured).
— Joining & Chain Links :
Info :
Arrange your 4 blocked medallions in a row with even spacing on a blocking board or flat surface. Place two small rosettes between each adjacent medallion spaced as in the photo. Position leaves around the outer edges, tucking leaf tips under the scalloped picot edges so the border remains neat.
Round 1 :
Using Cream and a 4.0mm hook, join by whip stitching through the back loops of edge rounds on each motif and the small rosettes: align the first medallion edge stitch to the rosette edge stitch and sew through both motifs with even, tight stitches. Continue to the next rosette and the next medallion until all four medallions are joined by 6 rosettes.
Info :
If you prefer a visible crochet join instead of sewing, use sl st joins: connect one motif to the rosette by placing wrong sides together and sl st through corresponding picot or ch-5 loops to create a decorative chain. Keep tension even so join stitches are neither too tight nor too loose.
Round 2 :
After securing rosettes, use Cream to crochet a decorative connecting chain along the top edge: attach at a picot point, ch 12, sl st into corresponding picot of adjacent medallion or rosette to form a looped chain bridge; repeat across all joins to mimic photo loops.
Info :
Test the chain length before continuing; too short will pull medallions together, too long will create sagging. Pin each loop into place and adjust spacing visually before final fixation.
— Outer Edge & Final Scallop :
Round 1 :
With Plum, pick up along entire outer edge of the runner and sc evenly around, catching both medallion and leaf bases where appropriate to make a continuous perimeter. Aim for consistent stitch counts around symmetric sections.
Round 2 :
Change to Cream. *ch 3, sk 2, (5 dc) in next st, sk 2, ch 3, sl st into next st—this creates scalloped clusters around the entire runner. Adjust spacing so scallops cover medallion curves and leaf tips evenly.
Round 3 :
With Lavender, work a decorative raised chain over the scallops: sl st across the top of each scallop to create a chained highlight, then secure with a sl st to the base between scallops. Fasten off and weave ends.
Info :
Blocking the entire joined runner is essential. Wet-block or steam-block the runner pinned to your desired final measurements, shaping each scallop and leaf to lie flat. Use plenty of pins for the leaves and petals to achieve even tension and symmetry.
— Alternate Decorative Edging (Optional) :
Round 1 :
If you desire a more open lace edge, substitute the scallop round with: *(ch 6, sl st into base), (sc, ch 3, sc) into next anchor; rep around—this produces a ringed fringe of chain loops for a delicate border.
Info :
Choosing an alternate edge influences how leaves tuck under; if you add the more open chain loop edge, increase the number of joining points between leaves and medallions to maintain cohesion.
— Finishing Touches :
Info :
Weave in all ends on the wrong side with a tapestry needle. For extra security where medallions join and for table use, consider adding a few hidden whip-stitches through multiple layers to make joins robust. Steam or wet-block once more after all ends are hidden.
Info :
If you want additional sheen, lightly starch the runner after blocking and allow to dry flat—this makes it more tableware-friendly and crisp for seasonal display.
— Puff Stitch & Cluster Techniques (Reference) :
Info :
Puff stitch (5-loop): yarn over, insert hook, pull up loop (repeat 5 times), yarn over and pull through all loops, ch 1 to close puff. Keep loops uncut and consistent. For clusters used in shell petals, work partial trebles into the same base, join at the top with a ch or sl st as directed to maintain shape.
Info :
When forming 3D petal loops, work chain spaces tall (ch 4 or ch 5) and anchor them with multiple dc into a small base so petals stand up after blocking. Lightly pin the petal loops upward during blocking to encourage lift.
— Sizing & Adjustments :
Info :
Each medallion as written measures approximately 9-10 inches (23-25 cm) diameter after blocking. With 4 medallions and joins, the finished runner measures roughly 40-44 inches (102-112 cm) long and 9-10 inches (23-25 cm) wide. To lengthen, add more medallions; to widen, add extra leaf rows or larger rosette spacing.
Info :
Gauge is not strict for decorative runners, but if your medallions differ in size, adjust hook size for subsequent motifs to even out final dimensions.
Crocheting this floral medallion runner is a wonderfully meditative project—each layered medallion becomes a miniature work of art that, when joined, forms an elegant centerpiece. The combination of puff petals, shells and picots brings depth and vintage-inspired charm to your table. Pin, block, and join with care and you'll have a heirloom-ready runner to display with pride. 🧶🌸✨