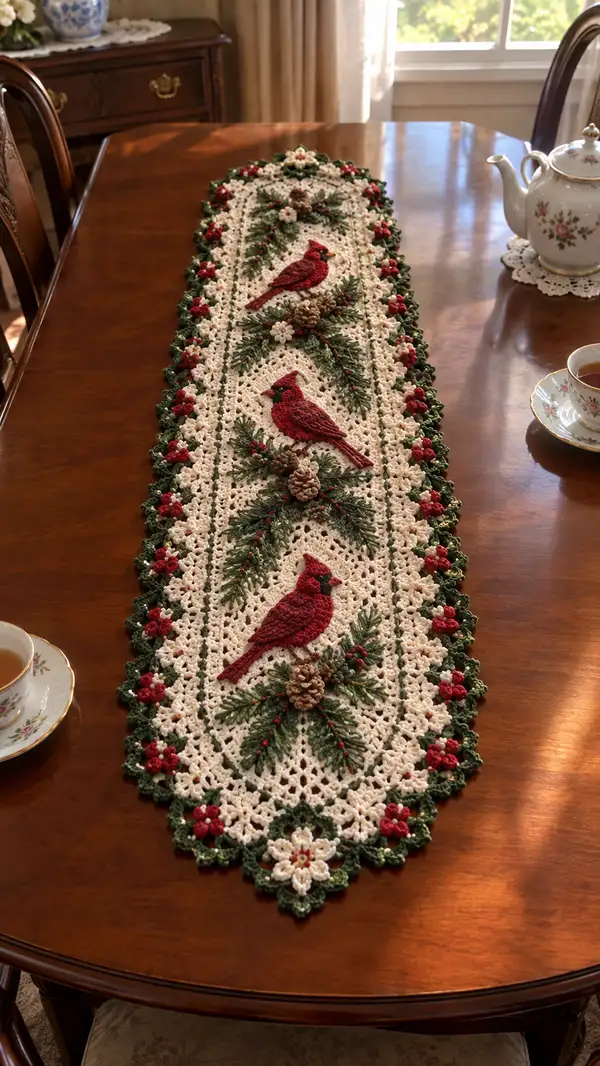
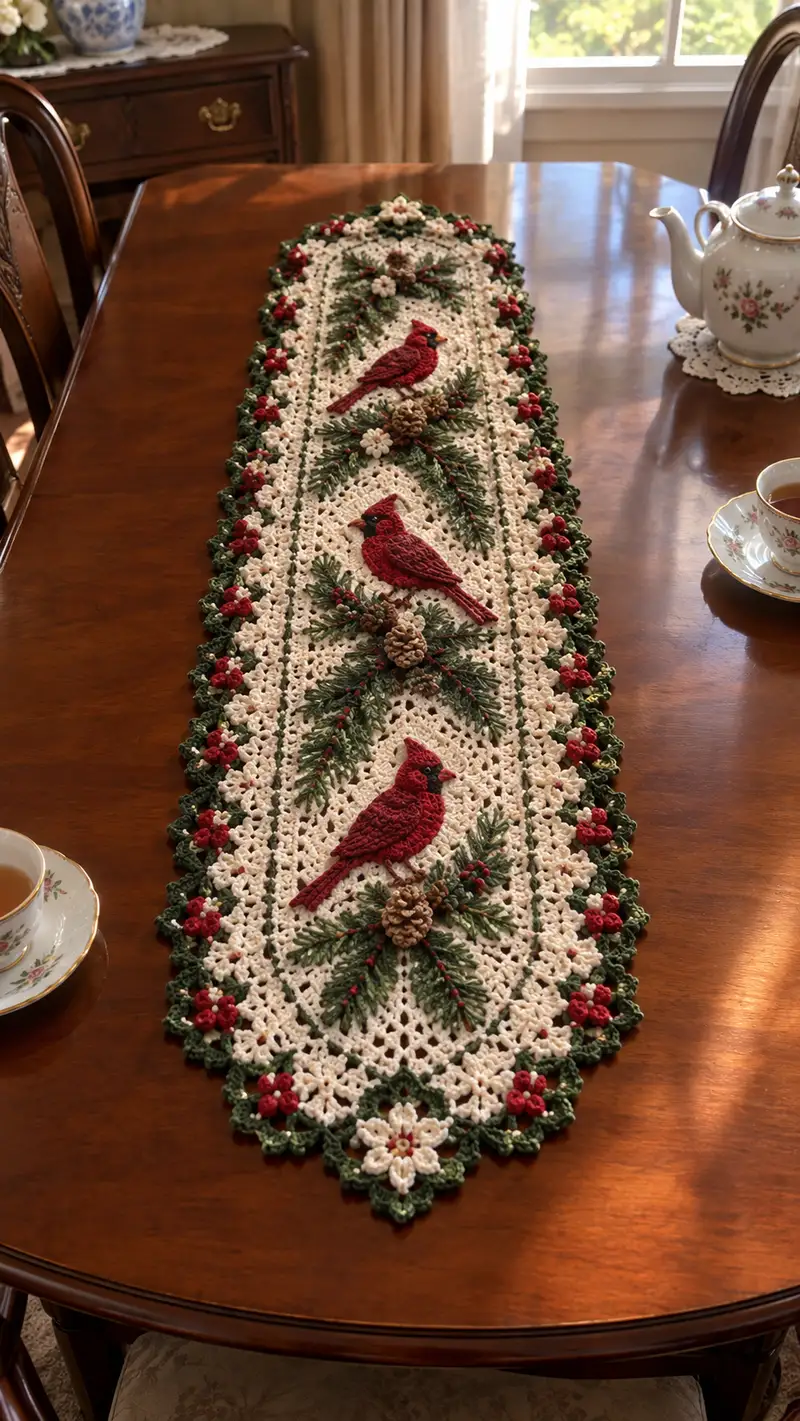
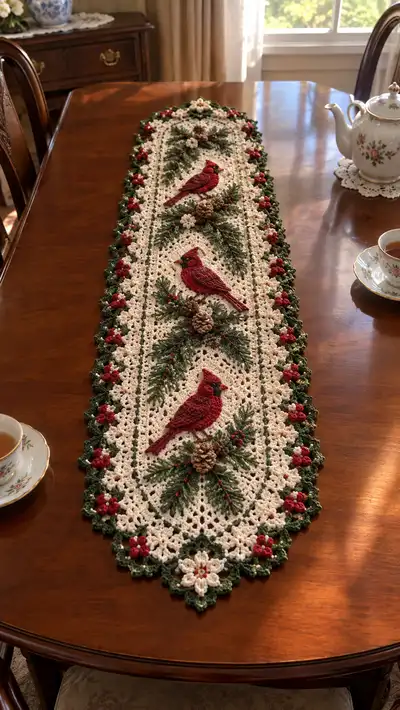
Create an elegant, vintage-inspired lace table runner featuring three detailed red cardinal appliques, pine sprigs, pinecones and holly berries on a soft cream lace background. This pattern uses layered embroidery-like crochet techniques, raised stitches, and a scalloped green border for a festive seasonal centrepiece. Detailed instructions guide you through the lace panel, three cardinals, greenery clusters, pinecones, berry clusters, and finishing. Perfect for holiday décor or a classic dining table accent.
Progress Tracker
0% Complete
— Central Lace Panel :
Info :
Work the central oval panel in cream worsted weight yarn using 3.5mm hook. This oval foundation creates the filigree lattice where appliques will be attached later. The panel is worked in rounds with increases at each short end to keep an even oval shape. Use a stitch marker at the first stitch of each round and move it up as you complete rounds. Block the finished panel before attaching appliques for best shaping.
Round 1 :
Ch 36, join with sl st to form ring, ch 3 (counts as dc), 35 dc into ring (36 dc)
Round 2 :
Ch 3, dc in next 17 sts, (2 dc, ch1, 2 dc) in next st (right short end increase), dc in next 17 sts, (2 dc, ch1, 2 dc) in next st (left short end increase), join with sl st to top of ch-3 (40 dc + 2 corner ch1 spaces)
Round 3 :
Ch 3, dc in next 19 sts, (2 dc, ch1, 2 dc) in corner ch-1 sp, dc in next 19 sts, (2 dc, ch1, 2 dc) in corner ch-1 sp, join (44 dc + 2 corner ch1)
Round 4 :
Ch 3, dc in next 21 sts, (2 dc, ch1, 2 dc) in corner ch-1 sp, dc in next 21 sts, (2 dc, ch1, 2 dc) in corner ch-1 sp, join (48 dc + 2 corner ch1)
Round 5 :
Ch 1, sc in same, *ch 3, sk 2 dc, sc in next dc* across to corner, at corner work sc, ch3, sc in corner sp, continue repeating pattern around; join (creates openwork chain mesh across sides)
Round 6 :
Ch 3, dc in next ch-3 sp, (dc, ch1, dc) in corner ch-3 sps, dc in next ch-3 sps across; join (maintains mesh, expand oval with corner clusters)
Info :
From this point the panel will alternate mesh rows and small lace clusters to build height. Keep counts consistent across both long edges and increase at both short ends using the corner clusters. Work until the central panel has three clear central medallion spaces evenly spaced for cardinal placement. Mark the centers where cardinals will be attached using removable pins.
Round 7 :
Ch 1, sc in each dc and ch-1 across the two long sides and make sc clusters (3 sc in same sp) in each corner ch-1 to maintain oval shaping (approximately 52 sc total)
Round 8 :
Ch 3, *dc in next 2 sts, ch1, sk1* repeat across long side, (2 dc, ch1, 2 dc) in corner clusters; join (mesh with small solid rows) (approx 56 dc + corner ch1s)
Round 9 :
Ch 1, sc in each st across, placing a sc in each dc and ch1 sp. At short ends continue 3-sc clusters in corner ch1s to keep oval (approx 56 sc)
Round 10 :
Ch 3, dc in next 3 sts, ch1, sk1 across, corner clusters as before; join. (Approx 60 dc)
Info :
The central medallion pattern begins now. We will create three identical inner oval medallions spaced along the runner by adding decorative lace rounds and leaving a clear open center to later sew the cardinal applique. Keep stitch markers at the lateral thirds where each medallion will be centered.
Round 11 :
Ch 1, sc across for one round to set edge (approx 60 sc)
Round 12 :
Ch 4 (counts as tr + ch1), *tr in next 2 sts, ch1* repeat across long edges, at short ends work (2 tr, ch2, 2 tr) in corner clusters to expand ends (approx 64 tr spaces)
Round 13 :
Ch 1, sc into each tr and ch1 sp; when you reach the three medallion position marks, work an extra 5-ch loop (ch5) anchored by a sc in next st to create a piloting loop for later applique placement; continue to end (approx 64 sc + 3 ch5 pilot loops)
Round 14 :
Ch 3, dc in each st across, dc in ch5 pilot loops working 5 dc into each loop to create slight raised oval anchors where cardinals will attach (work 5 dc into each pilot loop site), join (approx 74 dc after clusters)
Round 15 :
Ch 1, sc in each dc and around cluster sts to tidy (approx 74 sc)
Info :
If you'd like a slightly wider runner, add 1-2 repeats of Round 12-15 along the long sides before proceeding. Keep final panel length compatible with three cardinals evenly spaced.
Round 16 :
Ch 3, *dc in next 4 sts, ch1* across long edges, corner clusters (2 dc, ch2, 2 dc), join (approx 78 dc)
Round 17 :
Ch 1, sc across; at medallion anchors place a ring of picot-like loops by: *(sc, ch3, sl st in 3rd ch) x 5* around each 5-dc anchor to give a delicate framing (approx 78 sc + picot rings)
Round 18 :
Ch 3, dc around, working slightly into picot loops for texture; join (approx 78 dc)
Round 19 :
Ch 1, sc in each st; weave a decorative ladder-like chain across the inner medallion by working: ch5, sk4 sts, sc in next, repeat across the medallion length to create a subtle lattice inside each medallion (keeps an airy look) (approx 78 sc)
Info :
At this stage the central panel should show three slightly raised oval anchor areas and a stable lace background. Finish the central panel with 4 more tidy sc rounds and then proceed to border rounds. Block the panel flat to open the mesh before adding appliques.
Round 20 :
Ch 1, sc in each st around maintaining corner clusters, join (approx 78 sc)
Round 21 :
Ch 3, dc in each st across, working (2 dc, ch2, 2 dc) at both short ends for smooth oval shaping (approx 78 dc)
Round 22 :
Ch 1, sc in each st around to neat the edge and prepare for application of cardinals and greenery (approx 78 sc)
Round 23 :
Ch 1, sc around but in each corner cluster at short ends work (sc, ch1, sc) to maintain marker loops for future border joining (approx 78 sc)
Info :
Fasten off cream yarn leaving a 20-30" tail for blocking and seaming to the border rounds if you plan to join border motifs. Alternatively attach border motifs later by sewing. Block and pin to an oval block to set shape now.
— Cardinal Applique (Make 3) :
Info :
Each cardinal is worked in red yarn with layered pieces: body base, belly/texture layer, wing overlay, tail extension, and small beak/eye pieces. Work cardinals slightly three-dimensional by stuffing the body lightly between two joined layers and using surface stitches for feather texture. Work on 3.0mm hook for tighter fabric. The pattern below gives a modular round-by-round set; repeat for three cardinals and vary shading by alternating dark red for wings.
Round 1 :
Using red, mr, 6 sc in ring (6)
Round 2 :
Inc in each st around (12)
Round 3 :
(1 sc, inc) x 6 (18)
Round 4 :
(2 sc, inc) x 6 (24)
Round 5 :
(3 sc, inc) x 6 (30)
Info :
This creates a slightly rounded base for the underside of the bird body. We will begin shaping the back and chest separately by working increases along one side to build the oval bird silhouette. Keep markers to denote the front (beak) and back (tail) directional points.
Round 6 :
Work 12 sc (this will be the belly/front), ch 2, turn work to work along the next 12 sts: 12 sc across back to complete round without joining (30) — leave marker to show front center
Round 7 :
With RS facing, we will build height on the back: sc in next 6 sts, (2 sc in next st) x 6 across back area only (increase the back by 6 sts), then sc across remainder to complete round (36)
Round 8 :
Sc across, but work (blo) across the front chest 10 sts to create a subtle ridge for belly shaping; sc across remainder (36)
Round 9 :
(4 sc, inc) x 6 around the widest back section to expand the silhouette slightly toward the tail (42)
Round 10 :
Sc in each st around; work 2 sc in each of the center front two sts to create a small beak base stitch (44)
Info :
Now we will separate body into two thin layers: the top layer (feathered back) and bottom lining. Fasten off after next few rounds for lining then rejoin for top textured layer. Leave long tails for sewing layers together. Lightly stuff the lining when you join top and bottom later.
Round 11 :
Fasten off leaving long tail for sewing. Make a second identical piece for the top or work the top directly: rejoin red at front center for top feathers.
Round 12 :
Rejoin at front center, ch1, sc in next 6 sts (front), then work shell-texture down the back: *sk 1, 5-dc shell in next st, sk 1, sc in next* across back region to simulate feathering; finish sc around to join (approx 44 with shells counted as single stitch spaces)
Round 13 :
Sc around working into shell centers to secure shells and create layered texture (approx 44)
Round 14 :
Surface loop stitch: using yarn needle and red strand, embroider short raised stitches across the shell areas to mimic feathers. Work short couching lines from neck to tail; knot and weave ends on WS.
Round 15 :
Wing base: With dark red, mr, 6 sc, inc around to 12, (1 sc, inc) x 6 (18), (2 sc, inc) x 6 (24); shape wing tip by working (3 sc, dec) x 4 (20); work 2 rounds even then fasten off leaving tail for sewing. Use BLO on final round to create edge that will sit slightly raised when sewn to the body.
Info :
Sew wing to body using whip stitch or mattress stitch aligning the wing base over the back shells. Use a couple of small stitches to lift the wing slightly for a three-dimensional look. Add a few surface embroidery veins on the wing with darker yarn for feather detail.
Round 16 :
Tail: With red, ch 7, working back along chain: sc in 2nd ch from hook, sc in next, hdc, dc, tr, then join to tail base on body with slip stitches across two stitches to anchor. Fasten off. This creates a narrow layered tail - repeat to overlap layers of tail if desired.
Round 17 :
Beak: With yellow, mr, 4 sc, inc (6), (sc, inc) x 2 (8); shape to a small cone by (1 sc, dec) x 2 then fasten off leaving tail for sewing. Attach at front center with a few strong stitches. Add a tiny black bead or embroidered French knot for the eye just above and behind the beak.
Round 18 :
Assembly of body layers: Place top textured layer over lining, stuff with small amounts of fiberfill to achieve slight fullness. Whip stitch around edges leaving front opening for beak placement. Fasten securely. (No additional stitch count)
Info :
Repeat this complete cardinal construction three times, making each cardinal identical in size. For subtle variation you can use a tiny bit of burgundy or dark brown to add feather shading via surface embroidery stitches. Attach small black glass beads or embroidered French knots for eyes and secure thoroughly.
— Pine Sprig Cluster (Make 3) :
Info :
Pine sprigs are built as a central cluster of three to five fern-style leaflets radiating from a small brown stem. Use forest green and dark green alternating rows; work leaflets using a combination of chains and short sc/dc stitches to mimic pine needles. Attach each cluster beneath each cardinal with a pinecone in the center.
Round 1 :
With brown, ch 8, sl st back along chain to form a thin stem; fasten off leaving tail for sewing (counts as stem foundation)
Round 2 :
Rejoin forest green at stem base, ch 12 for longest leaflet, sc in 2nd ch from hook, hdc in next, dc in next 3, hdc in next, sc in next, sl st to stem base to anchor leaflet. Repeat for 4-5 leaflets on alternating sides of the stem varying chain lengths (ch10, ch8, ch6) for natural taper. (Creates 5 leaflets)
Info :
After anchoring leaflets, add texture by embroidering short surface stitches along each leaflet with darker green to create central vein and subtle dimension. Slightly curve leaflets by pinning and steaming or wet-blocking while sewn in place.
Round 3 :
Using dark green, pick up long floats along leaf edges by sl st or surface single crochet to give depth. Work 1 round of sc around the stem base to tidy. Fasten off leaving long tail to sew to panel.
Round 4 :
Optional small pine needle clusters: using green, embroider pairs of French knots or short bullion stitches along leaf edges to resemble needle clusters (no precise count)
— Pinecone (Make 3) :
Info :
Pinecones are three-dimensional bobble clusters worked in tan/brown with successive rounds of staggered bobbles. Work small cones about 1-1.5" tall; stuff lightly and sew to the center of the pine sprig cluster.
Round 1 :
With variegated brown, mr, 6 sc in ring (6)
Round 3 :
(1 sc, inc) x 6 (18)
Round 4 :
Sc around then work 6 small bobble clusters evenly spaced: *(bobble (5 dc cluster) in next st, sc in next 2)* repeat 6 times to create first scale tier (18 sc + 6 bobbles)
Round 5 :
Work sc around placing bobbles staggered between previous bobbles: *sc in next 1, bobble in next st, sc in next 2* repeat across (18)
Round 6 :
Decrease slightly toward top: (4 sc, dec) x 3 (15)
Round 7 :
Fasten off and lightly stuff base just enough to hold shape. Shape the pinecone by flattening top slightly and sewing with a few blind stitches to close top into a tapered cone. Leave tail for sewing onto sprig base.
Info :
Sew pinecone at the junction of the sprig leaflets, using long tail to anchor through both sprig and central lace panel. Use a few secure passes to avoid rotation when the runner is handled.
— Berry Cluster (Make 18 small clusters) :
Info :
Small berry clusters are worked as tiny 3D bobbles in red yarn. Make multiple clusters to tuck into leaf axils and border motifs. Use 2.75–3.0mm hook for tight bobbles.
Round 1 :
With red, mr, 6 sc in ring (6)
Round 2 :
Work a small bobble: *(yo, insert, yo, pull up loop) x 3, yo and pull through all loops, ch1 to secure* then sc around to tidy and fasten off leaving tail for sewing (makes one small berry approx 6-8 mm)
Round 3 :
Make clusters of 3 berries by sewing 3 bobbles together with short lengths of brown stem yarn and attach to sprig leaf junctions or border flower centers. Repeat to make 18 clusters total.
Info :
Position berries so they nestle into the leaflets and under wing tips of cardinals. Secure with small stitches and hide tails inside the sprig or panel for neat appearance.
— Small Cream Flowers for Border (Make ~20) :
Info :
Tiny five-petal flowers frame the runner at each scallop point. Work them in cream, with a small yellow or gold stitch at center. They are flat motifs sewn to border points.
Round 1 :
With cream, ch 2, 5 sc in 2nd ch from hook, sl st to join (5)
Round 2 :
*Ch 3, sl st in next st* repeat around to create five small loops, fasten off leaving tail for sewing. Optional: add tiny yellow French knot or seed bead at center.
Info :
Make approximately 20-24 flowers to space along the scalloped border nodes. Optionally add a small bead to the center for a polished look.
— Border Edging and Scallops :
Info :
The scalloped border is worked in forest green around the blocked cream panel using join-as-you-go or by sewing motifs after making them. The border features a layered two-row scallop with small red berry clusters and cream flowers at each scallop vertex.
Round 1 :
With forest green and working from RS around the panel, join at a short end seam: ch1, sc evenly around the cream panel working 1 sc in each sc or dc stitch; in corner clusters work (sc, ch3, sc) to prepare scallop points (approx 78 sc)
Round 2 :
*Sc in next 3 sts, (5 dc shell in next st), sc in next 3 sts, sl st in next st* repeat around to create shells; at corners work larger (7 dc shell) to maintain curvature (shells create scallops) (approx 22 shells)
Round 3 :
Ch 1, sc in each dc and sc across to tidy shells; in each shell apex attach a small cream flower by sewing at the center then add a 3-berry cluster on either side of select scallops to echo the interior sprig clusters.
Round 4 :
Edge picot row: *Sc in next 2, picot (ch3, sl st in 3rd ch), sc in next 2, sl st into shell apex* repeat to finish border. Fasten off and weave long tails for sewing if any motifs are made separately.
Info :
If you prefer join-as-you-go: make shell motifs separately and join them to the panel edge with slip stitches as you finish each shell to create a seamless border. Alternatively sew after blocking with the yarn needle using mattress stitch for a fully flush join.
— Assembly & Attachment :
Info :
Arrange all appliques on the blocked panel before sewing. Place each completed cardinal at the three medallion anchor points created in Round 13-15 of the central panel. Position pine sprig beneath each bird with pinecone centered and berry clusters tucked in. Pin motifs in place and photograph layout so you can replicate symmetry when sewing.
Round 1 :
Pin cardinal body over each 5-dc anchor so the front of bird aligns with the panel centerline. Using long tail and yarn needle, mattress stitch around the cardinal base through both the body lining and panel stitches making small, even stitches. Secure tail with multiple passes and weave in ends. (No numeric stitch count — anchor securely across base perimeter)
Round 2 :
Sew wing bases to body using small hidden stitches along the wing base. Add 2–3 underside stitches to pull wing slightly away from body for lift. Sew beak and eyes securely; if using beads, stitch through panel and back multiple times then knot on WS.
Round 3 :
Position pine sprig so leaflets fan under the bird chest; sew stem and a few leaflet anchors into panel stitches using brown thread for stem invisibility. Sew pinecone to center of the sprig with several passes to prevent rotation.
Round 4 :
Sew small berry clusters around sprig junctions and border shell apices using red tail ends. Sew cream flowers to scallop apexes and secure beads at centers if used.
Info :
For extra security, sew through the panel and tie off on the WS with a couple of half-hitches and weave tails 2-3" under the panel before trimming. Block again gently to set appliques and flatten any slight ripples from attachment.
Round 5 :
Final finishing: weave in all remaining tails, trim fuzz, and steam block lightly on RS with a damp cloth to set shape. Check underside to ensure no long tails or loose knots remain. The runner is ready for use as a display piece (avoid placing heavy wet items directly on appliques).
Info :
Storage suggestion: store flat or rolled with acid-free tissue between folds to protect raised motifs. Spot-clean with a gentle detergent by dabbing; avoid machine washing to preserve texture and three-dimensional details.
Completing this runner is such a joyful experience — each applique and stitch adds personality and warmth to a classic lace foundation. The finished piece makes an elegant seasonal centerpiece or heirloom gift that will be admired for its delicate detail and three-dimensional texture. I love how the red cardinals pop against cream lace and how the green scalloped edge frames the design perfectly. Enjoy blocking and finishing — this project is a lovely way to spend a few calm, creative sessions. 🧶🎁