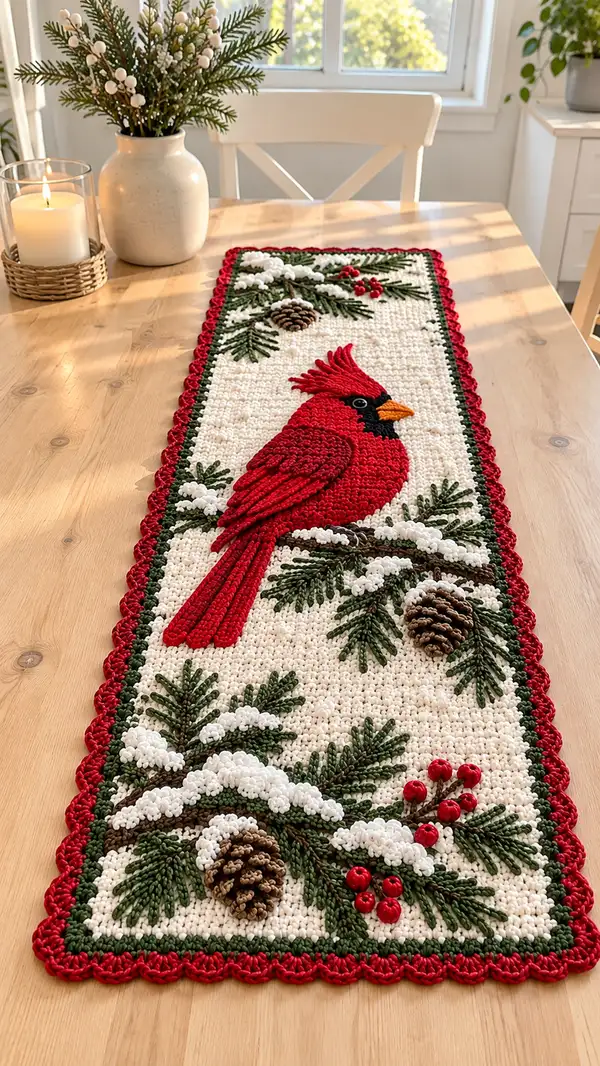
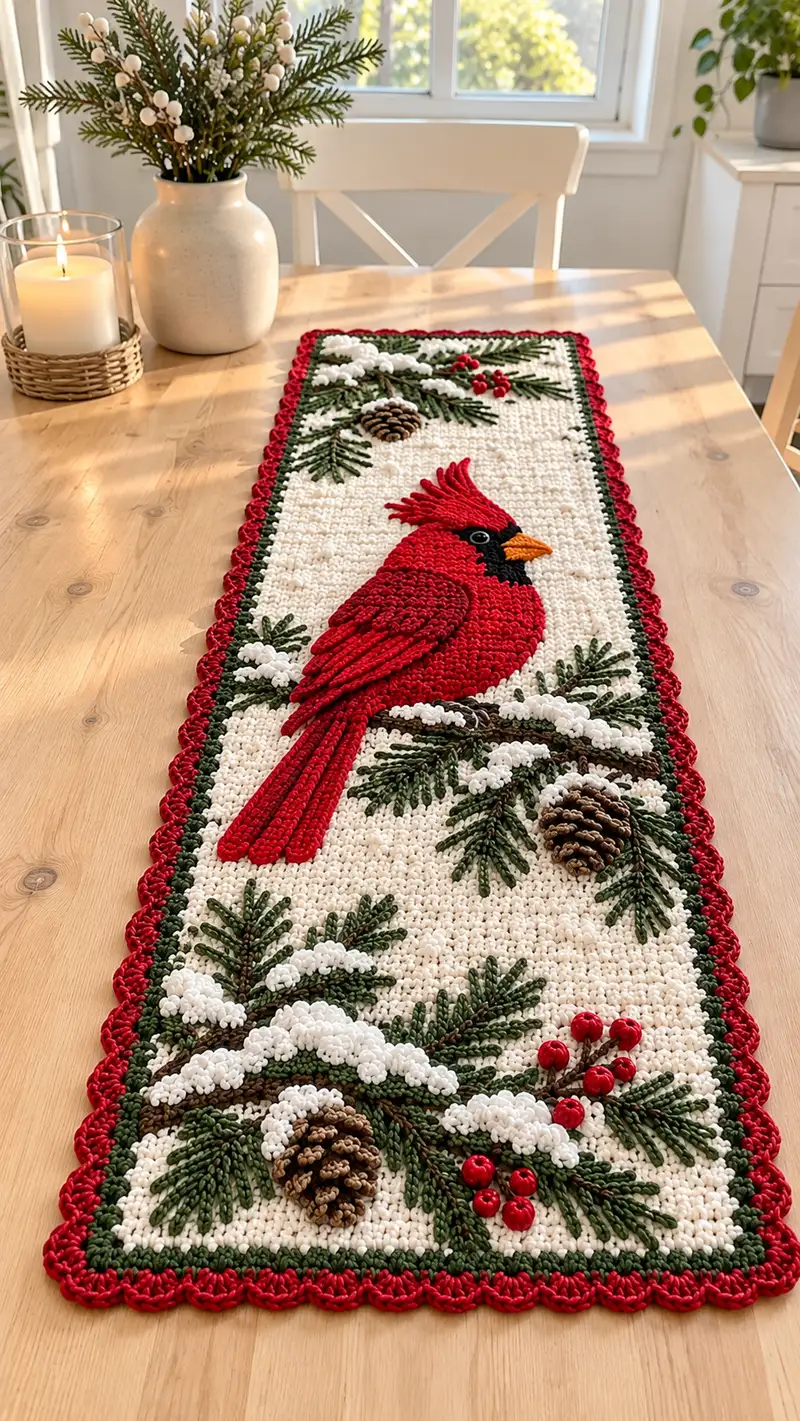
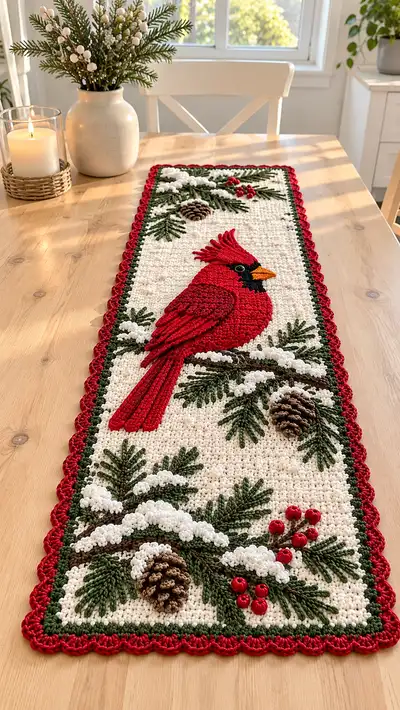
A festive, textured crochet table runner featuring a vibrant red cardinal perched on snowy pine branches with pinecones and bright red berries. This rectangular runner uses layered applique9, raised stitches, and bobble details for a rich, three-dimensional winter scene. Designed to sit as a centerpiece on a dining table, it combines solid background stitches with sculpted motifs and a scalloped border.
Progress Tracker
0% Complete
— Base Panel (Background) :
Info :
Work the runner flat in rows. The finished sample measures approximately 14" wide by 46" long using worsted weight yarn and a 4.0 mm hook. Adjust foundation chain to your desired width. The pattern below uses a foundation chain of 92 chains to give a 14" backbone at recommended gauge.
Row 1 (foundation) :
Ch 92, turn. (This counts as 0 for sc-based foundation; we will start with sc into 2nd ch from hook.)
Row 2 :
Starting in 2nd ch from hook, 1 sc in each ch across (91 sc). Ch 1, turn.
Rows 3-12 :
1 sc in each st across (91). Ch 1, turn. Work these rows in cream/ivory to establish a solid ground; these first 10 rows create the border-to-center height for the runner.
Info :
Place stitch markers at the first and last stitch of the row to help keep edges straight. Maintain even tension to avoid edge waviness.
Rows 13-24 :
1 sc in each st across (91). Ch 1, turn. Continue in cream. At the end of row 24 you will have created the lower third of the runner foundation where lower pine motifs are attached.
Info :
Mark approximate motif placement: measure 10 rows up from bottom edge for the lowest pine cluster, and 28-34 rows from bottom for cardinal center. This helps when sewing applique9.
Rows 25-40 :
1 sc in each st across (91). Ch 1, turn. Expand the center field; the cardinal applique9 will be sewn here spanning rows 30-48 depending on placement.
Info :
If you prefer tapestry crochet for the cardinal rather than applique9, mark the exact stitch columns and plan color changes. This pattern uses applique9 pieces to keep background simple.
Rows 41-60 :
1 sc in each st across (91). Ch 1, turn. Continue until the full runner length is reached. For the sample runner you will work 120 rows total in cream for the main panel; motif placement occupies rows as described below.
Info :
When you reach desired runner length (sample 120 rows), fasten off leaving long tail for sewing border. Block the panel lightly with steam or wet block to flatten and square edges before attaching motif pieces.
— Cardinal : Overview and Construction Notes :
Info :
The cardinal is created from multiple flat applique9 pieces worked in the round or in short rows then sewn together: head, body, breast, layered wing segments (wing base, feather overlays), tail panel, crest, beak, and small eye patch. Work pieces on smaller hook (3.5 mm) for tighter fabric. Pieces are seamed onto the background using mattress stitch. All shapings below show stitch counts per round and grow/decrease math for accurate sculpting.
— Cardinal Head :
Round 1 :
Using bright red, form a magic ring, 6 sc in magic ring (6).
Round 3 :
(1 sc, inc) x 6 (18).
Round 4 :
(2 sc, inc) x 6 (24).
Round 5 :
(3 sc, inc) x 6 (30).
Round 6 :
(4 sc, inc) x 6 (36).
Round 7 :
1 sc in each st around (36).
Round 8 :
1 sc in each st around (36).
Info :
Place a removable marker to indicate the front center of the head. The eye will be attached later overlapping the head and eye patch. Keep head flat and slightly oval; do not stuff. This piece is applique9 for a flat silhouette.
Round 9 :
(4 sc, dec) x 6 (30).
Round 10 :
(3 sc, dec) x 6 (24).
Round 11 :
(2 sc, dec) x 6 (18).
Round 12 :
(1 sc, dec) x 6 (12).
Round 13 :
6 dec (6). Fasten off and leave long tail for sewing. Shape head into a slightly pointed front by sewing a small tuck along the bottom center if you want more profile.
Info :
Head should measure approximately 2.5" across at the widest point. Block flat before attaching to runner to avoid bubbling.
— Cardinal Crest (Make 1) :
Round 1 :
With bright red, ch 10, sc in 2nd ch from hook and across (9 sc). Ch 1, turn.
Round 2 :
1 sc in first st, (sk 1, 3 dc cluster in next st, sk 1, sl st in next) repeat across to create pointed feather tips; finish with sc in last st. (creates 4 small crest points)
Round 3 :
Ch 1, fold foundation row so the base width is slightly narrower, sc through both thicknesses across to make a sturdier crest base. Fasten off leaving long tail for sewing.
Info :
Sew crest to top of head aligning center of crest with front center marker. Slightly curve crest upward for natural profile.
— Cardinal Eye Patch (Make 1) :
Round 1 :
Using black yarn, ch 6, sc in 2nd ch from hook and next 4 ch (5 sc). Ch 1, turn.
Round 2 :
1 sc in each st across (5). Ch 1, turn.
Round 3 :
Dec in first 2 sts, 1 sc in last st (3). Fasten off leaving long tail for sewing behind eye position to create the dark mask around the eye.
Info :
Position eye patch so its outer edge lines up with head front center; it should partially cover rounds 6-8 of the head piece. Use small whip stitches to attach.
— Cardinal Beak (Make 1) :
Round 1 :
With orange yarn, ch 4, 3 sc into 2nd ch from hook, sc in next ch (4 sc). Ch 1, turn.
Round 2 :
1 sc in first st, (inc, sc) across to end (5). Ch 1, turn.
Round 3 :
(sc, dec) x 1, finish with sc in last st (4). Fasten off leaving tail for sewing. Slightly stuff with a small bit of fiberfill to create a short, triangular beak.
Info :
Sew beak to head so the tip projects outward from the head center; secure with small stitches from base to underside of head for firm attachment.
— Cardinal Body :
Round 1 :
Using red yarn and 3.5 mm hook, magic ring, 6 sc in ring (6).
Round 3 :
(1 sc, inc) x 6 (18).
Round 4 :
(2 sc, inc) x 6 (24).
Round 5 :
(3 sc, inc) x 6 (30).
Round 6 :
1 sc in each st around (30).
Round 7 :
1 sc in each st around (30).
Info :
The body is worked in the round as a somewhat flattened teardrop. It will be applique9d flat to the background, so do not stuff. At round 7 plan the placement of the breast piece and wing base so stitches align.
Round 8 :
(3 sc, dec) x 6 (24).
Round 9 :
(2 sc, dec) x 6 (18).
Round 10 :
1 sc in each st around (18). Fasten off leaving long tail for sewing. Flatten gently to create a well-shaped body contour.
Info :
Measure body against the background before sewing. The body should span roughly 12-16 rows vertically on the background panel, depending on placement.
— Cardinal Breast Panel (Make 1) :
Round 1 :
With brighter red (or same red), ch 12, sc in 2nd ch from hook and across (11 sc), ch 1, turn.
Round 2 :
1 sc across 11 sts, ch 1, turn.
Round 3 :
Dec at start and end to create an oval shape: sc2tog at first two sts, sc across to last two sts, sc2tog (9). Ch 1, turn.
Round 4 :
Sc across 9 sts. Fasten off leaving long tail for sewing. Slightly curve the breast panel and place overlapping lower front of body for a layered look.
Info :
Sew breast panel centered over body just under head; use small whip stitches through body piece and breast piece to hold shape and create a raised seam simulating a breast contour.
— Wing Base (Make 1) :
Round 1 :
With red, ch 26, sc in 2nd ch from hook and across (25 sc), ch 1, turn. This creates a long oval foundation for the layered wing.
Round 2 :
Sc across 25. Ch 1, turn.
Round 3 :
Dec at start and end (sc2tog), sc across to last two sts, sc2tog (23). Ch 1, turn.
Round 4 :
Sc across 23. Fasten off leaving long tail for sewing. This base will be sewn along the upper side of the body, overlapping slightly with breast panel.
Info :
Position wing base where the cardinal sits on the branch. The wing will receive multiple feather overlays to create the layered feathered texture.
— Wing Feather Overlays (Make 8-10) :
Round 1 :
Ch 8, sc in 2nd ch from hook and next 6 chs (7 sc). Ch 1, turn.
Round 2 :
Working along one long side only, create tapered feathers: (3 dc cluster in next st, sl st in next) repeat 3 times to make scalloped feather tips; finish with sc. Fasten off leaving tail.
Info :
Sew these feather overlays stacked over the wing base, overlapping each by about 2-3 stitches so they create a realistic layered wing. Use 8-10 feathers per wing depending on desired fullness.
— Tail Panel :
Round 1 :
With red, ch 22, sc in 2nd ch from hook and across (21 sc), ch 1, turn.
Round 2 :
1 sc across 21, ch 1, turn.
Round 3 :
Dec at start and end (sc2tog), sc across to last two sts, sc2tog (19). Ch 1, turn.
Round 4 :
Sc across 19. Fasten off leaving long tail for sewing. Add 3-4 thin tapered feather strips for the tail overlay by crocheting ch 20 and working slip stitch edges to create flat strips. Sew strips layered and slightly fanned off the tail base.
Info :
The tail should extend off the body about 6-8 rows on the background; position accordingly so the cardinal sits naturally on the branch.
— Cardinal Eye (Make 1) :
Round 1 :
Use 6 mm black safety eye or embroider a small black round of 4-6 sc in black on a small round blank if you prefer no hard parts. If using an embroidered eye, ch 4, join, sc 6 in ring (6), pull tight and flatten into a small circle. Fasten off leaving tail for sewing.
Info :
If using safety eye, ensure it is secured through the head piece and eye patch layer before sewing head to background. If embroidering, stitch eye onto eye patch then sew patch to head.
— Pine Branches (Make 4 main clusters) :
Info :
Each pine branch cluster is worked as a main branch (brown foundation), then many pine-needle sprigs are added with surface loops or individual leaflets worked as short ch loops anchored back to branch. Use forest green for needles and brown for branch.
Branch Core Round 1 :
Ch 18 with medium brown, sc in 2nd ch from hook and across (17 sc). Ch 1, turn.
Branch Core Round 2 :
1 sc across 17, ch 1, turn. Fasten off leaving tail for sewing. These stitched rows form a flat branch core that will be sewn onto background.
Needle Sprig (Make many) :
Attach forest green at desired points along branch core by sl st into branch, ch 10, sc back down chains along the long side securing back into branch with a sl st; this creates a long pine needle sprig. Repeat both sides of branch core spaced every 2-3 stitches to form a dense cluster. For shorter sprigs ch 6-8. Use about 14-20 sprigs per large cluster for fullness.
Info :
To create raised needles, pull up long loops then secure with a sc in the base; alternatively work V-stitches (dc, ch1, dc) into the branch core to mimic fuller branches. Vary sprig lengths to look natural.
— Pinecone (Make 3) :
Round 1 :
With dark brown, magic ring, 6 sc (6).
Round 3 :
(1 sc, inc) x 6 (18).
Round 4 :
(2 sc, inc) x 6 (24).
Round 5 :
1 sc around (24).
Round 6 :
Switch to lighter brown. Work popcorn stitch sequence to mimic scale layers: *dc 3 in same st, remove hook, insert hook through first dc of the cluster, pull loop through to form popcorn, ch 1, sl st in next st* repeat across round so you have 12 popcorns (12 clusters). This creates overlapping cone scales.
Round 7 :
Fasten off leaving tail. Lightly stuff center with fiberfill only to give slight roundness. Sew cone to background with the pointed end tucked under snow bobble so it reads as lying on branch.
Info :
Make pinecones in two sizes by working fewer popcorns (8-10) for a smaller pinecone. Attach one cone near the lower cluster and one near the upper cluster as pictured.
— Snow Bobbles (Make many clusters) :
Round 1 :
With white, ch 3, 5 dc into 3rd ch from hook to create a puff, pull tight and sl st into base to form a bobble. Alternatively, work 5tr cluster then secure. Make small clusters of 3-6 bobbles to simulate snow drifts. Fasten off leaving a tail for sewing.
Info :
Sew bobbles along top of branches and on branch cores. Space them irregularly; add smaller single bobbles for flecks of snow on background around bird.
— Red Berries (Make 12-16) :
Round 1 :
Use red and 3.5 mm hook, magic ring, 6 sc (6). Fasten off leaving tail. Optionally sew a small round wooden bead on top for a glossy berry look. Cluster 3-4 berries together wired by sewing them close and anchoring to branch base.
Info :
Place berries in small groups near branch ends and lower left cluster as pictured. Use small stitches to anchor so they don't rotate on the flat background.
— Surface Embroidery Details :
Info :
After sewing applique9 pieces in place, use a tapestry needle and green yarn to add surface veins and needle tips. Use brown yarn to add small knots and twig texture. Use short satin stitch with black under the beak to emphasize the eye mask and to anchor the eye area.
Technique :
For needle points, use cast-on loops: insert needle where you want needle base, bring up a long loop on surface, then tack down the tip with a small stitch. This gives realistic raised needles.
— Assembly and Placement Info :
Info :
Pin the body piece to the background at the approximate location: center the body 6-8 rows above the central horizontal midline. Sew body first, then position and sew breast, head, wing base, and feather overlays in that order. This layering preserves natural feather overlap (breast under base of wing, wing overlays on top of wing base).
Info :
Sew at least 10-12 small whip stitches around each piece to secure them flat. Use matching thread color for invisible joins. For wing overlays, sew only at the top base to allow tips to lift slightly for a layered look.
— Inner Border (Green) :
Round 1 :
With forest green, join to right side edge of runner with sl st approximately 3 sts in from corner. Ch 1, sc evenly along the raw edge across entire perimeter; aim for 1 sc per row end and 2-3 sc across foundation chain ends. For sample runner work approximately 122 sc on long edges and 14 sc on short ends. Sl st to join at corner, fasten off.
Info :
Work evenly and pick up the same number of sc along opposite edge to keep border straight. Use pins to align corner turn counts and avoid bulging.
— Scalloped Outer Border (Red Scallop) :
Round 1 :
Join bright red at corner with sl st, ch 1. *Skip 2 sc, 5 dc in next sc, skip 2 sc, sl st in next sc* repeat along entire perimeter to create scallops. At corners work 7 dc cluster across corner sc to help turn smoothly. Fasten off and weave in ends.
Info :
Adjust number of skipped stitches to make scallops sit flat. If scallops pull the panel in, use fewer dc per scallop (4 dc) or skip one less stitch between shells.
— Finishing Touches :
Info :
Weave in all ends on the wrong side. Lightly steam-block the entire runner to settle the scallops and flatten motifs. If desired, tack some of the outermost shell tips down with small stitches to prevent catching when in use.
Info :
Add small beads to the center of a few snow bobbles for a sparkling effect, or apply a tiny dot of fabric glue to secure wooden beads used as berries.
Info :
Trim any excess stuffing used inside pinecones or bobbles so they do not show through the stitches. Make sure all applique9 pieces are sewn with secure knots on the wrong side and weave tails back through several stitches for durability.
Completing this Red Cardinal on Snowy Pine table runner is a truly rewarding project—every layered feather, pine needle, and snow bobble adds personality and depth to your holiday table. The contrast of vibrant red against soft cream and deep green creates a classic festive look that guests will admire. Enjoy the meditative process of building the scene piece by piece, and celebrate the finished centerpiece that will bring charm to seasons ahead. 🧶❄️🌲