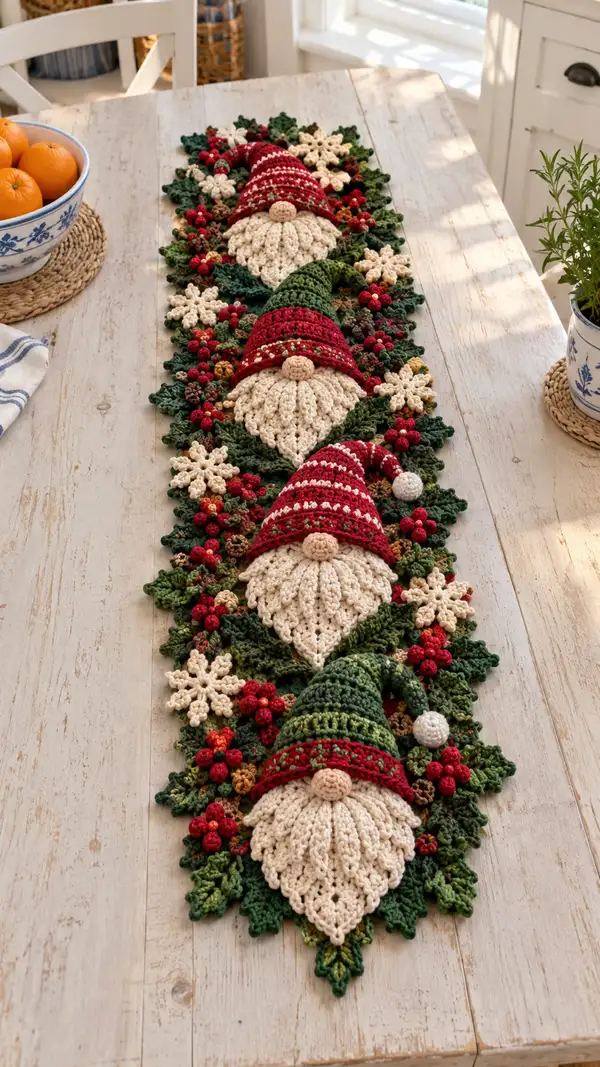
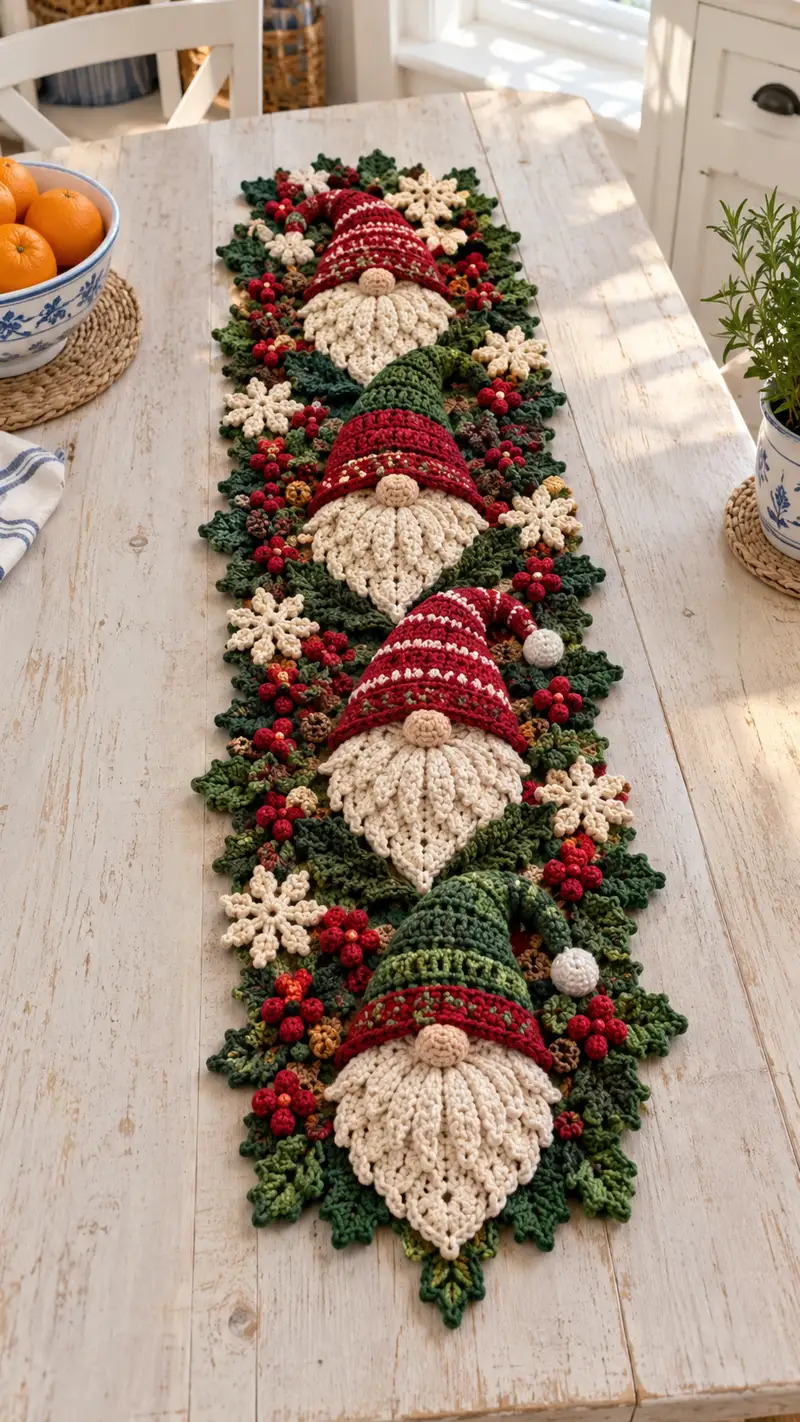
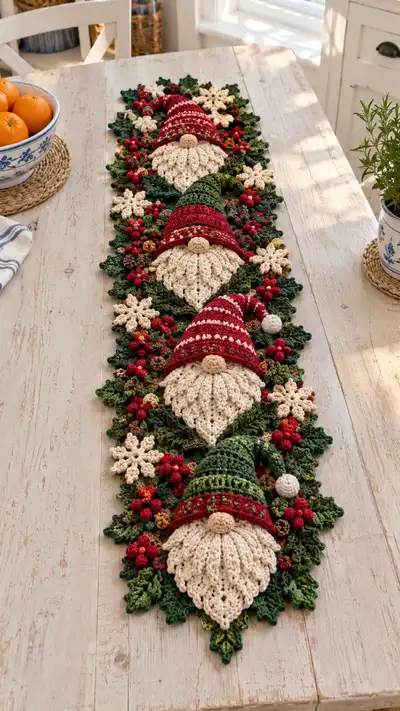
Create a festive Red Green Gnome Motif Table Runner featuring four cheery gnome faces with striped hats, textured cream beards, clustered berries, pinecones, and snowflake accents. The runner uses layered leaf-bordered motifs in rich greens and deep reds to create a lush holiday centerpiece. This detailed pattern breaks every element into easy-to-follow parts so you can crochet and assemble each gnome, leaf, berry cluster and snowflake into a beautiful cohesive runner.
Progress Tracker
0% Complete
— Overview and Gauge :
Info :
This pattern is constructed from motifs: gnome beards (large scalloped teardrops), gnome hats (striped cones), noses (tiny stuffed spheres), leaf motifs in two sizes, berry clusters (3-6 bead-like bobbles), pinecone motifs, and 6-point snowflakes. Make 4 gnome sets and arrange sequentially to create a 48-52 inch runner depending on spacing. Gauge: in sc, 14 sc x 16 rows = 4 in using 3.5-4.0 mm hook in worsted cotton; maintain tight tension so stuffing and tiny motifs do not show through.
Info :
Work in rounds for 3D elements and in joining rounds or flat rounds for leaves and snowflakes. Block leaves and snowflakes flat before assembly for crisp edges. Use stitch markers to track round starts and motif placement. We recommend making all motifs in batches to maintain consistent tension and color transitions.
— Head / Nose (Small Round Nose used for each gnome) :
Round 1 :
6 sc in magic ring (6)
Round 3 :
(1 sc, 1 inc) x 6 (18)
Round 4 :
(2 sc, 1 inc) x 6 (24)
Info :
Use flesh/tan color. Stuff lightly to make a firm but slightly squishy button nose. Work tightly so shape holds when sewn onto beard overlap.
Round 5 :
1 sc in each st (24)
Round 6 :
(2 sc, 1 dec) x 6 (18)
Round 7 :
(1 sc, 1 dec) x 6 (12)
Round 8 :
6 dec (6) - finish stuffing as you close
Info :
Fasten off leaving a 10-12 in tail for sewing. Weave the tail through the 6 remaining stitches and pull tight to close. Make 4 noses (one per gnome) and set aside.
— Beard (Large scalloped teardrop, worked flat then edged) :
Round 1 :
Using cream yarn with 4.0 mm hook: ch 21, 1 sc in 2nd ch from hook and in each across (20)
Round 2 :
Ch 1, turn, 1 sc in each st across (20)
Round 3 :
Ch 1, turn, (2 sc in first st), 1 sc in next 18 sts, 2 sc in last st (22)
Info :
We will increase at ends to create triangular teardrop shaping. Work flat rows with increases at edges to shape point then create scalloped texture with elongated stitches and shell clusters.
Round 4 :
Ch 1, turn, 1 sc in first st, (1 hdc, 1 dc, 1 hdc) in next st, 1 sc in next 18 sts, (1 hdc, 1 dc, 1 hdc) in last st, 1 sc in final st (22)
Round 5 :
Ch 1, turn, 1 sc in each st (22)
Round 6 :
Ch 1, turn, 1 sc in first 2 sts, 2 sc in next st, 1 sc in next 16 sts, 2 sc in next st, 1 sc in last 2 sts (24)
Round 7 :
Ch 1, turn, 1 sc in each st (24)
Round 8 :
Ch 1, turn, (1 sc, inc) across 6 times, 1 sc in remaining 12 sts (30)
Info :
Begin creating vertical 'beard strands' using front post puff clusters. Puff clusters will give the ropelike textured beard visible in the sample. Use slightly looser tension on puff stitches so beard has drape.
Round 9 :
Ch 1, turn, *fpdc puff over next 3 sts (see note), ch 1, sk 1* rep across to last 2 sts, 1 sc in final 2 sts (30)
Round 10 :
Ch 1, turn, 1 sc in each st and in each ch-sp across (30)
Round 11 :
Ch 1, turn, *ch 2, 1 sc in top of next puff cluster, ch 2, sk next sc* rep across to shape scallops (30)
Round 12 :
Ch 1, turn, 1 sc in each st (30)
Info :
Work decreases toward the tip by reducing stitches at both ends to form teardrop point. The puff clusters will remain vertical; finish with picot or shell edging for that scalloped look at the bottom point.
Round 13 :
Ch 1, turn, (3 sc, 1 dec) x 6 (24)
Round 14 :
Ch 1, turn, 1 sc in each st (24)
Round 15 :
Ch 1, turn, (2 sc, 1 dec) x 6 (18)
Round 16 :
Ch 1, turn, 1 sc in each st (18)
Round 17 :
Ch 1, turn, (1 sc, 1 dec) x 6 (12)
Round 18 :
Ch 1, turn, 1 sc in each st (12)
Round 19 :
Ch 1, turn, 6 dec (6) - draw up center point so the bottom tapers (6)
Info :
Fasten off leaving a long tail for sewing. Gently block the beard flat on a surface with pins to create the scalloped edges; steam or spray lightly with water if using cotton yarn. Ensure puff clusters face outward for texture.
— Beard Edging & Loopwork (adds scallop depth) :
Round 1 :
With cream yarn and 3.5 mm hook, join at top center of beard with sl st, ch 1, 1 sc in each st across top row to create a clean join line (approx 30)
Round 2 :
*Sk 1, (5 dc) in next st, sk 1, sl st in next st* rep across to create shell scallops down face center (approx 10 shells)
Round 3 :
1 sc around each shell and across edges to stabilize (approx 30)
Info :
These shell clusters produce the wide flowing beard look. Adjust shell height (use tr instead of dc) if you prefer longer loops. Make 4 beards, one for each gnome. Allow to dry after blocking before assembly.
— Hat (Tall cone with stripes and folded brim) :
Round 1 :
With green yarn and 4.0 mm hook, mr, 6 sc in mr (6)
Round 3 :
(1 sc, inc) x 6 (18)
Round 4 :
(2 sc, inc) x 6 (24)
Round 5 :
(3 sc, inc) x 6 (30)
Round 6 :
1 sc in each st (30)
Info :
We will build height by working even rounds and then a long taper to create the gnome hat curve. Change to stripe color (red) for decorative banding as noted below.
Round 7 :
1 sc in each st (30)
Round 8 :
Change to red yarn. 1 sc in each st (30)
Round 9 :
Change to green yarn. 1 sc in each st (30)
Round 10 :
Change to red yarn. 1 sc in each st (30)
Round 11-14 :
Alternate colors every round to create narrow stripes; 1 sc in each st (30)
Info :
Info :
For the cone taper, we will add decreases spaced irregularly to create the curved droop of the hat tip. Work decreases on the inner side of the cone so the point curls naturally when blocked.
Round 15 :
(6 sc, 1 dec) x 3 + (3 sc) (27)
Round 16 :
1 sc in each st (27)
Round 17 :
(4 sc, 1 dec) x 4 + (3 sc) (23)
Round 18 :
1 sc in each st (23)
Round 19 :
(3 sc, 1 dec) x 4 + (2 sc) (19)
Round 20 :
1 sc in each st (19)
Round 21 :
(2 sc, 1 dec) x 4 + (1 sc) (15)
Info :
To create the curled tip, stop decreasing and instead work a short tube of 8-10 rounds in alternating stripes, then fold and tack to retain curl. If making pom-poms, leave last 10 sts open to attach a small pom-pom ball.
Round 22 :
1 sc in each st (15)
Round 23-30 :
Alternate red and green every round, 1 sc in each st (15)
Round 31 :
(1 sc, 1 dec) x 5 (10)
Round 32 :
1 sc in each st (10)
Info :
Do not close top completely if you want to insert a pom-pom. For a folded brim effect, fold up 2-3 rounds of the bottom edge toward the outside and sew in place so the contrasting band shows as a cuff.
Round 34 :
Fasten off leaving long tail for sewing. If using a pom-pom, stuff a tiny bit into hat tip and sew through remaining sts to close around pom-pom base. Make 4 hats (alternate stripe sequences so runners look varied).
— Pom-Pom (small) :
Round 1 :
Wind yarn around small pom maker or cardboard until dense. Tie tightly in center. Trim to round ball. Optionally wrap in white yarn to create small white pom shown on one hat tip.
Info :
Sew pom-pom securely to hat tip with yarn tail. Use multiple passes and knot on the inside of the hat for security.
— Leaf Motif (Large Leaf) :
Round 1 :
With dark green and 3.5 mm hook: ch 8, sc in 2nd ch from hook, hdc, dc, tr, dc, hdc, sc in last ch. Turn to work other side of foundation, sc, hdc, dc, tr, dc, hdc, sc into remaining foundation chain (approx 16 sts)
Round 2 :
Ch 1, 1 sc in each st around; 3 sc in tip to round it (approx 18)
Round 3 :
*Ch 2, sk 1, 1 sc in next st* rep around to create serrated edge (approx 12 ch-2 loops)
Round 4 :
Work 1 sc in each sc and 3 sc in each ch-2 loop to form pointed serration (approx 24)
Round 5 :
Switch to variegated moss green for veins. Using FLO, 1 sc in each st BLO on previous round to create raised veins across leaf length (24)
Info :
Block each leaf flat and pin to shape. Make approx 36 large leaves for the runner clustered around gnomes (9 per gnome area). Adjust sizes by changing foundation chain length.
— Leaf Motif (Small Leaf) :
Round 1 :
Ch 6, sc in 2nd ch from hook, hdc, dc, hdc, sc; turn and work back down the other side to mirror (approx 12)
Round 2 :
1 sc in each st, ch 1, sl st to finish; fasten off (12)
Info :
Make 40-48 small leaves in mixed greens to fill gaps around berries and snowflakes. Small leaves are quick and add much of the runner's fullness.
— Berry Cluster (3-5 berry bunches) :
Round 1 :
With red yarn and 3.5 mm hook: mr, 6 sc in mr (6)
Round 3 :
(1 sc, 1 inc) x 6 (18)
Round 4 :
Fasten off leaving long tail. Roll into small tight ball and sew through center of cluster to make it round. Make 96-120 berries total (many are clustered in groups of 3 to 7).
Info :
Sew berries in tight clusters (3-7 per cluster) onto leaf patches. To create realist depth, stitch berries at different heights and tack one or two slightly under a leaf edge.
— Pinecone Motif (tiny textured cones) :
Round 1 :
With golden-brown and 3.5 mm hook: mr, 6 sc in mr (6)
Round 3 :
1 sc in each st (12)
Round 4 :
*Ch 2, sl st in same st* around to create looped scales (12 loops)
Round 5 :
Fasten off leaving tail and stitch loops down to form overlapping scale look. Stuff lightly if you like a dimensional cone. Make approx 12-16 pinecones.
Info :
Stitch pinecones into clusters near berry clusters and leaves for naturalistic texture. Alternate small pinecones with berries for color contrast.
— Snowflake Motif (6-point delicate motif) :
Round 1 :
With cream yarn and 3.5 mm hook: ch 5, sl st to form ring, ch 3 (counts as dc), 11 dc into ring, sl st to top of ch-3 (12 dc)
Round 2 :
*Ch 4, sl st in next dc* rep 6 times to form 6 points
Round 3 :
On each point: (sl st, ch 2, 1 sc, ch 2, sl st) to form tiny lacy star point; rep on each point (6 points)
Info :
Block snowflakes heavily to flatten and keep shape. Make 12 snowflakes distributed evenly across runner. Use cream to match beards and avoid color clash.
— Background Join and Border (Joining motifs into runner base) :
Round 1 :
Create a long background strip: using variegated green, ch 10, sc in 2nd ch from hook and across (9), turn, repeat rows until you have a strip the approximate length needed to anchor gnomes (about 48 in long when motifs are attached). This strip will be mostly hidden under leaves but acts as a spine for assembly.
Round 2 :
Using 3.5 mm hook, join motifs to the background strip with whip stitch or sl st as you pin each motif in place; leave slight gaps for clusters of berries and leaves to tuck in.
Round 3 :
Edge the entire runner with a scalloped green border: join yarn along long edges, *sk 1, 5 dc in next st, sk 1, sl st in next st* rep to create shell border along both sides. Finish ends with point edging by decreasing shells into small points.
Info :
Pin all pieces in place first: arrange large leaves to form a continuous leafy silhouette around each gnome head, layer beards on top, hat overlapping upper beard edge, sew noses centered on top of beards, then tuck berry clusters, pinecones, and snowflakes into negative spaces. Use extra long tails for sewing to ensure strong attachment.
— Assembly Sequence (Pin, Sew, Reinforce) :
Round 1 :
Lay background strip flat. Position first cluster of leaves for the bottom-most gnome area and pin. Add beard centered over those leaves so beard tip aligns with runner point. Sew beard in place with long tail using small whip stitch every 4-6 sts.
Round 2 :
Place nose centered 2-3 rows below top edge of beard where hat will sit. Sew nose firmly with a few passes through beard and the nose interior to anchor.
Round 3 :
Position hat overlapping top of beard and slightly forward so brim covers top edge of nose. Fold brim and tack if desired. Sew hat to background and to small top edge of beard to secure.
Round 4 :
Tuck small leaves and berry clusters around midsection, sewing clusters through a leaf base and into the background strip for stability. Sew pinecones in place with a few secure stitches through outer loops to imitate overlap.
Round 5 :
Add snowflakes last, tacking them down at two or three points so they sit flat without pulling nearby motifs. Reinforce any high-stress points with extra stitching through background strip.
Info :
Take time to hide stitches underneath motif edges and use matching yarn colors to keep seams invisible. For heavy usage, consider stitching motifs onto a fabric backing for extra durability and machine washing (use a washable cotton felt sewn invisibly to reverse side).
— Finishing Touches :
Round 1 :
Weave all ends through multiple stitches and trim. Use small amount of fabric glue inside pom-poms to stop shedding if desired. Steam block runner lightly to settle shapes and to make edges crisp.
Round 2 :
Add optional embroidered highlights: tiny gold French knots in berry clusters for realism, or white seed stitch on hat stripes to mimic embroidered speckles.
Info :
Final measurement will vary with motif spacing but expect approximately 48-52 inches long and 7-9 inches wide. Keep runner flat and store rolled or gently folded to preserve 3D motifs.
This Red Green Gnome Motif Table Runner is a delightful holiday project that turns small crocheted motifs into a dramatic, textured centerpiece. Each gnome is a little vignette — hat, nose, and flowing beard — surrounded by leaves, berries, pinecones and snowflakes that bring the design to life. The sense of accomplishment when you pin the final snowflake is so satisfying! 🧶✨ Hang onto this runner for yearly celebrations or gift it to someone who loves handmade holiday decor. Happy stitching and enjoy the cozy sparkle this brings to your table! 🎄