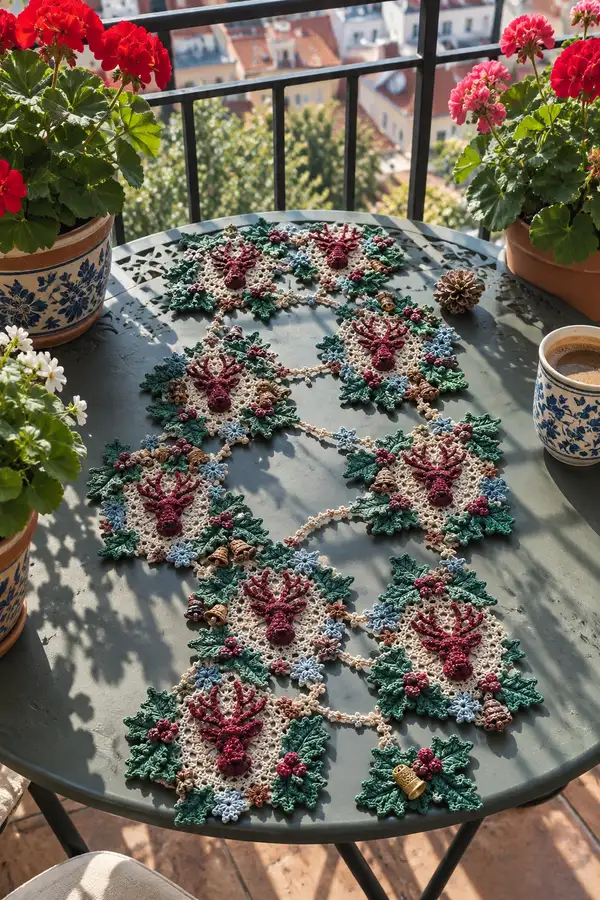
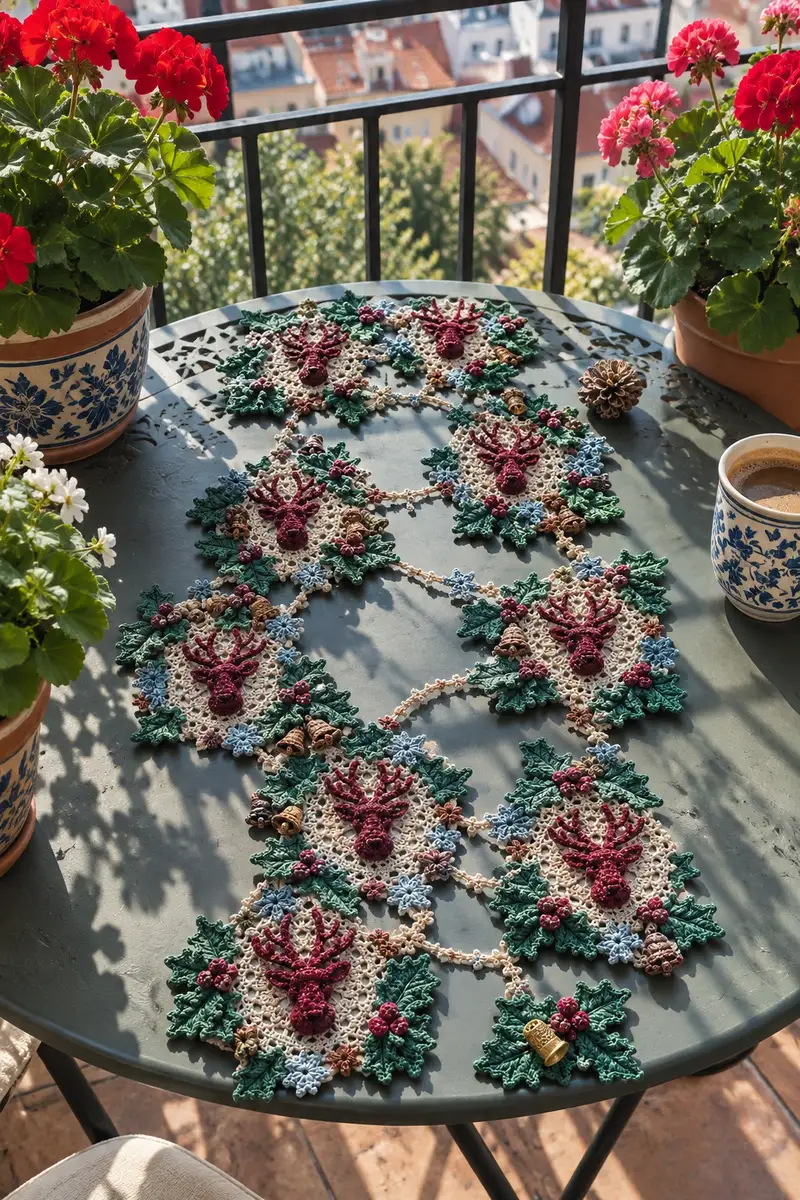
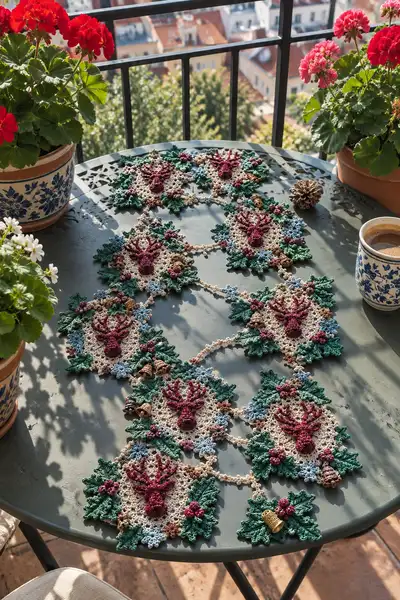
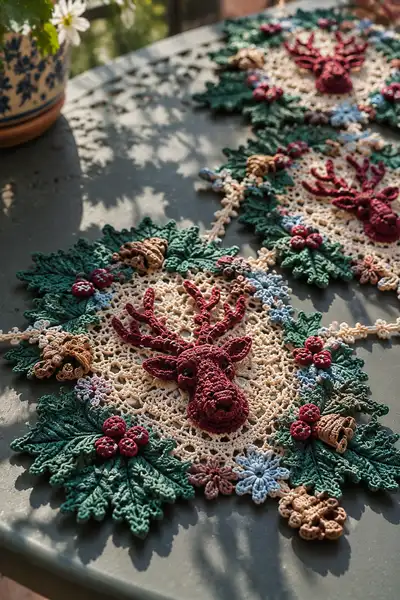
A festive, lacy table runner composed of linked oval doilies, each crowned with a three-dimensional burgundy reindeer head and surrounded by holly leaves, tiny blue snow-flowers and pinecone accents. The runner mixes delicate openwork cream lace with sculpted motifs in deep red, forest green and warm brown for a vintage holiday look. Ideal for a centerpiece or seasonal display, the motifs are made separately and connected with a decorative chain for flexible length. Detailed shaping and textured stitches create a striking 3D effect.
Progress Tracker
0% Complete
— Reindeer Head (make 1 per motif) :
Round 1 :
6 sc in magic ring (6)
Round 3 :
(1 sc, inc) x 6 (18)
Round 4 :
(2 sc, inc) x 6 (24)
Round 5 :
(3 sc, inc) x 6 (30)
Round 6 :
(4 sc, inc) x 6 (36)
Round 7 :
(5 sc, inc) x 6 (42)
Round 8 :
(6 sc, inc) x 6 (48)
Info :
This round-by-round increase builds a circular crown. Use burgundy thread for the 3D head. Keep tension even and place a stitch marker at start of each round
Round 9 :
1 sc in each st (48)
Round 10 :
1 sc in each st (48)
Round 11 :
1 sc in each st (48)
Round 12 :
(7 sc, inc) x 6 (54)
Round 13 :
1 sc in each st (54)
Round 14 :
1 sc in each st (54)
Info :
Eye placement: create small stitch-indented eye sockets by leaving two small open spaces for black glass or bead eyes. Place eye markers between rounds 12-14 and approximately 8-10 stitches apart depending on desired expression
Round 15 :
(7 sc, dec) x 6 (48)
Round 16 :
(6 sc, dec) x 6 (42)
Round 17 :
1 sc in each st (42)
Info :
Begin gentle shaping for the muzzle now. Stuff lightly around the crown area to give a lifted forehead but avoid overfilling the lower face which needs sculpting
Round 18 :
(5 sc, dec) x 6 (36)
Round 19 :
(4 sc, dec) x 6 (30)
Round 20 :
(3 sc, dec) x 6 (24)
Round 21 :
(2 sc, dec) x 6 (18)
Round 22 :
(1 sc, dec) x 6 (12)
Info :
At this point the face is narrowing. Start stuffing the head firmly, adding fiberfill in small amounts so you can shape the forehead and cheek hollows gradually
Round 23 :
1 sc in each st (12)
Round 24 :
1 sc in each st (12)
Round 25 :
Work 3 rounds of detail for brow ridge: Round 25: (1 sc, inc) x 6 (18)
Round 26 :
1 sc in each st (18)
Round 27 :
1 sc in each st (18)
Info :
Create facial indentations by working a short spiral of 6-8 sc across the front center for the snout base (we will attach a separate snout later). Keep the head round compact for strong 3D relief
Round 28 :
(2 sc, inc) x 6 (24)
Round 29 :
(3 sc, inc) x 6 (30)
Round 30 :
1 sc in each st (30)
Round 31 :
1 sc in each st (30)
Round 32 :
(3 sc, dec) x 6 (24)
Round 33 :
(2 sc, dec) x 6 (18)
Round 34 :
1 sc in each st (18)
Round 35 :
Fasten off leaving long tail for sewing. Finish stuffing head firmly and shape by hand to accent cheek and brow lines
Info :
We have created a slightly oblong head with upper brow area and narrowed lower face where we will attach the snout. Fasten off and reserve yarn tail for sewing to the doily base
— Snout / Muzzle (make 1 per head) :
Round 1 :
6 sc in magic ring (6)
Round 3 :
(1 sc, inc) x 6 (18)
Round 4 :
(2 sc, inc) x 6 (24)
Info :
Work the snout in burgundy. Keep stitches tight. This piece will be slightly domed and sewn to the lower front of the head
Round 5 :
1 sc in each st (24)
Round 6 :
(3 sc, dec) x 6 (18)
Round 7 :
(2 sc, dec) x 6 (12)
Round 8 :
(1 sc, dec) x 6 (6)
Info :
Stuff snout firmly with a small amount of fiberfill to create a rounded tip. Fasten off leaving long tail for applique sewing. Add a stitch-embroidered nostril line using a darker burgundy or black thread if desired
— Ears (make 2 per head) :
Round 1 :
6 sc in magic ring (6)
Round 3 :
(1 sc, inc) x 6 (18)
Round 4 :
(2 sc, inc) x 6 (24)
Round 5 :
1 sc in each st (24)
Round 6 :
1 sc in each st BLO (24)
Round 7 :
(2 sc, dec) x 6 (18)
Round 8 :
(1 sc, dec) x 6 (12)
Info :
Shape the ear by folding slightly and sewing the base to flatten; fasten off leaving a long tail for sewing to the head between rounds 9-12
— Antlers (make 2 mirrored branches) :
Round 1 :
6 sc in magic ring (6)
Round 3 :
1 sc in each st (12)
Round 4 :
(3 sc, inc) x 3, 1 sc in each remaining st (15)
Round 5 :
Work 5 sc along the first branch stem (15)
Round 6 :
Fold and work picot/turn: ch3, sl st in base to create a fork; continue with 5 sc along new fork (15)
Info :
Antlers are created as a central stem with worked-offshoots. Use burgundy or slightly darker thread. For sturdier antlers insert a thin floral wire through the stem before stuffing or after 6-8 rounds
Round 7 :
Add a second fork: ch4, sl st back along fork base, then 4 sc along the fork (15)
Round 8 :
Work two short branches on the opposite side using ch3 picot points; finish with 1 sc around stem (15)
Round 9 :
1 sc in each st (15)
Round 10 :
Work shaping to create a tapered end: (3 sc, dec) x 3 (12)
Round 11 :
(2 sc, dec) x 3 (9)
Round 12 :
(1 sc, dec) x 3 (6)
Round 13 :
1 sc in each st (6)
Round 14 :
Fasten off leaving long tail. If using wire, insert and wrap wire with leftover thread before final sewing to the head
Info :
Create mirror-image antlers by reversing forks on the second antler. Block lightly if working with thread to keep the forked shapes open
— Doily Oval Base (make multiple motifs) :
Round 1 :
6 sc in magic ring (6)
Round 3 :
(1 sc, inc) x 6 (18)
Round 4 :
(2 sc, inc) x 6 (24)
Round 5 :
(3 sc, inc) x 6 (30)
Round 6 :
1 sc in each st (30)
Round 7 :
Switch to cream if not already. (4 sc, inc) x 6 (36)
Round 8 :
1 sc in each st (36)
Round 9 :
(5 sc, inc) x 6 (42)
Info :
This is the foundation for the lacy oval. Use a small hook for thread to keep the fabric fine and lacy. Keep the rounds relatively flat by blocking later
Round 10 :
1 sc in each st (42)
Round 11 :
Work a circle-to-oval increase: at two opposite points (the top and bottom of the oval) work (inc, inc) over two stitches to elongate the circle; overall stitch count becomes 46
Round 12 :
1 sc in each st (46)
Round 13 :
Begin open lace: *ch5, skip 3 sts, sc in next* repeat around to create small arches (46)
Round 14 :
Into each ch5 arch work: sc, ch3, 3 dc, ch3, sc to produce lacy petal arches (approx 46 petals)
Round 15 :
1 sc in each st (46)
Round 16 :
Work a decorative lace row: *ch4, sl st into mid of next petal* repeat creating connecting chains around the oval
Info :
The doily base is intentionally lacy to show the table surface and create contrast with the raised reindeer head. Block each oval to measured dimensions before assembling to ensure even joins
Round 17 :
Even round: 1 sc in each st alternated with sl st into chain loops to keep edge neat (46)
Round 18 :
Work small scallops: *(3 dc, ch2, 3 dc) in next sc, skip 1 sc* around (23 scallops)
Round 19 :
1 sc in each st (46)
Round 20 :
Add decorative picot cluster row into scallop tips: *sl st, ch3, sl st in same* (46 picots)
Round 21 :
1 sc in each st (46)
Round 22 :
Create small inner star-lace by working from inside: pick up inner loops and work ch6 loops connected by slip stitches forming tiny open flowers across inner oval (pattern varies)
Round 23 :
1 sc around inner framework to stabilize (46)
Round 24 :
Work final edge row of small points: *(1 sc, ch3, sl st in base) repeat around to create delicate fringe (approx 92 points)
Round 25 :
Fasten off and block to oval shape. Leave long tails at top and bottom join points for assembly
Info :
Make as many oval doilies as you need for runner length. The sample photos show 6 large motifs linked; measure your table and plan motif quantity accordingly
— Holly Leaf (make 4 per motif) :
Round 1 :
8 sc in magic ring (8)
Round 2 :
ch1, 2 sc in each st around (16)
Round 3 :
Work leaf base: ch4, sl st in 3rd ch from hook then continue around in short rows to form pointed tip; work 6 sc along top center (16)
Round 4 :
Along one side: *(hdc, dc, tr, picot, tr, dc, hdc) in sequence to create serrated edge* repeat mirror on opposite side (16)
Round 5 :
1 sc in each st around to stabilize (16)
Round 6 :
Work veins: use surface slip-stitch technique along center and diagonals to suggest leaf vein texture; fasten off (no stitch count change)
Info :
Use dark green thread. Make the veins by pulling yarn across the leaf surface with a tapestry needle to create raised lines if preferred
Round 7 :
Optional: add small picot edging along serrated tips: *ch3, sl st in base* repeat.
Round 8 :
Block leaf flat by pinching serrations outward so it sits naturally on the doily edge; leave long tail for sewing
— Holly Berry Cluster (make groups of 3 per cluster) :
Round 1 :
6 sc in magic ring (6)
Round 3 :
1 sc in each st (12)
Round 4 :
Fasten off leaving long tail. Make 3 small spheres and sew them together into a tight cluster attached to leaf junctions
Info :
Sew berry clusters in groups of 3 and tack them securely through the doily and the leaf base to hold them in place against the 3D head
— Pinecone Accent (make 1-2 per motif) :
Round 1 :
6 sc in magic ring (6)
Round 3 :
1 sc in each st (12)
Round 4 :
Create scales: *ch3, sl st in base along a spiral, skip 1 st* around to produce layered scales (12)
Round 5 :
Continue spiral layers to form cone shape (12)
Round 6 :
Finish with a small picot tip and fasten off leaving tail to sew. Optionally stuff very lightly to keep cone rounded
Info :
Vary color between tan and light brown for natural effect. Make two or three nested spirals to produce the realistic pinecone look
— Small Flower Accent (make multiple per motif) :
Round 1 :
6 sc in magic ring (6)
Round 2 :
ch3, (2 dc, ch3, sl st) into same st to create petal, repeat x5 for 6 petals (6 petals)
Round 3 :
Fasten off leaving tail to sew into place at four corners of the oval between holly leaves
Info :
Work small flowers in dusty blue to echo the photos. Use a small hook for tight, crisp petals. Sew flat onto doily base so they read as appliques
— Connector Chain (make units to link motifs) :
Round 1 :
ch20, sl st into 2nd ch from hook forming a delicate chain (20)
Round 2 :
Along chain work small picot embellishments: *ch3, sl st in same ch* every 4th ch to create decorative nodes
Round 3 :
At ends create a small loop of ch6, secure with sl st for joining to oval edge
Info :
The connector chain is intentionally light and lacy so the runner remains flexible. Make as many as necessary to create the offset linked layout shown in the photo
— Edging & Final Decorative Border :
Round 1 :
With cream thread around outermost joins, work *ch3, sl st into gap* across each motif joint to create an even joining row
Round 2 :
Work a scalloped edge around the entire runner: *(3 dc, ch2, 3 dc) in every join point* repeat (scallop count depends on total joins)
Round 3 :
Finish with tiny picot tips in gold or cream: *ch3, sl st in base* at each scallop tip
Info :
Block the entire assembled runner flat, pinning gently to shape. Steam or spray-block to set the lace and keep the runner neatly shaped
— Assembly, Placement & Embellishment Notes :
Info :
Layout all motifs face down on blocking mats, placing doily ovals in desired sequence. Position reindeer heads centered in oval, then place holly leaves symmetrically around lower sides and floral accents between leaves before sewing
Info :
Sew the reindeer head to the doily using long tail from head rounds; use hidden ladder-like stitches through rounds 28-32 of the head and multiple rounds of the inner oval to secure. Attach antlers to head before final sewing if using wire
Info :
Attach berries clusters where three leaves meet; position small pinecone accent at a lower corner of each motif for visual weight. Use tiny stitches through several doily rounds rather than single surface stitches for durability
Info :
After sewing motifs to their own doilies, use connector chains to link ovals at four equidistant points around each motif, alternating sides to achieve the offset layout in photos. Reinforce connector loops with a few extra stitches if the runner will be moved often
Info :
Weave in all tails neatly to the back, and lightly spray with fabric starch for crispness if desired. Add tiny stitched metallic bell or bead if you want a little jingling accent
This reindeer motif runner is a joyful project that brings together lacy crochet and sculptural motifs for a beautiful holiday centerpiece. Each motif feels like a tiny framed portrait, and the linked design gives you freedom over the runner length and placement. The layered textures — openwork cream lace, dense burgundy heads, leafy greens and tiny pinecone shapes — create depth and warmth on any table. 🧶🎄 Enjoy the slow, satisfying process of making each piece and then watch them come together in a charming, festive display!