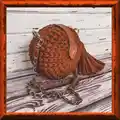
About This Round Bag with T-shirt Yarn Pattern
This pattern teaches you how to crochet a compact round bag using t-shirt yarn, creating a firm circular base and a decorative trim. You will assemble two crocheted panels, add hardware like snap hook-rings and a magnetic valve, and finish with a braided chain and handmade tassel. The instructions are beginner-friendly and include steaming and finishing tips for a polished result.
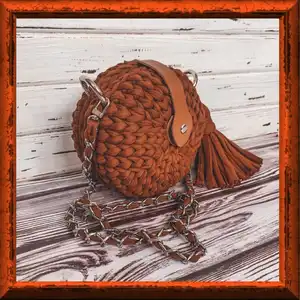
The finished bag measures approximately 7-8 inches (18-20 cm) in diameter and about 4 3/8 inches (11 cm) in width using the recommended materials. Full materials list, gauge information, and step-by-step photos are included to guide you.
Why You'll Love This Round Bag with T-shirt Yarn Pattern
I absolutely love this pattern because it turns simple t-shirt yarn into a chic, wearable accessory with minimal tools required. I enjoy how fast the circular base grows and how satisfying the steam-blocking step is for a professional finish. I also appreciate that the pattern is beginner-friendly yet allows room for creativity with straps and tassel designs. Making the chain and adding hardware always makes me feel like I finished a boutique-quality piece, and I enjoy gifting these to friends.
Switch Things Up
I love changing the color to create seasonal looks; try warm autumn tones or pastel shades for spring.
To make the bag larger, use bulkier t-shirt yarn or a larger hook for a chunkier, more spacious purse.
For a mini version suitable as a keychain, use thinner yarn and a smaller hook to scale the pattern down.
I often add a fabric lining to prevent small items slipping through and to give extra structure—use light cotton and hand-sew it in place.
Swap the magnetic snap for a zipper for extra security, or add a decorative buckle for vintage style.
Try different strap options: a fully crocheted strap, a leather strap for a refined finish, or a woven fabric strap for contrast.
Embellish the front panel with embroidery or sewn-on beads to make a personal statement piece.
Make multiple tassels in contrasting colors and cluster them together for a boho-chic accent.
I sometimes add an inner pocket by sewing a small fabric pouch to the lining to keep keys and cards organized.
Experiment with mixed materials by combining t-shirt yarn panels with macrame or leather details for a modern hybrid accessory.
Common Mistakes & How to Fix Them
✗ Not checking the yarn orientation and pulling from the outside of the bobbin; always pull the thread from the outside to avoid twisting and messy loops.
✗ Skipping the split single stitch technique can create visible holes; insert the hook between the legs of each stitch to split it and keep a neat fabric.
✗ Cutting the thread before steaming can make the base lose its shape; do not cut the thread until after steaming the circle and finishing the trim.
✗ Failing to hide and strengthen thread ends when joining parts can weaken seams; always secure and bury thread ends on the wrong side for durability.