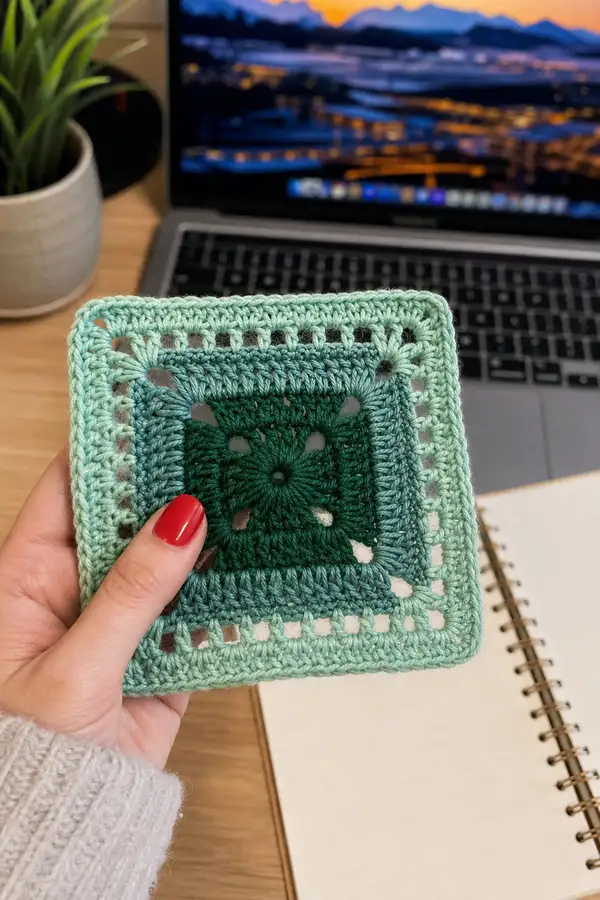
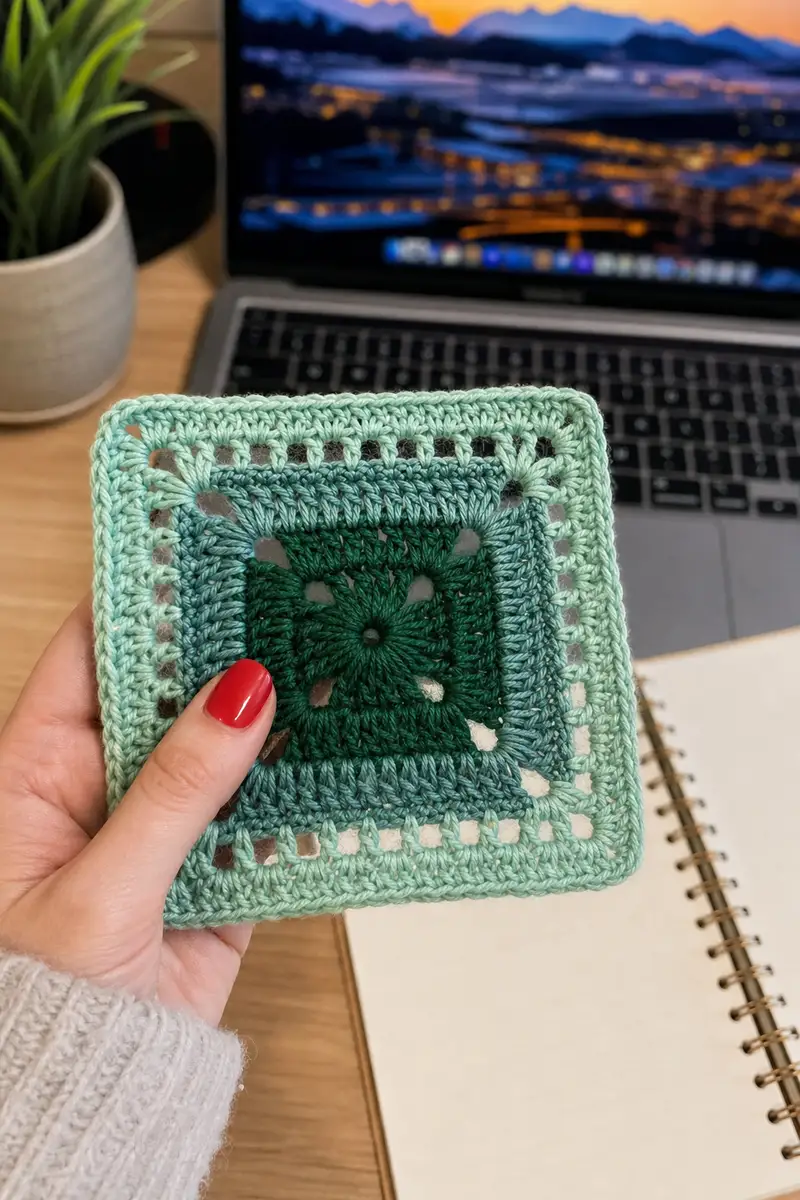
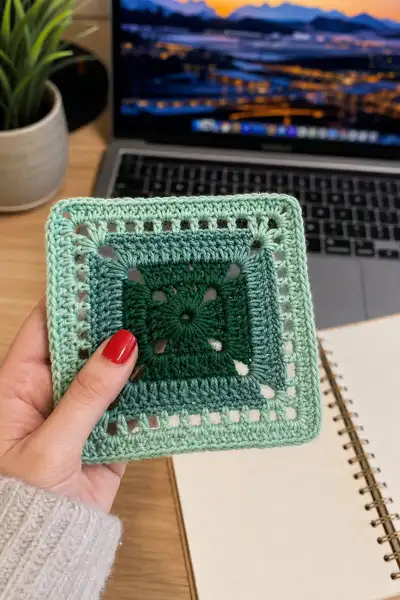
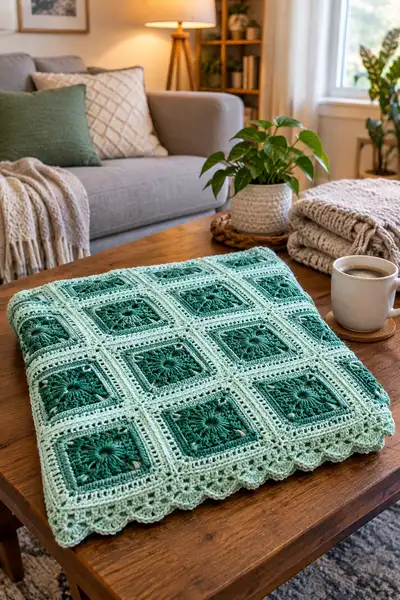
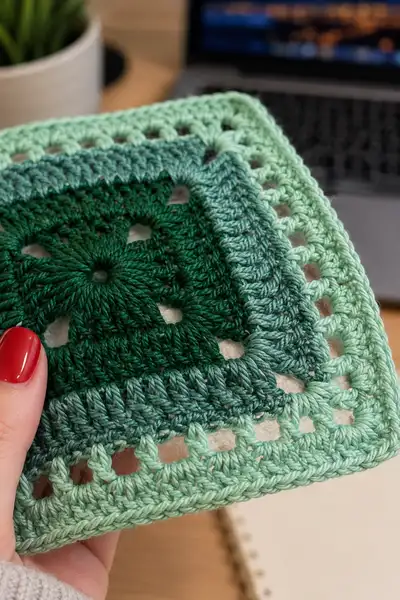
A calming sage green square bedspread made from textured floral-inspired crochet squares joined into a luxurious throw or full bedspread. This pattern uses graduated greens for depth, openwork chain spaces for lightness, and a scalloped shell border for a finished, romantic edge. Ideal for a cozy bedroom accent or special handmade gift, the pattern includes full square instructions, join-as-you-go options, and a multi-round decorative edging.
Progress Tracker
0% Complete
— Square Motif (Make 1 square to start and use as gauge) :
Round 1 :
Make a magic ring. Ch 3 (counts as first dc), work 15 dc into the ring. Join with sl st to top of ch-3. (16)
Info :
Use Deep Forest Sage for the center rounds. Keep your first round tight; the magic ring closed neatly will form a compact center medallion.
Round 2 :
Ch 3 (counts as dc), dc in same st, *ch 1, 2 dc in next st* around to create 8 groups. Join with sl st to top of ch-3. (32 dc; 8 ch-1 spaces)
Round 3 :
Ch 1, sc in same st, *ch 3, skip next 3 dc, (puff cluster: yarn over, insert hook, pull up loop, yarn over pull through 2 loops) repeat puff 3 times into same stitch space then yarn over and pull through all loops on hook to form a 3-puff cluster, ch 1, sc into next dc* repeat across around to form 8 clustered petals. Join with sl st. (Pattern work does not change total simple stitch count because clusters replace groups)
Info :
This round creates the raised floral 'petals'. Keep puff clusters consistent in height. Tighten each cluster by pulling the final loop evenly for a tidy centre.
Round 4 :
Change to Mid Sage. Ch 1, sc in same st, *ch 2, sc in center of next petal cluster* around to create 8 ch-2 spaces between petals. Join with sl st. (8 ch-2 spaces)
Round 5 :
Ch 3 (counts as dc), in each ch-2 space work: (2 dc, ch 2, 2 dc) to form a corner. Between corners, work 6 dc evenly across each side (work dc into top of petal cluster or into stitches as available). Complete 4 corners. Join with sl st. (Total sts: corners add 16 dc + side dcs; mathematically: 4 corners x 4 dc = 16 dc plus 4 sides x 6 dc = 24 dc → 40 dc)
Info :
At this round we form the first square corners. Count your side dc to keep square proportions even. If you have fewer loops along a side, adjust by adding or removing a dc or using ch-1 spaces to distribute evenly.
Round 6 :
Ch 3, 2 dc in same corner space (the ch-2 corner), *dc in next 6 sts along side, (2 dc, ch 2, 2 dc) in next corner space* repeat around. Join with sl st. (Perimeter count = previous total + 8 dc (two extra per corner) + 24 side dc = 48 dc)
Round 7 :
Ch 3, dc in same st, dc in next 8 sts across side, (2 dc, ch2, 2 dc) in corner ch-2 space; repeat for all 4 sides. Join. (Each side now has 10 side dc; total = 4 corners x 4 dc (16) + 4 sides x 10 dc (40) = 56 dc)
Info :
Check your work at this stage: the square should lie flat without cupping (too tight) or ruffling (too loose). Adjust by shifting one dc forward or back along a side to balance if necessary.
Round 8 :
Ch 3, dc in same st, dc in next 10 sts along side, (2 dc, ch2, 2 dc) in corner; repeat around. Join. (4 sides x 12 side dc = 48 side dc + 16 corner dc = 64 dc)
Round 9 :
Change to Soft Mint Sage for lighter outer rounds. Ch 2 (counts as hdc), hdc in same st, hdc in each of next 14 sts across side, (hdc, ch 2, hdc) in corner ch-2 space to build slightly shorter stitches that prepare for open chain round. Join. (Per side 16 hdc; total 4 sides x16 = 64 hdc)
Info :
Switching to hdc gives a subtle step down in stitch height before the openwork chain round. Carry color carefully or fasten off and join new color to maintain a cleaner join line.
Round 10 :
Ch 1, sc in each hdc across side, in corner work (sc, ch 3, sc) into ch-2 corner space to create an airy corner space. Repeat around. (Sc count = 64 sc plus corner chain spaces)
Round 11 :
Ch 3 (counts as dc), *ch 2, sk 1 sc, dc in next 2 sc* across each side to make evenly spaced chain/windows; in corner work (dc, ch2, dc) into corner ch-3 space. Join. (This forms 8 openwork chain windows per side approximately; total stitch count will be even and depends on distribution; maintain even spacing)
Info :
The open chain windows in this round create the visible holes seen in the photo. Maintain even spacing by counting stitches on the first side and mirroring for remaining sides.
Round 12 :
Final square stabilization: Ch 1, sc in each st and dc across, placing 3 sc into each corner ch-2 space to box the corner firmly. Fasten off and weave in ends. Final square stitch count will be around 80-100 stitches depending on distribution. Block each square to exact gauge before assembly. (Approx total 80-96 stitches)
Info :
Block squares to a 9.5" (24 cm) square (example gauge). Adjust block size to match your desired number of squares for bed size. Blocking evens edges and makes joining easier.
— Making Multiple Squares & Color Gradient :
Info :
Create squares by repeating Rounds 1-12. For a gentle gradient like the photo, use Deep Forest for rounds 1-3, Mid Sage for rounds 4-7, and Soft Mint for rounds 8-12. Weave in tails as you go or carry colors up to two rounds if comfortable.
Round 13 :
Repeat square Rounds 1-12 for each motif. Make as many squares as your bedspread requires: example counts — Twin 6 x 8 = 48 squares; Full/Queen 8 x 9 = 72 squares; King 9 x 10 = 90 squares. These counts assume a 9.5" finished square; adjust for your blocked size.
Info :
Keep a consistent color rotation so squares sit harmoniously. Lay out squares in the color progression pattern before joining to ensure an even overall gradient across the bedspread.
— Join Options (Pick One) :
Method A - Sew Join :
Use matching Soft Mint yarn and mattress stitch or whip stitch to join finished squares. Align squares right sides together and sew through back loops only of each square to create a flat seam. This method creates a visible seam but is strong and stable.
Info :
When sewing, place stitch marker at the center of each side to ensure even seam spacing. Use a blunt yarn needle and long tails for neat seams. Weave tails into seam on both sides after sewing for a clean finish.
Method B - Join-As-You-Go (JAYG) :
Join squares on the final round by working the last round of a square and slip-stitching into corresponding spaces of adjacent, already-joined squares. Work side by side: start with first square (A). For square B, work to last round; when you reach corner and side spaces, sl st into corresponding ch spaces on square A instead of ch-joining, creating a flat seam. Continue row by row.
Round 14 :
If using JAYG, during the final round of each square perform: *work 2 dc in ch space, ch 1, sl st into corresponding ch space of joined square, ch 1* to form a neat bridge; in corners work (2 dc, ch 2, 2 dc) and sl st into corner ch-2 of neighbor. Repeat for all joins. After joining rows, weave ends on join side. (Counts depend on number of joins; each sl st replaces one ch or dc so total stitch numbers mirror the original square)
Info :
JAYG produces a continuous fabric with no bulky seams on the front. Practice on two test squares to get consistent tension when sl stitching into existing squares.
— Assembling Field (Overall rounds per assembly) :
Round 15 :
Create a layout on the floor or bed following your planned color gradient. If using sewn joins, work by rows: sew first row of squares together along long side, then stack and sew row-to-row. For JAYG, join squares in rows then join rows together using same method.
Round 16 :
If you are aiming for Full/Queen size (example 8 x 9 = 72 squares), plan to assemble 9 rows of 8 squares. Mark the center point of the bedspread and work outward symmetrically to keep pattern balanced.
Info :
Check for slight size variations between batches of squares. If one row is slightly longer, you can add 1-2 extra stitches in the seam or use a single-row slip-stitch join to even edges before starting the border.
Round 17 :
Once all squares are joined into a single panel, measure final dimensions and trim any irregular edges by adding an extra sc round to create a perfectly rectangular edge if needed. Sc around the entire perimeter placing 3 sc in each corner space to square the work. (Perimeter count = dependent on panel width; measure and work evenly.)
Info :
At this stage the panel should be one continuous fabric. Blocking the entire panel flat before the border makes measuring and edge work far easier.
— Border Preparation & Stabilizing Rounds :
Round 18 :
Switch to Soft Mint yarn for border. Ch 1, sc evenly around outer edge of the panel, placing 3 sc in each corner to maintain square corners. Join with sl st. This creates a clean frame to build the decorative border on. (Total sc depends on perimeter. Example for 8 x 9 squares of 9.5" each: perimeter approx 2*(8*9.5)+2*(9*9.5) = 2*(76)+2*(85.5) = 152+171=323" — convert to stitch counts using your gauge; work evenly.)
Info :
When sc-ing around the finished panel, aim to place 1 sc per 1/4" to 3/8" depending on your gauge so the border doesn't pucker. Tension here determines the final lay of the bedspread.
Round 19 :
Ch 2 (counts as hdc), hdc in each sc around, placing (hdc, ch 2, hdc) at each corner. Join with sl st. This slightly raises the border to accommodate the shell scallop in later rounds. (Total st = approximately equal to Round 18 count)
Info :
If your edge is slightly too tight, switch to a 4.5mm hook for border rounds. A looser hook gives a better drape for a bedspread edge.
— Decorative Openwork Rounds :
Round 20 :
Ch 3 (counts as dc), *ch 2, sk next st, dc in next st* repeat around to create a row of airy arches. At corners work (dc, ch 2, dc) in corner space. Join. (Perimeter remains the same number of dc placements; ch-2 spaces add visual separation.)
Round 21 :
Ch 1, sc in each dc and in each ch-2 space work (sc, ch 1, sc) to define the openwork. Join. (Stitch count similar to previous round)
Info :
These openwork rounds echo the small windows visible between squares in the photo and lighten the overall fabric while keeping a continuous border look.
— Main Border Build (Multiple Rounds for Depth) :
Round 22 :
Ch 3, work 2 dc in same st, *dc in next 4 sts, (2 dc, ch 2, 2 dc) in next corner* repeat around. This expands border width and builds bulk for the scallop foundation. Join. (Total count increases by 8 dc due to corner increases and side repeats.)
Round 23 :
Ch 3, dc in each st across side, maintaining corner groups (2 dc, ch2, 2 dc). Join. (Perimeter count increases according to the number of dc per side; mathematically add the number of side dc walked)
Round 24 :
Ch 1, sc in each dc around to tidy stitches and create a firm base for the scalloped edging. Join. (Stitch count equals number of dc from previous round)
Info :
Repeat these build rounds until the border reaches approximately 2"-3" wide beyond the squares (this may require 2-4 rounds depending on gauge). Building a firm base ensures the scallop sits nicely.
— Decorative Scallop Edge (Shells) :
Round 25 :
Ch 1, *skip next 2 sts, in next st work (5 dc) shell, sk next 2 sts, sl st in next st* repeat around. At corners work sl st into corner sc then shell into corner to maintain flow. Join. (Number of shells depends on perimeter; shells placed every 6-7 stitches produce a balanced scallop.)
Round 26 :
Ch 1, sc in each st and in the center of each shell work (sc, ch 1, sc) to define scallops. Join. (Stitch count approx equal to previous round sc count plus shell centers)
Round 27 :
Optional: Repeat Round 25 for a fuller scallop (double-shell). Work *sl st to center of shell, (7 dc) in center, sl st to next shell center* repeat around. Join and fasten off. Weave in ends and block scalloped edge for crisp shells.
Info :
Blocking scallops individually with pins and light steam brings out a professional ripple. Use a damp cloth and iron steam without touching yarn directly to avoid flattening the shells.
— Pillow Sham (Make 2) :
Round 1 :
Make one square motif following Square Rounds 1-12. For pillow size, make 4 squares and join as a 2x2 panel to form a sham front (example finished size ~19" square). (Square counts per motif same as earlier)
Round 2 :
Join 4 squares using Method A (sew) or Method B (JAYG). After joining, add one sc round around assembled panel to square the edges and create a neat seam. (Sc count dependent on panel perimeter.)
Round 3 :
Work 3 rounds of border matching bedspread Rounds 19-21 to create coherence: hdc round, openwork arch round, sc tidy round. Fasten off and weave ends. Create a simple back panel of fabric or a crocheted plain double crochet rectangle slightly larger than the front and add a zipper or envelope closure.
Info :
For pillow backs use a tighter gauge or smaller hook to ensure the insert is held firmly; an envelope back is quickest and requires no hardware.
— Finishing Rounds & Final Details :
Round 4 :
Inspect the entire bedspread. Weave in any stray ends using a tapestry needle and hide ends into seams or border rows. Use blocking to flatten and square the entire spread. If any joins feel loose, add a background sc row to reinforce.
Info :
If you plan to launder the bedspread, use yarn labeled machine washable, and test a small swatch to avoid felting or running of colors. Consider adding a gentle fabric wash and air dry flat.
Round 5 :
Trim any visible tails close to fabric after weaving them in at least 1" length into the piece so they do not unravel. Use small drops of fabric glue on delicate tails if desired for extra security, but hide glue well to avoid stiff spots.
Info :
Store bedspread flat or folded loosely to preserve scallop shape. Avoid hanging long-term to prevent stretching under its own weight.
— Gauge & Size Notes :
Info :
Gauge example (blocked): one finished square = 9.5" (24 cm). Using this gauge, Full/Queen (72 squares) finished size approximates 72 x 9.5" by 8 x 9.5" arrangement ~ 76" x 85.5" (approx). Adjust final square count for exact bed size. Always block and measure a finished square before committing to number of squares.
Info :
Swatch test: Make two squares and join them to test seam behavior; if seam puckers, adjust hook size or stitch distribution for sides when making remainder of squares.
Completing this sage green square bedspread is such a satisfying journey — each square feels like planting a little patch of garden that grows into a serene, cozy whole. The scalloped border gives a polished, vintage-inspired finish that elevates any bedroom. I hope working through these squares becomes a relaxing ritual you look forward to. 🧶 Enjoy the slow, mindful rhythm of stitching and the beautiful result that will welcome many cozy nights. 🌿✨