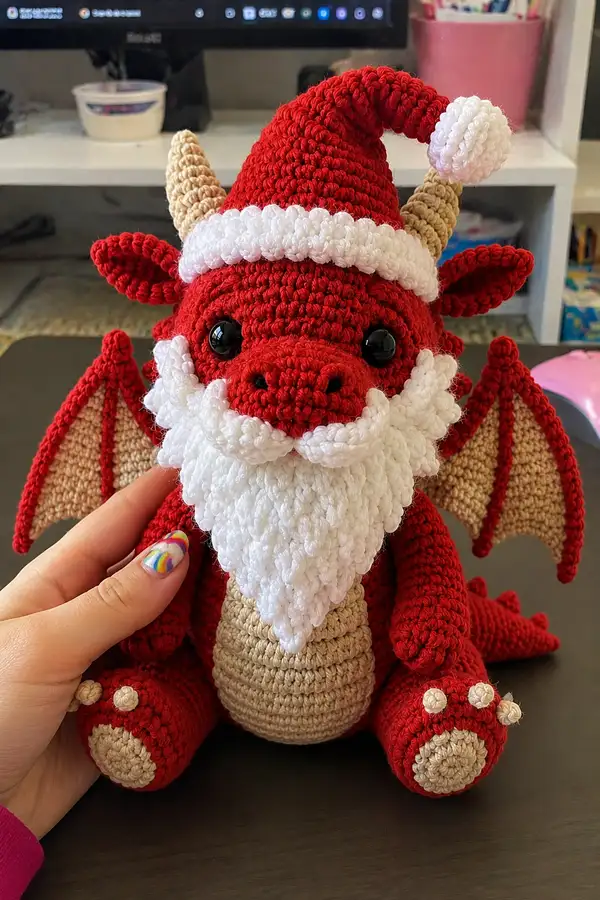
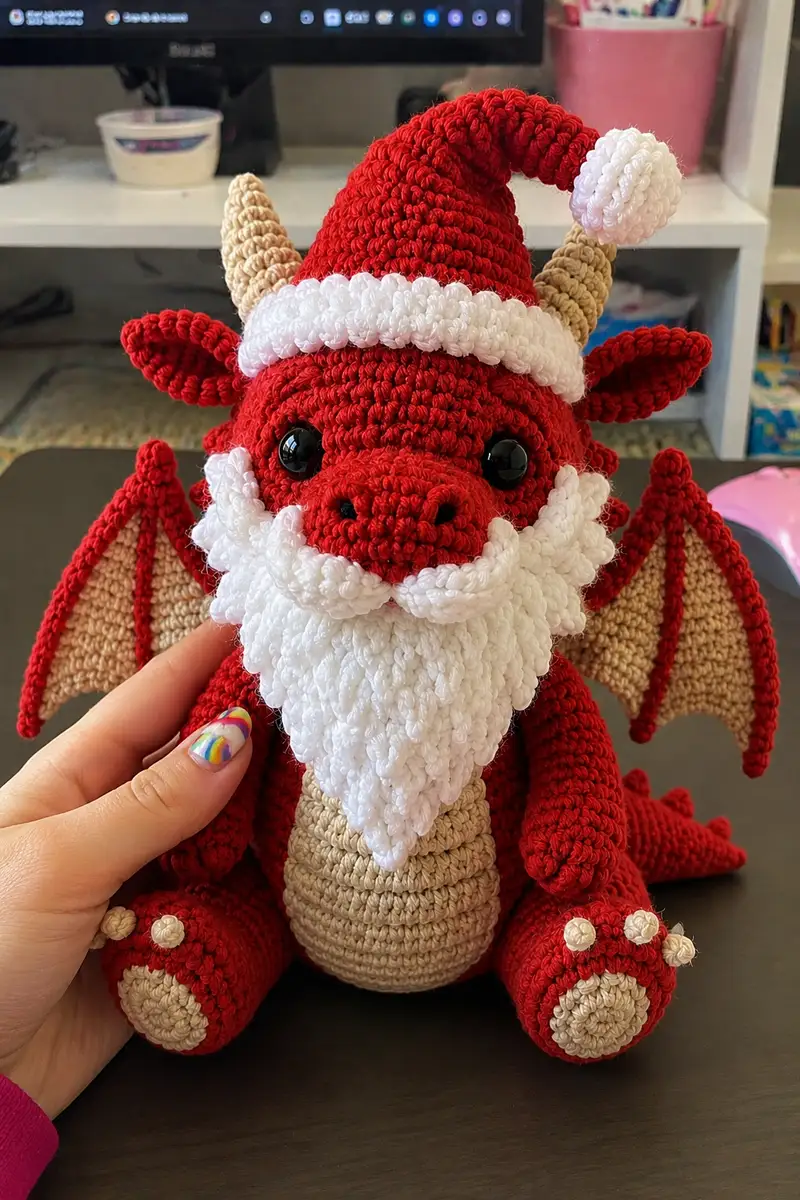
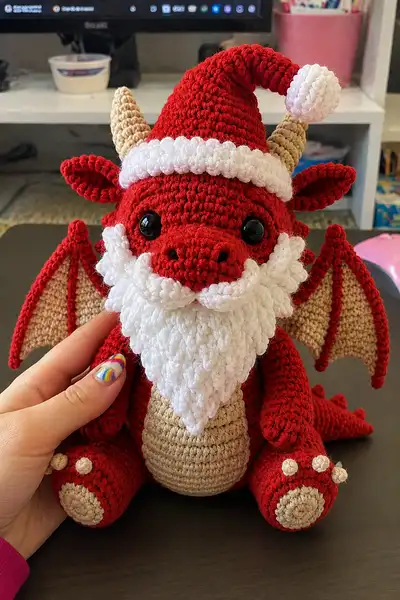
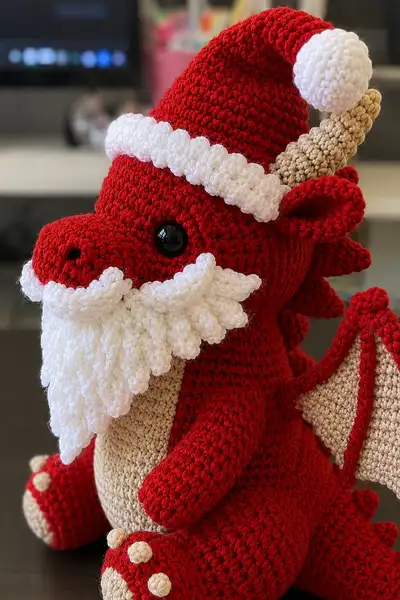
This festive Santa Dragon is a charming amigurumi mashup of a cuddly dragon and holiday Santa — deep red body, beige belly and horns, and a fluffy white beard and hat trim. The pattern includes full round-by-round instructions for head, body, limbs, wings, horns, beard, Santa hat and pompom. Designed to be made with worsted weight yarn and safety eyes, this plush dragon is perfect for gifting or holiday display.
Progress Tracker
0% Complete
— Head :
Round 1 :
6 sc in magic ring (6)
Round 3 :
(1 sc, inc) x 6 (18)
Round 4 :
(2 sc, inc) x 6 (24)
Round 5 :
(3 sc, inc) x 6 (30)
Round 6 :
(4 sc, inc) x 6 (36)
Round 7 :
(5 sc, inc) x 6 (42)
Round 8 :
(6 sc, inc) x 6 (48)
Round 9-14 :
1 sc in each st (48) (work 6 rounds even: 9,10,11,12,13,14)
Info :
Place safety eyes between rounds 13 and 14, approximately 10-12 stitches apart for the look in the photo. Use stitch markers to mark eye placement. If using embroidery for eyes, mark center position now.
Round 15 :
(6 sc, inc) x 6 (54)
Round 16-18 :
1 sc in each st (54) (three rounds even)
Info :
This larger section gives the forehead height and room for horns and hat brim. Mark the top-center stitch if you want the hat to sit aligned. Also mark positions for horns approximately 8-10 sts from center on either side depending on your preference.
Round 19 :
(6 sc, dec) x 6 (48)
Round 20 :
(5 sc, dec) x 6 (42)
Round 21 :
(4 sc, dec) x 6 (36)
Info :
Begin stuffing the head firmly but not overstuffed. Use small amounts at a time and push stuffing into forehead and cheek areas with a stuffing tool or blunt pencil.
Round 22 :
(3 sc, dec) x 6 (30)
Round 23 :
(2 sc, dec) x 6 (24)
Round 24 :
(1 sc, dec) x 6 (18)
Round 25 :
6 dec (6) — OR work (1 sc, dec) x 6 to leave a 12-st opening if you prefer for neck insertion (12)
Info :
If you are attaching the head to the body by sewing around a neck opening, fasten off leaving a long tail when the opening is about 12 sts (recommended). If you prefer to close completely and later attach via ladder stitch, fasten off at 6 sts. I recommend leaving 12 sts for easier joining to body.
— Snout / Muzzle :
Round 1 :
6 sc in magic ring (6)
Round 3 :
(1 sc, inc) x 6 (18)
Round 4 :
(2 sc, inc) x 6 (24)
Round 5-7 :
1 sc in each st (24) (three rounds even for a short muzzle length)
Round 8 :
(2 sc, dec) x 6 (18)
Round 9 :
(1 sc, dec) x 6 (12)
Info :
Stuff muzzle firmly to hold its rounded shape. Before the final rounds, position nostril embroidery or tightly sew a small black stitch where the nostrils should sit (center top of muzzle). Leave a long tail to sew muzzle to head; position slightly below eye line on the head and sew securely around the base.
Round 10 :
6 dec (6). Fasten off leaving long tail for sewing (or stop at 12 sts if you prefer a flange to tack in place).
— Beard (Fluffy White Section) :
Info :
The beard is made from clustered puff or bobble-style stitches worked in small triangular panel pieces and a curved upper mustache piece. Work with white yarn. Make the triangular beard panel first then add mustache lobes and small curly bits for the upper lip area. The texture is made by 3-loop puff stitches or 5-loop puff stitches depending on the yarn.
Beard Panel Round 1 :
Ch 6, 2 sc in 2nd ch from hook, 1 sc in next, 1 hdc in next, 2 sc in last ch; turn and work along opposite side: 1 sc, 1 hdc, 1 sc, 2 sc in last ch. Join ends to make small oval base (12 sts)
Beard Row 2 :
Ch 1, 12 sc (12). Turn.
Beard Row 3 :
Ch 1, sc in first st, (3-loop puff in next st, sl st into top of puff to secure) repeat across making 4 puff clusters across row. End row with sc to stabilize. (12 sts base plus puffs)
Beard Row 4-12 :
Work alternating rows of sc and puff clusters to build a triangular tapered panel. Each sc row reduce 1 sc at each side to shape point: Row 4 sc10, Row5 puff clusters across, Row6 sc8, Row7 puff clusters, Row8 sc6, Row9 puff clusters, Row10 sc4, Row11 puff clusters, Row12 sc2. After last sc row, fasten off leaving long tail for sewing. The final point will be formed by stitching remaining stitches together and closing the tip with a yarn end.
Info :
When placing beard on head, align the top of the beard under the muzzle and mustache lobes. Sew the triangle point down to the chest area, then add mustache lobes above it to cover the mouth for a layered look.
Mustache Lobes (Make 2) Row 1 :
6 sc in magic ring (6)
Mustache Row 2 :
6 inc (12)
Mustache Row 3 :
(1 sc, inc) x 6 (18)
Mustache Row 4-6 :
1 sc in each st (18) (three rows). Fasten off leaving long tail for sewing; shape by folding and sewing to create a curled lobed mustache that sits on each side of the muzzle.
Info :
Use a yarn needle to position puffs so they flare outward slightly; sew along the top edge of the beard and mustache lobes so they appear as a continuous fluffy beard covering the front of the chest.
— Hat (Santa Hat) :
Info :
Hat is worked red in continuous rounds from top to brim then the brim is worked in white with a textured ridge (BLO or small clusters) and a white pompom attached. Fit the hat on the head after mounting horns or ears to ensure proper spacing. Make hat slightly oversized to flop.
Round 1 :
6 sc in magic ring (6)
Round 3 :
(1 sc, inc) x 6 (18)
Round 4 :
(2 sc, inc) x 6 (24)
Round 5 :
(3 sc, inc) x 6 (30)
Round 6-12 :
1 sc in each st (30) (work 7 rounds to shape cone length)
Round 13 :
(3 sc, dec) x 6 (24) — optional decrease to make point less stiff if desired
Round 14-18 :
1 sc in each st (24) — continue until desired hat cone length; stretch slightly to get a slouchy look (work 5 rounds)
Info :
When you have the cone taller than shown, stop and try on the hat to decide how floppy you want it. The photo shows a tall slouchy hat that leans to one side; increase or decrease rounds to taste.
Brim Row 1 (Change color to white) :
Info: Change to white yarn. Carry the red yarn inside if you want to reuse it for the pompom later. Ch 1, work 1 sc in each st BLO around to create a ridge that will roll as a brim (24)
Brim Row 2-4 :
Work textured rows in white using (bump stitch: *hdc in next st, 3-loop puff in next, sl st to secure*, repeat) or simply 1 sc in each st around for three rounds to build a thick brim (24 each round)
Info :
For the fluffy scalloped brim look in the photo, use alternating puff/bobble stitches to create a scalloped edge. Work close to the hat cone and stitch the brim to curve down slightly.
Pompom :
Make a small crocheted ball in white: 6 sc in magic ring (6); R2 6 inc (12); R3 (1 sc, inc)x6 (18); R4-5 1 sc in each st (18); R6 (1 sc, dec)x6 (12); Fasten off leaving long tail to sew. Stuff lightly and close. Sew pompom to the hat tip securely.
— Body (Main Torso) :
Round 1 :
6 sc in magic ring (6)
Round 3 :
(1 sc, inc) x 6 (18)
Round 4 :
(2 sc, inc) x 6 (24)
Round 5 :
(3 sc, inc) x 6 (30)
Round 6 :
(4 sc, inc) x 6 (36)
Round 7 :
(5 sc, inc) x 6 (42)
Round 8-11 :
1 sc in each st (42) (four rounds even for torso width)
Info :
If you prefer to add the beige belly as an in-the-round color panel, change to beige now for a central strip: carry red on the inside and crochet 6–8 stitches center-only in beige on each round to create a belly panel; otherwise make a separate belly panel and sew later.
Round 12 :
(5 sc, dec) x 6 (36)
Round 13-16 :
1 sc in each st (36) (four rounds even - shape the torso depth)
Round 17 :
(4 sc, dec) x 6 (30)
Info :
Begin stuffing the body from the bottom up after Round 18; add fiberfill gradually and firmly around the base so the dragon sits well. Stuff legs lightly if they will be positioned later.
Round 18 :
1 sc in each st (30)
Round 19 :
(3 sc, dec) x 6 (24)
Round 20 :
(2 sc, dec) x 6 (18)
Round 21 :
(1 sc, dec) x 6 (12)
Round 22 :
6 sc (12) - leave a wide opening for joining the head and adding internal stuffing; do not fasten off.
Info :
Before closing the body completely, position legs and tail and sew them in place or crochet legs as separate pieces and sew to the lower body. Keep the opening large enough to wheel in stuffing and to securely sew the head in place in the next assembly step.
— Belly Panel (Beige) :
Round 1 :
Ch 8, 2 sc in 2nd ch from hook, sc across chain until last ch, 2 sc in last ch; work along opposite side of foundation chain sc across (approx 16-18 sts) — make an oval base depending on your chain length
Round 2 :
1 sc in each st around, placing 2 sc in each corner stitch to preserve oval shape (approx 20 sts)
Round 3-8 :
1 sc in each st (work 6 rounds even) to create a tall belly oval that matches the torso height. Increase or decrease rows to match your body proportion.
Info :
Stuff lightly and shape belly to be a bit flatter than body so it sits smoothly on torso. Sew the belly panel centered on the front of the torso, aligning the top of the belly about 2-3 rounds below where the head will attach.
— Arms (Make 2) :
Round 1 :
6 sc in magic ring (6)
Round 3 :
(1 sc, inc) x 6 (18)
Round 4-7 :
1 sc in each st (18) (work 4 rounds to form hand/forearm)
Round 8 :
(1 sc, dec) x 6 (12) — shape wrist
Round 9-14 :
1 sc in each st (12) (work 6 rounds for upper arm)
Info :
Stuff hands firmly and arms lightly; leave the top 6-8 rounds unstuffed for sewing into the torso to get a flat seam. If you want posable arms, insert a thin piece of floral wire before stuffing and fold wire ends back over themselves.
Round 15 :
(1 sc, inc) x 6 (18) — flare shoulder slightly to make sewing surface
Round 16 :
1 sc in each st (18)
Round 17 :
Fasten off leaving long tail for sewing. Repeat for second arm.
— Legs (Make 2) :
Foot Round 1 :
6 sc in magic ring (6)
Foot Round 3 :
(1 sc, inc) x 6 (18)
Foot Round 4 :
(2 sc, inc) x 6 (24)
Foot Round 5-7 :
1 sc in each st (24) — create foot length
Info :
To create a beige paw pad, change to beige for the toe top: make a separate small round (6 sc in magic ring, 6 inc to 12, 1 sc round) and sew onto the toe area. The photo shows a beige oval toe pad with small beige claws sewn on.
Ankle Round 8 :
(2 sc, dec) x 6 (18)
Leg Round 9-16 :
1 sc in each st (18) (eight rounds for calf and thigh)
Round 17 :
(1 sc, dec) x 6 (12)
Round 18 :
1 sc in each st (12) — leave top open for sewing to body. Stuff feet firmly and legs moderately. Fasten off leaving long tail for sewing. Repeat for second leg.
— Wing (Make 2) :
Info :
Each wing is made from a beige inner membrane panel edged in red. Work the membrane as a flat oval then add red border ribs and an outer edge. You will make two identical panels and sew ribs on before attaching to body.
Round 1 :
Ch 9, 2 sc in 2nd ch from hook, sc across chain to last ch, 2 sc in last ch, sc along opposite side of chain to join (approx 16-18 sts) - make a small oval base
Round 2 :
1 sc in each st around, placing 2 sc in corner sts to keep oval shape (approx 20 sts)
Round 3-8 :
1 sc in each st (work 6 rounds even to build membrane height)
Info :
Switch to red yarn and crochet 3 thin ribs along the wing by slip stitching from base to tip then adding strips of red sc along the rib for raised ridges. These ribs should be spaced evenly and match the photo: one central rib and two smaller side ribs.
Round 9-12 :
With red yarn, work single crochet around the edge of the membrane, adding 2 sc in outer corners to form a neat edge (approx 22-26 sts depending on sizing). Fasten off for second wing.
Info :
Lightly stiffen wings by inserting a small piece of craft felt or light wire inside and sewing shut at base if you want them to stand up. Otherwise sew them flat onto the back and position slightly angled outwards like the photo.
— Ears (Make 2) :
Round 1 :
6 sc in magic ring (6)
Round 3 :
(1 sc, inc) x 6 (18)
Round 4-6 :
1 sc in each st (18) — three rounds to give ear height
Round 7 :
(1 sc, dec) x 6 (12)
Round 8 :
1 sc in each st (12) — shape tip and fasten off leaving long tail for sewing. Slightly flatten and seam the inner curve so ears cup forward when sewn.
— Horns (Make 2) :
Info :
Horns are made in beige as a tiny spiral cone. Work in continuous rounds, increasing slowly to create a subtle spiral then working even and finally decreasing to taper. Slight curve can be added by stuffing unevenly or sewing a dowel inside.
Round 1 :
6 sc in magic ring (6)
Round 3 :
(1 sc, inc) x 6 (18)
Round 4-6 :
1 sc in each st (18) — work three rounds to elongate horn
Round 7 :
(1 sc, dec) x 6 (12)
Round 8 :
(6 dec) (6) — fasten off leaving long tail for sewing. Slightly stuff and shape so horn curves outward; sew to head in the marked horn positions.
— Tail :
Round 1 :
6 sc in magic ring (6)
Round 3 :
(1 sc, inc) x 6 (18)
Round 4-12 :
1 sc in each st (18) — work 9 rounds to create tail trunk
Round 13 :
(1 sc, dec) x 6 (12)
Round 14-18 :
1 sc in each st (12) — tapering the tail
Round 19 :
(1 sc, dec) x 4 (8)
Round 20 :
Fasten off leaving long tail for sewing. Add small red spikes by sewing little cones along the tail base (see Spikes section). Stuff tail moderately; leave base open to sew to lower back of the body.
— Spikes (Make 6) :
Spike 1 Round 1 :
4 sc in magic ring (4)
Spike 1 Round 2 :
4 inc (8)
Spike 1 Round 3 :
1 sc in each st (8) — fasten off leaving tail to sew. Make 6 spikes and sew along the dragon's back and tail in spaced intervals matching the photo.
— Paws / Claws and Paw Pads :
Paw Pad (Make 2 per foot) :
6 sc in magic ring, 6 inc (12), 1 sc around (12). Fasten off and sew to foot top centered. For small beige claws, make 3 tiny crochet bobbles: 4 sc in magic ring; fasten off and sew to top of foot as shown.
Info :
Sew claws on with beige yarn and stuff them slightly to keep round shape. Position claws evenly across toe area; on photo each foot has three small beige claws along the top edge.
— Assembly & Finishing Details :
Info :
Sew the belly panel centered on the front of the body. Attach legs at lower body rounds aligning foot tips forward so toy sits. Attach arms along body sides about 2-3 rounds below where the head will sit. Sew tail to center back at lower body rounds. Sew head to body by matching the head opening to the body opening; use whip stitch or mattress stitch for even join. Attach wings to back upper sides underneath where the hat sits and above tail base. Attach horns to marked positions on head near top sides. Sew ears slightly in front of horns and angle forward. Add beard and mustache pieces: sew mustache lobes to sides of muzzle first, then sew triangular beard under mustache and to chest. Stitch any spike cones along back and tail, spacing evenly.
Info :
Use safety eyes secured with washers before sewing muzzle in place. Embroider nostrils with small black stitches on the muzzle before closing. Weave in all ends and hide tails inside the stuffing. Add a light surface shuffle to beard to make puffs stand out if desired by teasing the clusters gently.
Info :
Use block or a light steam to shape the hat brim if needed (do not steam directly on synthetic yarn; use steam at a distance and reshape with hands). For a firmer brim, insert a small circle of felt inside when sewing brim to hat cone.
Info :
Final finish: add tiny blush to cheeks with powdered makeup or fabric paint if you like. Check all sewn parts for secure attachment if this will be given to a child; consider embroidering eyes instead of safety eyes for toddler-safe toy.
This Santa Dragon brings holiday magic and playful fantasy together into one irresistible plush friend! Every detail — from the fluffy white beard to the curled horns and slouchy Santa hat — adds personality and charm as you stitch. It makes a warm, handmade gift or a festive shelf sitter that will delight anyone who loves dragons and Christmas. Enjoy every stitch of this merry project and share your finished dragon with loved ones! 🧶🎅