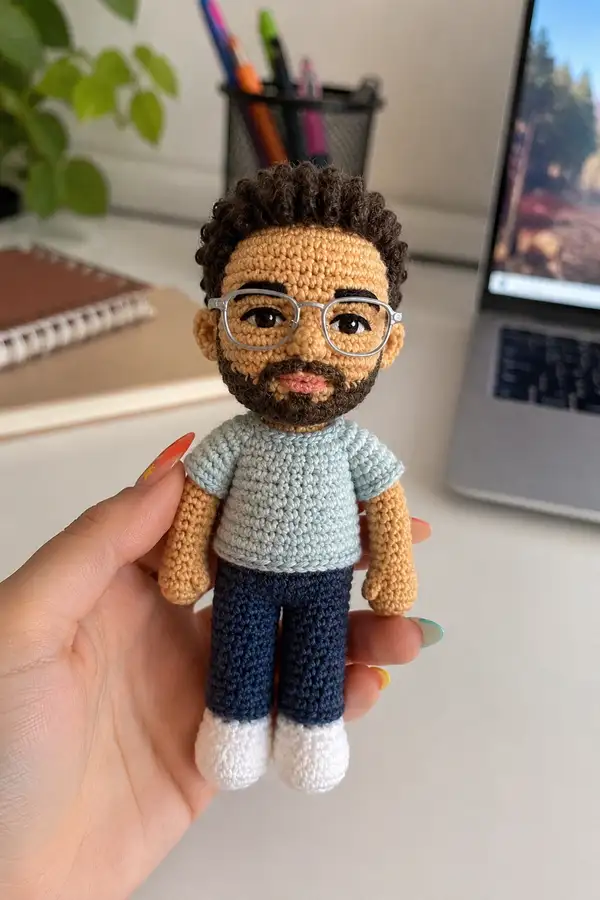
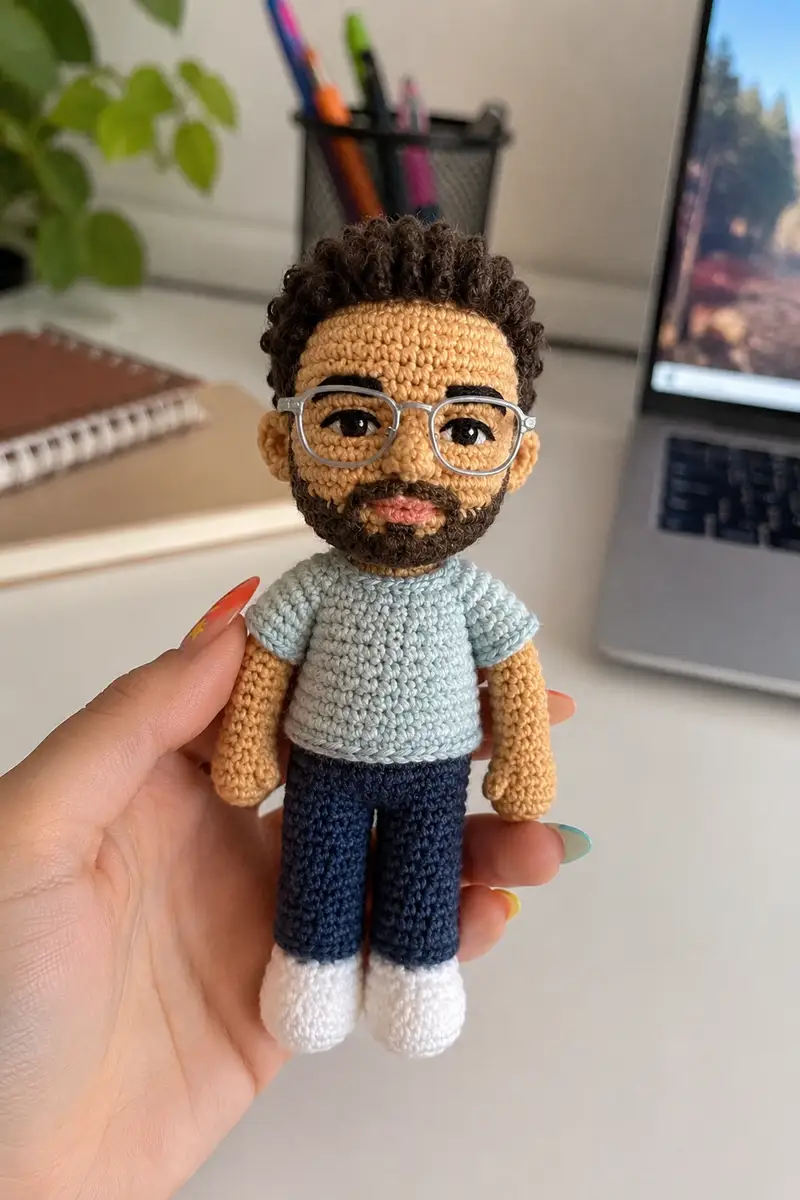
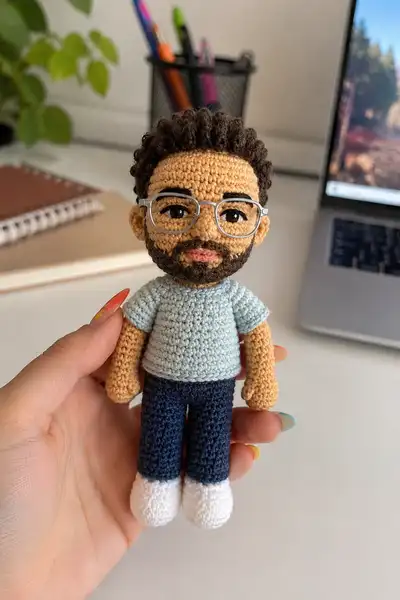
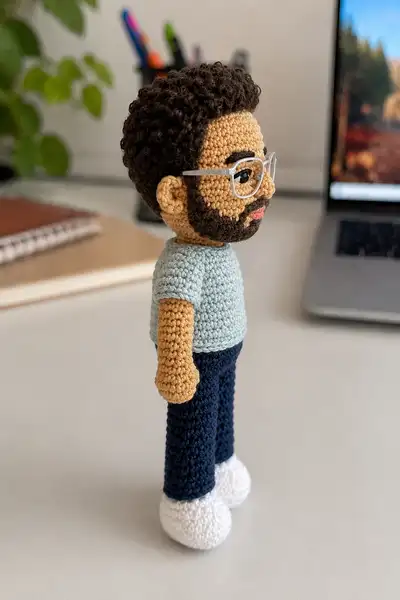
Create a charming miniature Ziad-inspired doll complete with curly hair, a sculpted beard, clear glasses, a soft blue tee, navy trousers and white sneakers. This pattern breaks down every round for head, body, limbs and curly hair so you can recreate the character with realistic proportions and facial detail. Perfect for a collectible, desk companion, or a seasonal Halloween twist when accessorized.
Progress Tracker
0% Complete
— Notes :
Info :
This pattern is written in continuous rounds (spiral) unless otherwise stated. Use a stitch marker for the first stitch of each round. Gauge is not critical but for proportion match use worsted weight yarn and a 3.0mm hook. Work tightly so stuffing does not show. All numbers in parentheses are stitch counts for that round.
— Head :
Round 1 :
6 sc in magic ring (6)
Round 3 :
(1 sc, 1 inc) x 6 (18)
Round 4 :
(2 sc, 1 inc) x 6 (24)
Round 5 :
(3 sc, 1 inc) x 6 (30)
Round 6 :
(4 sc, 1 inc) x 6 (36)
Round 7 :
(5 sc, 1 inc) x 6 (42)
Round 8 :
(6 sc, 1 inc) x 6 (48)
Round 9 :
(7 sc, 1 inc) x 6 (54)
Round 10-14 :
1 sc in each st (54)
Info :
Place safety eyes between rounds 13 and 14. For this head circumference, position eyes approximately 10-12 stitches apart (counting between inner edges) to match a gentle friendly expression. Use black yarn/embroidery for eyelids later or place small eyelash embroidery after stuffing.
Round 15 :
(7 sc, 1 dec) x 6 (48)
Round 16 :
(6 sc, 1 dec) x 6 (42)
Round 17 :
1 sc in each st (42)
Info :
Start stuffing head firmly but not hard. Stuff around the eye area first to secure eye placement, then add more to shape cheeks and forehead. Continue stuffing as you decrease.
Round 18 :
(5 sc, 1 dec) x 6 (36)
Round 19 :
(4 sc, 1 dec) x 6 (30)
Round 20 :
(3 sc, 1 dec) x 6 (24)
Round 21 :
(2 sc, 1 dec) x 6 (18)
Round 22 :
(1 sc, 1 dec) x 6 (12)
Info :
Fasten off leaving a long tail for sewing the head to the body later. Finish stuffing so the head feels firm but still squeezable. Close opening neatly with a yarn needle using the long tail.
— Face Sculpting & Facial Features :
Info :
Before attaching hair or beard, shape the nose and muzzle by adding polyester stuffing at the proper area under the eyes and sewing a short vertical stitch to create a small nose bridge. Use surface embroidery for eyebrows and mouth; see steps below for precise placement.
Feature - Nose :
Use a small amount of skin-tone yarn and the round-nose sculpting technique: embroider a small horizontal stitch at the center between rounds 13-15 to create the nose base, then add a small vertical stitch to make a nose tip. Alternatively, crochet a tiny nose bump (see optional small muzzle section below) and sew centered between the eyes on Rounds 13-15.
Feature - Mouth :
Using pink/coral floss or yarn, embroider a small horizontal line 3-4 stitches below the nose; add a short vertical stitch at each end to give a slight smile. Keep stitches small to keep proportionate to the head size.
Feature - Eyebrows :
Using darker brown yarn or embroidery floss, add short curved lines above the eyes approximately 2-3 stitches above the eye row to match the expression in the photo.
— Ears (Make 2) :
Round 1 :
6 sc in magic ring (6)
Round 3 :
1 sc in each st (12)
Round 4 :
(1 sc, 1 dec) x 4, 1 sc x 4 (8)
Info :
Fold ear slightly in half and sew to head at side between head rounds 16-18, slightly behind the eye row to achieve the natural placement visible in the reference photo. Leave the center of the ear flat with a tiny ridge for realism.
— Beard (Sewn-on muzzle piece) :
Info :
The beard is made as a small semicircular applique that is sewn to the lower face, then a second darker round is added to create fullness. Work in dark brown yarn and leave a long tail for sewing.
Round 1 :
6 sc in magic ring (6)
Round 3 :
(1 sc, 1 inc) x 6 (18)
Round 4 :
1 sc in each st (18)
Round 5 :
(2 sc, 1 dec) x 6 (12)
Round 6 :
1 sc in each st (12)
Info :
Pin the beard piece to the lower face aligning the top edge just below the nose and mouth. Sew around the top and sides with matching yarn, leaving the bottom edge free to create the moustache/beard depth. Add a second darker trim with surface stitches to define the beard edge if needed.
— Hair Cap (Curly Top) :
Info :
Hair is worked with a loop/stitch technique to create tight curls. Make a hair cap that fits the head circumference. Attach loops densely across the top rounds to simulate full curly hair. Work in dark brown yarn.
Round 1 :
Join yarn at top of head area where hair will start (approximately between rounds 8-10). Ch 1, 1 sc in each of next 54 sts around where hair will cover (54)
Round 2 :
1 sc in each st (54)
Round 3 :
Loop stitch across: *insert hook, yarn over and pull up a loop about 1 cm, yarn over and complete sc in same stitch* repeat across (54)
Round 4 :
Work sc in each stitch securing loops at base: 1 sc in each st (54)
Round 5-8 :
Repeat rounds 3-4 twice more to build a dense curly texture covering the crown and back (54 each round)
Info :
After completing loop rounds, trim loops slightly if desired to shorten curls, or leave intact for a fuller look. Securely sew the hair cap to the head around the hairline using small invisible stitches. Tuck and weave in yarn ends into the hair to hide them.
— Body (Torso with Shirt & Pants Color Change) :
Round 1 :
6 sc in magic ring (6)
Round 3 :
(1 sc, 1 inc) x 6 (18)
Round 4 :
(2 sc, 1 inc) x 6 (24)
Round 5 :
(3 sc, 1 inc) x 6 (30)
Round 6 :
(4 sc, 1 inc) x 6 (36)
Round 7-9 :
1 sc in each st (36)
Info :
Change to shirt color (pale blue) at the start of Round 10. Carry the pant yarn inside the body if you prefer invisible color change, or fasten off the pant color and join shirt color cleanly. Working in BLO for the first shirt round will make a subtle ridge for the shirt edge.
Round 10 :
Change to pale blue yarn. 1 sc in each st BLO (36)
Round 11-16 :
1 sc in each st (36)
Info :
Work even in shirt color until desired torso height is reached. The shirt sleeves will be made by leaving openings when you attach arms; plan for 6-8 shirt rounds above the waistline before attaching head.
Round 17 :
1 sc in each st (36)
Round 18 :
Change to navy yarn (pants) at the start of this round. Join navy in the back center and continue in rounds: 1 sc in each st (36)
Round 19-26 :
1 sc in each st (36)
Info :
Begin stuffing the body lightly at round 20 with medium firmness so the doll can stand when legs are attached later. Keep stuffing gradual to allow sewing the head on smoothly. At Round 26 evaluate waist to neck seam and prepare to attach the head: leave a long tail for sewing the head on if you finished closing the top earlier.
Round 27 :
(4 sc, 1 dec) x 6 (30)
Round 28 :
(3 sc, 1 dec) x 6 (24)
Round 29 :
(2 sc, 1 dec) x 6 (18)
Round 30 :
(1 sc, 1 dec) x 6 (12)
Info :
Fasten off leaving a long tail for attaching the head. Do not close the bottom here because legs will be attached through the lower rounds; instead leave the body opening so you can sew legs into place from the inside if preferred. If you prefer sewn-on legs, finish body closure after legs are attached.
— Arms (Make 2) :
Round 1 :
6 sc in magic ring (6)
Round 3 :
(1 sc, 1 inc) x 6 (18)
Round 4-6 :
1 sc in each st (18)
Info :
This small rounded end will be the hand. Stuff the hand firmly enough to keep it rounded but not so firm that the fingers seam is stiff. For simple absence-of-fingers, shape the hand by elongating a few stitches slightly when sewing to the side of the palm area.
Round 7 :
(2 sc, 1 dec) x 4, 2 sc (14)
Round 8-12 :
1 sc in each st (14)
Round 13 :
Change to pale blue (shirt) color. 1 sc in each st (14)
Round 14-18 :
1 sc in each st (14)
Info :
Stuff arms lightly — hands firmer than forearms. Leave a long tail for sewing. Attach arms to the body at the shirt openings between body rounds 12-15. Sew securely with ladder stitch or whip stitch, inserting seam through the shirt and body for a neat join.
— Legs & Shoes (Make 2) :
Round 1 (Shoe) :
6 sc in magic ring with white yarn (6)
Round 3 :
(1 sc, 1 inc) x 6 (18)
Round 4 :
1 sc in each st (18)
Round 5 :
Change to navy yarn. Work around the ankle: 1 sc in each st (18)
Round 6-10 :
1 sc in each st (18)
Info :
Legs are worked long to create the pant shape. Stuff the foot firmly, then the lower leg slightly less to allow the doll to sit or stand. When both legs are complete, sew them together at the uppermost rounds to create a small crotch seam or insert into body and sew in place from inside.
Round 11 :
(2 sc, 1 inc) x 6 (24)
Round 12-18 :
1 sc in each st (24)
Round 19 :
(3 sc, 1 dec) x 6 (18)
Round 20 :
1 sc in each st (18)
Round 21 :
Fasten off leaving a long tail for sewing or joining. Repeat for second leg.
Info :
If you prefer to make the doll able to stand, insert thin cardboard or stiff interfacing inside the sole during stuffing; glue or stitch in place before fully closing the shoe top.
— Optional Shoe Detail (Sole Ridge) :
Round 1 :
With white yarn, join under edge of shoe and sc evenly around to create a ridge (18)
Info :
This ridge gives the sneakers a defined sole when viewed from the front; keep tension even for a tidy edge.
— Shirt Sleeve Finishing :
Info :
To create short sleeves, fold the last few pale blue rounds outward slightly and sew with small slip stitches through the outer loop. Alternatively make a decorative rib using 1 sc in each st BLO for one round to create the cuff ridge.
— Glasses (Optional Frame) :
Info :
You can either buy small doll glasses or make a frame from 22-26 gauge craft wire. To make a simple frame: shape two round lenses (approx 1.2-1.6 cm diameter) with wire, connect with a small bridge, and twist thin wire arms that rest behind the ears. Smooth ends and wrap with a tiny drop of glue for safety. Alternatively buy clear doll glasses and secure with small stitches through head hair for stability.
— Assembly & Final Sculpting :
Info :
Before final assembly make sure all ends are woven in and hair and beard are in place. Attach legs to the lower body rounds from the inside: position legs centered under the body, pin and sew through the body rounds using the long tail from legs. Sew both legs so they are slightly touching to allow doll to stand. Attach arms to the shirt openings between rounds 12-15 on the torso, matching left and right symmetry.
Info :
Sew the head to the torso by aligning the head neck opening to the top of the torso (matching the shirt seam). Pin around at even spacing and sew through head and torso stitches using the long tail left from both pieces for an invisible join. Secure with several passes and weave end into the inside of the body.
Info :
Sew ears at head rounds 16-18, just behind and slightly above the eye level. Add beard by sewing the beard piece around the mouth and chin area, using small stitches at the top edge and more secure stitches along the cheeks to prevent movement.
Info :
Attach glasses last. If using plastic/doll glasses, run a tiny dab of fabric glue at the contact points where the arms rest on the ear or tuck glasses under hair curls and use a small stitch behind each ear arm for added security.
Finishing :
Embroider small nostrils with short black or dark brown stitches, tidy eyebrows and mouth. Add blush with light fabric paint or a tiny dusting of safe pink makeup if desired. Double-check that all seams are tight and weave away any loose tails.
Info :
Use pins for positioning and check placement with photos or in mirror to ensure symmetry. If you want the doll to sit, adjust the leg angle and sew a small waist reinforcement inside the body to help with posture.
This delightful miniature Ziad doll is a love letter to small-scale detail and personality — from the curly hair to the sculpted beard and clear glasses. Each carefully executed round builds up a tiny friend that’s full of charm and character. Enjoy the process of stitching, stuffing, and sculpting; the finished piece makes a perfect desk companion or thoughtful handmade gift. 🧶💫