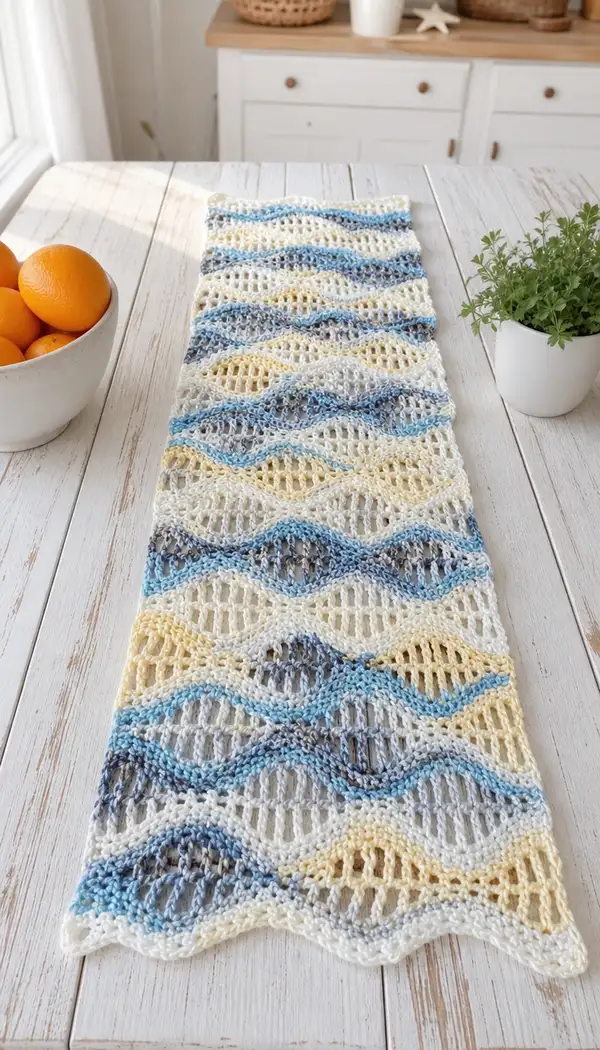
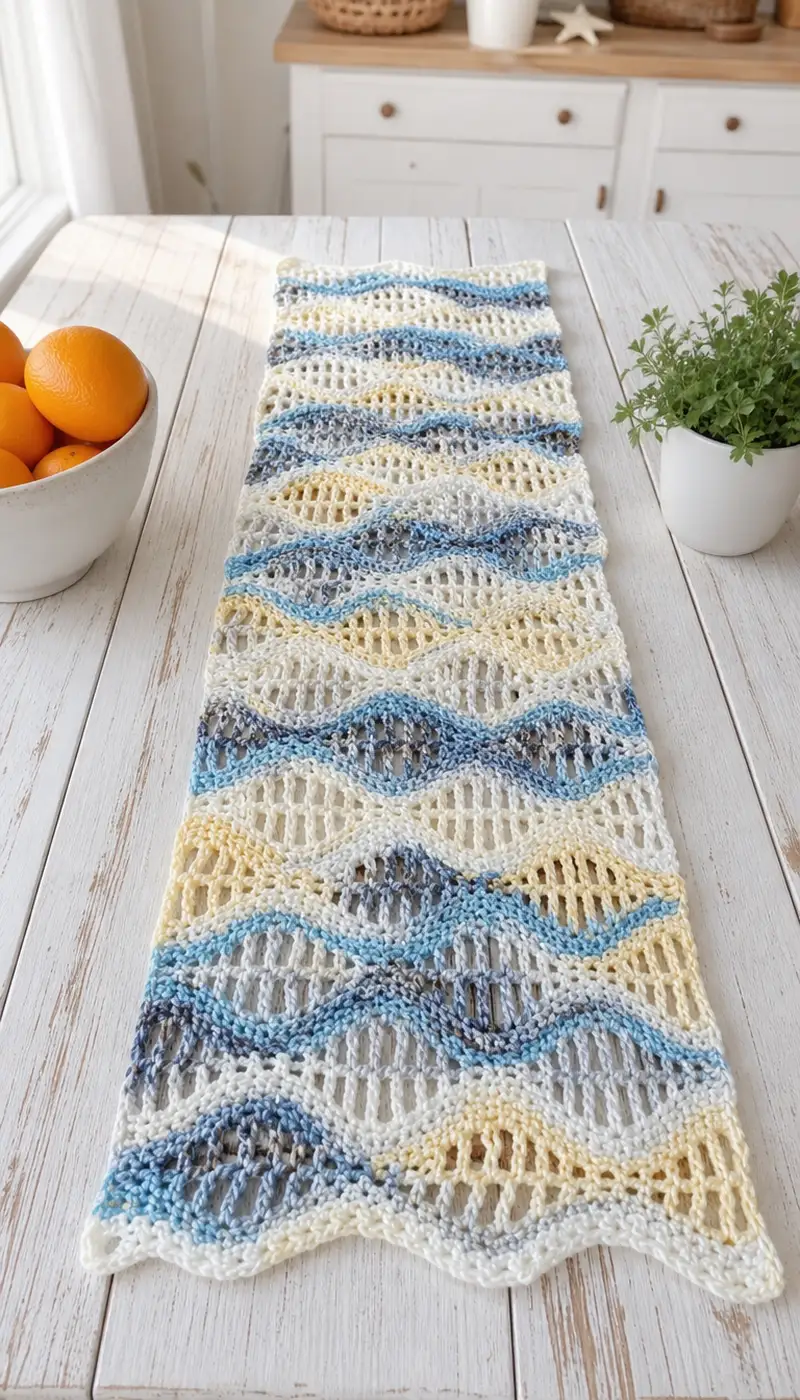
Create a breezy, lacy table runner featuring flowing wave motifs and open mesh panels. This runner blends soft cream with variegated blues, grays, and pale yellow to mimic a seaside palette. The stitch pattern alternates textured wave ridges with airy ladder-like mesh for an elegant, lightweight look. Perfect for coastal, farmhouse, or spring table settings — easy to scale for longer or narrower runners.
Progress Tracker
0% Complete
— Notes & Gauge :
Info :
This runner sample measures approximately 12.5 inches (32 cm) wide and 48 inches (122 cm) long after blocking. Gauge is approximately 18 dc = 4 inches (10 cm) across the mesh/ridge pattern using a 4.0mm hook and DK-weight yarn; your gauge may vary with yarn and hook choice. To make your runner wider or narrower, adjust the foundation chain by multiples of 12 stitches then add 1 turning chain (multiple of 12 + 1).
Info :
Terminology: This pattern is written in US terms. The stitch pattern is a 12-row repeat (Rows 1-12) which forms one wave-and-mesh unit. In the sample, Rows 1-12 are repeated 10 times to achieve the shown length. For a longer runner repeat more times. Important: foundation chain is 73 chains (72 = 12 x 6 repeats) + 1 turning chain; sample width uses 6 motif repeats across (72 foundation stitches).
— Materials & Preparation :
Info :
Prepare yarn and tools, weave in any tails from joining skeins, and place a stitch marker at the first stitch of each row to help with counting. If your variegated yarn has long color runs and you prefer small bands only at wave ridges, change yarn at the start of the ridge rows as described in the color change notes below.
Info :
Color strategy: In the photo, variegated yarn is used for the textured wave ridge rows while cream is used for the mesh rows between waves. The pattern indicates where to change colors; carry unused yarn loosely behind work if you prefer not to fasten off, but for neatness I recommend fastening off and weaving in tails at each change for variegated color placement.
— Foundation Chain :
Row 0 :
Ch 73 (this gives 72 foundation sts = 12 x 6 repeats). Turn. (73)
Info :
Check your foundation chain on a flat surface to ensure it is not twisted. Using a foundation chain of 73 allows six full 12-stitch repeats across the width shown in the photo. For a wider runner, add 12 stitches per additional motif repeat.
— Border Base (Row 1 - Row 2) :
Row 1 :
RS: Sc in 2nd ch from hook and in each ch across. (72 sc)
Info :
This first sc row provides a stable base for the delicate mesh. Keep tension slightly snug to avoid a floppy edge. Place a stitch marker in the first sc of this row to mark the row start for future rows.
Row 2 :
Ch 3 (counts as dc), turn. Dc in same st and in each st across to last st, dc in last st. (72 dc including turning ch-3)
Info :
Row 2 transitions into the mesh and ridge repeat. The ch-3 counts as the first dc; be mindful of this when placing stitches to maintain stitch count.
— Lace & Wave Motif (12-Row Repeat) :
Info :
The following 12-row sequence forms one full wave-and-mesh unit. Stitch counts are maintained at 72 across. Rows labeled 'Mesh' create the ladder-like openwork, while Rows labeled 'Wave' form raised ridges using dc and short clusters. Work Rows 1-12 and then repeat as many times as necessary; the sample repeats these 10 times for 120 working rows (plus borders and edging).
Row 1 :
Ch 3 (counts as dc), *sk next st, (dc, ch 2, dc) in next st (shell made in same st), sk next st, dc in next 3 sts; rep from * across to last st, dc in last st. (72)
Info :
Row 1 begins shaping small shells across the fabric that later help form the wave openings. The (dc, ch2, dc) shell sits over a single stitch and creates an initial hollow. Keep shells aligned by counting carefully through the first repeat.
Row 2 :
Ch 1, turn. Sc in each st and in each ch-2 sp across (72 sc). (Work sc into each dc and into ch-2 spaces to create ladder base.)
Info :
Working sc across both stitches and chain spaces evens the fabric and prepares rows for the open mesh. Keep stitches consistent; this row should feel slightly more compact than mesh rows.
Row 3 :
Ch 3, turn. *Sk next sc, dc in next sc, ch 3, sk next 2 sc, (dc, ch 2, dc) in next sc, sk next 2 sc, dc in next sc; rep from * across, ending with dc in last sc. (72)
Row 4 :
Ch 1, turn. Sc in each st and in each ch-3 sp across. (72 sc)
Info :
Rows 3-4 start to establish a ladder/more open row by introducing ch-3 spaces. The sc row locks those spaces and sets a firm base for the raised ridge that will appear later. If using variegated yarn for the wave, plan your color join at the start of Row 5 (first Wave row).
Row 5 (Wave - Texture Row) :
Change to variegated yarn now if desired. Ch 2 (counts as hdc), turn. *FLO dc in next 5 sts (work dc into front loop only to create a ridge), sk next 2 sts, (hdc in next st, ch 2, hdc in same st) (small V), sk next 2 sts; rep from * across, ending with FLO dc in last stitches. (72)
Info :
Front loop only (FLO) double crochets create the raised wave ridge. Work these dc into the front loop of the stitches from Row 4 so the back loops create the subtle mesh channels. This row is where the variegated yarn shows as a rounded ridge across the runner.
Row 6 :
Ch 1, turn. Sc in each st and in each ch-2 sp across, working sc into the back loop of the ridge row where possible to keep the ridge pronounced. (72 sc)
Info :
When working sc into the back loops of the ridge, feel for the raised front loop and insert your hook into the loop behind it. This secures the ridge and emphasizes the wave contour.
Row 7 (Mesh Expansion) :
Ch 4 (counts as tr), turn. *Sk next sc, (tr, ch 3, tr) in next sc (large open V), sk next sc, dc in next 3 sts; rep from * across, ending with dc in last sts. (72)
Row 8 :
Ch 1, turn. Sc in each st and in each ch-3 sp across to stabilize openings. (72 sc)
Info :
Row 7 creates larger vertical mesh windows (tr-ch3-tr over a single base stitch) that form the airy ladder panels seen in the photo. The following sc row keeps these openings tidy.
Row 9 :
Ch 3, turn. *Dc in next 2 sts, sk next 2 sts, (dc, ch 2, dc) in next st, sk next 2 sts, dc in next 2 sts; rep from * across. (72)
Row 10 :
Ch 1, turn. Sc in each st and in each ch-2 sp across. (72 sc)
Info :
Row 9 mirrors the first shell row but offset, helping create diamond openings in the fabric. The sc rows between each lace row maintain a stable, even texture and a consistent stitch count.
Row 11 (Wave - Peak Row) :
Ch 2, turn. *Work 3 FLO dc into the next 3 sts (working front loop only on each), then work 1 tr in next st to create a taller peak, then 3 FLO dc into next 3 sts; sk next 2 sts, (hdc, ch 2, hdc) in next st to form valley; rep from * across. (72)
Info :
This row forms the top of the wave ridges: alternating blocks of FLO dc and a centered tr make a soft peak that reads as the crest in the photo. Keep the FLO stitches shallow and even to stay consistent across repeats.
Row 12 :
Ch 1, turn. Sc in each st and in each ch-2 sp across. (72 sc)
Info :
Row 12 finishes the 12-row motif. After completing Row 12, you will see a full diamond opening aligned beneath a raised wave ridge. For the sample runner repeat Rows 1-12 a total of 10 times to reach the pictured length. Continue below for full-repeat instructions and final edging.
Repeat :
Repeat Rows 1-12 nine more times (working Rows 1-12 a total of 10 times). After each 12-row repeat, check color transitions if you are joining or switching yarn for the wave ridges. (Total after repeats: 12 x 10 = 120 rows worked plus the initial foundation rows and base rows.)
Info :
As you repeat, periodically lay the panel flat and check the edges for straightness. If the edges start to pull in slightly, a gentle block after a few repeats will help keep the fabric even. Weave in ends every 2-3 repeats to avoid a large weaving task at the end.
— Final Border & Scalloped Edge :
Row (Border Start) :
After finishing the desired number of repeats and ending on a Row 12 sc row, work one additional sc row in cream across the entire width: Ch 1, turn, sc in each st across. (72 sc)
Info :
This stabilizing sc row evens the top edge before you work the decorative scallop. If you like a narrow framed edge, you may switch to a 3.5mm hook for the next rows to create a slightly firmer finish.
Scallop Round 1 :
Ch 1, turn. *Skip 2 sts, 5 dc in next st, sk 2 sts, sl st in next st; rep from * across, ending with sl st in last st. This forms gentle scallops across the long edge. (Number of scallops = 12 per width depending on spacing)
Info :
Work the 5-dc shell into every 5th stitch to form evenly spaced scallops; if your stitch count is exact, you will get symmetrical scallops across the runner. Pin scallops down to blocking mat to shape them while wet-blocking.
Tip :
For a mirror scallop along the opposite long edge, rotate the runner and repeat the scallop rows the same way. For a narrow end border, work 2-3 rows of sc and a single scallop round as above on the short sides too.
Final Finishing Row :
With cream yarn, ch 1, turn. Work sc evenly around the entire runner's perimeter (short sides and long sides), placing 3 sc in each scallop tip to maintain shape and 1 sc per stitch on straight edges. Join with a sl st to first sc. Fasten off and weave in ends. (Perimeter sc count varies by length)
Info :
When working around the corners of the runner, place 2-3 sc in the corner stitch to avoid puckering. Weave tails along ridge rows where possible for a neater back side. Trim remaining tails after weaving them securely.
— Blocking & Care :
Info :
Wet-block the runner gently: soak in lukewarm water, roll in towel to remove excess, then pin flat on blocking mat to measurements, stretching the diamond openings and shaping scallops as you pin. Allow to air dry fully. If yarn is cotton, you may iron on low with a damp cloth for extra crispness.
Info :
Care: Hand wash cold and lay flat to dry for longevity. Avoid bleach and rough scrubbing to preserve the variegated color zones and the delicate lace structure.
This Sea Breeze Wave Table Runner brings a serene coastal vibe to any table with its soft color transitions and airy, undulating lace. The combination of raised wave ridges and ladder-like mesh creates both structure and elegance, making it a striking accent for seasonal decor or everyday enjoyment. I hope you love blocking and styling yours as much as I enjoyed designing this delicate motif. 🧶🌊✨