🧢 Beautiful ✨ Detailed πŸ’ Adorable

Slice Handbag Pattern

Slice Handbag Pattern
4.0β˜… Rating
5-7 Hours Time Needed
2.0K Made This
βœ‚οΈ

Intermediate Level

Ideal for those with basic crochet experience, featuring slightly more advanced stitches and techniques to expand your skills.

⏱️

Weekend Treat

Takes 5-7 hours, making it an enjoyable project to finish over a couple of days.

✨

Stylish Touch

An elegant detail to elevate any look, combining traditional techniques with contemporary design sensibilities.

About This Slice Handbag Pattern

This pattern creates a compact, slice-shaped handbag crocheted from macrame or polyester cord for a sturdy, fashionable bag. The instructions include detailed steps for crocheting an oval base and building up the side with clear stitch counts. Hardware suggestions and finishing tips are included so you can add a magnetic clasp and snap hooks. The pattern is illustrated with photos to help you follow along easily.

Slice Handbag Pattern crochet pattern - detailed view of completed project

Suitable for intermediate crocheters comfortable with single crochet and slip stitch techniques. The finished bag measures approximately 9 inches long by 7 inches high and 4 inches wide when using the recommended materials.

Why You'll Love This Slice Handbag Pattern

I absolutely love this pattern because it turns simple cord into a refined little handbag with striking texture. I enjoyed designing the oval base so it grows smoothly and lays flat, which creates a professional finish. The side construction is clever and easy to follow yet gives a solid structure that holds shape beautifully. Making the bag is satisfying and quick enough to finish over a weekend, and I love how the hardware elevates the final look.

Slice Handbag Pattern step 1 - construction progress Slice Handbag Pattern step 2 - assembly progress Slice Handbag Pattern step 3 - details and accessories Slice Handbag Pattern step 4 - final assembly and finishing

Switch Things Up

I love experimenting with colors on this bag: try a two-tone design with a contrasting side and base for a modern look.

I often make it larger or smaller by changing cord thickness and using a different hook size; a thicker cord and larger hook give a chunky tote, while thinner cord makes a delicate mini bag.

I like to swap the magnetic closure for a button or a zipper if I want extra security; just stitch or sew the chosen hardware firmly in place.

I sometimes add a fabric lining for extra stability and a polished interior; cut the lining to the oval shape and hand-sew it in using hidden stitches.

I like to experiment with strap options β€” a short wrist strap, a long crossbody strap, or metal chain handles all change the bag's style.

I sometimes embellish the front with embroidery or a crocheted applique9 to personalize the bag for gifts.

For a boho vibe, I add tassels or fringe to the zipper pull or side seams; use leftover cord strands to make matching tassels.

I recommend testing a small swatch if you change cord type to check gauge and fabric drape before reworking the whole oval base.

I also try different finishing techniques like whipped seams or decorative slip stitch edging to vary the final look.

If you want more structure, add a thin cardboard or leather insert in the base covered with felt and glued into place before assembling the side.

Common Mistakes & How to Fix Them

βœ— Not keeping the working loop pulled to hook level will change stitch height and distort the fabric; pull the working loop about 20 mm to maintain consistent stitch height. βœ— Tight slip stitches when working the back loop only make the edge stiff and uneven; crochet SlSt loosely and avoid tightening the loop to preserve flexibility. βœ— Forgetting to reposition markers each odd row will misplace increases and shape; place and rearrange your markers exactly as instructed to keep counts accurate. βœ— Skipping the instruction to leave a long tail for closing rows can make finishing difficult; leave approximately 80 inches (2 meters) when starting the oval for closing and finishing. βœ— Overdrawing or underdrawing the cord while crocheting can create uneven tension and wavy edges; maintain steady, moderate tension and check counts frequently to keep rows even.

Slice Handbag Pattern

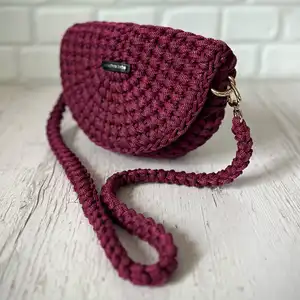
Make a stylish slice-shaped handbag using macrame cord and simple crochet techniques. This pattern guides you step-by-step through crocheting the oval base and side, finishing with hardware for a polished look. You will enjoy the textured stitches and clear photos that show each important stage. Perfect for crafters who want a beautiful handmade bag.

Intermediate 5-7 Hours

Materials Needed for Slice Handbag Pattern

β€” Main Fabric

  • 01
    Any propylene/polyester cord, 4 mm, approximately 185 yards (165 meters) per skein
  • 02
    PP Macrame Medium cord, burgundy color - example uses 2 skeins (91 yards / 82 m each shown as example)
  • 03
    Approximately 2 skeins (example amount shown) or enough 4 mm cord to complete base and side (estimated total shown on materials page)

β€” Tools Required

  • 01
    Crochet hook size 5.5 mm
  • 02
    Magnetic sewing button 18 mm
  • 03
    2 snap hook rings 20 mm
  • 04
    2 snap hooks 30 mm
  • 05
    4 stitch markers
  • 06
    Sewing needle and thread
  • 07
    Scissors
  • 08
    Lighter or heat source to seal cord ends
  • 09
    Measuring ruler
  • 10
    Pins for positioning (optional)

Progress Tracker

0% Complete

β€” Crochet the oval :

Infos :

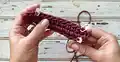
The diagram for crocheting the oval is in the appendix 1. The diagram shows odd rows. Leave the end of the thread about 80 inches (2 meters) long for closing the rows. Make the slip knot. Crochet the chain of 13 CH with two threads. To do this, make a yarn over, crochet 2 loops together. Repeat 13 times. Crochet the loops loosely, do not tighten.

Round 1 :

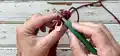
1 row. Crochet from the 2nd loop from the hook: 11 SC, 3 SC in 1, 11 SC to the other side, crochet the last SC with the end. Pull out the end, close the row with the end of the thread (=26). Insert the hook on both loops of the chain.

Info :

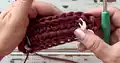
When crocheting SC, pull the working loop to the hook level by 20 mm.

Infos :

There are 10 loops between the side ones (3 SC in 1). Place 4 markers in the 1st and 10th loops. Place markers on the front loop only. Rearrange the markers into these loops of each odd row.

Round 2 :

2 row. Insert the hook in the 2nd loop right behind the marker. Pull the loop. Crochet 25 SlSt to the other side on the back loop only. Crochet the last SlSt with the end of the thread. Close the row with the end (=26).

Info :

Don’t tighten SlSt, crochet loosely.

Round 3 :

3 row. Insert the hook in the 2nd loop, left of the marker. Pull the loop. Crochet 8 SC. Next, crochet 3 Inc, 10 SC, 3 Inc, 1 SC. Crochet the last SC with the end. Close the row with the end (=32).

Info :

Crochet SC with diagonal stitches. To do this, from the front side, insert the hook under the right leg, from the back side - between the legs of the SC. Pull the working loop to the level of the hook.

Round 4 :

4 row. Insert the hook into the 3rd loop, left of the marker. Pull the loop. Crochet 31 SlSt to the other side on the back loop only. Crochet the last SlSt with the end. Close the row with the end (=32).

Round 5 :

5 row. Insert the hook in the 5th loop, left of the marker. Pull the loop. Crochet 5 SC, (SC, Inc)*3, 10 SC, (SC, Inc)*3, 4 SC. Crochet the last SC with the end. Close the row with the end (=38).

Round 6 :

6 row. Insert the hook in the 5th loop, left of the marker. Pull the loop. Crochet 37 SlSt to the other side on the back loop only. Crochet the last SlSt with the end. Close the row with the end (=38).

Round 7 :

7 row. Insert the hook in the 5th loop, left of the marker. Pull the loop. Crochet 5 SC, (2 SC, Inc)*3, 10 SC, (2 SC, Inc)*3, 4 SC. Crochet the last SC with the end. Close the row with the end (=44).

Round 8 :

8 row. Insert the hook in the 5th loop, left of the marker. Pull the loop. Crochet 43 SlSt to the other side on the back loop only. Crochet the last SlSt with the end. Close the row with the end (=44).

Round 9 :

9 row. Insert the hook in the 5th loop, left of the marker. Pull the loop. Crochet 5 SC, (Inc, 3 SC)*3, 10 SC, (Inc, 3 SC)*3, 4 SC. Crochet the last SC with the end. Close the row with the end (=50).

Round 10 :

10 row. Insert the hook in the 5th loop, left of the marker. Pull the loop. Crochet 49 SlSt to the other side on the back loop only. Crochet the last SlSt with the end. Close the row with the end (=50).

Round 11 :

11 row. Insert the hook in the 5th loop, left of the marker. Pull the loop. Crochet 5 SC, (4 SC, Inc)*3, 10 SC, (4 SC, Inc)*3, 4 SC. Crochet the last SC with the end. Close the row with the end (=56).

Round 12 :

12 row. Insert the hook in the 5th loop, left of the marker. Pull the loop. Crochet 55 SlSt to the other side on the back loop only. Crochet the last SlSt with the end. Close the row with the end (=56).

Round 13 :

13 row. Insert the hook in the 5th loop, left of the marker. Pull the loop. Crochet 5 SC, 2 SC, Inc, (5 SC, Inc)*2, 3 SC, 10 SC, 2 SC, Inc, (5 SC, Inc)*2, 3 SC, 4 SC. Crochet the last SC with the end. Close the row with the end (=62).

Round 14 :

14 row. Insert the hook in the 5th loop, left of the marker. Pull the loop. Crochet 61 SlSt to the other side on the back loop only. Crochet the last SlSt with the end. Close the row with the end (=62).

Round 15 :

15 row. Insert the hook in the 5th loop, left of the marker. Pull the loop. Crochet 5 SC, (6 SC, Inc)*3, 10 SC, (6 SC, Inc)*3, 4 SC. Crochet the last SC with the end. Close the row with the end (=68).

Info :

Oval dimensions: ~ 13x9 inches (32x23 cm).

β€” Crochet the side part :

Info :

Put the oval with the seam facing up. Remove 2 markers on the left. Rearrange the markers to the right 5 stitches to the left.

Round 16 :

16 row. Insert hook in the loop with marker. Pull the loop, crochet 32 SlSt to the other side on the back loop only to the 2nd marker.

Round 17 :

17 row. 32 SC, CH.

Info :

Strengthen the end with which we closed the rows. Process with fire. Remove the markers, rearrange them into the 5th loops from the sides.

Round 18 :

18 row. 27 SlSt to the other side on the back loop only to the 2nd marker.

Round 19 :

19 row. 22 SC to the 1st marker, CH.

Info :

Count 5 more loops from the sides and place 2 more markers.

Round 20 :

20 row. 17 SlSt to the other side on the back loop only to the 3rd marker.

Round 21 :

21 row. 12 SC to the 2nd marker, CH.

Round 22 :

22 row. 17 SlSt to the other side on the back loop only to the last marker.

Round 23 :

23 row. Remove the 2nd and 3rd markers, 22 SC to the 1st marker. CH.

Round 24 :

24 row. Remove the last marker, 27 SlSt to the other side on the back loop only.

Round 25 :

25 row. Remove the 1st marker, 32 SC, CH.

Round 26 :

26 row. 32 SlSt to the other side on the back loop only.

Assembly Instructions

  • After crocheting the side part, strengthen the tail end used to close the rows by carefully melting the cord end with fire to prevent unraveling.
  • Remove and reposition the stitch markers as instructed during side construction so the side matches the oval and the seams align before final joining.
  • Attach snap hook rings and snap hooks to the side edges where indicated by your placement of markers, sewing through the cord with needle and thread for security.
  • Sew the magnetic sewing button (18 mm) onto the flap or designated position using a strong thread and securing stitches to ensure stable closure.
  • Weave in and trim all ends after assembly and check that all hardware is firmly attached before final use.

Important Notes

  • πŸ’‘Use stitch markers and rearrange them exactly as directed to maintain stitch counts and even shaping for the oval and side.
  • πŸ’‘Crochet slip stitches loosely and avoid tightening them so the side fabric lays flat and flexible instead of puckering.
  • πŸ’‘Pull the working loop up to hook level (about 20 mm) when making SC to maintain consistent stitch height across the textured surface.
  • πŸ’‘Leave a long tail (about 80 inches / 2 meters) when starting the oval so you can use it to close and reinforce rows at the end.
  • πŸ’‘Strengthen and seal cord ends with heat to prevent fraying and secure the finished bag edges.

This Slice Handbag pattern is a chic, tactile project that uses macrame cord and simple crochet to create a stylish accessory. The oval base and structured side come together for a refined handmade finish you can be proud of. Perfect as a weekend project or a beautiful handmade gift β€” enjoy making it! 🧢✨

You ask,

we answer.

FAQs

What size will the finished piece be?

The finished bag from the specified materials measures approximately 9 inches (23-24 cm) in length, 7 inches (17-18 cm) in height, and 4 inches (10 cm) in width.

Can I use different yarn weights or cord sizes for this pattern?

Yes, you can use different cord sizes but this will affect the final size and texture; adjust your hook size accordingly and check gauge to maintain proportions.

Do I need prior crochet experience for this pattern?

This pattern is rated intermediate, so basic knowledge of single crochet, slip stitch, and increases is recommended for best results.

How long does this project typically take to complete?

Most crocheters complete this project in 5-7 hours, though time may vary depending on experience level and working speed.