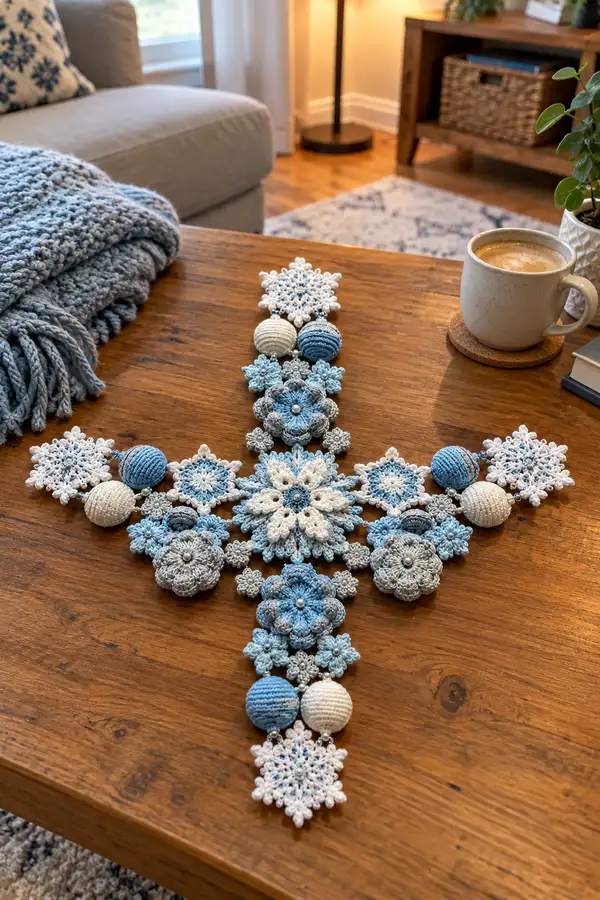
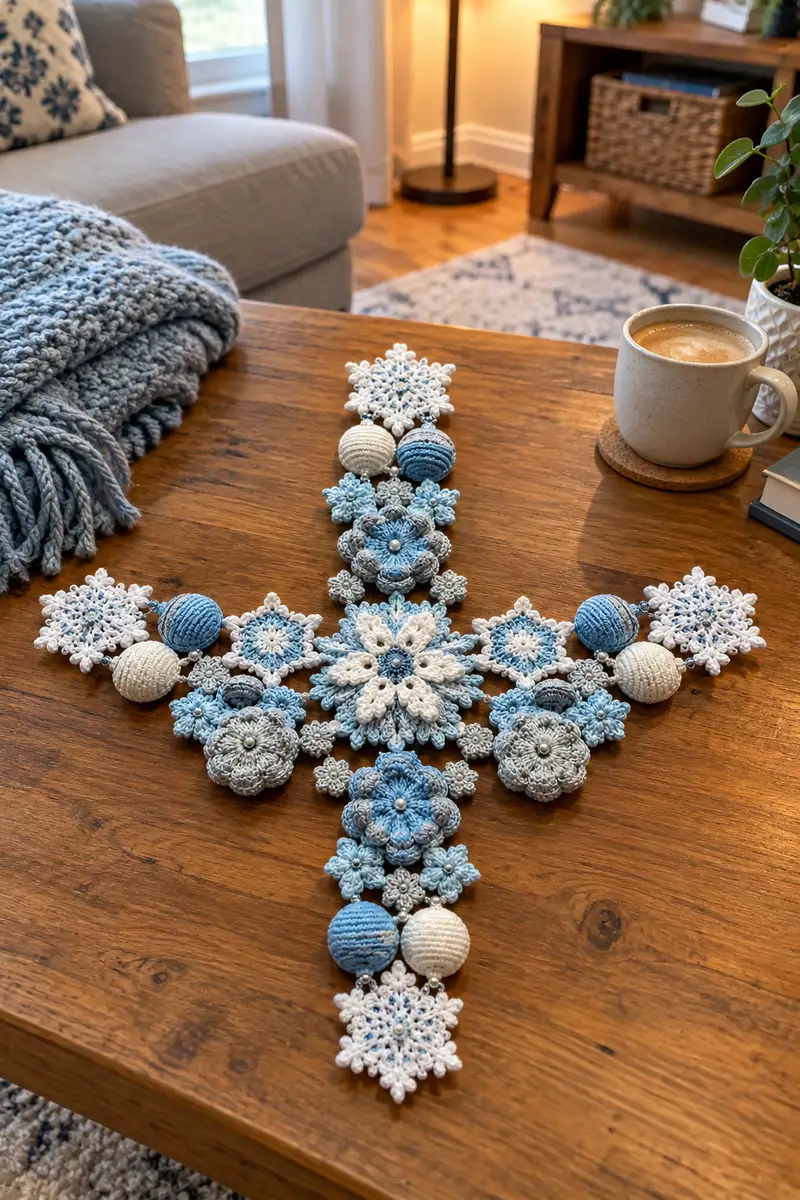
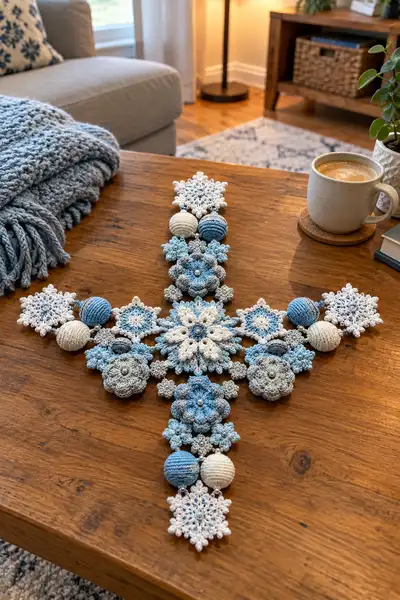
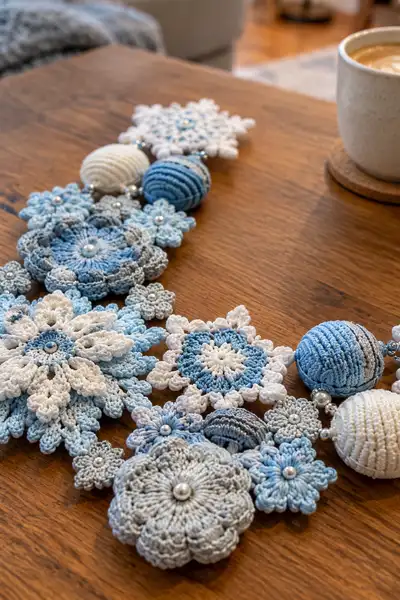
Create a delicate winter centerpiece made from layered crocheted snowflakes, floral rosettes and fabric-covered ornament beads. This pattern uses cool blues, soft gray and crisp white to form a star-shaped arrangement perfect for holiday tables or mantel displays. Detailed motif and assembly instructions guide you through crocheting each element and joining them into a cohesive, wearable-length star centerpiece.
Progress Tracker
0% Complete
— Notes and Overview :
Info :
This centerpiece is constructed from 1 large central layered snowflake, 4 medium layered floral motifs, 8 medium snowflake motifs, 12 small filler flowers, and 3 yarn-wrapped ornament beads per arm (12 total beads) plus small connecting rings and pearl spacers. Work motifs flat, block to shape, then join with whip stitch and decorative bead spacers. Use stitch markers at round starts. All rounds are worked in continuous rounds unless otherwise indicated; join rounds with sl st when indicated. Gauge is approximate—blocking will help align motif sizes.
— Materials Preparation :
Info :
Wind yarn into small balls by color; pre-select pearl beads for centers (6mm-10mm) and larger spacer beads (8mm-12mm). Prepare three 12mm foam core balls for yarn-wrapping or opt for store-bought ornament cores. Have a small bowl of fiberfill handy for stuffing spheres. Use a 3.5mm hook for the majority of motifs and a 3.0mm for tight rounds and bead loops.
— Central Layered Snowflake (Make 1) :
Round 1 :
Using white. 6 sc in mr (6)
Round 3 :
(1 sc, inc) x 6 (18)
Round 4 :
(2 sc, inc) x 6 (24)
Round 5 :
(3 sc, inc) x 6 (30)
Info :
These initial rounds form the central disc of the snowflake; keep tension consistent to produce a flat center. Place a small pearl bead later in round 6 center using a tail to sew through.
Round 6 :
1 sc in each st (30)
Round 7 :
Change to light blue. (4 sc, inc) x 6 (36)
Round 8 :
1 sc in each st (36)
Round 9 :
(5 sc, inc) x 6 (42)
Round 10 :
1 sc in each st (42)
Round 11 :
Change to gray for subtle contrast. (6 sc, inc) x 6 (48)
Round 12 :
1 sc in each st (48)
Info :
We will form the first petal layer across rounds 13-18 using puff clusters. Insert pearl center after blocking to keep bead sitting flat.
Round 13 :
*(ch2, puff stitch in next st - yarn over insert draw up loop 5 times, yarn over and pull through all loops), ch2, sl st into next st* rep around to create 16 small petal bases (48 sts will yield cluster spacing) (16 clusters)
Round 14 :
Working behind petal clusters: sl st to base of first puff, ch3 (counts as dc), (dc, ch2, dc) into base st of each puff to create shell petals; sl st between shells (48)
Round 15 :
Change to white. *Ch4, sl st into tip of previous shell to create elongated loop petal; ch1, sl st to next spacing* rep around (16 elongated loops)
Round 16 :
Working behind loops: 1 sc in each loop base around to stabilize (48)
Round 17 :
Switch to light blue. *(ch3, tr in same base, ch3, sl st in base) across each elongated petal to make pointed snowflake arm* rep around (16 points)
Round 18 :
Edge each point with picot: *sc at base, sc in next st, ch3 sl st in 3rd ch (picot), sl st back into point tip* rep around making 3 picots per point for frosted tips (48 picots total)
Info :
Block the motif flat with minimal stretching so that points are even. Sew a 6mm pearl bead to the center of Round 6 using a long tail and secure with multiple passes. Leave a long tail for joining to the underlayer motifs.
— Large Layered Rosette (Make 4 - One per arm base) :
Round 1 :
Using sky blue. 6 sc in mr (6)
Round 3 :
(1 sc, inc) x 6 (18)
Round 4 :
(2 sc, inc) x 6 (24)
Round 5 :
(3 sc, inc) x 6 (30)
Round 6 :
1 hdc in each st (30)
Round 7 :
Change to gray. *(sc, ch3, sc) in next st to form 15 small arches* (15 arches)
Round 8 :
Into each ch3 arch: (sc, 3 dc, sc) to create petal clusters (15 petals)
Round 9 :
Change to white. Behind petals: 1 sc in each stitch to stabilize (30)
Round 10 :
Switch to light blue. *In front loop only of each petal: puff stitch (yarn over draw up loop 5 times) to create raised scallops, sl st between* (15 puffs)
Round 11 :
1 sc around to even edge (30)
Round 12 :
Make outer decorative lobes: *(ch4, sl st into base) around next 10 stitches to create 10 lobes* (10 lobes)
Round 13 :
In each lobe: sc, hdc, dc, hdc, sc to form a rounded petal edge (10 petals)
Info :
Sew a medium pearl (8mm) into the center of the rosette after blocking. Leave a long tail on one side of each rosette for joining to neighboring motifs and to the central snowflake.
— Medium Snowflake Motif (Make 8) :
Round 1 :
Using white. 6 sc in mr (6)
Round 3 :
(1 sc, inc) x 6 (18)
Round 4 :
Change to light blue. (2 sc, inc) x 6 (24)
Round 5 :
1 sc in each st (24)
Round 6 :
*(ch4, sl st in next st) around to make 12 chain loops* (12 loops)
Round 7 :
Into each loop: sc, picot (ch3 sl st in 3rd ch), sc to create frosted points (12 picot points)
Round 8 :
Change to gray. 1 sc around to stabilize (24)
Round 9 :
On alternating loops, add an extra puff (puff, sl st) to create texture (6 extra puffs)
Info :
Block each snowflake so the points are crisp. Trim tails and reserve a long tail for sewing to rosettes and central snowflake. Use a pattern layout to keep symmetry while assembling.
— Small Filler Flower (Make 12) :
Round 1 :
Using sky blue. 6 sc in mr (6)
Round 3 :
*ch3, sl st in next st* rep around to create 6 tiny loops (6 loops)
Round 4 :
Into each loop: sc, 3 dc, sc (6 small petals)
Round 5 :
Change to white. 1 sc around to tidy edge (12)
Info :
Embroider or sew a 4-5mm pearl to the center of each filler flower. These act as spacers and fill gaps during assembly.
— Tiny Micro Snowflakes (Make 12) :
Round 1 :
Using white. 6 sc in mr (6)
Round 3 :
*ch3, sl st in next st* rep around to make 6 tiny points; finish with sl st (6 points)
Info :
Work these very tightly with 3.0mm hook for crisp small motifs. They are used between rosettes and snowflakes to add delicate lace detail.
— Yarn-Wrapped Ornament Beads (Make 12) :
Option A - Wrapped foam bead :
Begin with 12mm foam bead. Using 3.0mm hook and chosen color, sl st around the bead to anchor yarn, then sc in spiral around bead to cover until bead is fully encased. Aim for 30-40 sc total depending on bead size; adjust by adding hdc rows for larger circumference. Fasten off and weave tails inside.
Option B - Crocheted sphere cover (small) :
Using gray. Round 1: 6 sc in mr (6). Round 2: 6 inc (12). Round 3: (1 sc, inc) x 6 (18). Round 4: (2 sc, inc) x 6 (24). Round 5: 1 sc around (24). Round 6: (2 sc, dec) x 6 (18). Round 7: (1 sc, dec) x 6 (12). Round 8: 6 dec (6). Stuff lightly before final decreases and close. Slip foam ball inside or use stuffing. This version will be slightly puffier and can be embellished with horizontal ribbing using BLO rows.
Round details for ribbed bead cover :
After Round 4: change to contrasting color for 2 rounds of BLO sc (24 each) to create ridges. Then proceed with decreases as above. Add a 2-3mm pearl bead spacer on a thin cord between beads when assembling to mimic image spacing.
Info :
Wrap beads with yarn tightly and evenly; if using foam core, a single continuous spiral of sl st or sc yields a clean, lined appearance. For consistent bead size, mark 30 sc as approximate circumference then adjust subsequent rows to maintain evenness.
— Large 3D Flower (Make 3) :
Round 1 :
Using variegated blue. 8 sc in mr (8)
Round 3 :
(1 sc, inc) x 8 (24)
Round 4 :
Change to gray. *Ch3, sl st in next st* around to create 12 loops (12 loops)
Round 5 :
Into each loop: (sc, 5 dc, sc) to form full petals (12 petals)
Round 6 :
Front loop only: 1 sc in each st to create a raised rim (24)
Round 7 :
Using white: make overlay petals by slip-stitching into the top of every other petal and creating a small 5 dc fan, sl st into base to secure (6 overlay petals)
Round 8 :
Attach a large pearl in the center (10mm) using a long thread tail and secure through several times. Weave tail inside back of motif.
Info :
These large rosettes become main focal decorative pieces under the central snowflake and at arm ends. Block to round shape before joining.
— Decorative Joining Chain Motifs (Make multiple) :
Round 1 :
Using gray. ch6, sl st to form ring. Round 2: ch3, 12 dc into ring, join with sl st (12)
Round 3 :
Make two ch loops on opposite sides: *ch5, sl st into base* twice to form attachment loops
Info :
These small rings are used between beads and motifs to add drape and provide a place to thread spacer beads or to stitch motifs together invisibly.
— Assembly Preparation and Layout :
Info :
Block every motif to the approximate size: central snowflake ~12-14cm diameter, large rosette ~9-10cm, medium snowflake ~6-7cm, small filler ~3cm. Lay out a template on flat surface in a cross/star arrangement as in the image: central snowflake in middle, large rosettes centered on each arm base, beads and medium snowflakes alternating along each arm, tiny fillers tucked between for even spacing. Use pins to hold pieces in place so symmetry can be inspected from all angles.
— Joining Motifs (Step-by-step) :
Round 1 :
Begin at the central snowflake. Use long tail from central piece to sew a large rosette to one chosen arm base: whip stitch through the back loops of the central snowflake's petal bases and through a matching loop on the rosette (approximately 12-15 small stitches spaced evenly) to create a secure flat join.
Round 2 :
Sew rosette to two adjacent filler flowers on either side using 6-8 small whip stitches each, ensuring the rosette center remains centered on the arm base (avoid pulling too tight to maintain slight 3D texture).
Info :
As you join, insert pearl spacer beads on short lengths of heavy thread or eye pins between motif joins in the bead positions. String the spacer, pass needle through motifs, and secure on the back with a couple of invisible stitches to hold bead in place. This provides the beaded line detail visible in the photo.
Round 3 :
Attach medium snowflakes at the outer edge of rosettes by sewing through the outer picot or lobe edge and into the rosette lobe base. Use 6-8 stitches per join, spacing evenly so the snowflake sits flat and tangent to the rosette.
Round 4 :
Between the medium snowflake and bead positions, sew filler flowers and micro snowflakes to fill gaps and create layered depth. Use small pearl beads to hide join centers and to give that polished, jewelry-like finish.
Round 5 :
Attach yarn-wrapped beads on short loops of thread or thin yarn: tie a small loop of matching yarn to the bead spacer ring, then sew both ends of the loop into the motif back to form a hanging bead. Secure thread well and weave ends into the back.
Info :
Monitor symmetry constantly. After joining one arm, mirror exactly on the opposite side. The center-to-arm distances should be equal; adjust by repositioning filler motifs before final stitching. Block lightly after partial joins to keep the star flat.
— Final Edge and Reinforcement Rounds :
Round 1 :
Working around the entire assembled piece with matching yarn (gray or white as chosen), single crochet around visible join edges to neaten and provide slight reinforcement. Place 1 sc every 3-4 visible join stitches to avoid narrowing gap (approx 80-120 sc total depending on size).
Round 2 :
Optional decorative scallop: *ch3, sl st in next sc* around at approximately 10-12 scallops. This produces a consistent rim that echoes the snowflake points.
Info :
Weave all ends through the back of motifs, then trim. If the centerpiece will be handled, consider adding small fabric squares lightly glued to the underside of larger beads to prevent wear on table surfaces.
— Bead Spacer and Hanging Loop Option :
Round 1 :
If you wish to hang the centerpiece, attach a decorative loop to the topmost point by sewing a 10cm loop of chain (ch20) in matching yarn into the back of the top snowflake's topmost point. Secure with multiple stitches and reinforce with glue if desired.
Info :
Test the hanging balance by holding the loop—if the piece tilts, reposition or add a small counterweight bead on the opposite arm to adjust balance.
— Finishing Touches :
Round 1 :
Sew any remaining pearls into centers; add tiny metallic silver thread highlights by couching a running line across selected petal tips for shimmer. Add a light spray of fabric starch if you want extra stiffness for display.
Info :
For storage, separate bead elements from delicate points with tissue paper and keep in a flat box. The assembled piece is decorative and not intended for heavy handling or laundering.
— Alternate Colorway and Size Notes :
Info :
To scale up, increase yarn weight and hook size and adjust motif rounds accordingly (for each motif, add 2-4 additional increase rounds to grow diameter proportionally). For a more delicate look, use size 10 crochet thread with 1.75-2.25mm hooks and reduce bead sizes accordingly.
This snowflake star centerpiece brings winter wonder to your table with delicate crochet motifs and pearl accents. Every stitch adds texture and sparkle, creating a handmade centerpiece you will be proud to display. Gather your yarns, pick your favorite shades of blue and white, and enjoy assembling this elegant star—perfect for festive dinners or seasonal decor. 🎨❄️🧶