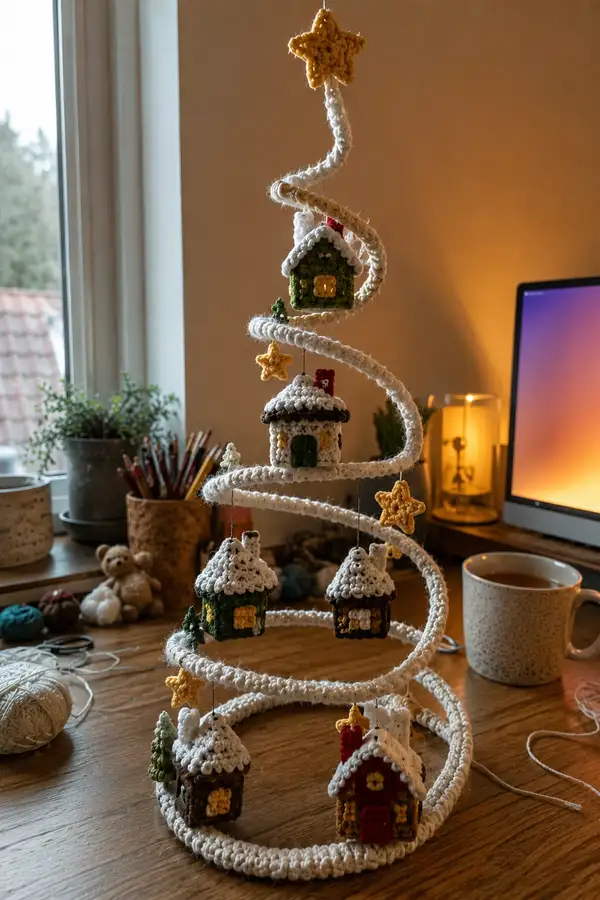
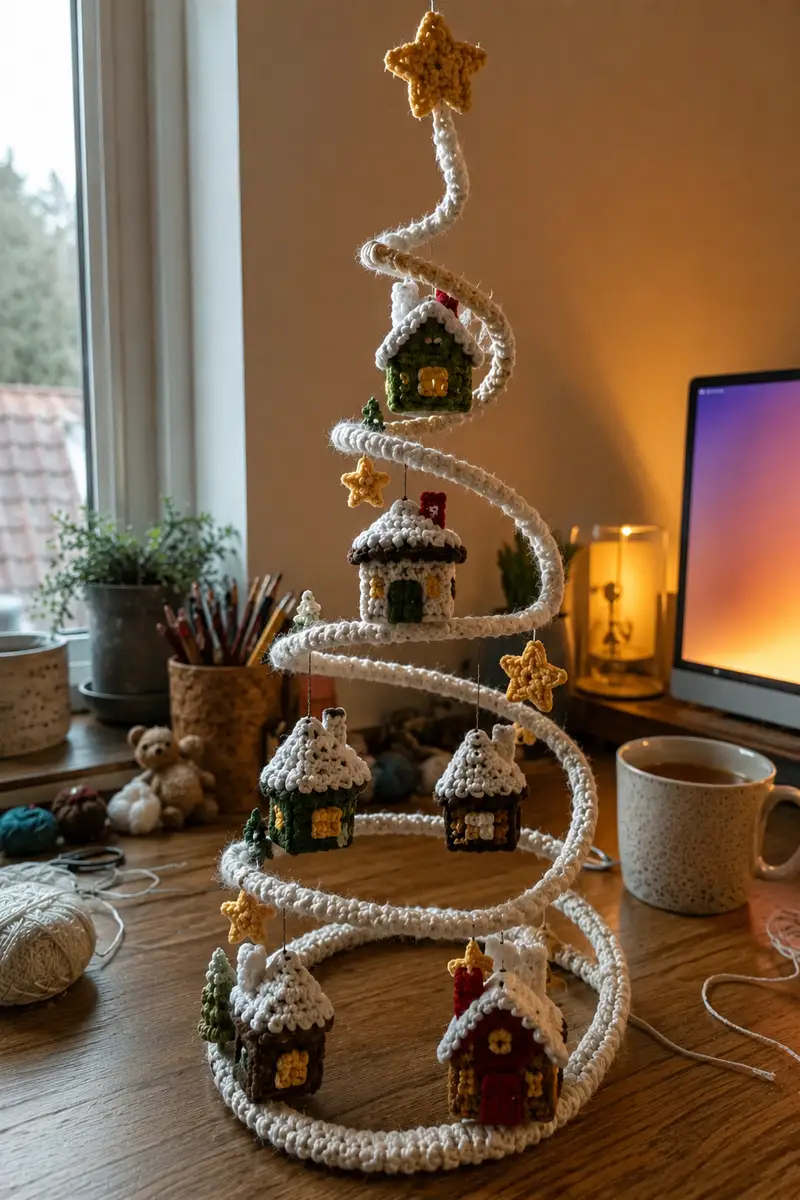
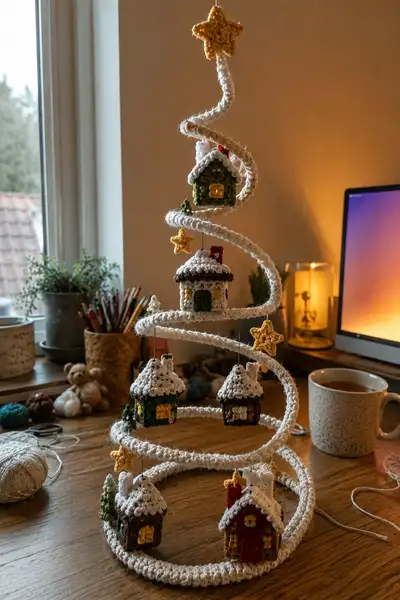
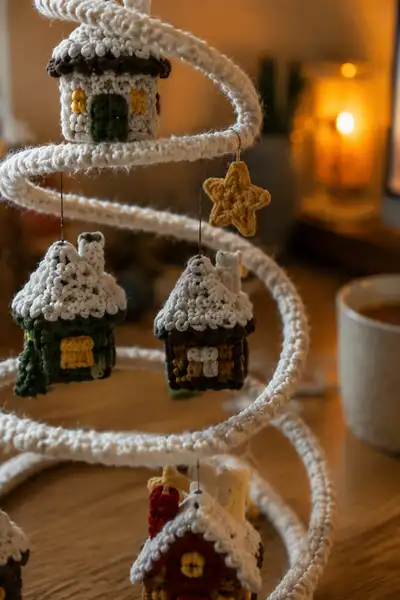
Create a whimsical spiral garland that winds like a miniature Christmas tree, dotted with tiny snowy-roof houses, stars and little trees. This pattern shows how to crochet a sturdy wrapped spiral column and multiple hanging ornaments (houses, stars, mini trees) to suspend along the coils. Warm neutrals with pops of green, red and mustard bring a cozy, Scandi-inspired holiday look.
Progress Tracker
0% Complete
— Materials & Prep :
Info :
Prepare a length of sturdy craft wire for the central spiral column. The example spiral pictured is approximately 40cm tall with four full coils; cut a length of wire approx 120-140cm to form coils and the top stem depending on coil diameter. Make a base ring about 20-22cm diameter from wire to anchor the lowest coil. Use pliers to bend ends, and tape or loop ends to avoid sharp points. Wrap the wire with a thin layer of floral tape if desired before crocheting.
— Spiral Column (wrapped wire tube) :
Info :
This section creates a crocheted tube that wraps around the wire to make a cozy, snowy spiral. Work continuous rounds in the round; you will be crocheting around the wire as you go, forming a tube that slides over the wire. Use bulky/off-white yarn and a 4.5mm hook for a snug wrap. Make one tube long enough to wrap and form 4-5 coils.
Round 1 :
Ch 6, join with sl st to form a ring (6)
Round 2 :
6 sc in each ch around (6)
Round 3 :
Inc in each st around (12)
Round 4 :
(1 sc, inc) x 6 (18)
Round 5 :
(2 sc, inc) x 6 (24)
Info :
Test slip the tube over the wire now. It should slide but be snug; if too tight, make one extra round of increases in a spaced pattern ((3 sc, inc)x6) to reach 30 sts. If too loose, use a slightly smaller hook or pull tighter tension.
Round 6 :
1 sc in each st around (24)
Round 7 :
1 sc in each st around (24)
Round 8 :
1 sc in each st around (24)
Round 9 :
1 sc in each st BLO (24)
Info :
Working BLO creates a subtle ridge that can help the spiral sit more snugly on itself when coiled. Continue working even rounds until tube reaches approx 100-120cm in length depending on how many coils you'll make. Each 10 rounds adds about 1.5 - 2 cm of tube length; calculate to reach your desired final coil size. Use stitch marker every 6-8 rounds to mark progress.
Round 10-60 :
1 sc in each st (24) - continue until tube length is reached (24)
Info :
When finished crocheting the tube, fasten off leaving a long tail for sewing the seam. Slide the tube over the wire, positioning the stitched seam to the underside where invisible. Securely stitch the end of the tube closed around the wire with yarn tails and a yarn needle. Bend and loop the wire at the top to form a smooth stem for the topper star; secure wire ends by wrapping them back into the base ring and taping if needed.
— Base Ring & Coil Assembly :
Info :
Shape the wire into a spiral (from base ring up to top) with 4-5 evenly spaced coils. Use round-nose pliers to make smooth curves. Slide crocheted tube over the shaped wire. If coil heights are uneven, nudge the tube on the wire until coils align. Sew the tube's ends to hide gaps and secure the starting base ring to the lowest coil by stitching through the tube and the wrapped base loop with yarn to secure it from shifting.
Round 1 :
Fasten off spiral ends and tack tube to base ring at 3 evenly spaced points using long yarn tail and tapestry needle. (No st count)
Info :
Mark anchor points for hanging ornaments: decide where each hanging point will be along the coil. Use pins to temporarily attach ornaments during assembly to check balance before final sewing.
— Tiny Star Ornament (Make 8) :
Round 1 :
With mustard/yellow yarn, mr, ch1, 5 sc in mr, tighten (5)
Round 2 :
(ch2, sl st in next sc) x5 to create five points (no count)
Round 3 :
Attach yarn at base of one point, (sc, hdc, dc, hdc, sc) in point, sl st to center. Rep around for all 5 points (no single st total)
Info :
Sew a small loop of beading thread at the top of a star for hanging. Stars are flat but have tiny raised points from the dc in the points. Block lightly by pinning to shape if necessary.
Round 4 :
Fasten off leaving long tail for sewing. Weave in ends. (No st)
— Tiny Pine Tree Ornament (Make 4) :
Round 1 :
With forest green, mr, 6 sc in mr (6)
Round 2 :
Inc in each st around (12)
Round 3 :
(1 sc, inc) x6 (18)
Round 4 :
1 sc in each st (18)
Round 5 :
Change to BLO, (2 sc, dec) x4 then sc remaining to shape slightly conical (15)
Info :
Stuff the tree lightly and fasten off leaving a tail. Attach a small trunk piece of brown yarn by stitching a short length of yarn at the base. Add a hanging thread at the top and secure tightly.
— Little House Body (Make 6 total; 3 color variants) :
Info :
Each house is worked in the round to form a small 4-5 side cube/cylinder about 2.5-3.5cm tall. We'll construct a square-ish house by crocheting a cylinder and flattening/closing the top, then adding roof separately. Make six houses in your chosen color palette: green, brown, red bodies with mustard windows and white roofs.
Round 1 :
With body color, mr, 6 sc in mr (6)
Round 2 :
Inc in each st around (12)
Round 3 :
(1 sc, inc) x6 (18)
Round 4 :
(2 sc, inc) x6 (24)
Round 5 :
1 sc in each st (24)
Info :
At this point the house circumference is 24 sts — this number is used for windows and door placement. Use a tapestry technique or surface crochet later for windows, or change colors now for panels. We'll maintain 24 sts through the body rounds to create a stable wall.
Round 6-9 :
1 sc in each st (24) - work 4 rounds for wall height (24)
Round 10 :
1 sc in next 4 sts, change to mustard/yellow yarn, 6 sc for window panel, change back to body color, 1 sc in next 14 sts (24)
Info :
Window panel is worked by changing color for a block of 6 stitches; keep floats neat behind and stitch ends later. For a second window on the opposite side, on Round 11 shift placement by 12 sts and repeat a small 4-st window (optional). The door will be worked on a later round centered between windows.
Round 11 :
1 sc in each st (24)
Round 12 :
1 sc in next 6 sts, change to dark color for doorway (3 sc tall pattern next rounds), 1 sc remainder (24)
Round 13 :
1 sc in each st (24)
Info :
Now the body is tall enough. Stuff the body lightly through the top opening you'll create after attaching the roof. Stuffing should be minimal so the house keeps crisp edges.
Round 14 :
Fold top into a square-ish lid by sc2tog evenly around to start closing: (3 sc, dec) x6 (18)
Round 15 :
(2 sc, dec) x6 (12)
Round 16 :
(1 sc, dec) x6 (6)
Info :
Fasten off leaving long tail to sew shut if necessary. Weave tail through remaining stitches and pull closed. Hide tail through body to the underside for neat finish. Body is complete and ready for roof attachment and surface details (windows, door frames) with yellow and dark brown yarn.
— House Roof (Make 6) :
Info :
Each roof is worked separately as a small circle then edged with a scalloped 'snow' trim. The roof should slightly overhang the house body. Use dark brown for roof base then work a white scallop for snow.
Round 1 :
With dark brown, mr, 6 sc in mr (6)
Round 2 :
Inc in each st around (12)
Round 3 :
(1 sc, inc) x6 (18)
Round 4 :
(2 sc, inc) x6 (24)
Round 5 :
1 sc in each st (24)
Info :
Stitch this circle over the top closed area of the house body, centering. The circle will create a peaked roof when you put a few shaping stitches in the center or when you slightly gather the center. For a taller peaked roof, work 1-2 more rounds of sc increasing by 6 stitches total per round to increase diameter.
Round 6 :
Change to white yarn for snow trim. *Sl st in next st, ch2, sl st in same st* repeat around to create small scallops. Alternatively, (sc, hdc, sc) in alternating sts gives a fuller snow edge (24)
Round 7 :
Fasten off leaving long tail. Sew roof to top of house using mattress stitch around the rim to create slight overhang. Add a small chimney by sewing a 6-st column (ch4, turn, work 3 rows sc across the 3 chs) and attach to one side of the roof with a few hand stitches.
— Window & Door Detail (Surface Crochet / Embroidery) :
Info :
Use mustard/yellow for windows: embroider small crosses for window panes or work small 2x2 panels of sc on the body rounds. For doors, use dark green or brown yarn and couch a small rectangle of surface sc. Sew door centered on one side, about 5 rounds down from roof edge. Use small French knot or surface loop for doorknob with yellow yarn.
— Roof Snow Accent (scalloped variance) :
Round 1 :
With white yarn, join at roof edge, *ch1, sl st in next st* repeat to create a subtle rim (24)
Round 2 :
*Skip 1 st, (sc, hdc, sc) in next st, skip 1 st, sl st* repeat around for snow scallop (24)
Info :
Optional sprinkle effect: add small white single crochet picots on the scallop tips to mimic clumps of snow by ch3, sl st in first ch to make picot, then secure to next scallop tip.
— Alternate House Variant: Tall Chimney and Side Tree :
Round 1 :
Create small chimney tube: ch 4, 3 sc across, turn and sc across for 6 rows to form rectangle, then gather and sew to roof side. (No st count)
Info :
For a side mini-tree, crochet a cone as described earlier and sew it to the base side of the house using a few small stitches. These tiny extras help vary the village look.
— Hanging Loop & Rigging for Ornaments :
Round 1 :
Cut a 10-12cm length of beading thread or strong cotton. Thread through the roof center or a reinforced point under roof scallop. Tie and secure with a small dab of fabric glue or a tiny knot; hide knot with a few stitches.
Info :
Use a small metal jump ring or crimp bead at the top of the thread to attach to spiral. For houses that hang from the middle of a coil, create a short length (6-8cm) so they sit just below the coil. Test each bead hook location before finalizing—balance is key to prevent twisting of the spiral.
— Assembly: Positioning Ornaments on Spiral :
Info :
Lay the spiral flat and pin the ornaments along it to determine spacing. The pictured example has six houses spaced roughly evenly on 4 coils with stars placed between houses. Hang one house per coil on outer edge and two on lower coil for fullness. Use extra thread length for lower houses so they hover inside the coil loops.
Round 1 :
Sew hanging thread loop to coil by passing tapestry needle and yarn through tube fabric at marked point and knotting behind the tube; reinforce with a second pass. (No st count)
Info :
If you want ornaments removable, attach small lobster clasps to hanging threads and small matching rings sewn to the coil. This allows repositioning for storage and transport.
— Topper Star (Slightly dimensional) :
Round 1 :
With mustard yarn, mr, ch1, 5 sc in mr (5)
Round 2 :
Sl st into next st, ch3, sl st into center, rep to form five ch spikes (no count)
Round 3 :
Work (sc, hdc, dc, hdc, sc) into each spike from base outward, then sl st back into center to secure. This builds a puffier point (no single total)
Round 4 :
Join front and back points with sc around edge to create a thicker 3D star. Stuff lightly through center before fully closing. Fasten off and attach to top wire stem by sewing or sliding onto a small loop at the top of the wire. (No st)
Info :
Secure the star to the wire stem tightly with several stitches and a bit of glue at the base for added security; hide stitches with yarn ends.
— Final Finishing Touches :
Info :
Check all hanging threads and knot points. Trim excess yarn tails and weave in ends neatly inside the tube or the house underside. Pin the spiral upright and tweak ornament positions until visual balance is achieved. Add tiny beads glued inside windows for a lit look if desired.
Round 1 :
Optionally, lightly hackle the tube with a small amount of faux snow spray for extra sparkle; test on a scrap first. (No st)
Info :
For storage, detach houses and stars and store inside padded box. The spiral tube can be straightened and re-formed if necessary, but avoid excessive bending of the wire to prevent metal fatigue.
This Snowy Roof Spiral Christmas Garland is a tiny festival of cozy houses, stars and evergreen accents that make a magical tabletop display. Each house is its own little story, and together they create a charming suspended village. I hope you enjoyed building texture and tiny details — it's a perfect gift to display every holiday season. 🧶✨🌟